This article describes the requirements for developing Android applications with GeneXus, as well as the requirements of the target devices.
Note: Requirements vary if you want to prototype using GeneXus Project Navigator or compile your app.
A setup that automatically downloads and installs all Android SDK requirements is provided. Note that you'll also be able to access this setup through the Update Android SDK tool menu option from the GeneXus IDE.
It is not recommended to install the Android SDK components manually, but in some cases, it may be necessary. That's why the information you will need to do it is provided below.
Note: It is strongly recommended to install the Android SDK (in any directory) with no blank spaces or any special characters.
Note: The tool known as "Android SDK Manager" has been deprecated by Google and is no longer available.
You'll have two options: using the command line tool "sdkmanager" provided by the Android SDK or downloading Android Studio and using the built-in "SDK Manager". In either case, you'll have to install the following components. Each component per upgrade can be found in <genexus_directory>/Android/RequirementsTool/android_requirements.txt.
Info: Google Play requires that new apps target at least Android 13 (API level 33) from August 2023, and that app updates target Android 13 from August 2023 also. This implies that you must use
GeneXus 18 upgrade 1 or higher to be able to deploy to Google Play.
More information in
Play Console Help answer.
The necessary components are available on the Android Developer website.
| GeneXus 18 or higher users. |
| Component |
Required Version |
Comments |
| Android SDK Tools |
26.1.1 or higher |
Refer to Update Android SDK tool option. |
| Android SDK Platform-Tools |
34.0.4 or higher |
- |
| Android SDK Build-tools |
34.0.0 exactly |
- |
| Android Emulator |
32.1.15 or higher |
- |
| Android 14(API 34) |
Any |
-
|
| - SDK Platform |
34.0.4 or higher |
- |
| - Google APIs Intel x86 Atom System Image API 34 |
Any |
If you have an Intel-based computer, use the Intel x86 System Image. Otherwise, use the ARM EABI v7a System Image.
If there are any AVD already created with the previous requirement (Intel x86 Atom System Image), they will not be re-created. You may consider deleting it from the AVD Manager and re-running the app from GeneXus to create a new one. |
| Android Support Repository |
45 or higher |
- |
| Google Repository |
44 or higher |
- |
| Intel x86 Emulator Accelerator (HAXM installer) |
Any |
If HAXM cannot be installed (deprecated), you can use WHPX or GVM instead. If not accelertor is used, it is necessary to install Android 5.0 (API 21), including SDK Platform and ARM EABI v7a System Image. |
Once you have finished installing the requirements, you must define a suitable virtualization accelerator.
Depending on your computer, you can choose one of the following virtualization accelerators:
- HAXM (designed for Intel processors).
- GVM (compatible with AMD processors).
- WHPX (compatible with both)
These virtualization accelerators will optimize performance and efficiency when running the x86 Emulator.
Warning: Intel announced that HAXM will be discontinued. As an alternative, it is suggested to use WHPX for Intel processors.
Read about how to use WHPX in https://developer.android.com/studio/run/emulator-acceleration#vm-windows-whpx.
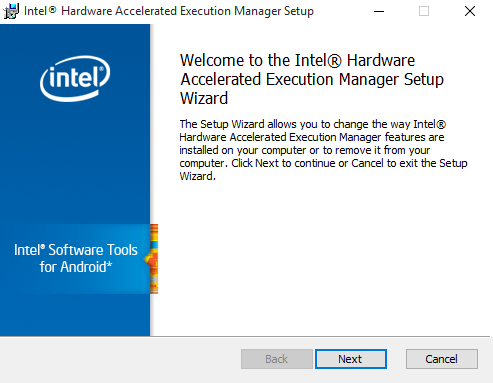
To install HAXM, open the <Android_SDK_Installation_Directory>/Extras/Intel/Hardware_Acelerated_Execution_Manager directory, execute the intelhaxm-android.exe installer, and follow its instructions.
With this configuration, you can run Android applications on your device (if it is plugged into your computer).
HAXM only works in Intel processors if the Hyper-V feature of Windows platform is turned off and VT-x is enabled in your BIOS.
- In order to check if Hyper-V is disabled, open Control Panel > Programs > Turn Windows features on or off, and then, in the pop-up windows, make sure that Hyper-V is not selected.
- Detailed information about how to enable VT-x from the BIOS can be found on this post and this one for troubleshooting.
- In Windows 11, the features Windows Hypervisor Platform and Virtual Machine Platform should also be turned off.
- The generated Android application works on devices with API 21 (Android 5.0) or higher.
- There is no "maximum" OS version supported for a given GeneXus upgrade. The generated applications will still work in OS versions released after the release of the GeneXus upgrade. However, the new features of these later OS versions will require a new GeneXus upgrade release to be fully supported.
- The GeneXus setup program searches for the Android SDK version in the Windows registry key "HKEY_LOCAL_MACHINE\SOFTWARE\Wow6432Node\Android SDK Tools" for 64-bit Windows and in "HKEY_LOCAL_MACHINE\SOFTWARE\Android SDK Tools" for 32-bit Windows.
- Once the SDK Directory is found, it searches the file "<Android_SDK_Installation_Directory>\tools\source.properties" to check that the property "Pkg.Revision=" is 23.0.2.
- If you are using an Intel processor and the HAXM installer produces the following error:

...you must check that VT-x (Virtualization) is enabled in your BIOS and that you haven't installed HyperV.
- If you are using Parallels to run GeneXus in a Windows VM, do NOT place the Android SDK you use on your host machine or in your model directory. The Android Gradle Plugin does not support this, and it may lead to strange behavior while compiling (for example, your computer could stop working).
- Solutions for the case that a 404 or 500.19 error occurs.
As stated above, Android SDK requires at least 3GB of free space on your disk.
Approximately 2 GB of RAM are required by default for compilation; this value can be changed in the Android specific properties.
The compilation process uses the Gradle build system, which needs network connectivity to download dependencies. If your environment does not have network connectivity, the build will cancel with an error similar to the following:
error: FAILURE: Build failed with an exception.
error:
error: * What went wrong:
error: A problem occurred configuring root project 'Android'.
error: > Could not resolve all artifacts for configuration ':classpath'.
error: > Could not resolve com.android.tools.build:gradle:3.4.1.
error: Required by:
error: project :
error: > Could not resolve com.android.tools.build:gradle:3.4.1.
error: > Could not get resource 'https://dl.google.com/dl/android/maven2/com/android/tools/
build/gradle/3.4.1/gradle-3.4.1.pom'.
error: > Could not GET 'https://dl.google.com/dl/android/maven2/com/android/tools/build/
gradle/3.4.1/gradle-3.4.1.pom'.
You can add the Gradle --offline option to the Gradle Options property for Android Generator to force Gradle to work offline and not download any dependency. You will need to previously download all the dependencies needed and update the GeneXus installation; follow the steps detailed in SAC #47748.
Android SDK installer
Update Android SDK tool
Creating an Android Virtual Device
Android - FAQ and Common Issues