Many times information needs to be shown in a context of range values. To do so in the Native Mobile Generator there is the Linear Gauge Control.
This article shows an example of how to use the control and explains some facts about it.
Create the following Transaction and apply the Work With pattern and Work With object (WWSD) (see about this here: Applying Work With Pattern).

This control loads the information it needs to build the ranges from an SDT. This SDT is automatically generated by GeneXus when control is applied.
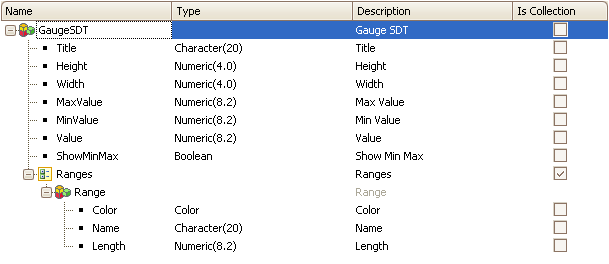
| Title |
Is the text that will be displayed above the control. |
| Height |
Is the Height for the range bars. |
| MaxValue |
Is the max value the range will have (total). Should be equal to: MinValue + Sum(Length). |
| MinValue |
Is the min value the range will have (total). |
| Value |
The current value. |
| ShowMinMax |
Is a boolean flag which enables/disables if the minimum and maximum values are show within the control. |
| Color |
A string value which has the hexa code for a color. This color will be associated with the range. |
| Name |
The name the range will have. |
| Length |
This will define the lenght of the range. |
The ranges are defined in order. If you want to define a Low, Medium and High you should defined them on the same order because if not there are not going to be seen as you want.
Create the getRanges Data Provider to fill the SDT, as follow:
GaugeSDT
{
        Title = ''
	Height = 10
	MaxValue = 100
	MinValue = 20
	Value = TrnCustomersNumeric
	ShowMinMax = false
	Ranges
	{
		Range
		{
			Color = "#0000FF"
			Name = "Low"
			Length = 20
		}
		Range
		{
			Color = "#008000"
			Name = "Medium"
			Length = 40
		}
		Range
		{
			Color = "#660000"
			Name = "High"
			Length = 20
		}
	}
}
In a Work With for Smart Devices we can´t have variables from SDTs. We will load a Character variable with a representation of the SDT in JSon.
a. Lets do the following procedure (getRangesChar). This procedure will call the DataProvider defined in step 3, then will apply the .ToJson() function.
&gaugSDT = getRanges(&CustomerId)
&chargaug = &gaugSDT.ToJson()
parm(in: &CustomerId,out: &chargaug);
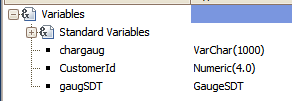
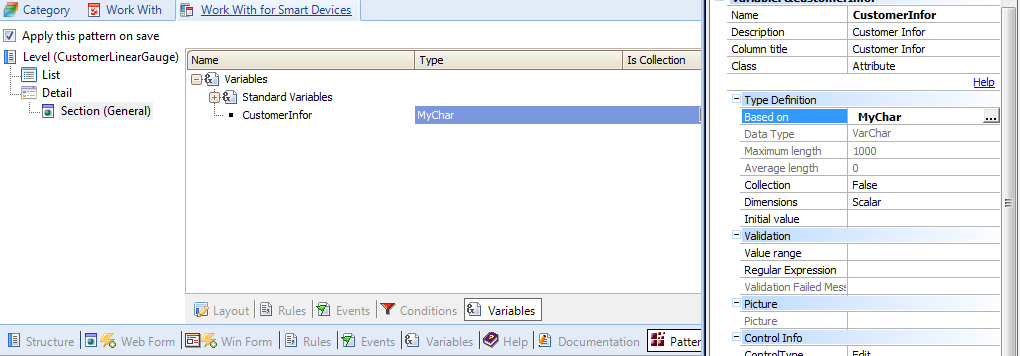
b. Define a new variable in the WWSD
MyChar= VarChar(1000)
As shown in the image below:
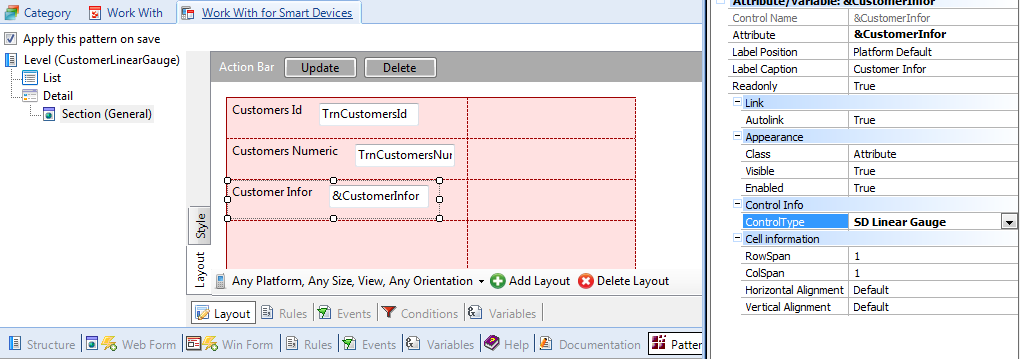
c. Add the variable In the layout of the WWSD and set the Control Type property to SDLinearGauge
In the "Events" section, write the following code:
Event Refresh
     &CustomerInfor = getRangesChar(TrnCustomersId)
EndEvent
As said before in a near future when we suppoort variables based on SDT the procedure defined in Step 4 is not going to be needed, because you will be able to call the Data Provider from the load code of the variable.
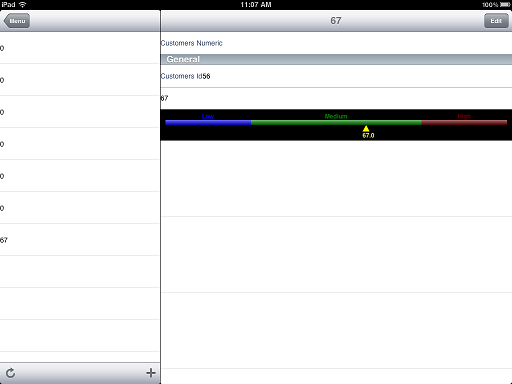
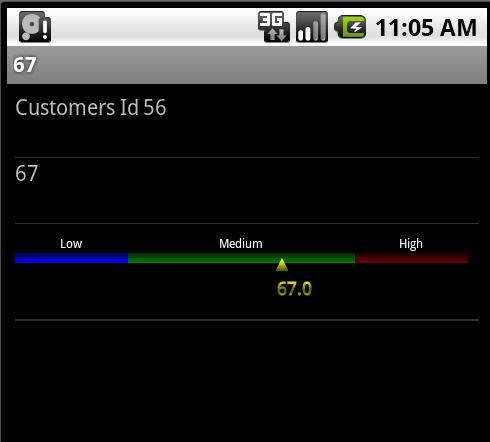
Press F5 and test the Linear Gauge Control!
If you want to change the size or forecolor (*) of text displayed in this control, you can do it in the Theme Class associated to the control in the layout.
(*) Available in Android from GeneXus X Evolution 3 Upgrade 4
 Work With for Smart Devices – General Aspects and List layout
WorkWith for Smart Devices – Detail Layout