See Previous Version
This article explains the steps needed in order to enable the centralized licenses scheme on a Windows Server 2012.
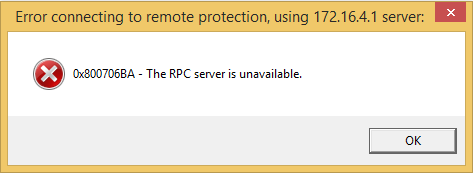
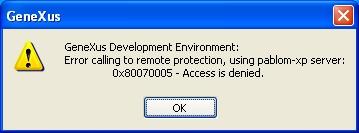
Errors may occur when attempting to establish the connection with the license service—this also happens with Windows Server 2003 and Windows 2008 Server. The problem arose since the Windows XP Service Pack 2 introduced several modifications regarding security that affect the DCOM connection between the licenses server and the clients. The possible errors are shown in the following figures and occur when attempting to enter to any tool (GeneXus, GXplorer, etc.) that uses centralized licenses :
There are two options:
- Completely disabling Windows Firewall
- Configuring DCOM port (135) and applications through Windows Firewall, Enabling ports range and editing DCOM rights.
Please see Enabling centralized licenses scheme—Quick Guide for a quick guide on how to configure the second option or the corresponding section of this article for a fully detailed step by step description.
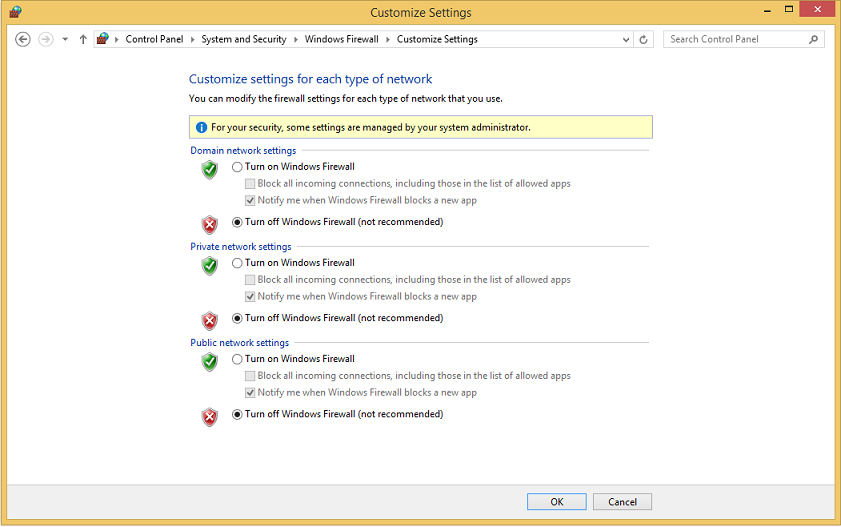
Windows Firewall is installed and turned on by default. If the company has already a Firewall in the network, having Windows Firewall turned on may not be necessary; therefore, the first option is disabling it. This is performed from Control Panel -> Windows Firewall as shown in the figure:
To verify that the Firewall was turned off we recommend downloading the service Windows Firewall/Internet Connection Sharing (ICS) in Control Panel -> Administrative Tools -> Services.
This step must be done in the server PC and in every client PC consuming the licenses.
Quite often, having the Firewall turned off is not desirable; therefore, the best option is including DCOM (135) communications port and the applications (Protection Server, GeneXus, etc.) in the Firewall exceptions. Apply the steps described: Enabling a port range and Enabling DCOM port (135) and applications through Windows Firewall —steps must be applied on the server machine and on every client machine. If the errors continue after all the steps are applied you should try editing DCOM rights as explained in the; Editing DCOM rights (Application) and Editing DCOM rights (System) sections.
For the Remote Procedure Calls (RPC)/Distributed Component Object Model (DCOM) protocols, RPC uses Transmission Control Protocol (TCP) port 135, and DCOM uses a nightmarish combination of TCP, User Data Protocol (UDP), ports, and connections.
DCOM is particularly troublesome for firewall access because it dynamically assigns ports to processes. By default, it freely assigns TCP and UDP ports ranging from 1024 to 65535, making it difficult to function securely across a firewall. In addition, new connections are established when responding to a client, meaning that the port the client used for the request is not the same as the port used for the response. Also, DCOM does not support Network Address Translation (NAT), which is among the more common methods of configuring a firewall.
For those cases where you have a local firewall you may need to enable ports some ports ranging from 1024 to 65535 (local intranet). To narrow the port range check the following reference (More Information).
You can setup this range in two different ways:
-
Steps:
- Click "Start", "Administrative Tools", "Component Services".
- Expand "Component Services", "Computers".
- Right-click "My Computer" and select Properties.
- Click the "Default Protocols" tab.
- Select "Connection-oriented TCP/IP", and click Properties—if more connections are available set TCP/IP as the first of the list.
- Use the Add button to add the required port range, for example, "5000-5300". It is recommended that you have at least 300 ports available.
- Leave all other settings with default values.
-
Another way to setup this ports range is entering the following entrys in the "HKEY_LOCAL_MACHINE\SOFTWARE\Microsoft\Rpc\Internet" key—if this key does not exist you must create it:
Name = Ports , Type = REG_MULTI_SZ, Value = 5000 - 5300
Name = PortsInternetAvailable, Type = REG-SZ, Value = Y,
Name = UseInternetPorts, Type = REG_SZ, Type = Y
Please use REGEDT32.EXE to configure these settings. REGEDT.EXE currently does not support the REG_MULTI_SZ type required by the ports named value entry
In short, make sure to enable the 135 port and the associated port range detailed above to connect to another machine to get licenses, otherwise you will get "Access is denied" or "The RPC server is unavailable" errors.
Apply the changes. A Reboot of the server could be needed in order for settings to be applied.
Create the required firewall rules:
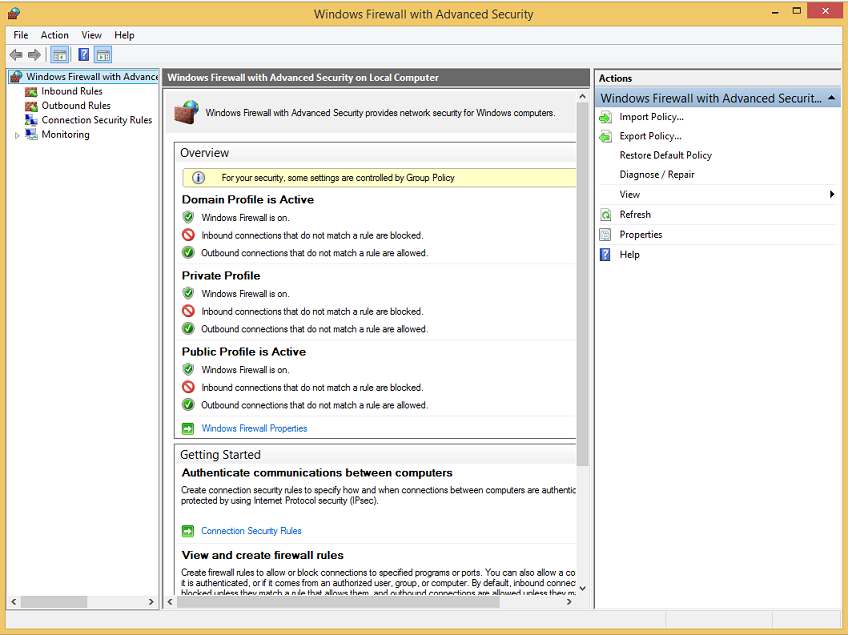
You can setup these exceptions in Control Panel -> Windows Firewall, Advanced Settings tab:
Steps:
- Click "Start" -> "Administrative Tools" -> "Windows Firewall" and then "Advanced Settings".
- Click "Inbound Rules", and check that "COM+ Network Access (DCOM-In)" is enabled.
- Create an inbound rule for TCP Port 135, if one does not exist, allowing the connection.
- Create an inbound rule of type "Port". Select TCP and specify the port range that you used in "Enabling a port range" and set it to allow the connection.
- Create an inbound rule of type "Port". Select UDP and specify the port range that you used in "Enabling a port range" and set it to allow the connection.
- Create an inbound rule of type "Program". Select the "ProtSrv.exe"—usually instaled under "%Program Files (x86)%\Common Files\Artech\GXProt1\ProtSrv.exe"— and set it to allow the connection.
See here for further details about how to creating inbound firewall rules.
A Reboot of the server could be needed in order for settings to be applied.
If the previous steps have not solved the problem, a fourth option would be attempting the edition of the DCOM rights. Firstly you attempt to edit the DCOM rights for the Protection Server application in the license server. If after this step is performed the problem continues, you can try "Editing DCOM rights (System)".
Steps:
- Go to "Control Panel" -> "Administrative Tools" -> "Component Services".
- In the left tree, go to "Component Services" -> "Computers" -> "My Computer".
- Select "DCOM Config" and then select "ProtSrvService" in the applications list.
- Right click and select Properties. A screen like the following one will be displayed:
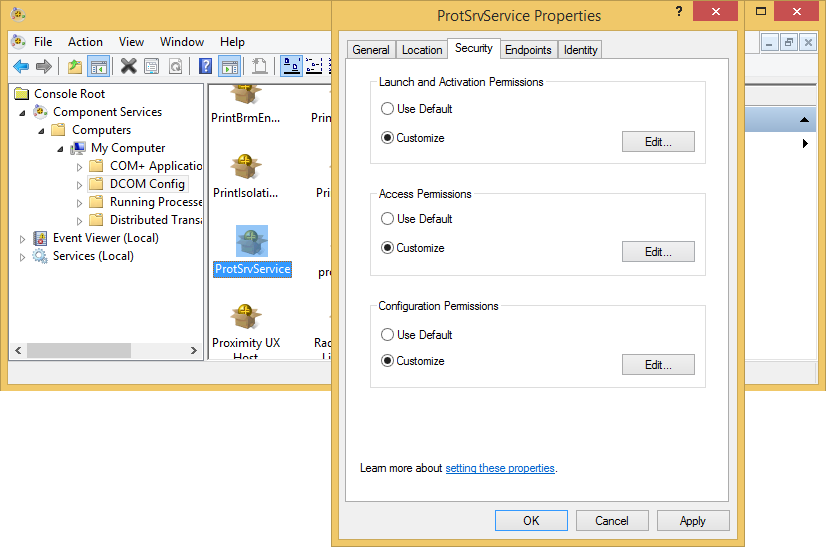
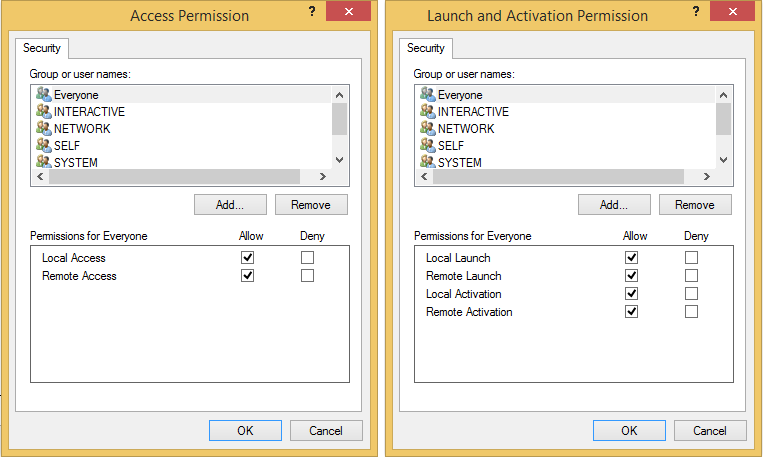
- On the screen shown, you must edit the launch and activation rights and the access rights (Launch and Activation Permissions and Access Permissions) by selecting the Customize option and pressing the Edit... button. You must select total access (select the four options) for the following groups: Everyone, Network, System and Interactive, as shown in the following figures:
If you have not been able to solve the problem with the previous steps or if after step 3 the problem continues, you must try editing the system DCOM rights. This may be performed in the same window where you edit the fixed exit ports range for TCP/IP mentioned before.
Steps:
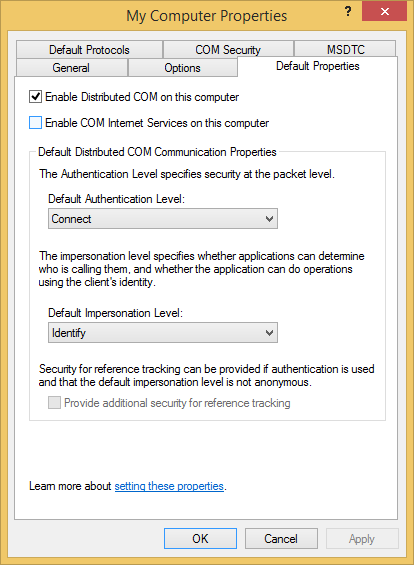
- Verify that the distributed DCOM is enabled (in Default Properties tab, by selecting Enable distributed COM on this computer. Besides, Default Authentication Level must be in Connect and Default Impersonation Level in Identity.
- Setup access and launch rights (Access Permissions and Launch and Activate Permissions) in COM Security tab.
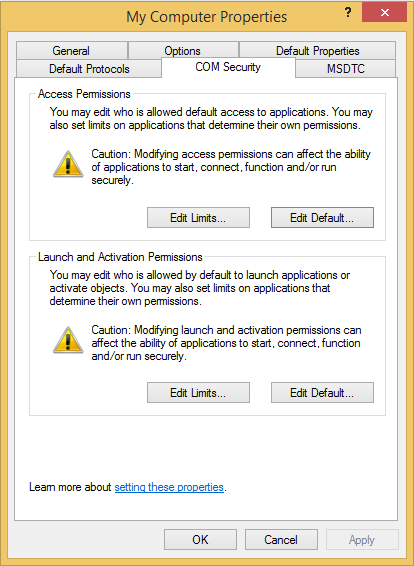
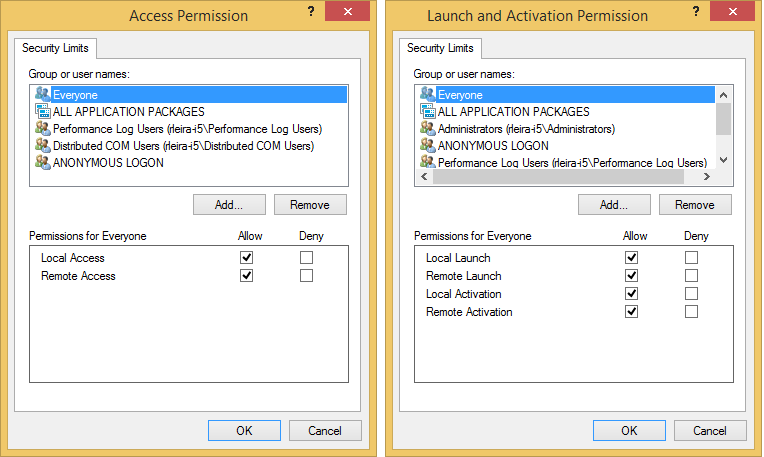
- You have to do the same in both places: first go to Edit Limits ... and setup the rights (for the group Everyone and ANONYMOUS LOGON), as shown in the following figures:
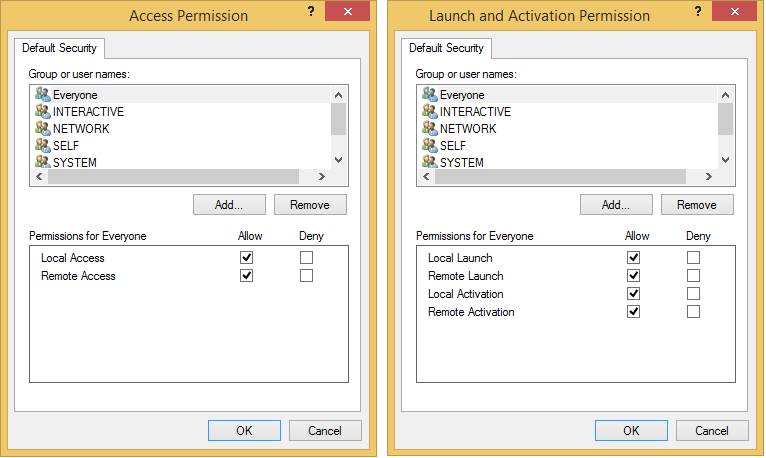
- And then, in Edit Defaults ..., you must setup the rights for the following groups: Everyone, Network, System and Interactive , as shown in the following figures.
GeneXus 9.0, and older versions, need to make callbacks to the
GeneXus Protection Server. Therefore a connection is firstly created using port 135 and then a second connection is established from the license server to the client. In order to enable this second connection—from the server to the client—through the firewall, in addition to enabling the connection through port 135, all TCP connections initialized from the server must be allowed.
A port range can be given for these connections, to do so follow the next steps:
- In the server and client PCs, enable the DCOM port range as explained in section "Enabling DCOM port (135) and applications through Windows Firewall".
- In the server PC allow all outbound connections for DCOM port 135 and to the port range used in step 1.
| Note |
| Port 135 and the port range used by DCOM must be enabled in the VPN settings if the client and server are connected through a VPN. |
Once you have made all the different changes in the settings, we recommend restarting the corresponding PC. Regarding the license server, we recommend downloading the service and turn it on again.
SAC 16577
SAC 9809
Tool to test the DCOM connection
Security changes in Windows XP Service Pack 2
DCOM Settings for remote access
Use DCOM with firewalls