This paper explains the steps to generate a WAR file for an application using GXflow.
1. Execute the WAR Deployment wizard and select the main objects to deploy.
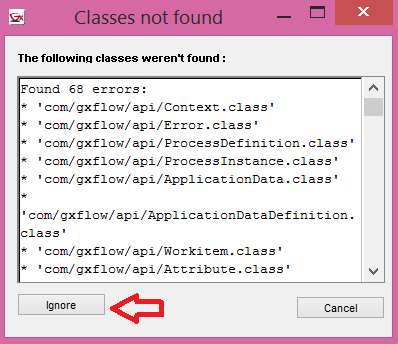
2. Ignore the warning that will be displayed. The files mentioned in the warning message are automatically included in the WAR, inside the wapi.jar file.
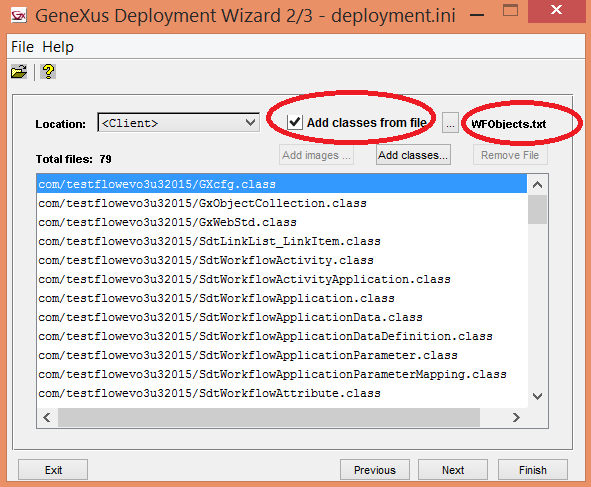
3. Select the "Add classes from file" checkbox and browse for the following file:
- WFObjects.txt (located under dataXX\web)
This file contains the list of objects that are related to some Business Process Diagram object and is generated by the GeneXus build operation.
4. Press next until the last window, where you have to select some metadata.
Press the browse button to select the following metadata files:
- GXFlowWARDeployment.xml
- QueryViewerWARDeployment.xml. This file is called GXplorerWarDeployment.xml in previous versions (before upgrade 4 of GeneXus X Evolution 3).
Both files are located under the web directory of the GeneXus Java model.
The first one contains the reference to all the workflow servlets and JAR dependencies. The other contains the list of the GXquery servlets and JAR files needed to run the application.
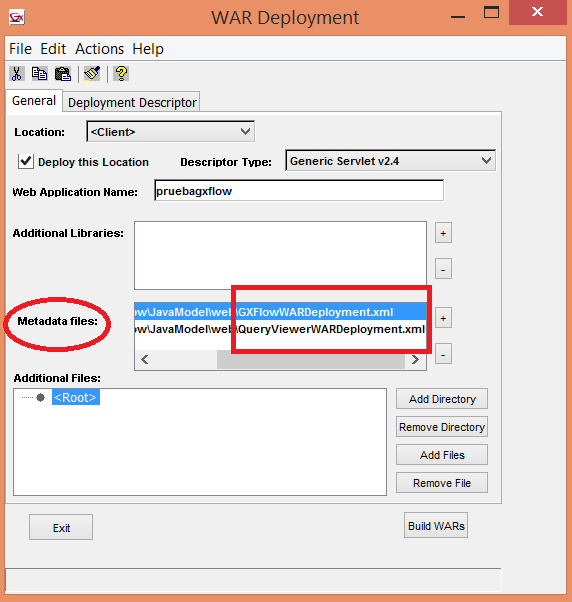
5. Press Build WAR. The war file is built including all the application servlets and static files, plus the GXflow servlets required (referenced in the metadata files stated above).
Note:
Check that the GXflowImages.txt file is located under the WEB-INF\classes\<Java Package file>. This file contains the mapping to the image files, so if it isn't located under that folder, the images won't be displayed correctly.