Below are explained the steps needed to use Jenkins to achieve the Continuous Integration in projects developed with GeneXus and thus to be able to implement a DevOps process on your application.
An initial project will be created for the basic cycle of Check for Changes - Update – Build starting from a GeneXus Knowledge Base. Next, the GeneXus IDE will be used to make changes to the app and check that, once this change is committed, Jenkins will automatically update its work copy, run a Build, and make available a new version of the application.
Typical Continuous Integration in Jenkins can be done using GeneXus Jenkins Plugin, for update and Build the KB (steps 1 and 2),.
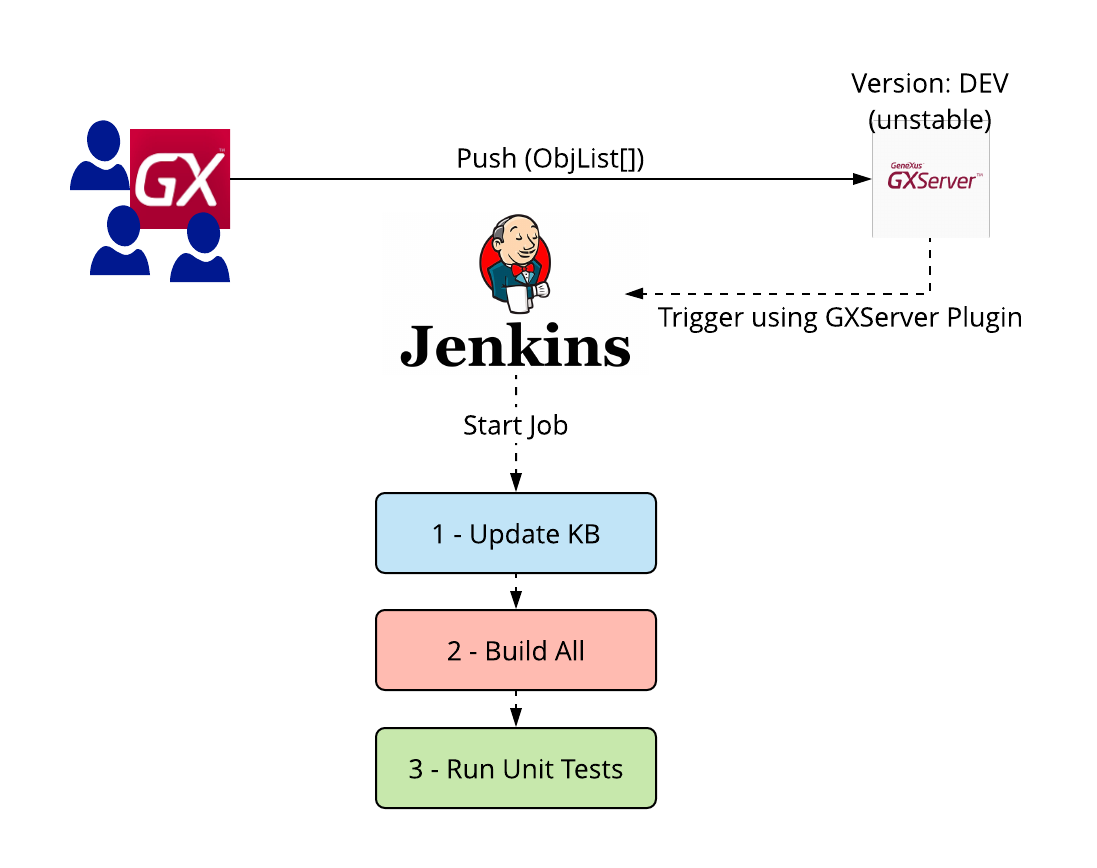
You should design the pipeline based on your needs but the first three steps are mandatory to have a successful and efficient process.
1 - Update Knowledge Base
The first step on your pipeline must be the control version. This means that Jenkins brings the last version committed to your GeneXus Server.
2 - Build All
Then, Jenkins will need to build the Knowledge Base so that you can make sure it works fine.
The steps to perform these tasks are:
A project to update and build the Integration project will be created in Jenkins.
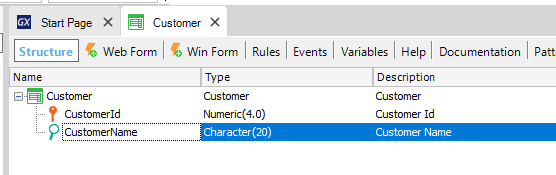
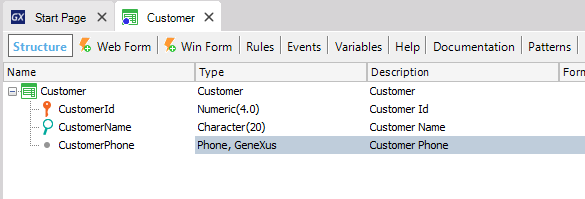
For example, in the development KB you can have the following TRN Customer:
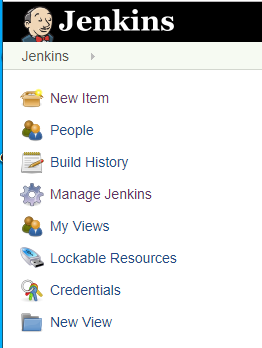
- Step 3: Define a new Jenkins project.
On the Jenkins main page, click on the New Item menu option.
In the form that is displayed, enter Integration as the project name, select the option Freestyle Project, and click on the OK button.

When the project is created, its configuration page is displayed, which consists of several sections.
General Section
In the General section, select the option “Disable this Project”. This will prevent the processes associated with this project from being triggered automatically when you finish creating it so that it doesn’t consume machine resources, and you don’t have to wait for its completion to perform other tasks.
Also, select the option “This project is parameterized,” click on “Add Parameter” and choose “Boolean Parameter.”
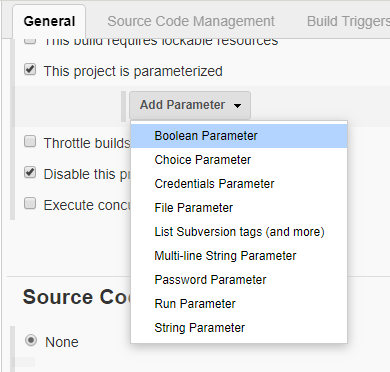
As parameter name, enter ForceCreateDatabase and repeat to also enter a parameter called ForceRebuild.
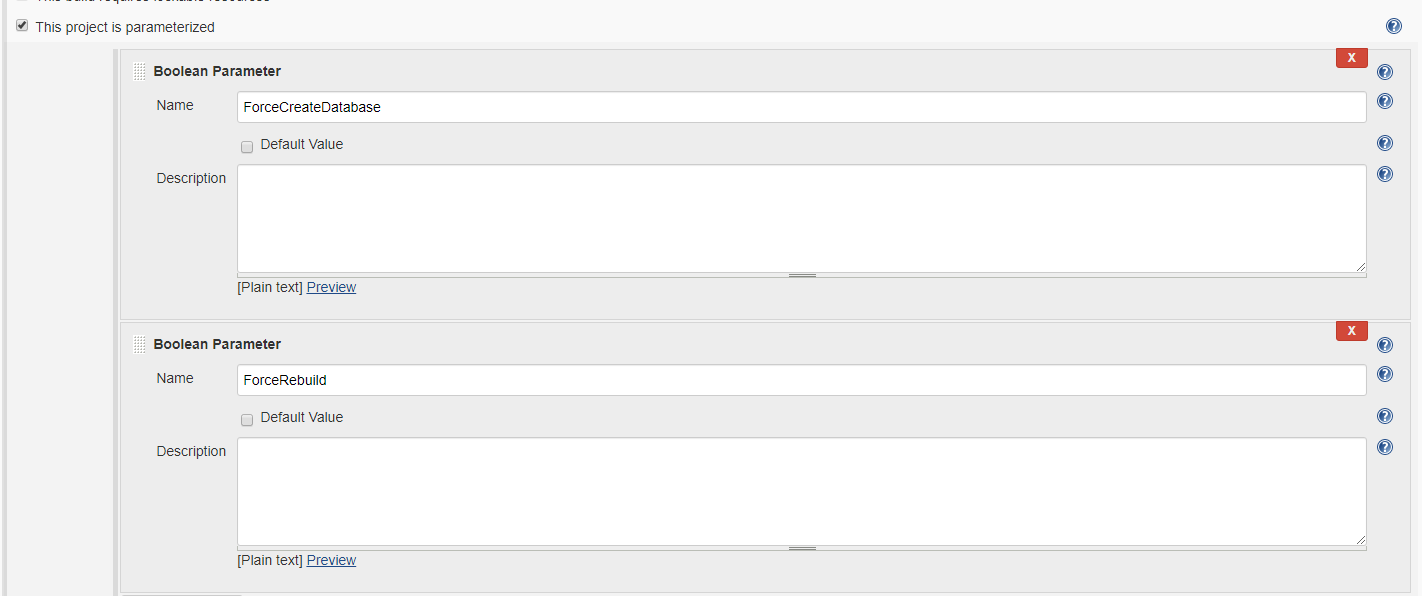
These parameters allow you to indicate, respectively, if you want to force the database creation (equivalent to the command Create Database Tables in the IDE) as part of the Build, and if the Build must be forced for all objects (equivalent to the command Rebuild All in the IDE).
The default value of these parameters is left unselected, which means that when processes are triggered automatically their value will be false. However, if at any time a user forces the execution of the project from Jenkins, he/she will be given the option to select any of these parameters.
Source Code Management Section
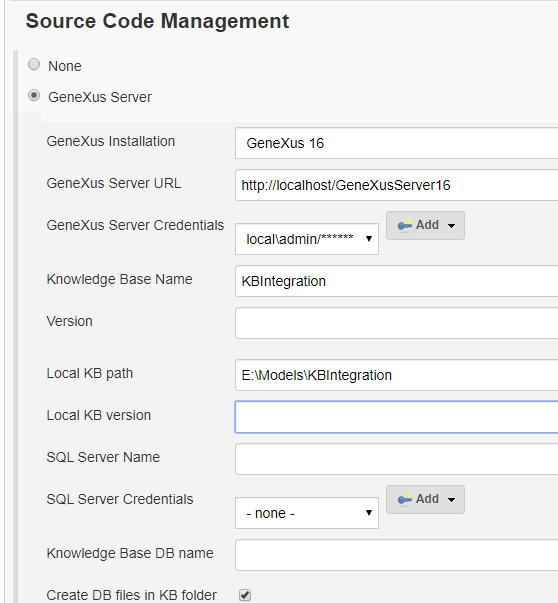
In the Source Code Management Section, you need to indicate that GeneXus Server will be used.
Indicate that the GeneXus installation to be used is GeneXus 16, enter the GeneXus Server URL and choose the GeneXus Server credentials (that had already been previously cataloged). Also, enter the name of the KB in GeneXus Server.
Enter KBIntegration as the name of the local KB and the local KB path.
Build triggers section
In the Build Triggers section, choose the Poll SCM option and enter H/5 * * * *
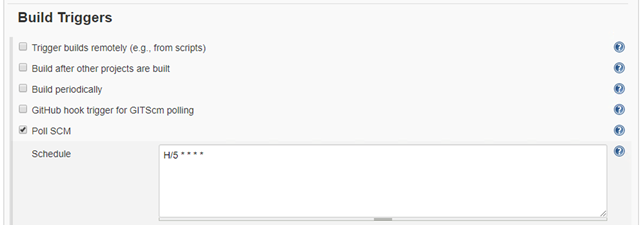
This expression means that GeneXus Server will be queried every 5 minutes to find out if there were any new commits after the last Build.
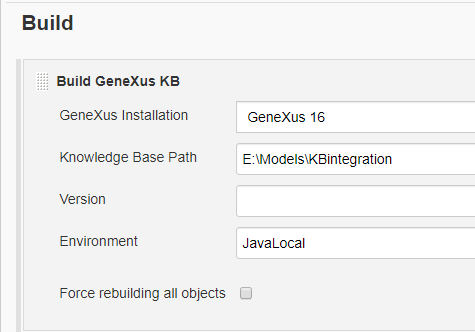
Build Section
In the Build section, click on “Add build step” and select the option “Build GeneXus KB.”
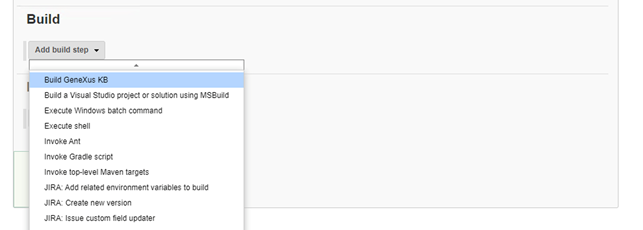
Select the GeneXus 16 installation, enter the path to the local integration KB and the name of the Environment.
Saving the project
Lastly, click on Save to finish creating the project.
This newly created project is currently disabled, but in a similar way to cooking programs, the Integration project already has the result after the first execution.
- Step 4: Making changes to the application (KBDevelopment)
Run GeneXus 16 to open the development KB (KBDevelopment).
Make some change in the development KB and commit that change to GeneXus Server.
For example, add a new attribute CustomerPhone and execute the commit to GeneXus Server:
In Jenkins, open the Integration project page (https://localhost:8082/job/Integration), unselect “Disable this Project” option.
Save the project.
See if it starts to run automatically. It is set to check for new changes every 5 minutes, so you may have to wait for a little.
Note: If you're in a hurry, you can select the Build with Parameters menu option displayed on the left and force it to be executed immediately.
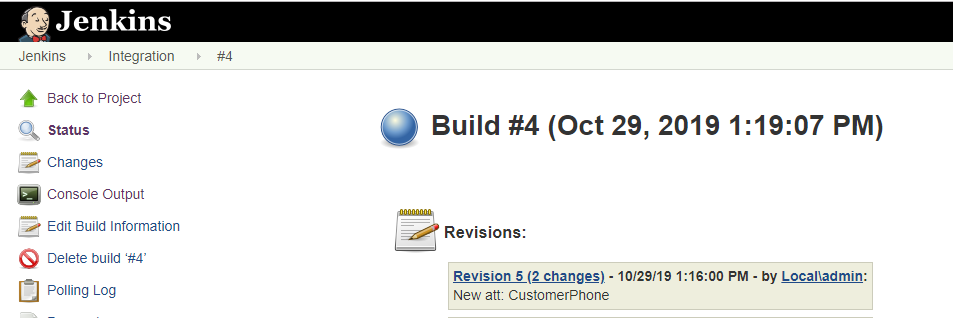
Once the process is triggered, you can see a new execution in progress (they’re identified with # and execution number; i.e. #4) in the Build History panel displayed below the menu on the left.
By clicking on that execution line you can access its details.
In particular, through the Console Output option (for example http://localhost:8082/job/Integration/4/console) you can see information about the steps being run.
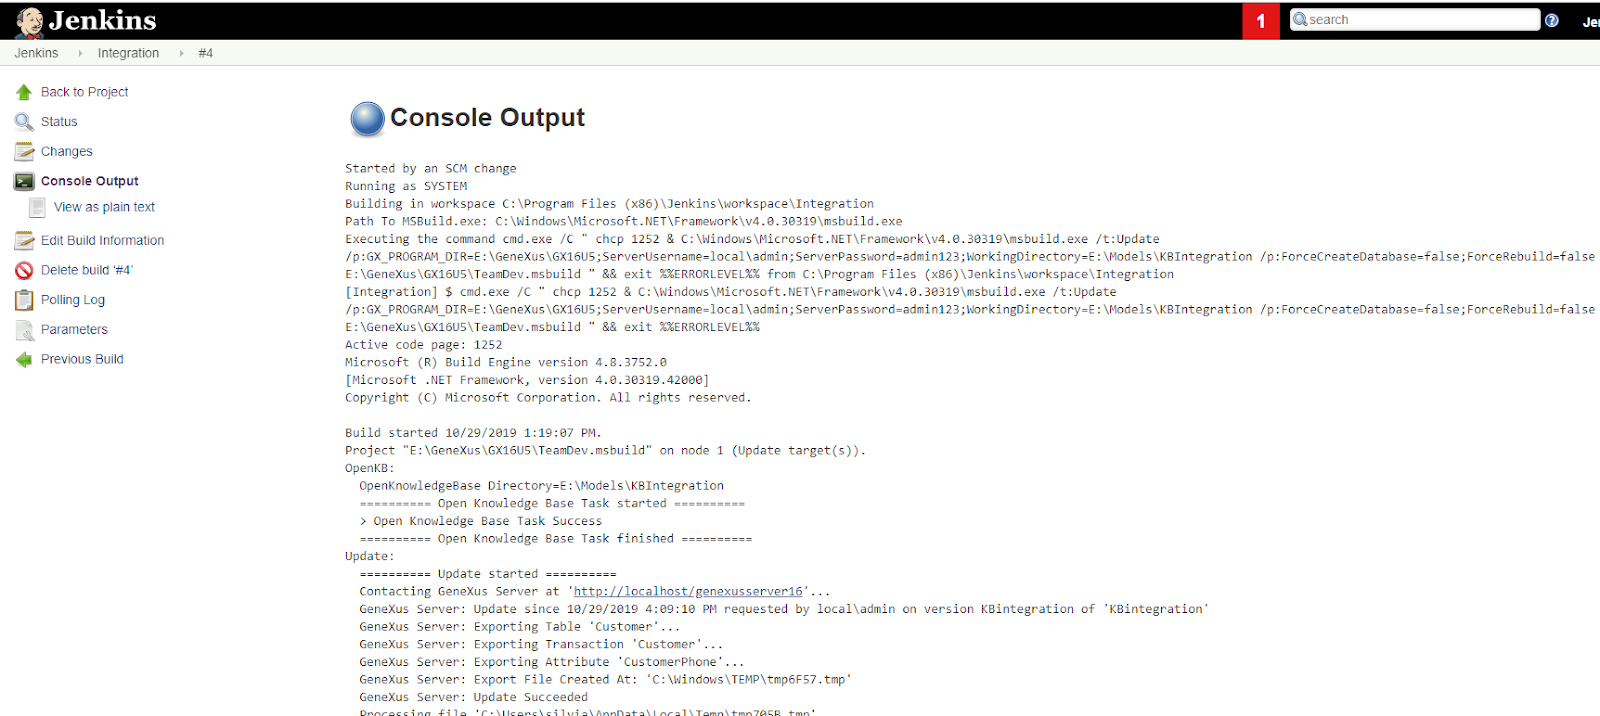
If everything works as expected, this Jenkins process will have updated the Integration KB with the latest changes made (Commit in particular) and built the KB. Also, a new version of the app including the change you’ve made will be available.
Besides, that execution information shows that it is associated with the changes incorporated at that moment: what the commit was, its number and details of the modified objects (for example http://localhost:8082/job/Integration/4/changes#detail0).