Below are the steps that must be followed to install and configure Jenkins to work with continuous integration pipelines.
Step 1: Download and install Jenkins.
Install Jenkins selecting the option "Run service as local or domain user".
Common Issues
When Jenkins is installed, it is running as a Windows service. By default, it is running using the Local System Account user, but if tasks are executed by command line, things are saved related to the user who is connected to the machine. Therefore, if Jenkins service runs with another user it can't find them. For that reason, you need to change the user with which the Jenkins service runs, configuring to run with the same user that is connected to the machine: https://stackoverflow.com/questions/63410442/jenkins-installation-windows-10-service-logon-credentials. Refer to SAC# 49225 for more information.
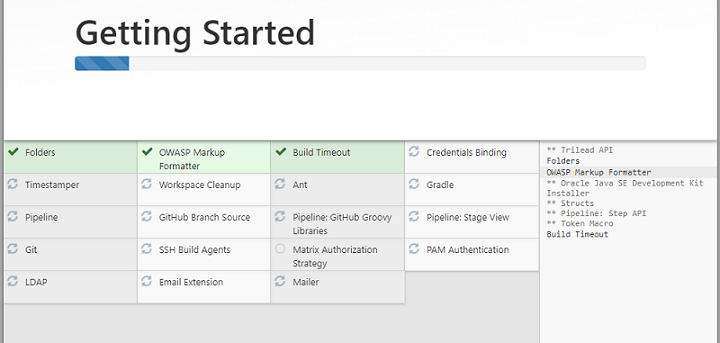
Step 2: Install the recommended plugin set in Jenkins.
Note: The machine where Jenkins will be must also have one or more GeneXus installations because it is the one where the builds will be executed.
Step 3: Clone the Jenkins Integration repository. Take notes on the local path to which it is downloaded, for example, “C:\GXJenkins.”
Step 4: Add Jenkins plugins.
Go to “Manage Jenkins,” “Manage Plugins,” click on the “Available” tab and select the following plugins:
- Blue Ocean
See https://www.jenkins.io/doc/book/blueocean/getting-started/#on-an-existing-jenkins-instance
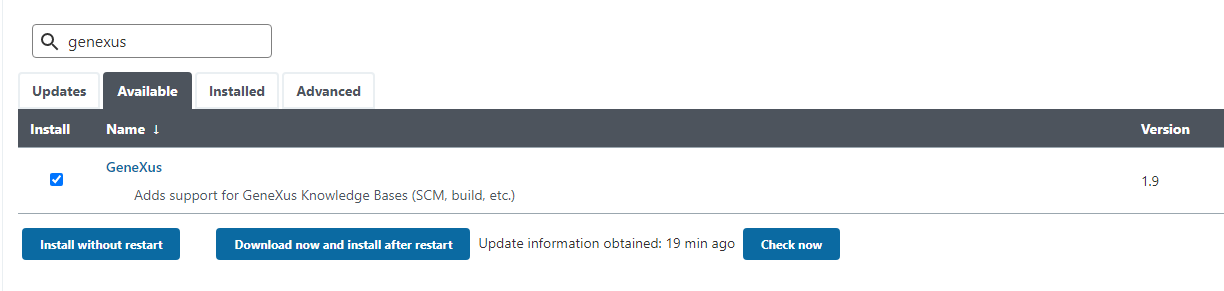
- GeneXus
If this is a Jenkins installation that already had this plugin, make sure to update it to the latest version 1.9 (not beta).
- Custom Tools Plugin
At the bottom of the page, click on the "Download and install after restart" button.
Once Jenkins completes the installation and reboots, continue with the next steps.
Step 5: Go to "Manage Jenkins," "Global Tool Configuration" (If jenkins is installed on http://localhost:8080, go to: http://localhost:8080/configureTools/).
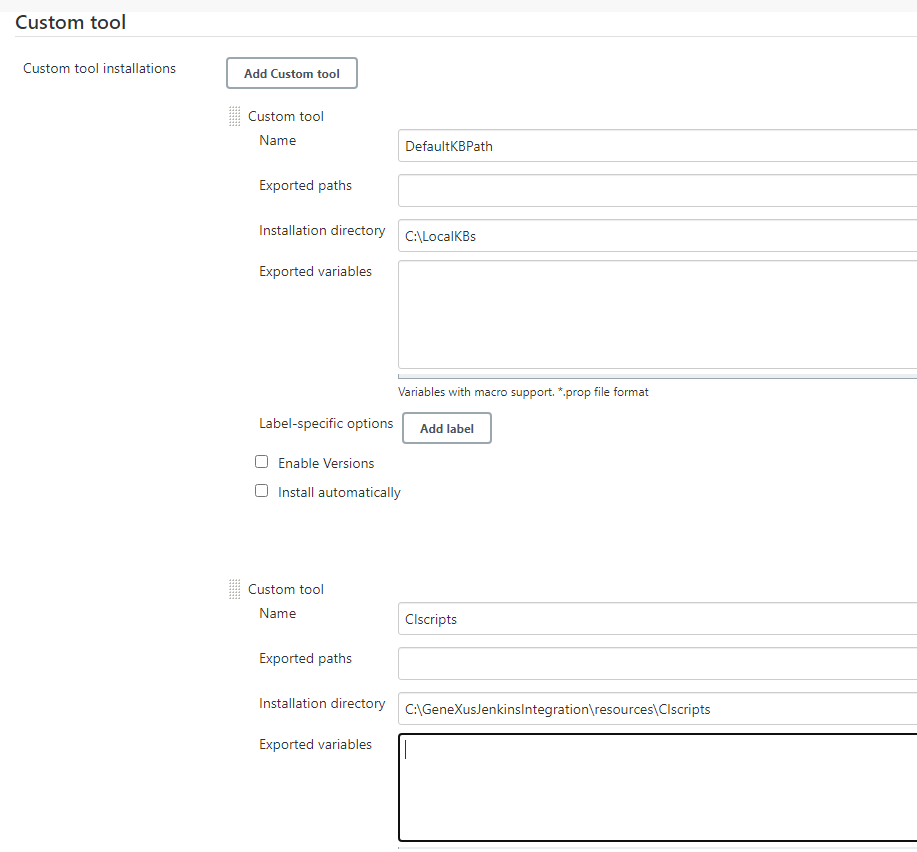
On that page: Click on "Custom tool installations" to catalog the following tools (Add Custom Tool button):
- Name: DefaultKBPath
Uncheck Install automatically.
In the Installation directory field: <KBs base path>. The <KBs base path> will be the folder in which the KBs obtained from GXserver will be created. For example : "C:\LocalKBs"
- Name: CIscripts
Uncheck Install automatically.
Installation directory: <Script Path>. The <Scripts Path> is the “resources \ CIscripts” subfolder of the GeneXusJenkinsIntegration repository. If, for example, that repository was in "C:\GXJenkins," here you have to place "C:\GXJenkins\resources\CIscripts."
Step 6: Catalog the MSBuild installation and GeneXus installations in Jenkins.
Install the Build Tools for Visual Studio and make sure that MSBuild is referenced in the path for MSBuild.
For example, the msbuild.exe is installed in a path similar to the following: C:\Program Files (x86)\Microsoft Visual Studio\2019\BuildTools\MSBuild\Current\Bin
See https://plugins.jenkins.io/genexus/ for more details.
Note: The MSBuild configured must be 32 bits.
Continuous Integration