This article explains how to use NTLM Authentication in Java web applications generated with GeneXus.
NTLM allows the application to authenticate against Active Directory in a Windows Network so you do not have to program anything related to it. The typical scenario is Intranet applications, where the user uses the same authentication to log into Windows as to enter the application. Moreover, if everything is configured properly, there is no need for the user to enter his domain\user and password again.
In order to accomplish this we will use Filters (introduced in Java Servlets specification v2.3) and JCIFS, an open source library that implements CIFS/SMB networking protocol.
Step by Step
This document shows how to implement it in Tomcat for simplicity, but the same technique can be used with any servlet engine that supports Filters.
-
Download JCIFS library from http://jcifs.samba.org/src/. In this example version 1.3.10 was used (jcifs-1.3.10.jar).
-
Put the library in the <Tomcat 6>\lib or <Tomcat 5.5>\common\lib folder.
-
Edit your application’s web.xml to include the following inside the <web-app> node:
    <filter>
          <filter-name>NtlmHttpFilter</filter-name>
          <filter-class>jcifs.http.NtlmHttpFilter</filter-class>
          <init-param>
              <param-name>jcifs.smb.client.domain</param-name>
              <param-value>domain</param-value>
          </init-param>
          <init-param>
              <param-name>jcifs.smb.client.username</param-name>
              <param-value>username</param-value>
          </init-param>
          <init-param>
              <param-name>jcifs.smb.client.password</param-name>
              <param-value>password</param-value>
          </init-param>
          <init-param>
              <param-name>jcifs.util.loglevel</param-name>
              <param-value>2</param-value>
          </init-param>
    </filter>
        <filter-mapping>
             <filter-name>NtlmHttpFilter</filter-name>
             <url-pattern>/*</url-pattern>
        </filter-mapping>
The Filter
The first two lines define a name for the filter and the class where the filter is implemented.
Then, the first three initialization parameters indicate the domain, username and password which will be used to authenticate against Active Directory, this way the library can then perform further queries to it.
The last initialization parameter simply defines a log level.
The mapping
The mapping is defined to indicate which HTTP Request should be intercepted by the filter. The requests that match the url pattern will be intercepted. In the example every request will pass through the filter.
Transparent Authentication
If the filter is working properly the password dialog should never appear and the browser should use the same credentials as the user logged in the Windows domain. However there are several requirements that must be met for a web browser to transparently negotiate credentials using NTLM HTTP authentication. If any of these requirements are not met, the default behavior is to present the user with the Network Password dialog. Those requirements are detailed in the JCIF documentation. I’ll briefly show how to setup the browser so the dialog does not appear:
Internet Explorer:
Either the target URL must contain a server in the local domain (e.g. mycompany.com) or the client's security settings must be changed (add your site to the Intranet zone in Tools > Internet Options > Security > Local Intranet > Sites > Advanced > add your site.
Firefox:
Enter the about:config as the url. A warning may appear, go ahead.
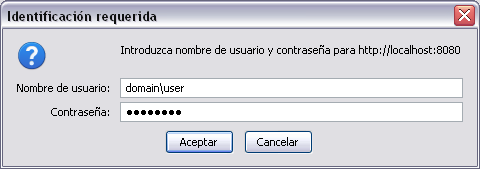
Filter by network.negotiate-auth.trusted-uris and change the value of that preference to include your domain (e.g. http://myhost:8080/ http://myintranet/). Otherwise a dialog like this will be presented:
More info about this property can be found here and here.
Miscellaneous
If you put the following code in your web panels, then you get the user logged in the Windows Network:
java [!&windowsUser!] = httpContext.getRequest().getRemoteUser();