Protection changes have been made as of upgrade 3 of version Xev2.
Therefore, all users who have licenses for the above version will have to upgrade all their licenses prior to installing Upgrade 3.
These licenses are “backward compatible” meaning that once they are activated, it is possible to use previous versions of GeneXus (6.1 U5 and higher).
Users who have centralized licenses or have installed GeneXus Protection Server must update their licenses to version 9.4.16 (or higher), which can be downloaded from http://www2.gxtechnical.com/portal/hgxpp001.aspx?15,8,77,O,S,0,,4177
Note: This also applies to GXserver and GXflow products
For local licenses, you can choose any of the options below to authorize GeneXus.
Option 1
- Install Upgrade 3 of Xev2 version
- Open the GeneXus License Manager and press "Upgrade Legacy".
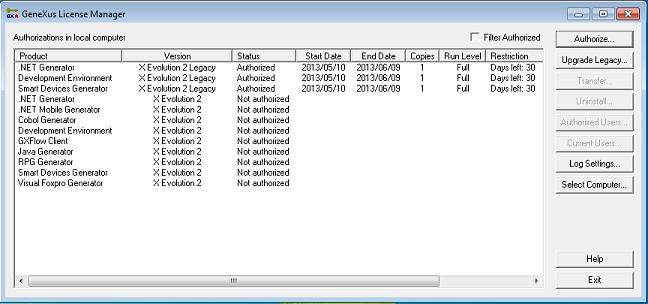
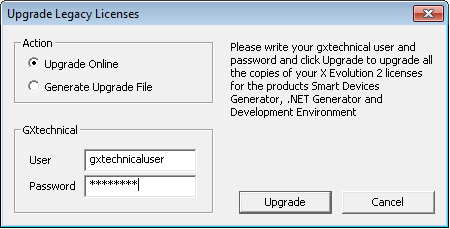
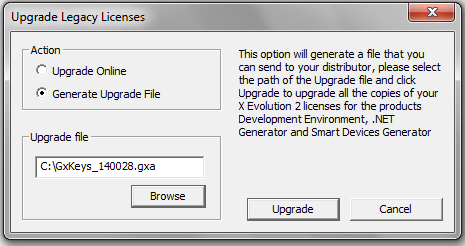
- Choose between the options "Upgrade Online" and "Generate Upgrade File".
- If "Upgrade Online" is selected (an Internet connection is needed), enter your GXTechnical username and password and press the "Upgrade" button. Wait a few seconds and all licenses will be automatically upgraded.
- If "Generate Upgrade File" is selected, press "Upgrade" and send the generated file to your local distributor. Enter the license authorization codes you will receive by e-mail.
- Now you can start working with GeneXus.
Option 2
- Install Upgrade 3 of version Xev2.
- Run GeneXus Upgrade 3 of version Xev2.
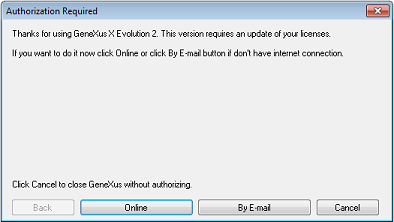
- Choose between the options "Online" and "By E-mail".
- If "Upgrade Online" is selected (an Internet connection is needed), enter your GXTechnical username and password and press the "Upgrade" button. Wait a few seconds and all licenses will be automatically upgraded.
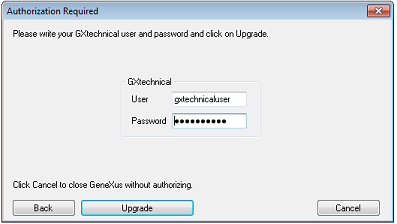
- If "By E-mail" is selected press "Upgrade"; your default e-mail client will be opened for you to send the generated e-mail to your local distributor. Enter the license authorization codes you will receive by e-mail.
- Now you can start working with GeneXus.
Option 3
- Uninstall licenses of version Xev2 for all products.
- Install Upgrade 3 of version Xev2.
- Request licenses for all the products that have been uninstalled.
- Enter the licenses.
- Now you can start working with GeneXus.
Option 4
- Install Upgrade 3 of version Xev2.
- Open the GeneXus License Manager and uninstall the licenses of products labeled X Evolution 2 Legacy.
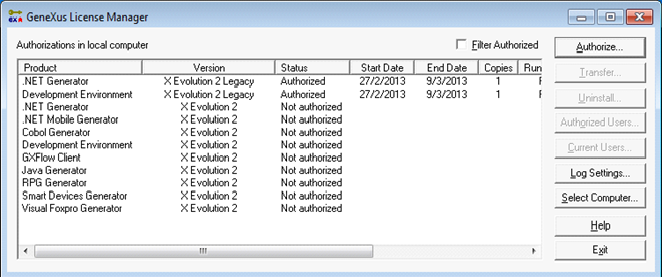
- For the uninstalled products, request authorization for version X Evolution 2.
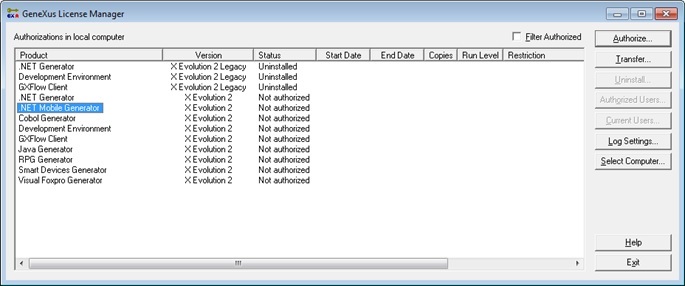
- Enter the license authorization codes you will receive by e-mail.
- Now you can start working with GeneXus.
For local licenses with local GeneXus protection server, you can choose any of the options below to authorize GeneXus:
Option 1
- Install GeneXus Protection Server 9.4.16 or higher
- Open the GeneXus License Manager from GeneXus Protection Server 9.4.16 and press "Upgrade Legacy".

- Choose between the options "Upgrade Online" and "Generate Upgrade File".
- Install Upgrade 3 of version Xev2.
- Now you can start working with GeneXus.
Option 2
- Install GeneXus Protection Server 9.4.16 or higher
- Uninstall the licenses of the products indicated (X Evolution 2 Legacy).

- For all the products uninstalled, request licenses for version X Evolution 2.

- Enter the license authorization codes you will receive by e-mail.
- Install Upgrade 3 of version Xev2.
- Now you can start working with GeneXus.
For the case of centralized licenses, you can choose any of the options below to authorize GeneXus:
Option 1
- Install GeneXus Protection Server 9.4.16 or higher on the license server.
- Open the GeneXus License Manager from GeneXus Protection Server 9.4.16 and press "Upgrade Legacy".

- Choose between the options "Upgrade Online" and "Generate Upgrade File".
- If "Upgrade Online" is selected (an Internet connection is needed), enter your GXTechnical username and password and press the "Upgrade" button. Wait a few seconds and all licenses will be automatically upgraded.

- If "Generate Upgrade File" is selected, press "Upgrade" and send the generated file to your local distributor. Enter the license authorization codes you will receive by e-mail.

- Install Upgrade 3 of version Xev2 on each PC client.
- On each PC client, open the GeneXus License Manager from Upgrade 3 of version Xev2, press "Select Computer", choose "Remote License", write the IP address of the License Server and press "OK".
- Now you can start working with GeneXus.
Option 2
- Install GeneXus Protection Server 9.4.16 or higher on the license server.
- Uninstall the licenses of the products labeled X Evolution 2 Legacy.

- For all the uninstalled products, request licenses for version X Evolution 2.

- Enter the licenses you will receive by e-mail.
- Install Upgrade 3 of version Xev2 on each PC client.
- On each PC client, open the GeneXus License Manager from Upgrade 3 of version Xev2, press "Select Computer", choose "Remote License", write the IP address of the License Server and press "OK".
- Now you can start working with GeneXus.
In order to share licenses between GeneXus Server instances, follow the steps described on the following SAC:
http://www2.gxtechnical.com/portal/hgxppredirect.aspx?15,26,0,,,31905
The GXflow production environment must be updated. To do so, download and Install GXflow Production Environment Setup (see Business Process Deployer Setup for details). In addition, upgrade the licenses using the "Upgrade legacy" option from the Protection Server, as indicated above.
When using temporary licenses, notice that the "Start Date" applies when the License is processed and the Site Key is generated and sent to the Customer.
More Information