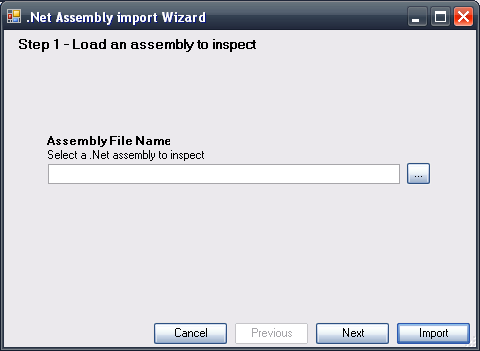
The .Net Assembly Import Wizard is located in Tools > Application Integration in the GeneXus main menu. It allows you to create External Objects (EO) and the data types required to use them simply by selecting the relevant .Net assembly.
Enter the path into the assembly.
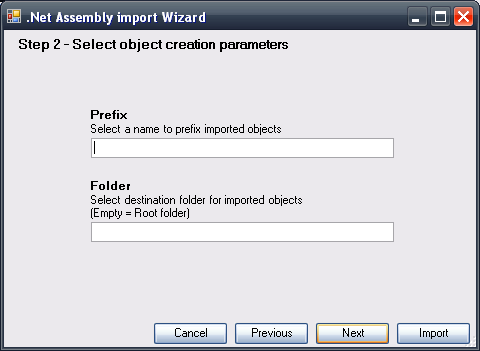
If desired, indicate a prefix for the EOs and a folder where said objects will be stored in the KB.
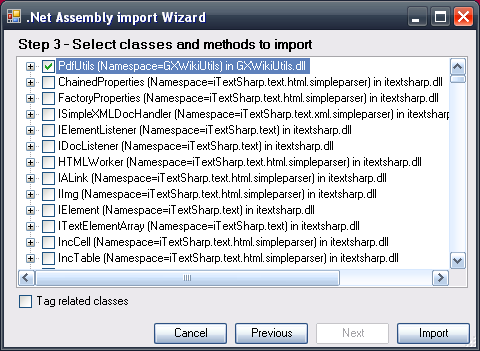
Given that the assembly can have more than one class, in the last step, you must select those classes you wish to import.
Checking the Tag related classes option causes all the classes related to the selected class to be imported.
An EO will be created for each selected class; its name will be formed by the prefix entered and the name of the class.
External Objects with Type property 'Native Object'.