This article is a quick tutorial of how to use the Invisible Mode property in an application. The example is going to be based on the LightCRM (X Evolution 2).
The LightCRM app has a Meeting tab were you can find the information of a meeting. A meeting is composed by a Company, a Contact and the meeting info such as date, location and more.
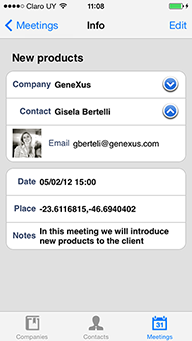
So the following screen shows the information of a meeting.
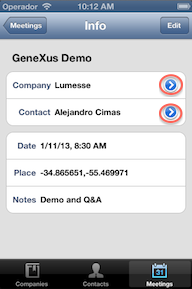
Note that the blue buttons on the right side of the Company and Contact will take you to a secondary screen to show more info about each element.
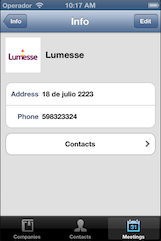
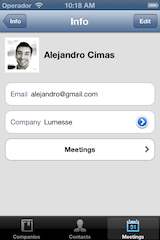
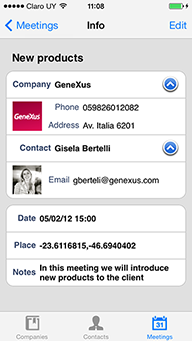
These are the secondary screens.
The idea is to change this behavior in such way that you don't have to go to the secondary screen to see more info about the meeting.
The new meeting screen:
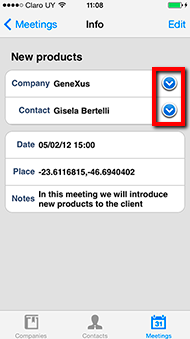
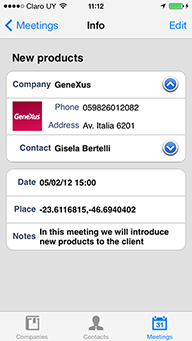
When tapping on the Plus button more info about each fields appear, this button tranforms to a Minus button that will also hide this information:
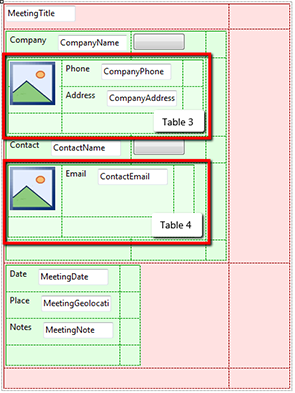
Add two rows to the layout. These rows are going to have the hidden information. Also add two buttons which are going to trigger the actions to show and hide the extra information displayed on the screen.
Two icons with a Plus and Minus images have been used for UI purposes, but in your example any image class or caption can be used.
Considerations:
- The big container table should have Auto Grow property in true because this table will have to grow in order to show all the information.
- The rows which contains Table 4 and Table 3 need to have the minimum value of a row.
Table 3 and Table 4 should both have:
- Visible property =False
- Invisible Mode = Collapse Space.
Code the Events that are going to trigger the action to show and hide the extra information. As mentioned on the Step 1, in this example two button Classes which have a Minus and Plus images as background images were created. This was done just for UI purposes, is not going to change the way this tutorial works.
The following sample code shows the event for the Company button, which executes 'Comp' Event. Needless to say that it is the same for the Contact button, which executes the 'Cont' Event.
Event 'Comp'
    Composite
        if &varBoolCompany
           Table4.Visible = false
           &varBoolCompany = false
           Comp.Class = "Button.Plus"
        else
           Table4.Visible = true
           &varBoolCompany = true
           Comp.Class = "Button.Minus"
        endif
    EndComposite
Endevent
Where:
&varBoolCompany
Is a boolean flag used to know in which state is the screen.
Comp.Class = "Button.Plus"
It can change the caption or anything you want, to let the user know that the action is contrary to the previous state of the button.
After having this done, you can test your application.
You can see this example working on the LightCRM (X Evolution 2) sample.