In this article, we'll go over the basic steps to upload a war file to IBM Cloud manually.
So, if you want to deploy to IBM Cloud yourself, go on reading this document.
This is the final step after having configured all the necessary requirements, please see the following guide before going on through this paper: Deploying to IBM Cloud prerequisites.
Cloud Foundry is a command-line interface that you can use to deploy and manage applications on Bluemix.
After having downloaded Cloud Foundry, open a command line window and execute the following:
- Change directory to the location of the war file in the Windows development machine.
- Connect to Bluemix.
cf api https://api.ng.bluemix.net
- Initiate a Bluemix session using your user, organization, and space.
cf login -u sjuarez@genexus.com -o genexus.com -s GENEXUS-INVESTIGACION
See this link for more information.
- Deploy the application, using the "push" argument of the cf command. The parameter passed is the name of the application in Bluemix.
cf push testmemcache
or
cf push -p c:\bluemixtest\testmemcache.war testmemcache
After having installed the war on Bluemix, you'll see the following in the command line:
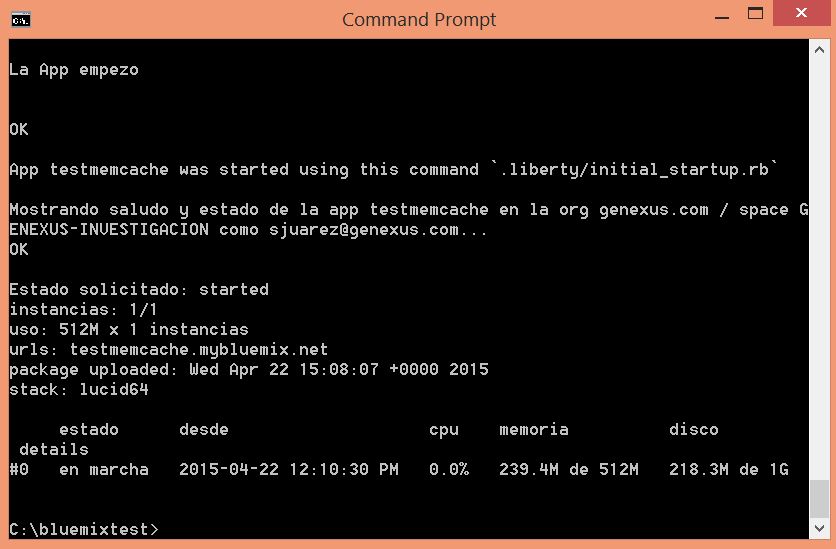
In the Bluemix web console, you can see the state of the application (up and running) and the URL to access it.
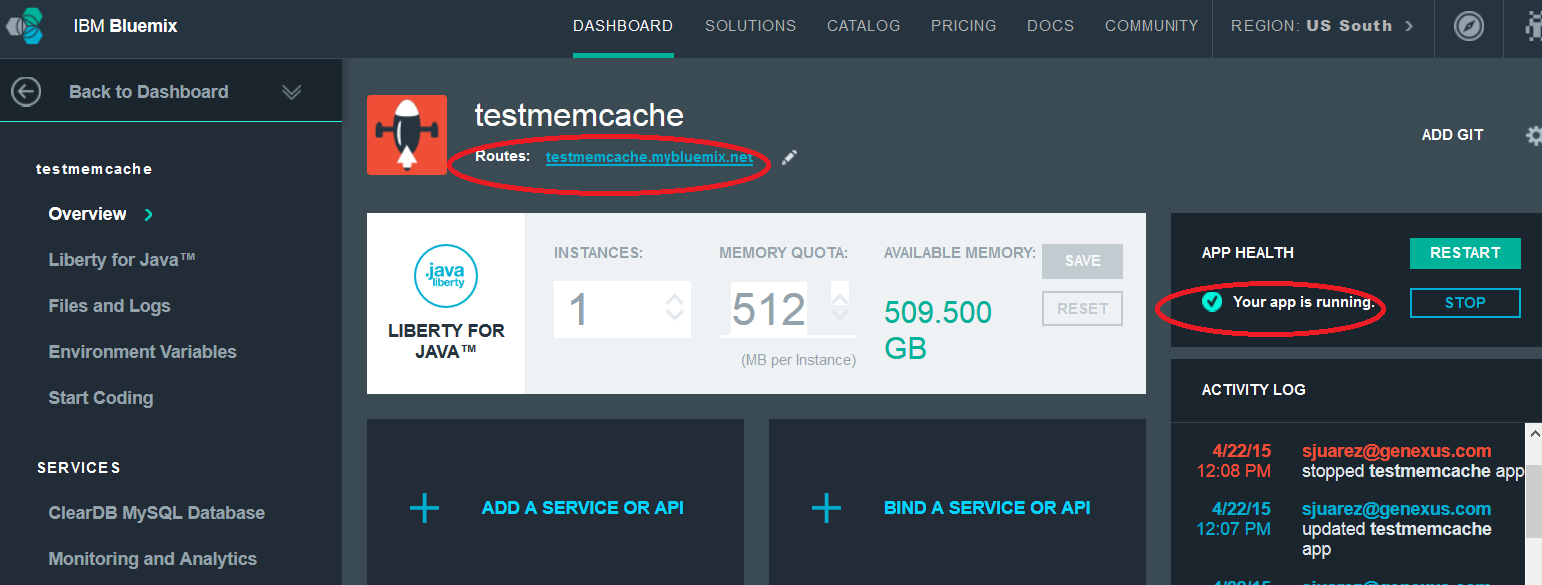
In this example, the execution URL would be the following: http://testmemcache.mybluemix.net/servlet/com.testgxmemcached.cachetest
Note that we added the Java package configured in the KB and the "/servlet" to the URL.