File Upload is an HTML5 control whose purpose is to enable the end-users to upload multiple files to the web server's file system at the same time. Those files can be handled as needed afterward.
The control is distributed with GeneXus and has the following characteristics:
- The files to upload can be dragged to the form.
- Each file can be uploaded independently from the rest, or all can be uploaded at once. The upload progress can be seen for all the files being uploaded.
- It shows a preview of the image, audio or video file being uploaded (if the browser supports that format).
- It's a control for Responsive Web Applications.
- Runs in Chrome, Firefox, Safari, and IE>=8
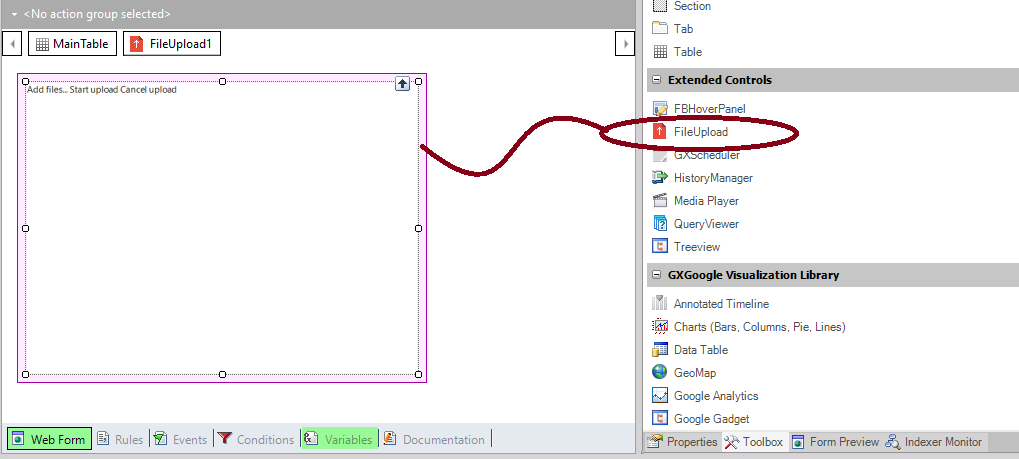
The control can be found in the Extended Controls section of the Toolbox and should be dragged to the form. Only the Abstract Layout supports this control.
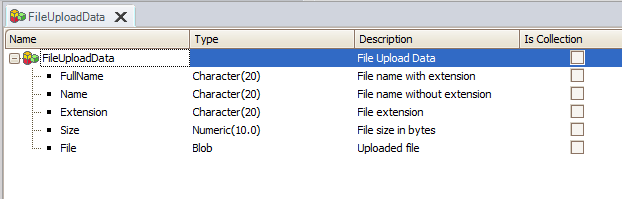
When the control is dragged to the form, the FileUploadData SDT is imported to the KB. Its purpose is to get the file data that is going to be uploaded.
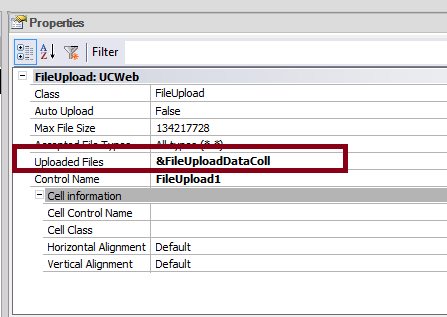
- At design time, you need to configure the Uploaded Files control property. It should be assigned to a variable based on the FileUploadData SDT collection data type.
2. When the files are uploaded, you can get them using the variable associated with the Upload Files property. The files are uploaded to the server file system, to the location indicated on the Temp media directory property. Those files are deleted from the server on a basis established here. In Java, the files are deleted according to this document. Then, using the File data type is recommended to check for the existence of the file before using it.
| Auto Upload |
By default, files added to the widget are uploaded when the user clicks on the start buttons. To enable automatic uploads, set this property to true |
| Tooltip Text |
Sets the tooltip text to show on the "Add files" button |
| Enable Uploaded File Canceling |
By default, already uploaded files cannot be canceled, only file that haven't been uploaded can be canceled. To enable canceling already uploaded files, set this property to true. Canceled uploaded files will be removed from the SDT collection bound to the UploadedFiles property. |
| Disable Image Resize |
Set to true to disable the automatic resize of images done by the control. If false, the image will be automatically resized depending on its size. |
| Max File Size |
The maximum allowed file size in bytes. This option only has an effect for browsers supporting the File API. |
| Max Number Of Files |
Set this property to limit the number of files that are allowed to be uploaded using this control. Specify 0 for unlimited file uploads. |
| Auto Disable Adding Files |
Set to true to automatically disable the Add files button and disabling file dropping on the control when MaxNumberOfFiles property is set and the files limit is reached. |
| Accepted File Types |
Indicates the types of files the control will accept. To specify a custom type list, set this property to Custom value and use the Custom File Types property to specify the accepted file types.
Possible values:
- All types (*.*)
- Image (*.png, *.gif, *.jpg, *.jpeg)
- Audio (*.mp3, *.wav, *.ogg, *.3gp, *,aac, *.wma)
- Video (*.avi, *flv, *wmv, *.mov, *.mp4)
- Custom
|
| Custom File Types |
A comma-separated list of accepted file extensions. For example: doc, xls ,pdf. |
| Uploaded Files |
A FileUploadData SDT collection, containing the uploaded files. |
| Failed Files |
A FileUploadData SDT collection, containing the failed uploads. |
| UploadComplete |
The event is automatically executed when one or more files have finished being uploaded. |
| UploadFailed |
This event allows consulting the failed uploads. |
| StartUpload |
The upload action is triggered. Can be used in any event, but uploaded files information will only be available in the UploadComplete event. |
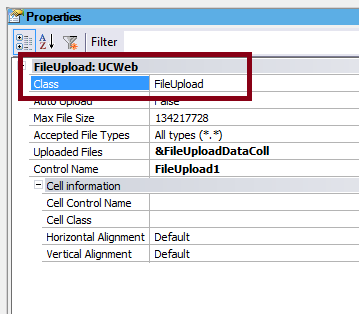
Use the FileUpload Class of the Theme (or define one of its descendants).
The FileUpload class is assigned by default to the Class property of the UC.
The Class can be edited on the Theme, as follows:
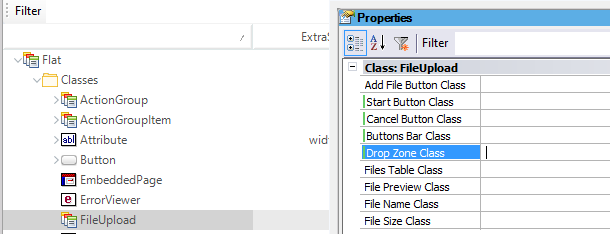
- Add File Button Class: Class used to style the "Add Files" button.
- Start Button Class: Class used to style the "Start" buttons.
- Cancel Button Class: Class used to style the "Cancel" buttons.
- Buttons Bar Class: Class used to style the bar containing the buttons on top of the files table.
- Drop Zone Class: Class used to style the area where files are dropped.
- Files Table Class: Class used to style the table where files are displayed.
- File Preview Class: Class used to style the file preview.
- File Name Class: Class used to style the file name text.
- File Size Class: Class used to style the file size text.
- Error Message Class: Class used to style the error messages of the control.
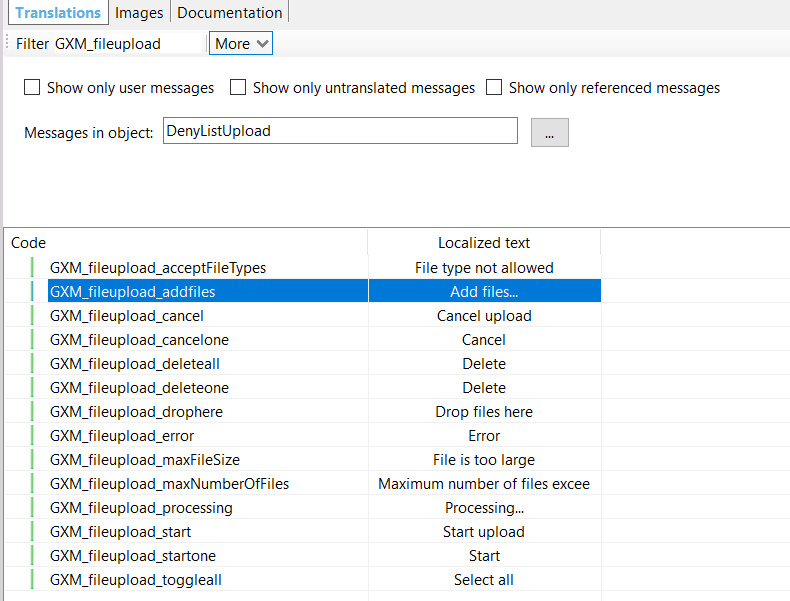
The captions of the buttons are GeneXus standard messages. If you want to change them, you have to access the language object and unmark the "Show only user messages" filter. The captions of the buttons of the FileUpload User Control have the GXM_fileupload prefix.
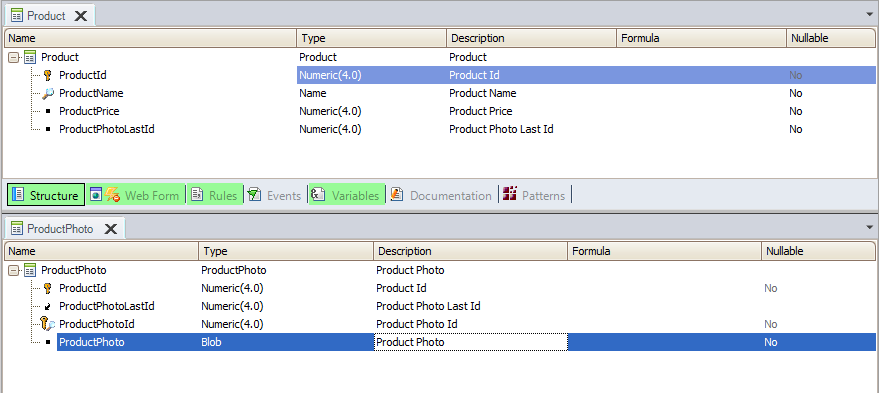
Consider the following two Transactions (both are set as Business Component):
Look at the ProductPanel object:

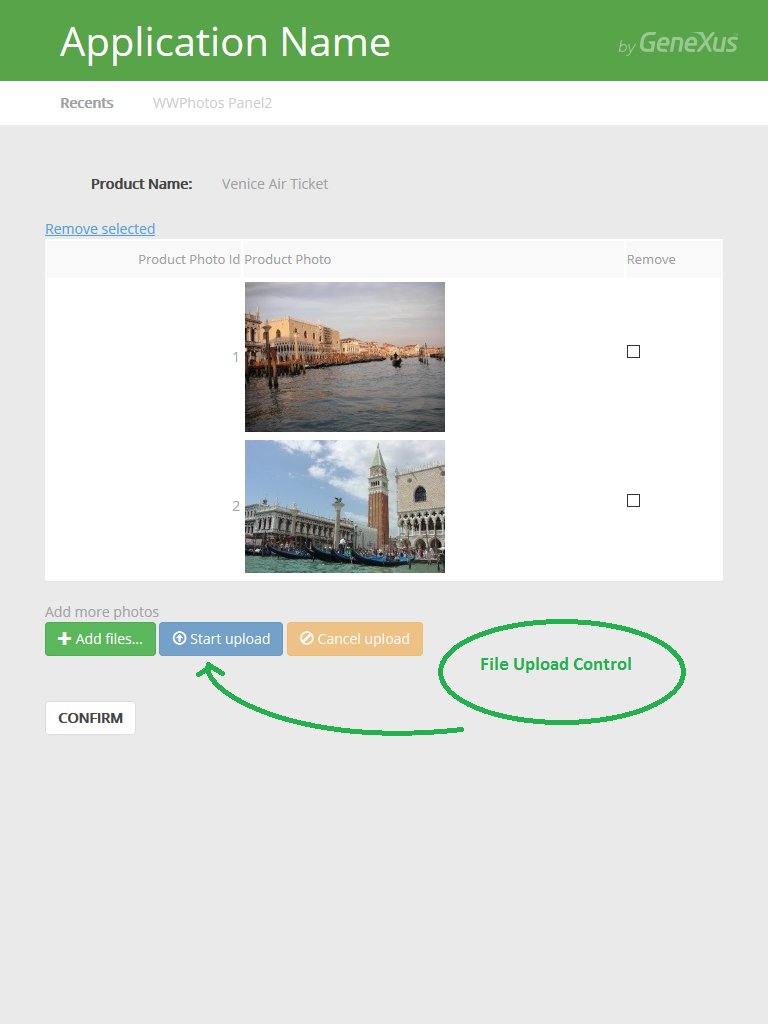
It receives the &ProductId as a parameter. It loads the Product information and allows the end-user to make any changes to the product basic information (name or price). Also, it offers a button to upload several photos related to this product. When that button is clicked, another Web Panel is called. There the end-user can choose multiple files to upload at the same time. Besides, he/she can also remove photos.
Then, the resulting form looks as follows:
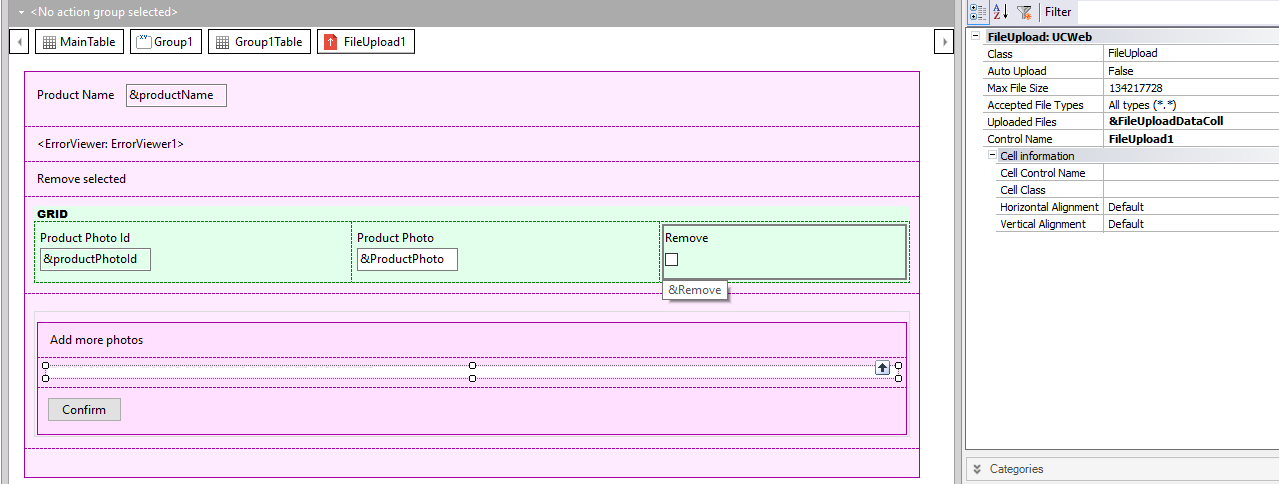
Note that the File Upload control has been dragged to the form and the "Uploaded Files" property has been assigned to the &FileUploadedDataColl variable. Also, note that the photos that have already been uploaded are going to be displayed using a grid.
Below you can see the part of the code related to the saving process of the photos in the database. To see the entire example, download it from FileUpload UC sample.
Event 'Confirm'

    for &FileUploadData in &FileUploadDataColl

        &ProductPhotoItem = new()
        &ProductPhotoItem.ProductId = &ProductId
        &ProductPhotoItem.ProductPhoto = &FileUploadData.File
        &ProductPhotoItem.Save()
        if &ProductPhotoItem.Success()
            commit
            &count += 1
            msg(format(!"Data sucessfully added: File #%1",&count.Tostring()))
        else
            &ErrorMessage = &ProductPhotoItem.GetMessages().Item(1).Description
            msg(format(!"There was an error uploading the images: %1",&ErrorMessage))
        endif

    endfor
    grid1.Refresh()
Endevent
Basically, the &FileUploadDataColl collection is scanned and each photo is saved to the database.
The ProductPhotoId is assigned by the following rule which is defined in the ProductPhoto Transaction:
serial(productPhotoId,ProductPhotoLastId,1);
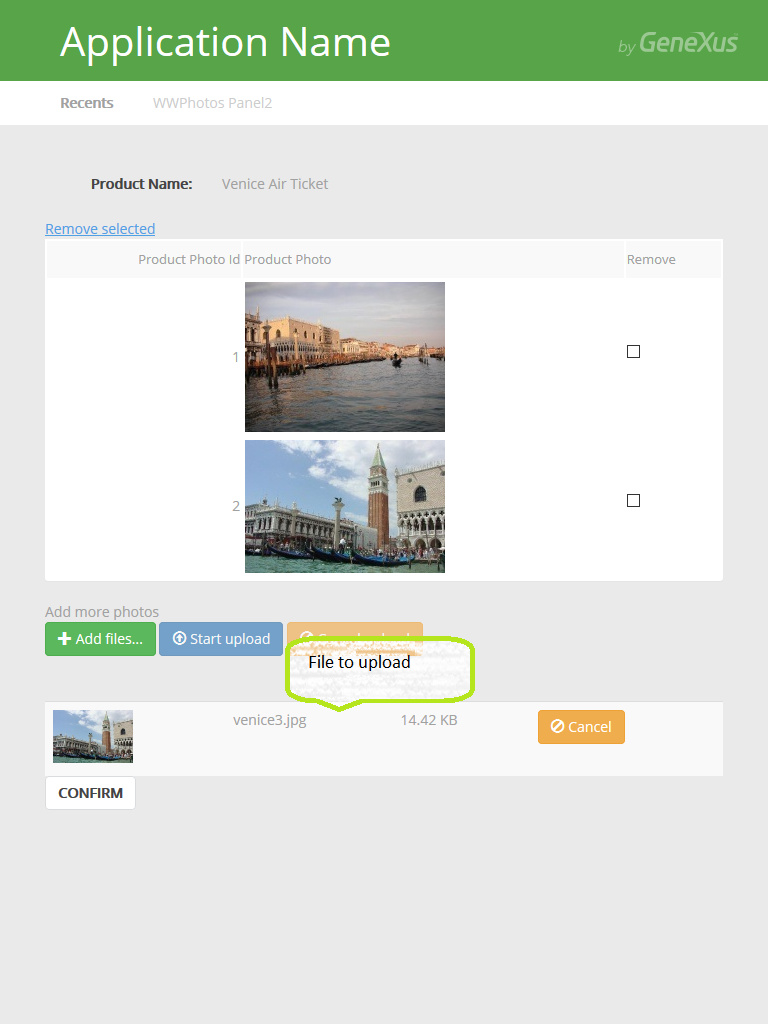
At runtime, the form looks as follows:
By default, requests size is limited to 4M, so if a file bigger than 4M is being uploaded an error like "Error Internal Server Error" occurs.
Using browser developers tools (F12) the error shows: "Failed to load resource: the server responded with a status of 500 (Internal Server Error) Gxobject.aspx:1"
Using Windows event viewer it shows: "Exception message: Maximum request length exceeded."
How to fix it?
Try to set a higher "maximum request size" value in web.config file.
Example to limit to 20M:
<system.web>
    <httpRuntime executionTimeout="600" maxRequestLength="20120"/>
Download sample from FileUpload UC sample