After the whole build and test process of your application is configured and set up, the following step is to set up everything necessary for its deployment to the corresponding server(s): test, pre-production, production.
To accomplish this task, you will add steps in the configuration of your Jenkins project, on which you have worked using DevOps.
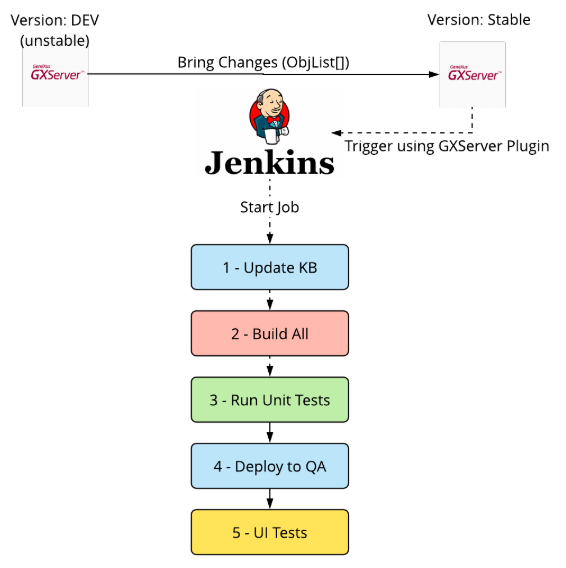
4 - Deploy
Create the deploy package to be able to perform the tests in the test, pre-production, production environment.
Step 1: Creating the deployment unit
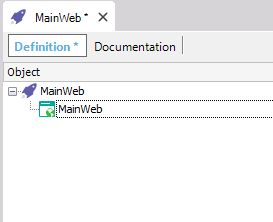
Prior to setting up the deployment in the Jenkins project, you will create a Deployment Unit. This very simple Deployment Unit will just include the Web Panel called MainWeb. This Web Panel has call to the Customer Transaction.
Go to Preferences, and in the current Environment, in Deployment Units, right click on -> New Deployment Unit.
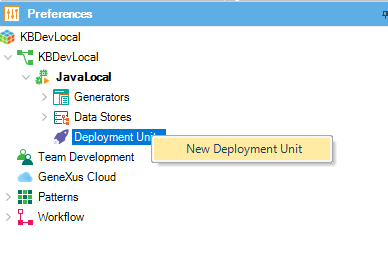
Give a name to the Deployment Unit, such as MainWeb, and in its edition dialog add the MainWeb web panel.
Step 2: Configuration in Jenkins
Now you will set up the deployment tasks in Jenkins. You will create a war package with the application and do its deploy in what would be the “production” server (the local Tomcat of the development computer will be used by way of example).
Creation of the gxdproj file with msbuild
The first step is to create a gxdproj file through an MsBuild task that will contain the information required to create the package of the application to be deployed. To do that, go to the Jenkins project and add a new step in the build with the Add Build Step button; it must be of the type Build Visual Studio project or solution using MsBuild.

When you create a step of the MsBuild type, you must indicate 3 things:
- Which MsBuild you will use
- Which file you will execute
- What parameters will be sent in runtime
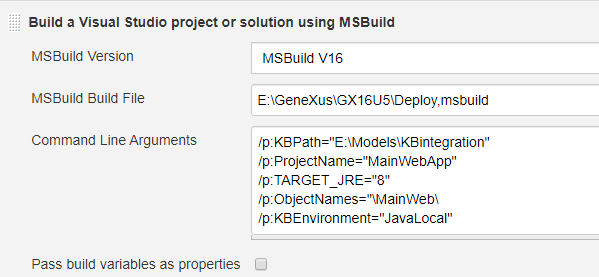
So, to create the deploy project, you will use the MsBuild version catalogued in Jenkins, execute the Deploy.msbuild file that is at the root of the GeneXus installation, and you will pass the following parameters:
/p:KBPath : Path of the KB
/p:ProjectName : A name for the deploy task that could be any. It will be used in the following step.
/p:TARGET_JRE : Java version to be used.
/p:ObjectNames : Object or objects to be deployed. Use the name of the Deployment Unit you created at the start.
/p:KBEnvironment : Environment of the KB from where you will be deploying.
See CreateDeployProject to get more information about the task being executed and the parameters required.
For example, the configuration in Jenkins will be as follows:
Creation of the war package of the application
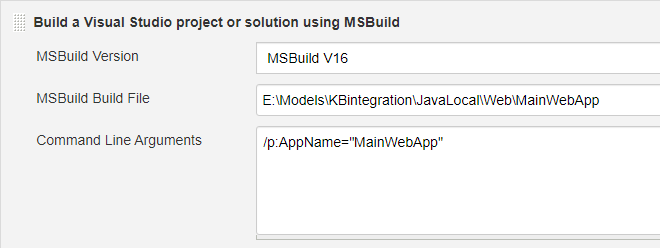
The gxdproj file created in step 1, is in fact an MsBuild file that must be executed to generate the war package of the application. So, as in step 1, you must add a new step in the Jenkins project, of the Build Visual Studio project or solution using MsBuild type, and using the following setup:
- Use the MsBuild catalogued in Jenkins.
- The file to be executed will be the one created in step 1, which was generated in the web directory of the selected environment of the KB, with the name of the project indicated (in the /p:ProjectName parameter) and the gxdproj extension.
- You must set up a single parameter: /p:AppName, where you will indicate a name for the application, which could be any, and it will be used in the following step.
- By way of example, the setup in Jenkins will be as follows:
See CreatePackage to get more information about the task being executed and the parameters required.
Copying the war package to Tomcat
After you created the war package, you will need to take it to the corresponding server. What you must execute will depend on the server used. GeneXus provides MsBuild tasks to send war packages to servers such as Amazon, Azure, IBM, SAP, etc., which should be executed at this time in such case.
Since a local Tomcat will be used for this practice, what you have to do is simply copy the war file to the server.
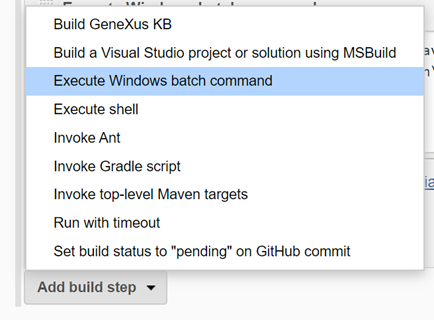
This is set up in Jenkins by adding a new build step of the Execute Windows batch command type, where you will set up that the file be copied to the directory of the Tomcat webapps, with the following command:
xcopy <KBPath>\<EnvironmentName>\Deploy\Local\<AppName>.war <TomcatPath>\webapps
Where:
<KBPath> is the path where the KB is located
<EnvironmentName> is the name of the environment of the KB where you are working. It is the same one indicated in step 1 (in the /p:KBEnvironment parameter)
<AppName> is the name of the app you configured in step 2 with the /p:AppName parameter
<TomcatPath> is the path where Tomcat is installed.
By way of example, the configuration in Jenkins will be as follows:

Notes:
- If any of the paths indicated contains spaces, then the value must be between quotation marks. The value of the Tomcat path in the image is an example. Verify what version is installed and use the correct one.
- If you need to deploy to an external deployment target (such as a Paas), see Deploy to external targets.
Step 3: Integration Test
Commit the deployment unit from the KB Development and execute the Jenkins project that will execute the following steps:
- Update and build of the application with the new Deployment Unit
- Test
- Deploy to production
After executing the project in Jenkins, you can verify that the deploy package is copied to Tomcat and the application can be run in the Integration environment (http://localhost:8080/<AppName>/servlet/com.kbintegration.mainweb).