The GXScheduler User Control allows managing a schedule of chronological events. The events can be viewed by day, week, or month, and can be added, updated, and deleted directly on the control with the mouse.

The events can be edited using the default edit control offered by the user control implementation, or a Web Panel object or Transaction object defined in your Knowledge Base.
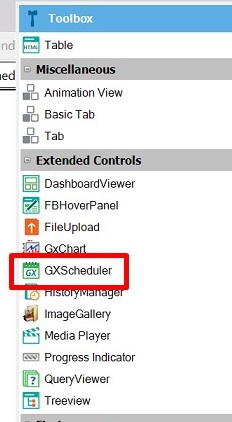
You can find the GXScheduler User Control in the Toolbox under the Extended Controls group:
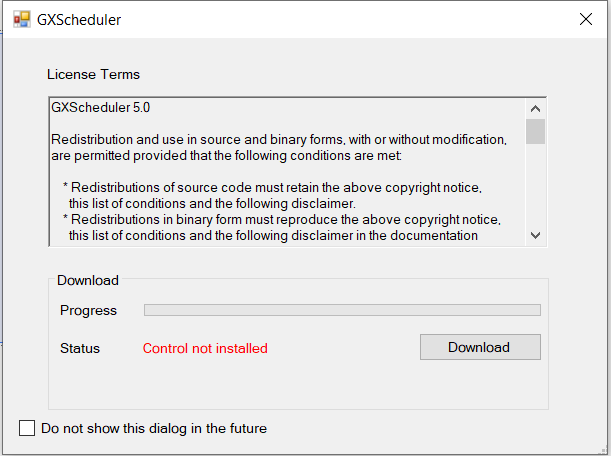
To use it, just drag it to the Web Layout of a Web Panel object. The following dialog is shown:
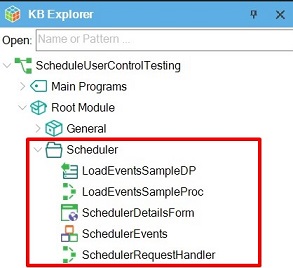
Press the "Download" button and some objects are automatically imported into your KB, under the Scheduler folder:
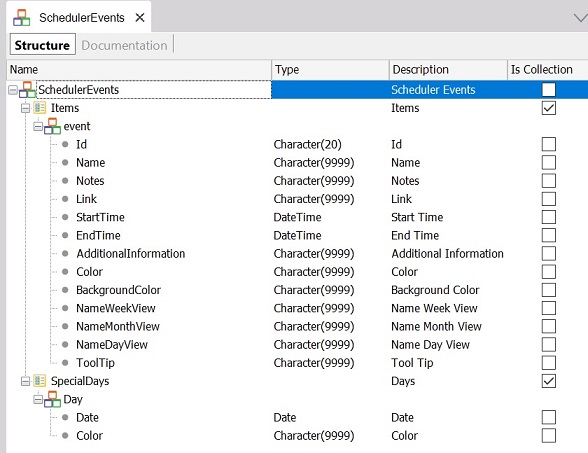
One of the imported objects is the "SchedulerEvents" Structured Data Type (SDT). The events loaded in this SDT are the ones shown in the GXScheduler user control. The structure of the SDT is as follows:
You have to define a Data Provider object or a Procedure object to load the "SchedulerEvents" SDT. After that, the name of this object must be specified in the Load Events Object property of the GXScheduler control (included in a Web Panel).
Note: By default, the
Load Events Object property of the GXScheduler control is set to "LoadEventsSampleDP" (the name of a sample Data Provider included in the Scheduler folder. This folder also includes a sample Procedure called "LoadEventsSampleProc"). You can check their implementations to define your own object.
The Data Provider (or Procedure) in charge of loading the "SchedulerEvents" SDT with the events of a given period must receive the following parameters:
Parm(&dateFrom, &dateTo);
 // &dateFrom and &dateTo are based on the Date data type
The Output property of the Data Provider must be set with the "SchedulerEvents" Structured Data Type.
The following Data Provider source corresponds to the one used to show the previous screenshots (it is similar to the "LoadEventsSampleDP" source):
SchedulerEvents
{
    Items
    {
        event
        {
            Id = "Sample1"
            Name = "World Cup Match"
            Notes = "Venezuela vs Uruguay"
            Link = "http://www.genexus.com"
            StartTime = ymDHMStoT(&Today.Year(),&Today.Month(),&Today.Day(),01,30,0)
            EndTime = ymDHMStoT(&Today.Year(),&Today.Month(),&Today.Day(),02,30,0)
            AdditionalInformation = ""
        }
        event
        {
            Id = "Sample2"
            Name = "World Cup Match"
            Notes = "Argentina vs Brasil"
            Link = "http://www.gxtechnical.com"
            StartTime = ymDHMStoT(&Today.Year(),&Today.Month(),&Today.Day(),01,30,0)
            EndTime = ymDHMStoT(&Today.Year(),&Today.Month(),&Today.Day(),02,30,0)
            AdditionalInformation = ""
        }
    }
}
Suppose that instead of defining the Data Provider source to load the SDT with fixed data, you want to load it with data available in the database. To do so, consider the following Transaction object:
Event
{
   EventId*
   EventStart
   EventEnd
   EventDescription
   EventDetails
}
Drag the SchedulerEvents SDT to the Data Provider source and edit the source as shown below:
SchedulerEvents
{
   items
   {
      event
         where EventStart >= &dateFrom
         where EventEnd   <= &dateTo
      {
         Id                    = EventId
         StartTime             = EventStart
         EndTime               = EventEnd
         Notes                 = EventDescription
         AdditionalInformation = EventDetails
      }
   }
}
1) Using a Transaction object
You can select a Transaction object in the Details Form Object property of the GXScheduler control in order to update events.
This Transaction must be defined with a certain Parm rule. The Id of this Transaction must be based on the Character(20) data type (as the EventId of the "SchedulerEvents" SDT). The EventStart and EventEnd attributes must be based on the DateTime data type.
parm(&Mode,EventId, &EventStart,&EventEnd);
default(EventStart,&EventStart);
default(EventEnd,&EventEnd);
2) Using control Events and Business components
When the GXScheduler control is dragged to the Web Layout of a Web Panel, some code is added in the Events section of the Web Panel.
Check the Web Panel Events tab as well as the Variables tab to analyze the code.
There are four events:
- EventAdded
- EventDeleted
- EventUpdated
- EventSelected
These events are triggered with a double-click on a scheduler cell (for example, the EventAdded event is triggered when the user double-clicks on an empty cell of the GXScheduler).
When the GXScheduler control triggers one of these events, it loads the CurrentEvent property that is bound to a variable (by default the variable is called ¤tEvent and its type is SchedulerEvents.Event).
In other words, the ¤tEvent variable contains the data captured about the event added, modified, deleted, or selected each time the EventAdded, EventDeleted, EventUpdated, or EventSelected is triggered.
Suppose you want to store an event in your database when the GXScheduler control triggers the EventAdded event. For this purpose, follow these steps:
- Create a Transaction object that models the events. Set its Business Component property to True.
- In the Web Panel object that contains the GXScheduler control, define a variable based on the Business Component type defined in the preview step (suppose the variable name is &businessComponent).
- Define the following event in the Web Panel where the GXScheduler user control (named gxScheduler1) is used:
Event gxScheduler1.EventAdded
&businessComponent.EventId = ¤tEvent.Id
&businessComponent.EventStart = ¤tEvent.StartTime
&businessComponent.EventEnd = ¤tEvent.EndTime
&businessComponent.EventDescription = ¤tEvent.Notes
&businessComponent.EventDetails = ¤tEvent.AdditionalInformation
&businessComponent.Save()
commit
EndEvent
3) Using control methods
It is also useful to work with the GXScheduler events without using the control directly. For this purpose, the following methods are available:
- AddEvent(Events.Event) method: Receives the event(s) to be added.
- UpdateEvent(Events.Event) method: Receives the event(s) to be updated.
- DeleteEvent(Events.Event) method: Receives the event(s) to be deleted.
For example, the following can be inserted in a Web Panel:

Also, these events have to be defined, where &auxEvent is the event to be added, updated, or deleted:
Event 'AddEvent'
do 'GetRecords'
gxScheduler1.AddEvent(&auxEvent)
EndEvent
Event 'UpdateEvent'
do 'GetRecords'
gxScheduler1.UpdateEvent(&auxEvent)
EndEvent
Event'DeleteEvent'
do 'GetRecords'
gxScheduler1.DeleteEvent(&auxEvent)
EndEvent
Sub'GetRecords'
&auxEvent.Id = &id
&auxEvent.Name = &name
&auxEvent.StartTime = &startTime
&auxEvent.EndTime = &endtime
&auxEvent.Notes = ¬es
&auxEvent.AdditionalInformation = &additionalInformation
EndSub
- Only one GXScheduler control per Web Panel object can be used. The base implementation (dhtmlx.com) does not allow this feature.
- The SDT base structure can be modified, for example, to change the Id datatype from char(20) to numeric(4). However, consider that it is distributed within GeneXus, so when you update your GeneXus version, you will lose these changes.
The GXScheduler control uses dhtmlxScheduler as the base control.
The license information about this control can be read here.