When inserting records, many times you need to check some restrictions before saving it. For example, calling a Panel object, a Procedure object, return to the Work With List Node, etc. So, using the cancel action allows you to add more behavior to your application, when complex constraints determine whether a record should be saved or not.
The Cancel method can also be used on any Native Mobile application. The behavior outside the insertion of a record on a Work With should be: Cancel the execution of the Composite block, and return to the caller screen.
In this article, you will see one simple example of the previously mentioned. You are going to be able to create your own simple Cancel button.
Use the following Transaction with the Work With pattern applied as used on Save method:
Customer
{
  CustomerId*
  CustomerName
  CustomerLastName
  CustomerBirthDate
  CustomerMessage
}
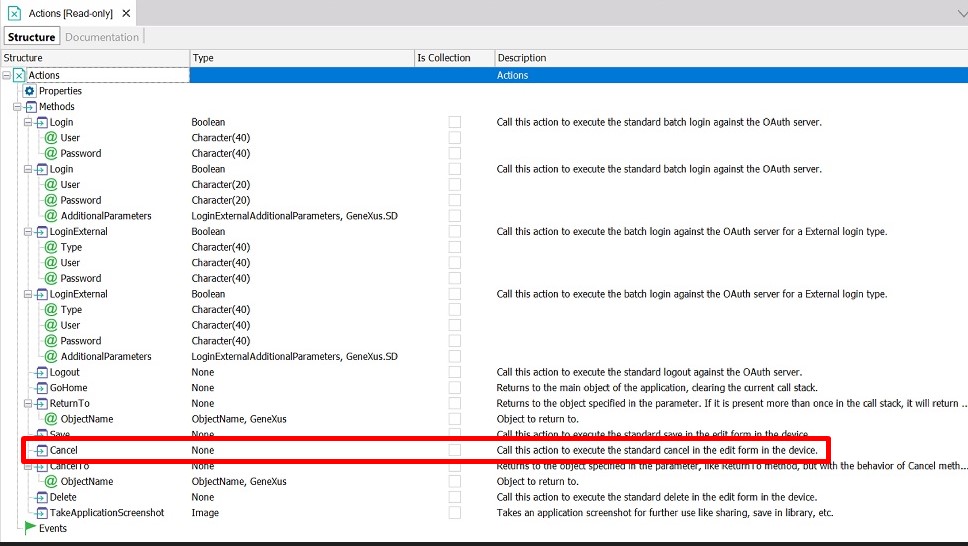
As seen on the Actions external object, the Cancel method doesn’t expect any parameter:
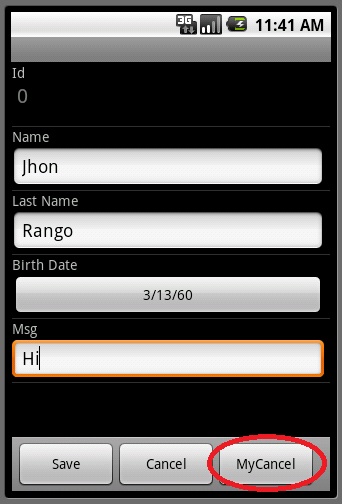
The behavior you want this example to have is to cancel a Transaction insertion when the button you created is pressed.
First, add the new Cancel button to the Application Bar on the Edit mode in Section General of the Work With pattern in the Customer Transaction object. Then, set the Priority property = High.
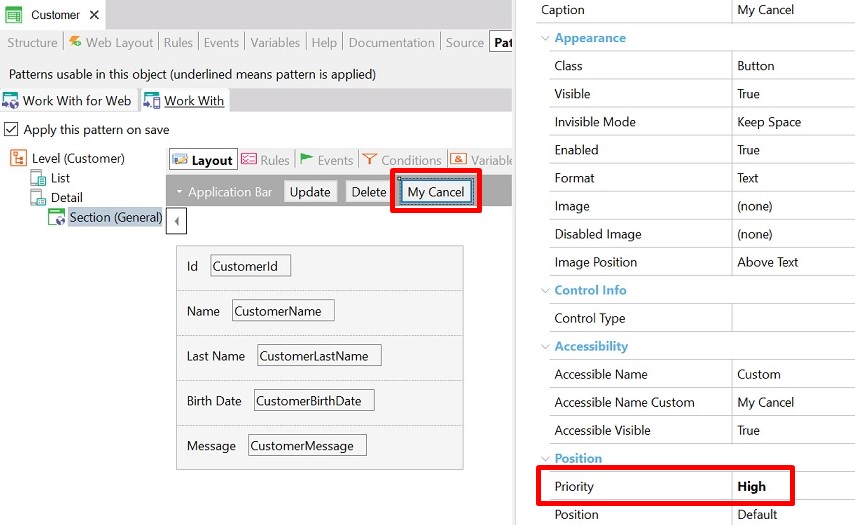
By double-clicking over the new Action (button MyCancel) it will take you to the event associated:

Event 'MyCancel'
    Actions.Cancel()
EndEvent