This document explains how to create a Category and provides a brief overview about it. When working with Categories, you need to create your own structure. They can be either Static or Dynamic.
1. Open the Categories Toolwindow: View > Other Tool Windows > Categories
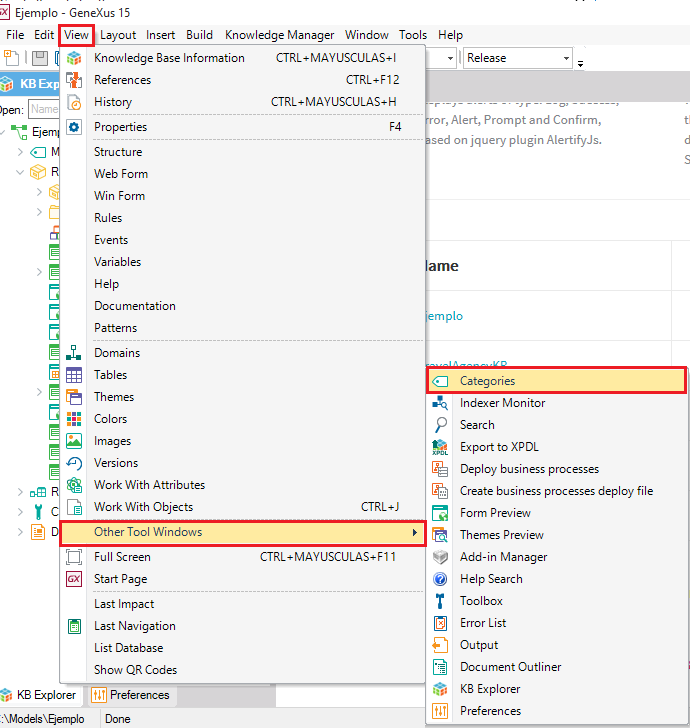
The Categories window will open to the right of the IDE (where the Properties window is opened).
2. Select an existing category in which you want to create a new one, and right-click on it:
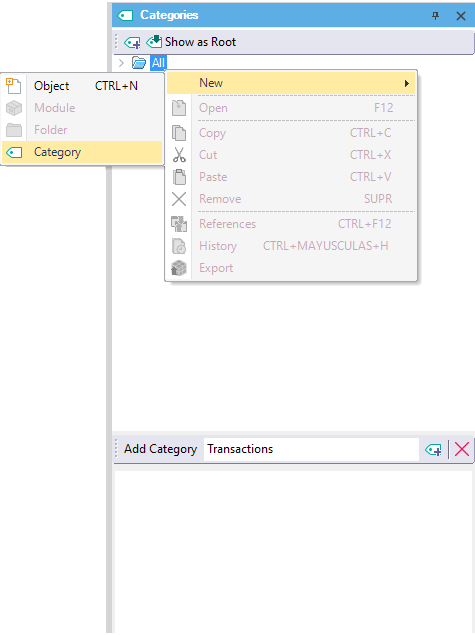
You can also use the Add Category field and buttons:
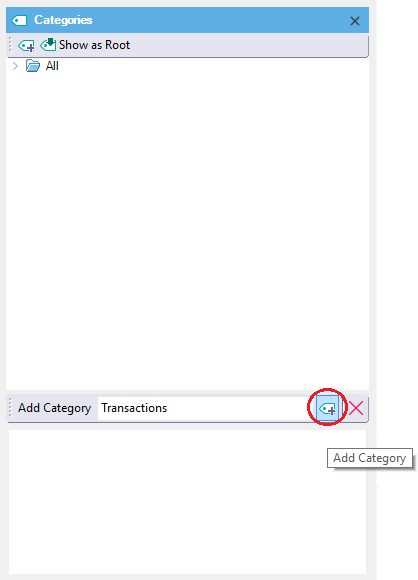
In this way, you can easily create your Category tree.
You can create a Dynamic Category through the Search window and also through the Categories toolwindow. Take a look at both options.
GeneXus provides a powerful search engine that allows you to find anything in your Knowledge Base quickly. This type of category is known as a Dynamic Category, where the category content is automatically loaded with the objects that always match the search criteria. You can search for any given text, or even for specific property values (anything having property X with value Y). See more in Full Text Search
Display the Search window by:
-
Opening the menu View > Other Tool Windows > Search.
-
Then type the search text and press Search
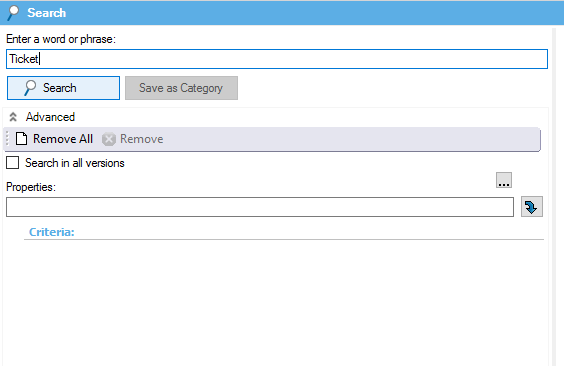
Results will be shown on the right:
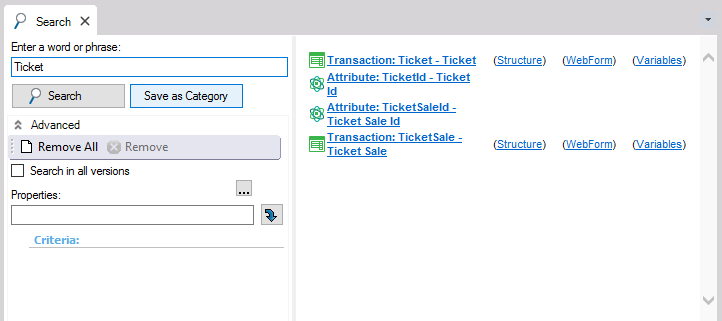
If there is a result, the Save as Category button will be enabled, as shown in the following image:
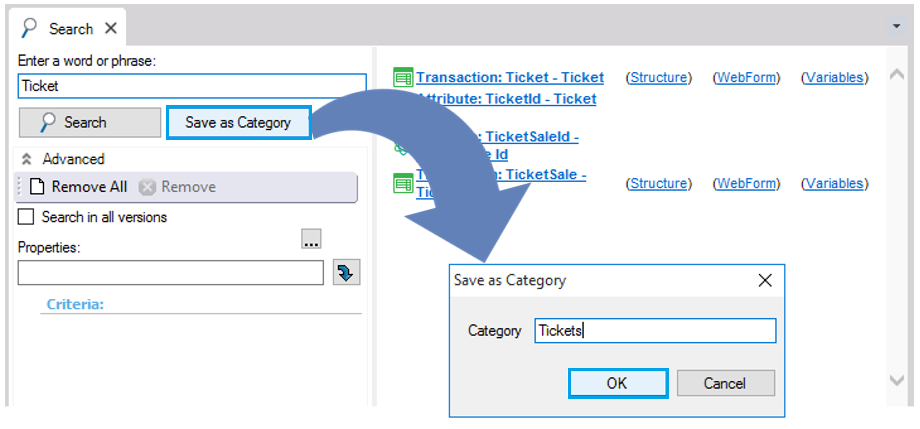
You can use this option to create a new Category only if the Search action returns a result for the word or phrase you entered.
Finally, press the Ok button to create the Category.
You can also create a Dynamic Category in the same way you create a Static Category. All you have to do is to specify some Query and/or Properties in the Category Properties window. Select a category and press F4 to open the Properties window. For example, look at the following image:
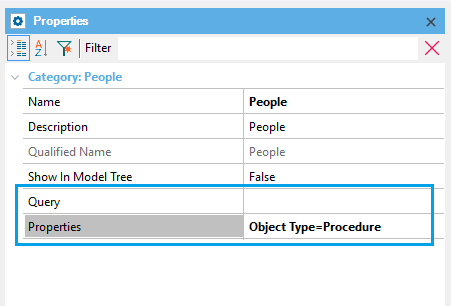
1.Using Search Window Criteria
As previously stated, this type of Category automatically loads its content with the objects matching the search criteria. So, you can look for all your Transaction objects, and then create a Dynamic Category named Transactions. All your transaction objects will belong to it.
- Display the Search window
- In the Advanced option, select the Property "Object Type" and select "Transaction"
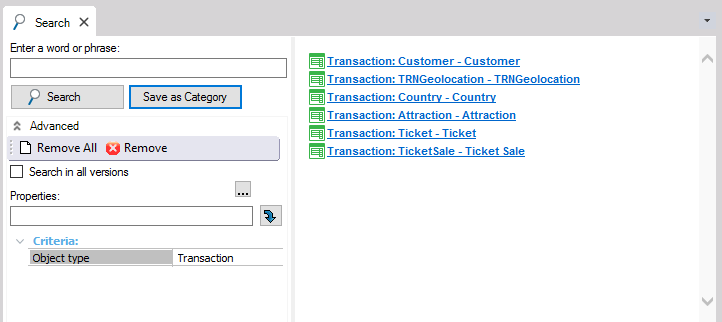
- Press the Search button.
- Press the Save as Category button.
All transaction objects automatically belong to the Transactions category:
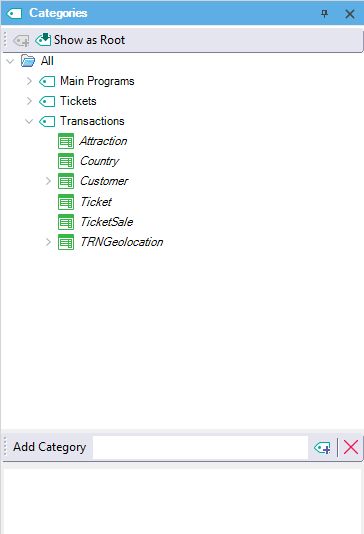
In this way, you can create your "object views" based on object types.
2. Information Flow
Suppose that:
- You have objects with special Tags in their documentation site (All: Peter, Status: Development).
- You have dynamic categories (search results) named "To do Peter", "Status: Test".
- When a document status is modified (for example, Development is changed to Test), the category's content will change automatically.
Look at the following image:

When the documentation status of the Ticket transaction is modified (Development changed to Test), the Category View displayed is:
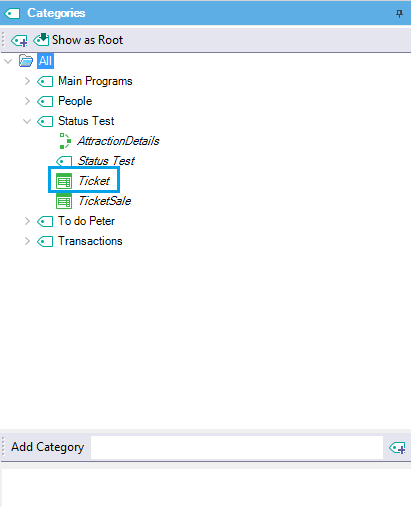
Working with Categories