Warning: Globant Enterprise AI Frontend will be discontinued as of February 10th, 2025.
Playground Interface is on the way to replace this.
The Globant Enterprise AI Frontend offers an experience similar to what you will find in ChatGPT or Bard, as well as an intuitive interface for interacting with Assistants and LLMs. Additionally, it allows you to create your own prompts and adjust settings in the User Menu to have full control over your customized experience.
The frontend screen is divided into three sections:
- Assistants Panel and User Menu
- Chat Panel
- Contextual Panel
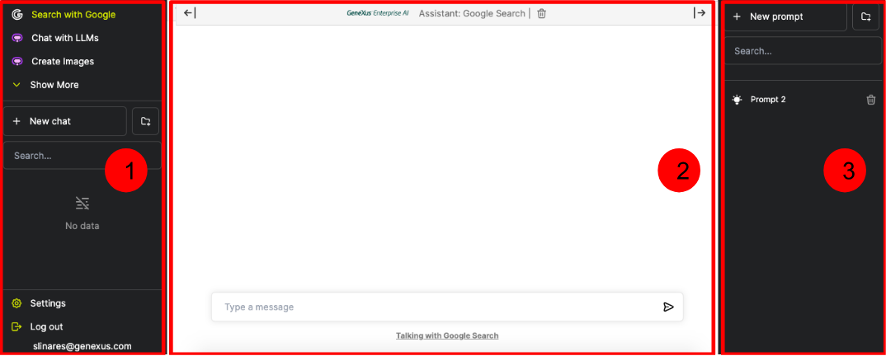
Below is a detailed description of the steps for establishing conversations with Assistants and LLMs, together with information on the operation of each Panel.
This Panel contains:
- In the upper part: the Assistants section.
- In the lower part: the User Menu.
In the upper part of the Panel there is a list of Assistants, including those defined by default and those defined by your organization. The default Assistants include "Search with Google", "Chat with LLMs", and "Create Images".
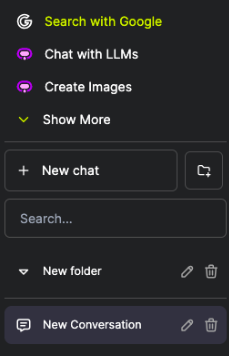
In this section, you may perform the following actions:
- Generate a New Chat by selecting the Assistant with which you wish to interact, or click on “+ New chat”.
- Create New Folders by clicking on the option available next to “+ New Chat” (whose image contains a folder and “+”).
- Select, search for, and organize Chats. Once you have created folders and chats, you may select them, make searches, and even organize your chats. For example, you may drag your chats to the corresponding folder to keep everything organized and accessible.
- Rename your conversations. To do so, click on the name of the chat, select the pencil image, and then edit based on your preferences. Lastly, confirm the change by pressing Enter or by clicking on the check mark.
- Delete a specific chat when you no longer need it. To do this, you must select the chat to be deleted, click on the Trash icon, and end by confirming with a click on the check mark.
Bear in mind that the chat history is stored in the local storage of the browser you are using; therefore, if you change your browser, you will not view the same data.
The User Menu is in the lower part of the Panel, with additional options to manage and customize your experience.
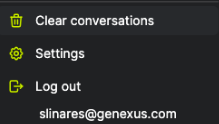
It includes the following options:
- Clear Conversations: it deletes all conversations.
- Settings: it adjusts the Panel's appearance by changing between light and dark modes.
- Log out: to exit the system.
The Chat Panel is the main interface for interacting with Assistants and LLMs. Here, you will be able to view your queries and the responses generated. You may use the Chat Box to enter your queries and enjoy fluent communications.
The upper part of the Chat Panel shows the name of the Assistant selected for chatting. The following image shows that the assistant selected is "Search with Google".
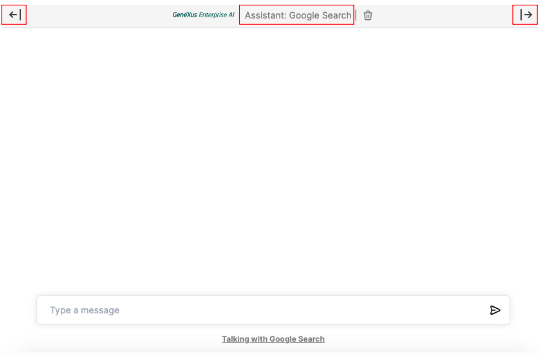
You will find arrows on both sides of the selected Assistant name:
- Left arrow: collapses the Assistants Panel.
- Right arrow: collapses the Prompt Panel.
Below is a detail of the steps you should follow to:
- Chat with Assistants.
- Chat with LLMs.
- Select Assistant: select the Assistant you wish to interact with in the Assistants Panel.
- Write Message: write your message in the Chat Box of the Chat Panel in accordance with the Assistant’s guidelines.
- Send Message: press Enter or click on the arrow that will send your message to the Assistant.
- Receive Reply: the Assistant's reply will appear in the Chat Panel.
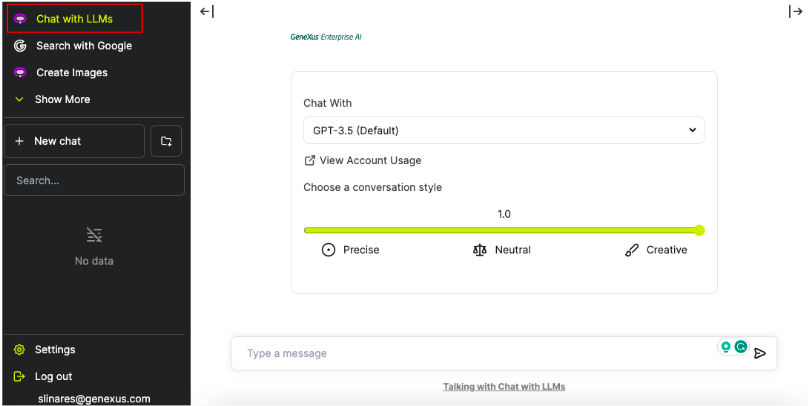
- Select Assistant: select the LLM Assistant with which you wish to interact in the Assistants Panel.
-
Customize the LLM: in the Chat Panel, you may select the desired LLM Assistant (the default value is GPT-3.5) and adjust the conversation style using the scroll bar.
-
Write Message: write your message in the Chat Box of the Chat Panel.
-
Send Message: press Enter or click on the arrow that will send your message.
-
Receive Reply: the reply will appear in the Chat Panel.
The Contextual Panel allows you to simplify daily or repetitive tasks by creating prompts. The prompts are stored locally in your computer to facilitate the execution of actions with just one click.
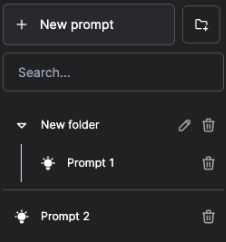
The Prompt Panel allows the following actions:
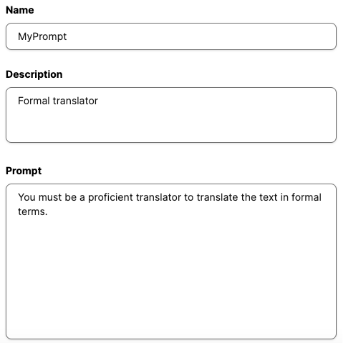
- Create a New Prompt: click on "+ New prompt" and complete the data requested on this screen:
-
Create New Folders: as in the Chat Panel, you may organize your Prompts in customized folders. To create a new folder, click on the option appearing beside “+ New prompt” (with an image of a folder and “+”).
-
Select, Search, and Organize Prompts: once you have created folders and prompts you may select, do searches, and even organize your prompts. Simplify your experience by dragging your prompts to the corresponding folders.
To use a defined prompt go to the Chat Panel, write a slash (/) in the Chat Box, and select the desired prompt:
