The Playground Interface provides an intuitive and fluid experience to interact with the different assistants you have access to within the projects defined in your organization. This interface allows you to communicate effectively with the assistants available and ensures that you can make the most of the resources allocated to your project.
The Chat User Interface screen is divided into three main sections:
- Navigation header: Includes user information, project management and general settings.
- Side menu: Manages the assistants and the conversion history.
- Context layout: Central space where the main interaction with the selected assistants takes place.
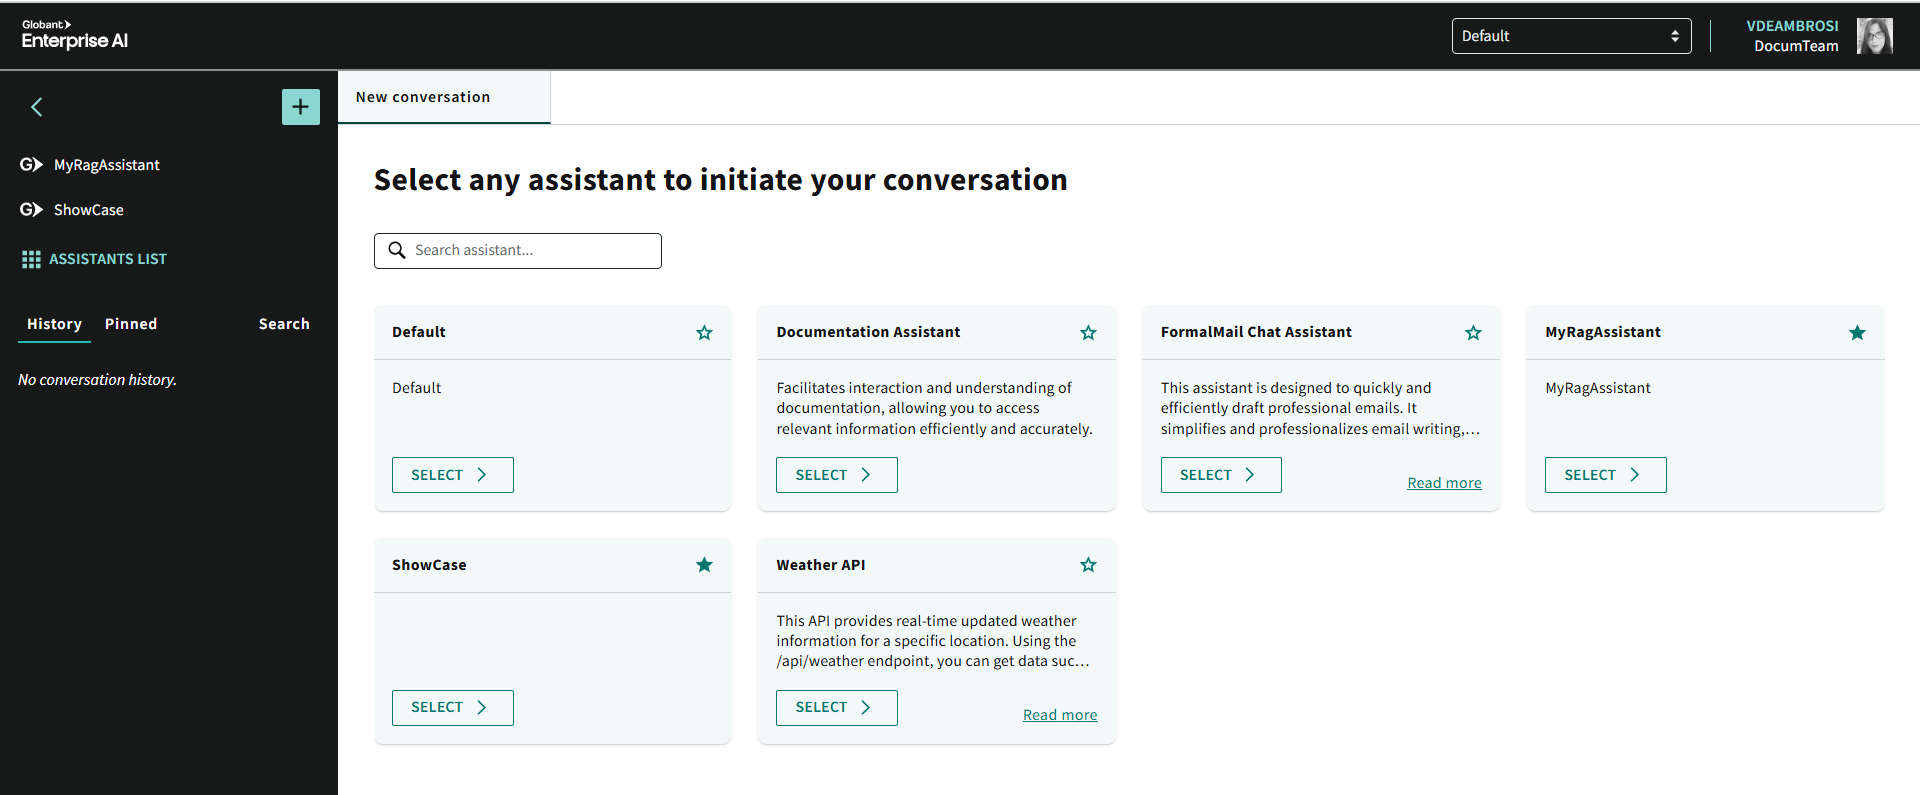
The Navigation header is located at the top of the interface and has the following components:
- Project selector.
- End user information.

The Project selector allows you to select the project you want to work on. From this menu, you can switch between different projects available within your Organization.
It shows the user's photo and the name of the Organization to which they belong, as well as a drop-down menu with several options.
To access this menu, click on the user image.

This drop-down menu allows you to:
- Change the language: Select the language in which you prefer to use the interface.
- Change the organization: If you are working in multiple organizations, you can switch between them.
- Logout: End your work session securely.
- Toggle between light and dark mode: Adjust the appearance of the interface according to your viewing preferences.
The Side menu is a section that groups several functionalities to manage your assistants.
This menu can be hidden or displayed according to your needs, using the "<" icon at the top, which allows you to maximize the workspace.
In addition, from the Side menu you can start a new chat with one of your assistants by clicking on the + (New chat) button. When you click on +, a window opens in Context Layout, where all available assistants are displayed for you to select with which one to start a conversation.
The panel is organized into the following components:
- Favorite assistants.
- Assistants List.
- Conversations panel.
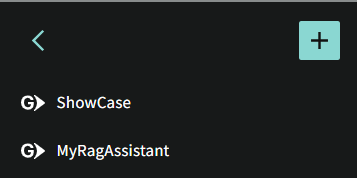
It is located at the top of the Side Menu and displays a list of the assistants you have marked as favorites.

It is located below the list of Favorite assistants. This option allows you to view all the assistants available in the Context layout. It is especially useful when you need to return to the default view to browse all the assistants of the selected project in the Project selector, making it easier to select the most suitable assistant for your current task.
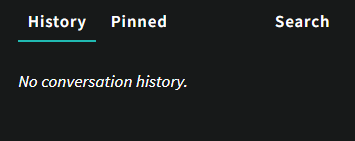
This section allows you to manage all your conversations within the Side menu.
Conversations are organized in three tabs: History, Pinned and Search.
Provides access to the complete history of chats, organized alphabetically.
In addition, chats are grouped by time periods to make navigation even easier. For example, Today shows all the conversations that took place on this day, while Last 30 Days groups the conversations that took place in the last 30 days.
In this section, you may perform the following actions:
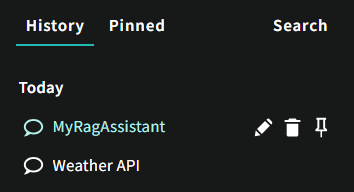
- Rename your conversations. To do so, click on the name of the chat, select the pencil image, and then edit based on your preferences. Lastly, confirm the change by pressing Enter or by clicking on the check mark.
- Delete a specific chat when you no longer need it. To do this, you must select the chat to be deleted, click on the Trash icon, and end by confirming with a click on the check mark.
- Pin the conversation. To pin a conversation, click on the push pin icon next to the trash icon in each conversation. When you do this, the conversation will automatically show up in the Pinned tab.
Once a conversation has been marked as pinned, the crossed-out push pin icon appears.
To unpin a conversation, click on the same crossed-out push pin icon. In addition, this conversation will no longer be in the Pinned tab.
Groups the conversations you have pinned, providing quick access to the most important or recurring interactions.
Allows you to search for specific conversations.
Context layout is the main area where you can view and manage both available assistants and active conversations in Globant Enterprise AI.
All available assistants are presented here, ready to be selected and used as needed.
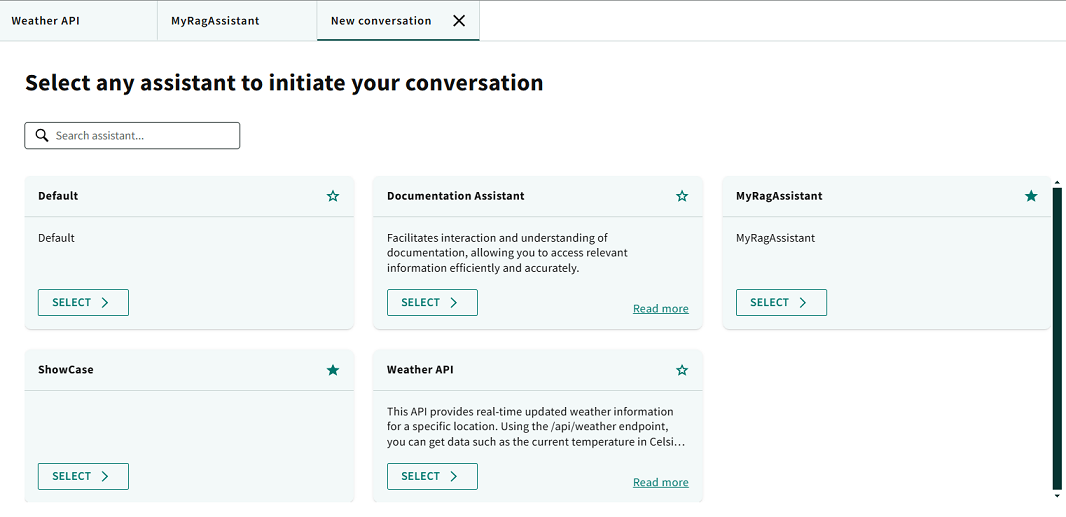
When you select an assistant by clicking on the SELECT button, the Context layout will display the active conversation with that assistant. For example, to query weather information, select the Weather API assistant by clicking on SELECT. Then, the Context layout will open a new tab where you can:
- Type your message in the chat box, following the assistant's instructions.
- Send the message by pressing Enter or clicking on the send arrow.
- Receive the assistant's response, which will appear directly in the chat panel.
Each assistant has a card that includes its name and a short description. If the description is too long, a "Read More" option is displayed.
Clicking on "Read More" opens a modal window in the same browser, displaying the assistant's full description and providing more details without leaving the current page.
In addition, each assistant card has a star that, when clicked, marks the assistant as a favorite.
The assistants marked as favorites are automatically added to the Favorite assistants section in the Side Menu for quicker access.
At the top of the Context Layout, open conversations or interactions with assistants are organized in tabs.

These tabs allow you to quickly switch between the different assistants with which you are interacting. In addition, each tab has a close option that allows you to end the interaction with a specific assistant when it is no longer needed.
Note: If the selected Assistant is integrated with a
Flow, keep in mind that the Flow does not start running when the Playground opens. It only begins executing after the user sends the first message in the conversation. For more information on how to create and configure Flows, see
How to create a Flow.