This is a step-by-step guide on how to use RAG Assistants, upload a document, and start chatting with the assistant from the Playground Interface.
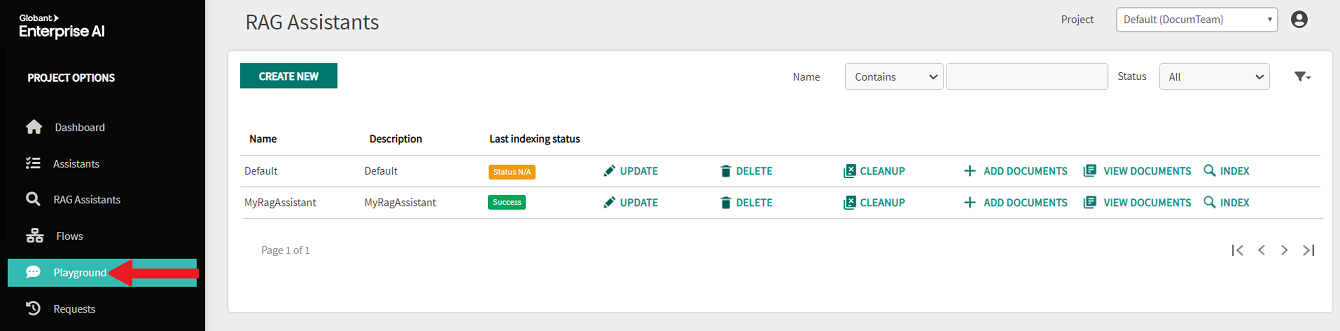
First, enter the Globant Enterprise AI Backoffice. On the left side of the screen, you can find the Backoffice menu. In this menu, click on RAG Assistants.
Next, in the Project Dynamic Combo Box, select the project you want to work with (in this case, the Default one is used).
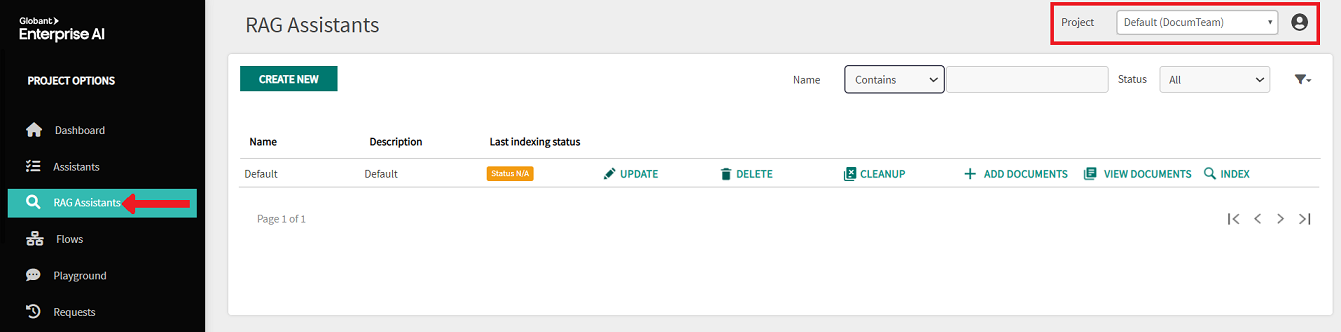
By default, when opening the RAG Assistants section, a RAG Assistant named Default is displayed.
Create a New RAG Assistant by clicking on the CREATE NEW button.

When you click on the CREATE NEW button, a window will appear where you can define the following:
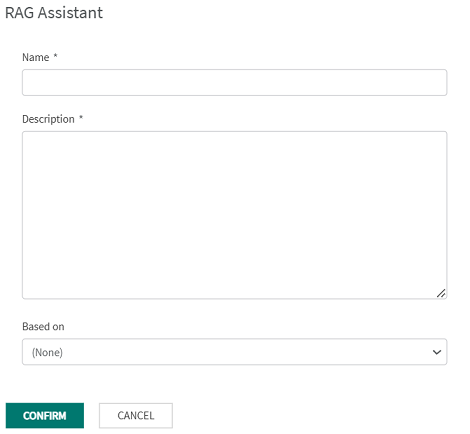
- Name: This is the name that will identify your RAG Assistant.
- Description: Provide a brief description of the purpose or functionality of your RAG Assistant.
- Based on: Optionally, you can select an existing RAG Assistant as a starting point. This will copy the configuration settings but not the documents associated with the RAG Assistant.
Once you have entered the name and description, and selected a base RAG Assistant (if desired), click on the CONFIRM button to create your new RAG Assistant.
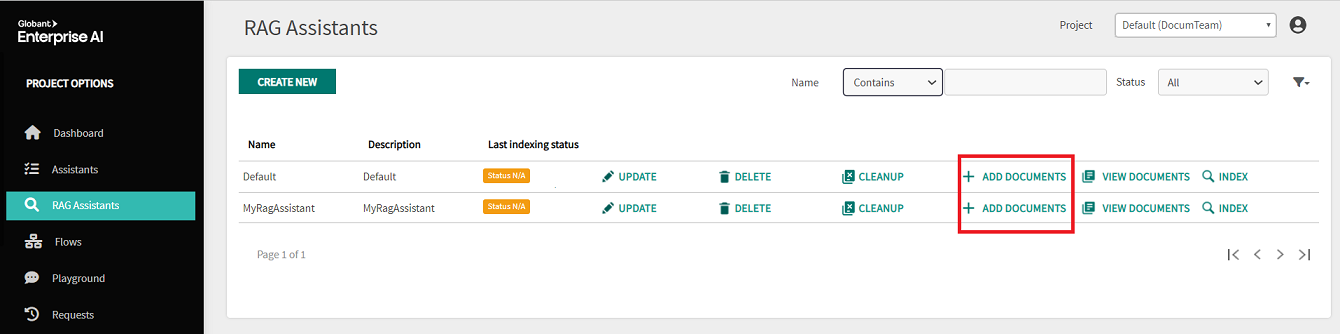
To add documents, go to the RAG Assistants home page and click on ADD DOCUMENTS.
This will open a window similar to the one below, with three tabs: General, Metadata, and Advanced.
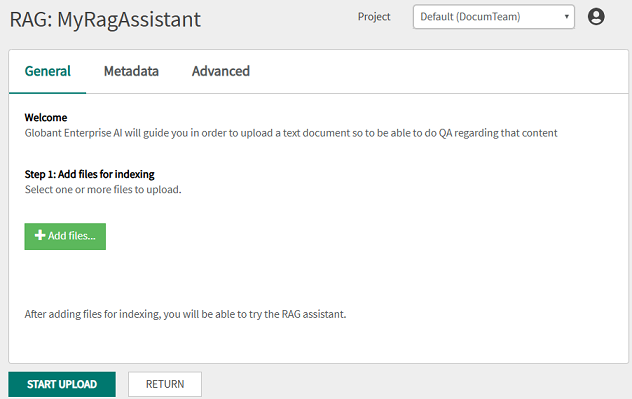
Click on the +Add files... button to upload files. See the list of supported RAG File Formats.
- When you upload new content, it is automatically indexed into the Vector Store. This process does not affect the performance of users currently interacting with the assistant.
- The newly uploaded content becomes available to users as soon as the indexing process is complete.
Note: Each file must not exceed 100 MB. In addition, it is possible to upload up to 100 files simultaneously.
In addition, it is possible to add metadata by clicking on [[New row]].
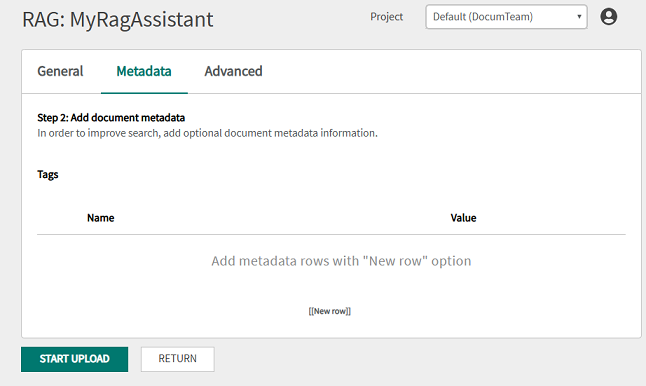
The format is a key/value configuration for each row. For example:
Name: 'year'
Value: 2003
Later, during the retrieval process, it is possible to filter according to specific metadata. Possible options are as follows:
It is possible to define how each file will be processed by selecting the Ingestion Provider. You can choose from options such as Globant Enterprise AI (default), llamaParse, or legacy.
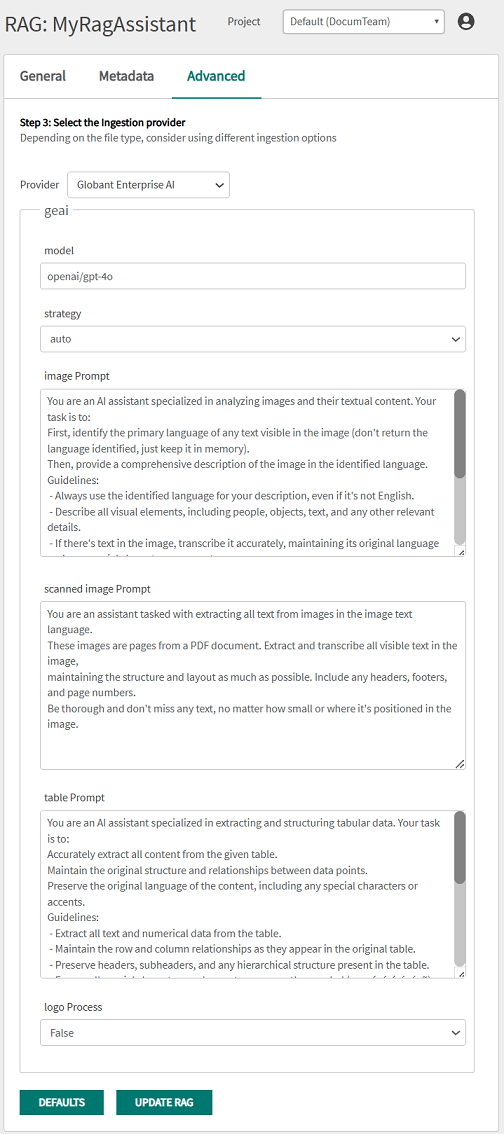
If you changed the default parameters and want to keep it in the Assistant for new uploads, click on the UPDATE RAG button to apply the settings. If you prefer to revert to the system defaults, use the DEFAULTS and then the UPDATE RAG button again.
Finally, click on START UPLOAD to upload the documents.
Finally, you can test your RAG Assistant by clicking on Playground on the left side menu of the Backoffice window:
In the following image, you can see it running:
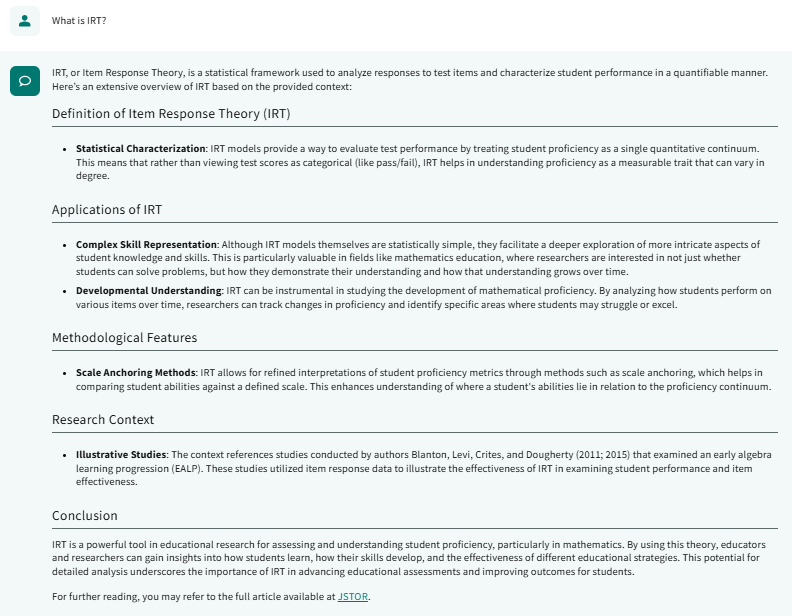
At the end of the page, the Sources section is displayed. This section includes the document links used to construct the answer:
- A temporary link to the files is provided if no url metadata is set. Check Metadata special values for more details.
- The link will remain valid for 6 days.
Once the RAG Assistant is created, you return to the main page that provides the UPDATE option. This option allows you to customize the RAG Assistant to your needs.

For more information, see: RAG Assistants section.
This section allows you to configure indexes, which are essential for structuring unstructured documents so that LLMs can optimally interact with them.
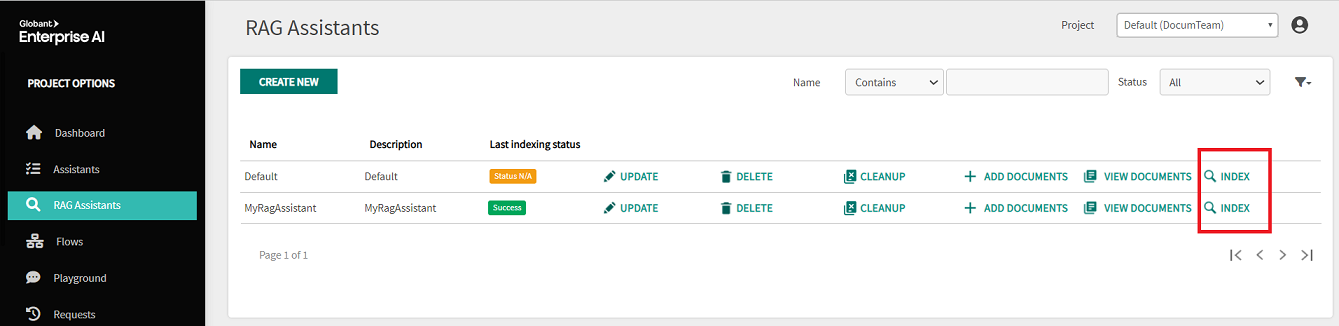
To configure Indexes to your needs, go to the RAG Assistants main page and click on INDEX.
If you want to configure the default values taken by Index, click on UPDATE:
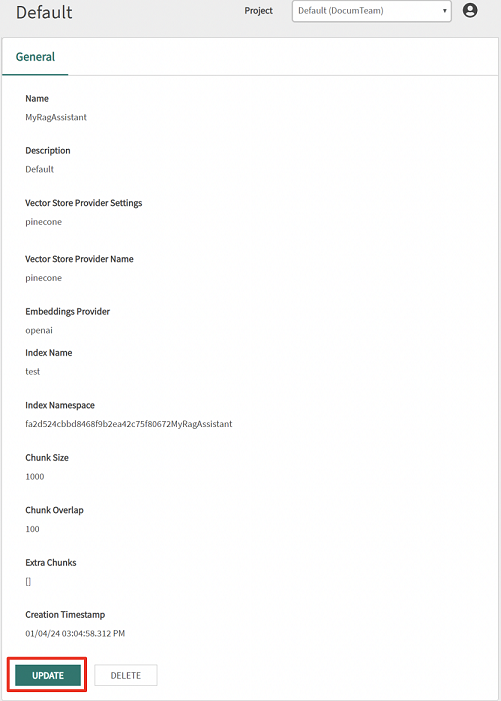
To customize the Chunk Size, Chunk Overlap, and Extra Chunks values, take into account that these parameters are critical to tailor LLM processing to your specific needs.
The default settings include the maximum character limit per chunk and the number of overlapping characters between adjacent chunks. Modifying these values allows you to adjust the document partitioning process according to your preferences and application requirements.
Note: Keep in mind that if you make changes to the chunks configuration, you must re-ingest the documents so that Globant Enterprise AI takes the new configuration into account. To do so, delete the existing documents and upload a new one.
In addition, you can explore additional partitioning strategies using the Extra Chunks element. This component gives you the flexibility to add additional chunks and test different configurations to determine the most effective partitioning strategy in your specific case.
For example, if you wish to add two additional chunks, you can populate the Extra Chunks parameter as shown below:
[
  {
      "chunkSize":500,
      "chunkOverlap":80
  },
  {
      "chunkSize":3000,
      "chunkOverlap":100
  }
]
In this case, each document will be chunked three times and ingested separately. Later, when querying you can change the default namespace by appending the extra chunkSize value.
To save the changes, click on CONFIRM.
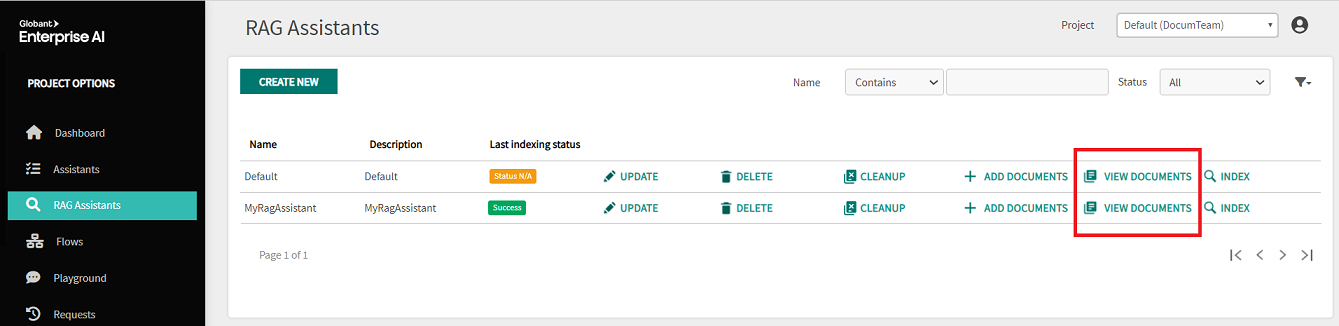
To view the documents and the details of each one, go to the RAG Assistants home page and click on VIEW DOCUMENTS.
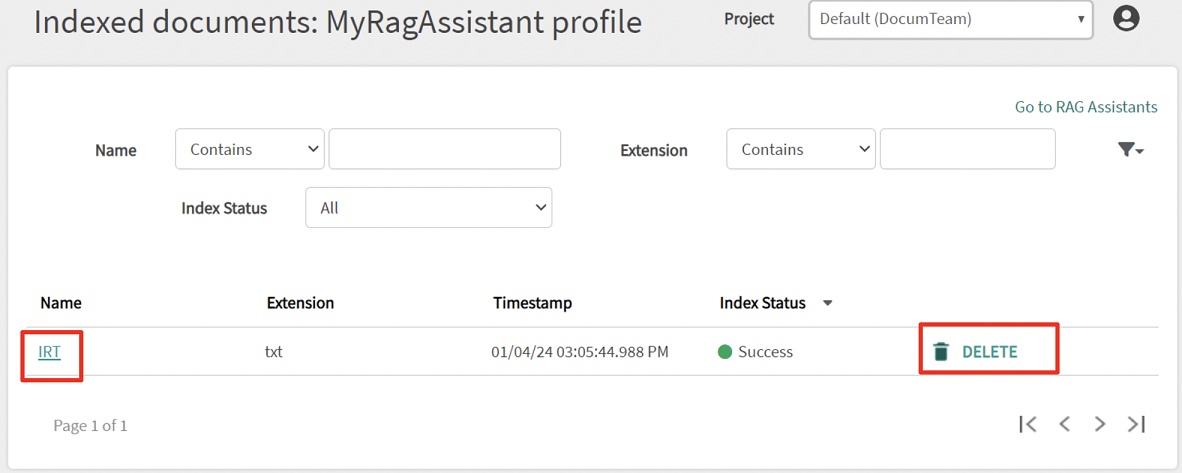
In the specific case of MyRagAssistant, only one document called IRT is available. Here, you can click on the document name (IRT) to access its details or, if you prefer, delete the document.
By clicking on the document name, in this case IRT, you will find two subsections: General and Metadata
In the General section, you can view the following information:

By clicking on Document Url, you can view/download the document.
By clicking on Chunks, you can view/download the internal document associated with the chunking process.
In the Metadata section, you can view the following information:
Metadata Name: IRT
Metadata Value: 2015
To delete all documents loaded in your RAG, go to the RAG Assistant home page and click on the CLEANUP option.
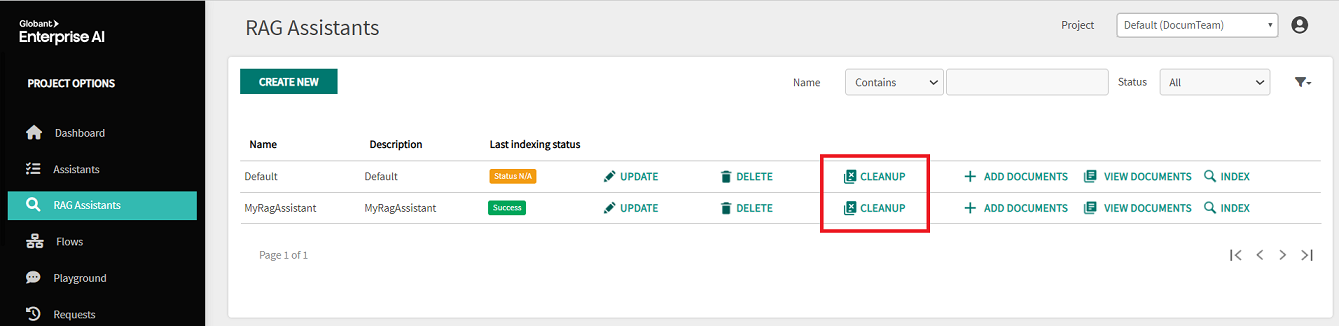
Clicking on CLEANUP starts a process that permanently deletes all files, clears the associated vectorstore namespace, and updates the relevant information in the RDS (Relational Database Service).
The CLEANUP process essentially "wipes the slate clean" by removing all traces of your uploaded documents. Use this option with caution, as it cannot be undone.