Here is a step-by-step guide on how to create API Assistant and start chatting with the assistant from the Playground.
The first step is to get the OpenAPI 3.0 Specification for the API you want to call.
Make sure to give it the right structure, taking the Weather API sample as a reference.
Enter the Globant Enterprise AI Backoffice. On the left side of the screen, you can find the Backoffice menu. In this menu, click on Assistants. Then click on CREATE API ASSISTANT.
Next, in the Project Dynamic Combo Box, select the project you want to work with (in this case, the Default one is used).

In this step, you must provide the description of your API. Even though this description is optional, it may be helpful for the Assistant to understand the purpose and functionality of your API. You can include any other relevant instructions you deem necessary to guide the Assistant effectively.
For example, for the Weather API, it can be something like the following:
The final response must strictly comply with the following:
It must be in the same language as the user's request.
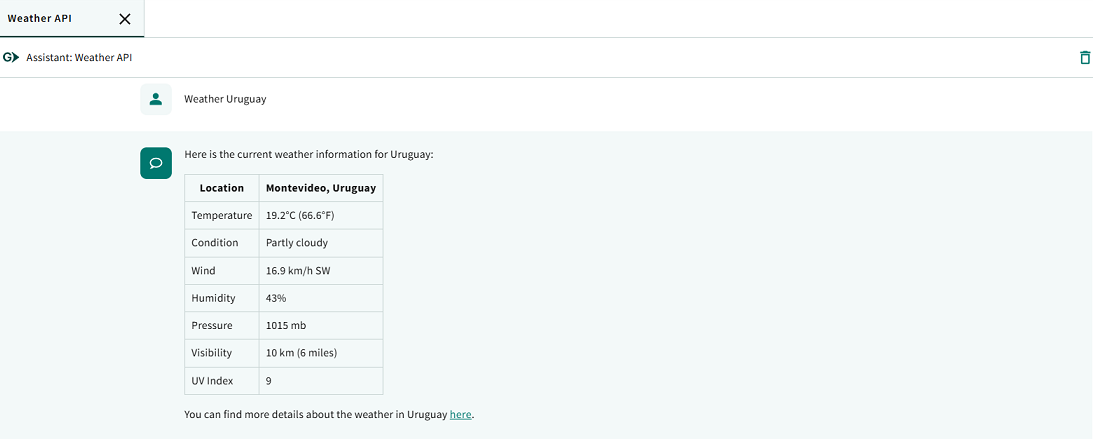
The response text must be formatted as a Table, with 2 columns and rows.
In case it exists, it must return the LINK to view more details of the Weather.
Draw an emoji that roughly describes the weather condition, in the Condition column along with the description.
This step involves completing the OpenAPI JSON file with the OpenAPI 3.0 specification or higher. This is where you specify the technical details of your API, including paths, HTTP methods, query parameters, request and response bodies, among others. This file acts as a detailed specification of your API, allowing for accurate and consistent interaction with the Assistant.
Here, you can check an example of how to fill OpenAPI JSON.
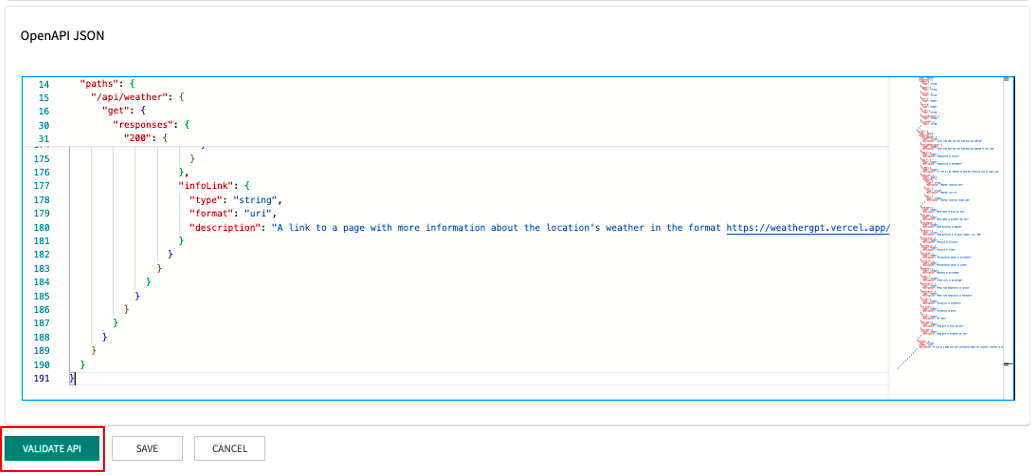
Then, you can click on the VALIDATE API button for a basic check of the JSON, which checks if it is properly formed and if it has any services defined. In addition, it also checks if the URL of the service is correctly defined. It should be noted that this validation does not run a test against the API.
In this step, it is possible to define whether the API requires authentication, and if so, what type of authentication will be used. Globant Enterprise AI offers support for authentication based on ApiKeys, which can be Basic or Bearer.
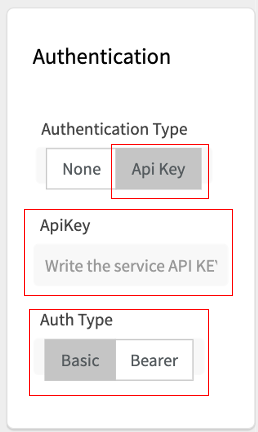
If the API does not require authentication, select the None option. Otherwise, you must set the API Key value.
When setting Authentication Type with the API Key value, make sure to provide the service's API key in the ApiKey field. This unique key gives you exclusive access to the API.
In addition, you must specify the Auth Type, where you will have the option to select between the Basic or Bearer values.
This step consists of customizing the settings related to the language model to adapt it to your specific needs and obtain optimal performance.
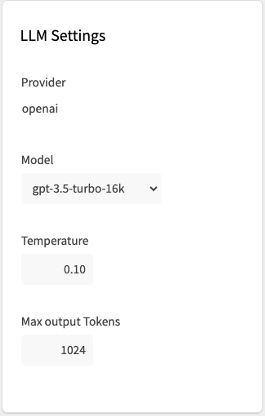
- Provider: It determines that the language model provider is OpenAI.
- Model: Select the specific language model you want to use. You can choose from a variety of options, from GPT-3.5 to GPT-4, which have their own unique features and capabilities. The default model is "gpt-3.5-turbo-16k".
- Temperature: Adjusts the temperature of the model to control creativity and diversity in the answers generated. Lower values produce more conservative answers, while higher values encourage creativity. The default value is 0.10.
- Max output Tokens: Defines the maximum number of tokens allowed in each answer. This setting determines the maximum length of the answers generated by the language model. The default value is 1024.
It is important to note that these settings are optional and can be left with their default values if you want.
Once you have completed the configuration, click on the SAVE button.
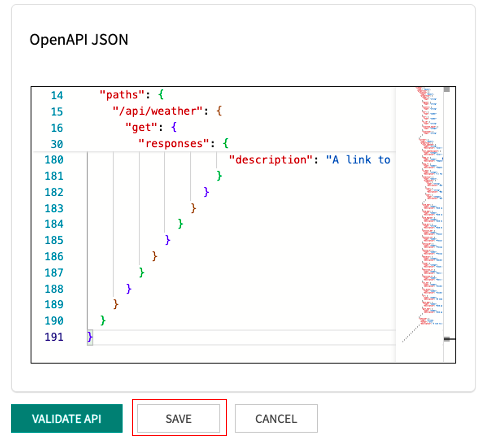
This will open a popup window where you can enter the Name and Description of your API. You can also add a file for Icon.
After entering the required information, click on CONFIRM to save all changes.
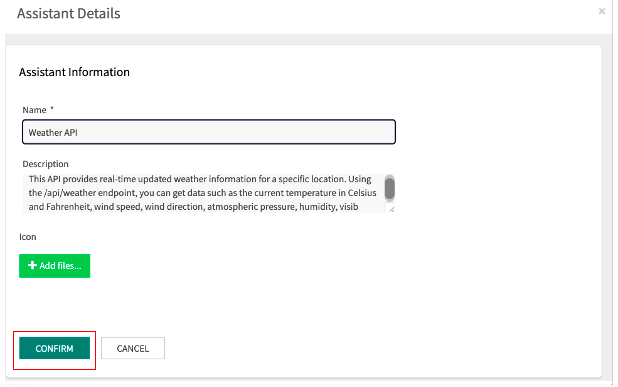
Once you have created the API Assistant, you return to the Assistants page where you can click on UPDATE.

This option allows you to view the version identifier with which it was saved. In addition, you can change the name and description, configure it as enabled or disabled, or add an icon if you wish.
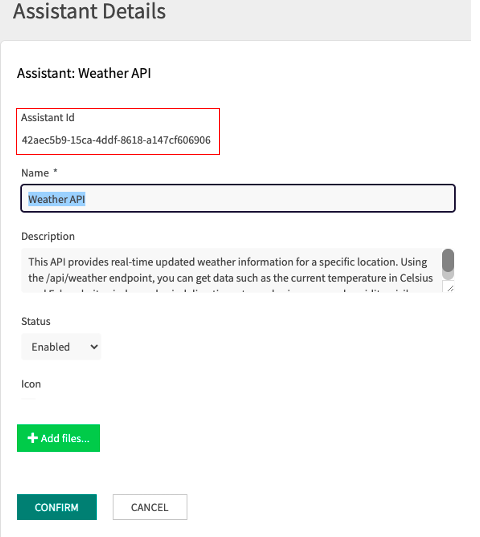
To edit the API Assistant, go to the Assistants home page and click on CONFIG.

By editing the Assistant, you can manage and maintain different versions of your project efficiently.
If you want to overwrite the existing version, click on the button SAVE IN CURRENT REVISION. On the other hand, to create a new version with the changes you have made, choose the SAVE AS NEW REVISION option.
In this way, you can control and organize your modifications as needed.
Also, to view all versions of the Assistant, you can go to the Assistant home page and click on ALL REVISIONS.
Finally, you can test your API Assistant by clicking on Playground on the left side menu of the Backoffice window:

The result of your query will look as follows:
It is also possible to use the Chat API.
Note: All LLM requests needed to call the API go through Chat API, allowing you to view the requests, including the payload exchanged between the LLM and Globant Enterprise AI.
Issue: The assistant is not accepting my API token.
Solution: Verify that the API token is correctly formatted and included in the Authorization header. Make sure that you are using the correct token type (Basic or Bearer).
Issue: The AI does not understand my prompts accurately.
Solution: Refine your prompts to be more specific and clear. Adjust the AI model settings if necessary to better align with your interaction goals.
For further assistance or inquiries, please refer to support documentation or contact help desk.