The User Control Editor is a graphical tool which helps in developing user controls.
Execute UserControlEditor.exe which is under the GeneXus installation directory and then press the "new" button. Enter the name of the user control and the folder location.
Remember that all user controls must be placed under the UserControls directory which is also under the GeneXus installation directory. See User control structure overview for details.
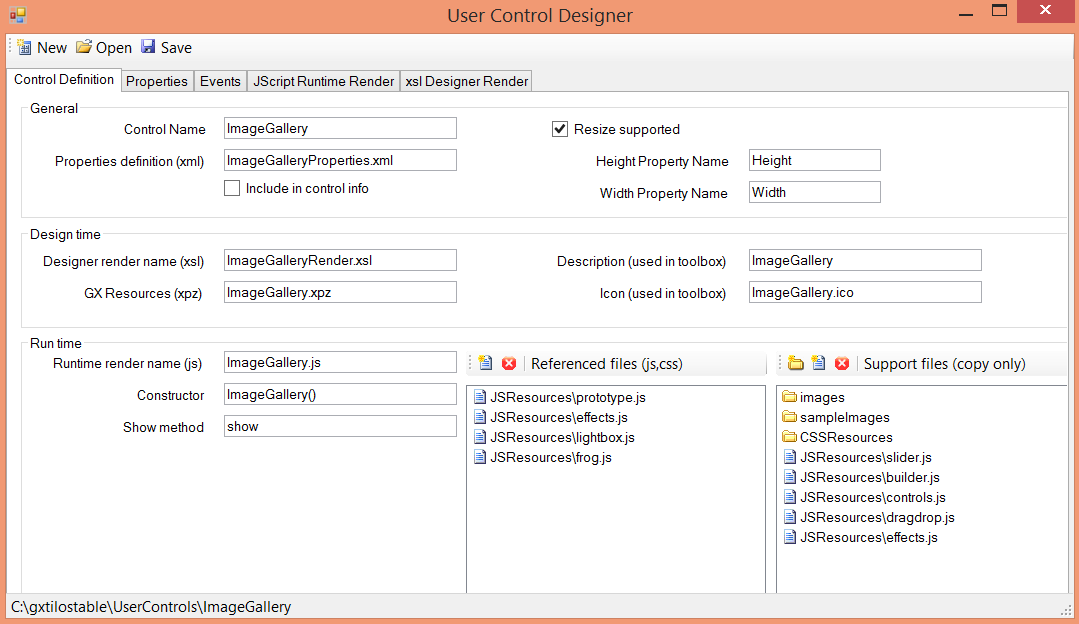
The Control Definition is divided into 3 groups: General, Design time and Runtime. Let's see each of them.
- Control Name. Defines the control's name.
- Properties definition (xml).
Defines the name of the control's properties file which can be edited in the "Properties" tab. All these properties will then be editable from the GeneXus Property window (when the focus is on your control).
- Include in control info (checkbox).
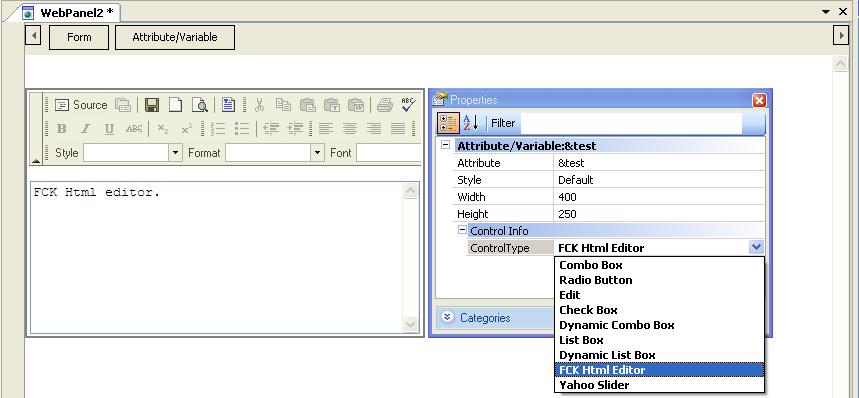
Indicates if the user control should be included as "control info". Doing this, the user control will not be displayed in the toolbox and will only be available as "Control Info" so, when dropping an att/var in your form you will be able to set your UC (user control) as the "control info" for that att/var. As an example, the FCKEditor user control can be used as "control info".
In the following example, &test is a longVarChar variable and we are setting the FCKEditor as its "control info". As a result the FCKEditor is shown in the web form.
- Resize supported.
This checkbox indicates if resizing the control is available at design time and, when enabled, the "Height Property Name" and "Width Property Name" properties are shown. These property names will appear in the property window for the control.
- Designer render name.
Defines the name of the design render file which will be used to show the control in the GeneXus IDE. This file can be edited in the "Xsl Designer Render" tab.
- GXResources.
In many cases you will be creating controls that are bound to data. This data may be an att/var or it can also be a specific SDT. If it is an SDT you will want to distribute that SDT with your control so the programmer does not need to create the specific SDT that your control needs. Consequently, the GXResources property allows specifying an xpz file which will contain all the SDTs that your controls need. When dropping your user control (which uses an SDT for the data bind) GeneXus will consolidate your GXResources (the xpz containing the sdt in this case) and the programmer will be able to create a new instance of this SDT (which will be then assigned to your control).
As an example you can see the GXChart control: you will notice that it consolidates the gxChartSdt.xpz which contains the SDT that you will use to create categories and series.
- Icon (used in the toolbox).
This is the icon that will be used in the toolbox to represent the control.
- Description (used in the toolbox).
This is a control's description used in the toolbox.
- Runtime render name.
Defines the name of the runtime render file which can be edited under the JScript Runtime Render tab. This file will contain all the intelligence to display your control at runtime.
- Constructor.
Defines the constructor of the runtime file. The main idea is that GeneXus will create a new instance of your "runtime class" (defined in the runtime render tab) so you should specify the constructor name here.
- Show method.
Defines the name of the "show method" of your UC javascript class. The main idea is that after GeneXus has created a new instance of your "control class" it will invoke the "show method" which will contain all the intelligence to display the control at runtime.
- Referenced files
When creating a control it will be quite common to use external javascript libraries (like Yahoo library, Dojo) and css files. In order to use those external resources it will be necessary to add references to them in the generated html. This can be done by just adding those files to the "Referenced files" list box. E.g. if you have a js library named thirdPartyJSLibrary and you need to have it referenced in the html, just add it as a "reference file" and the generated html will contain something like the following:
<script language="javascript" src="YourControl\thirdPartyJSLibrary.js"></script>
- Support files.
In the "support files" list box you will be adding all kind of external resources that your control uses but don't need to be referenced in the generated html (because in those cases you will add them as "References files" as explained before). A typical example of a "support file" would be an image: for example, when thinking about a Treeview control you will need some images to represent the tree nodes; those images must be added as "support files".
User control structure overview