This article explains how to create a new and simple GXflow Dynamic Forms in GXflow Client.
First, open your GXflow Standard Client application. To do so, right-click on one of your Business Process Diagram object and select Run:

Log in with a user that has the GXflow Backend Administrator role and add the GXflow Form Designer role —see GXflow Management Console for details on how to manage users and roles. If no user has the GXflow Backend Administrator role, log in with the WFADMINISTRATOR user in order to set this role to any user. Then log in with that user.
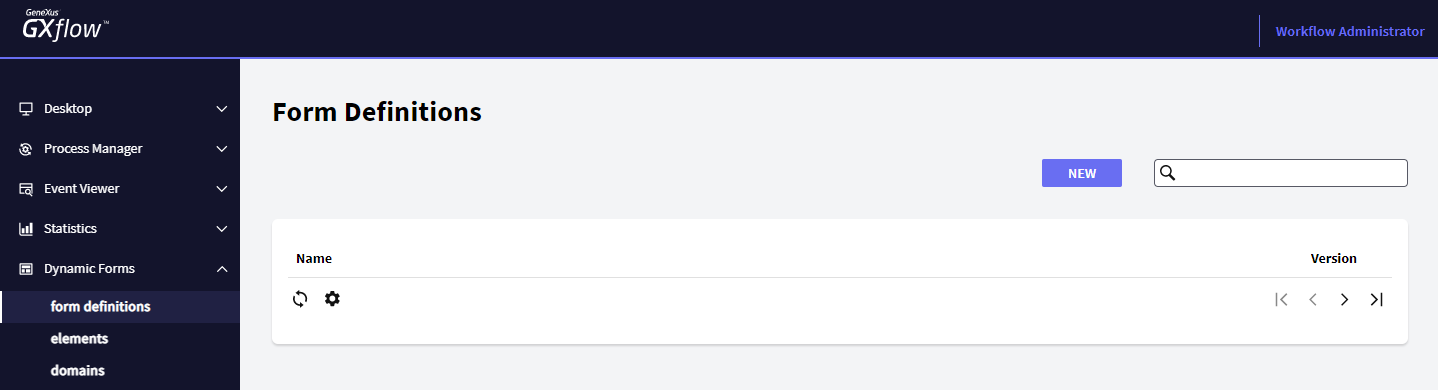
Open the GXflow Form Definitions component by selecting it. It is located under the GXflow Dynamic Forms node. Once opened, the GXflow Form Definitions dialog should look as follows:
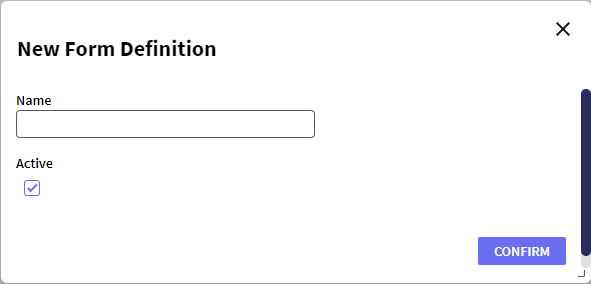
Press the "NEW" button and write the form name:
Note: when using GAM a permission will be created once the Form Definition is created, using the GAM Prefix property value. The GAM Prefix property will be ignored when GAM is not used.
Next, you need to add some GXflow Elements to the newly created Form Definition.
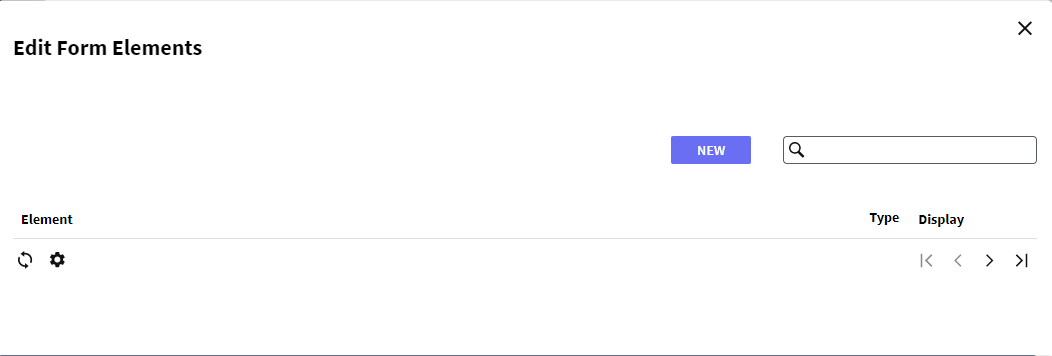
To do so, select it from the grid and press the "ELEMENTS" button. A dialog box will be displayed for you to add and delete elements from the form:
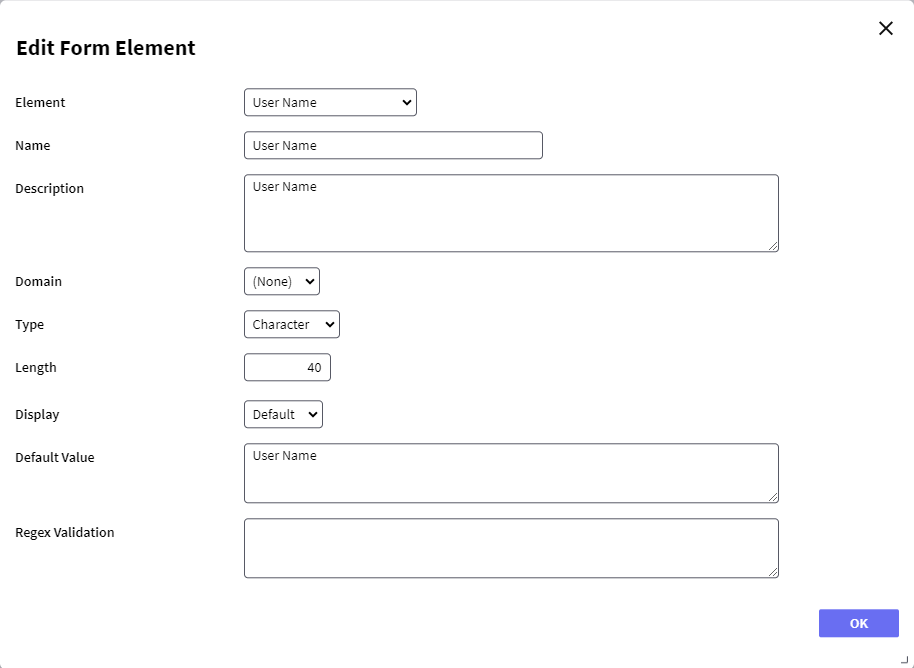
In order to add an element, press the "NEW" button. When the button is pressed, the element creation dialog will be displayed; add a new element called "User Name" as follows:
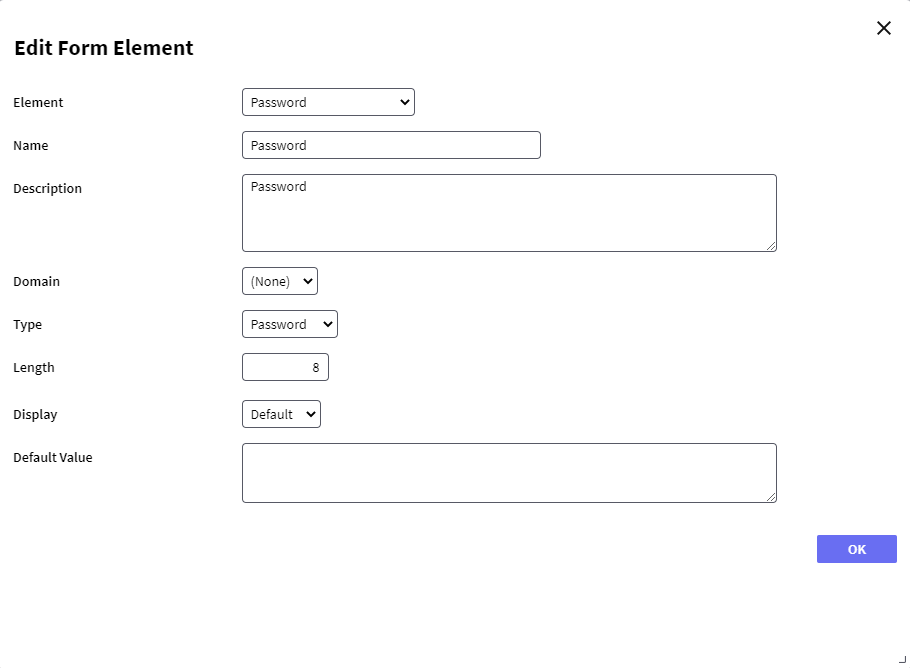
Add two new elements called "Password" and "Password Confirmation" as shown below:
The last element to be added will be "User Age"; create this element as numeric using Length = 2 and Decimals = 0.
The layout should look as follows:

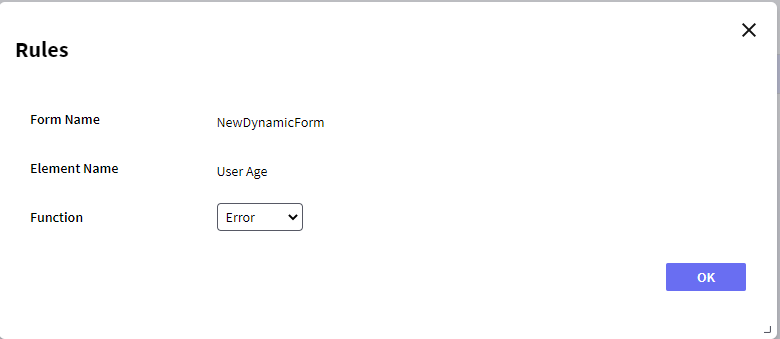
Add a rule in order to check that the "User Age" is not under 18.
To do so, edit the "User Age" element by hovering the mouse over the element and pressing the "RULES" button. Then in the Rules tab, and press the "NEW" button. Add an "Error" rule as follows:
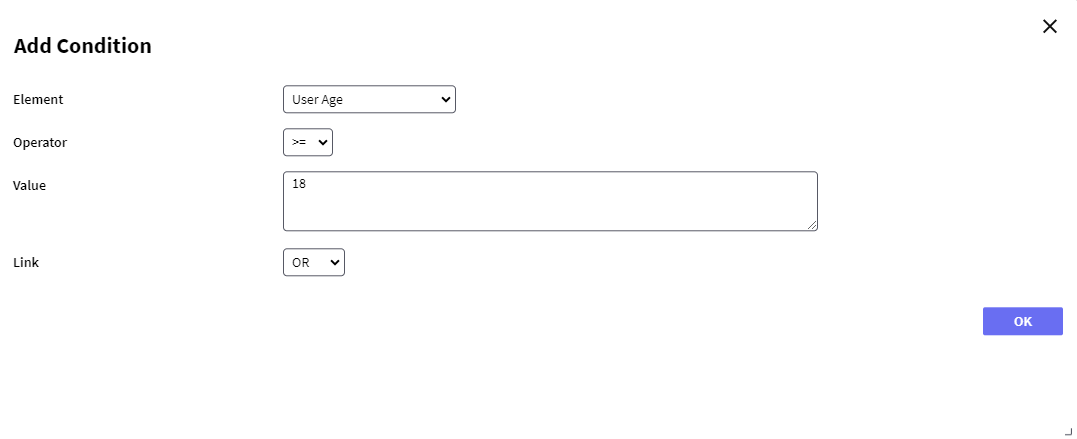
Next, add a condition over the Rule; to do so, select the Rule from the grid and press "CONDITIONS" and then "NEW". Select the "User Age" element and create a condition as follows:
Once the dynamic form is defined, you need to associate it with a User Task. To do so, open your Knowledge Base and create a new Business Process Diagram object, drag a user task to the diagram and set the Application form property of the user task to the newly created Form Definition as shown below:
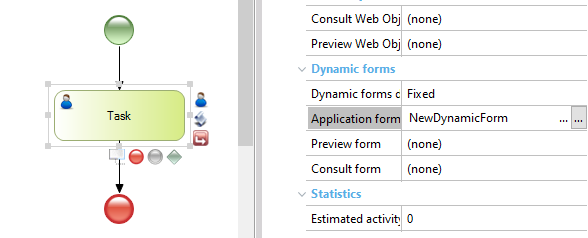
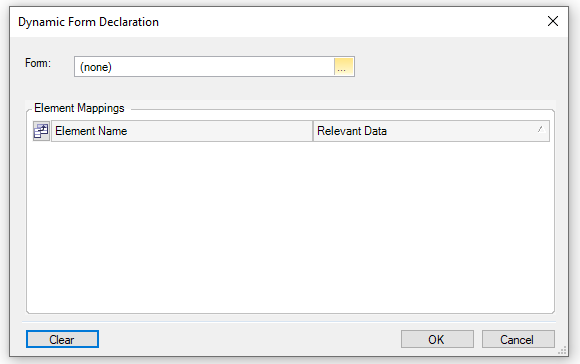
In order to set the newly created Form Definition to the user task: open the Application form property options by clicking on the "..." in it.
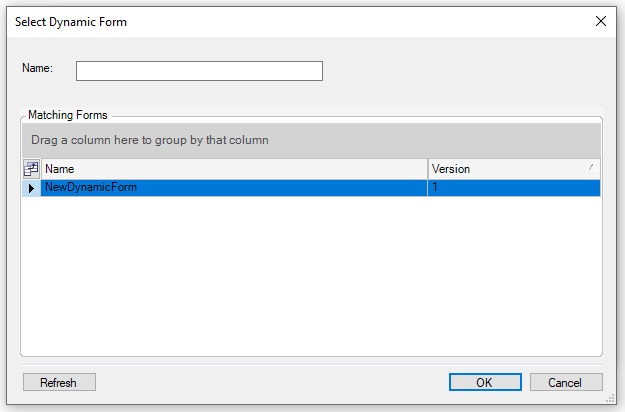
Then press the "..." of the "Form" property and select "MyNewDynForm" as follows:
Once the Form Definition is set to the Application form property deploy your Business Process Diagram object and execute the GXflow Client—running the newly created Business Process Diagram object is enough.
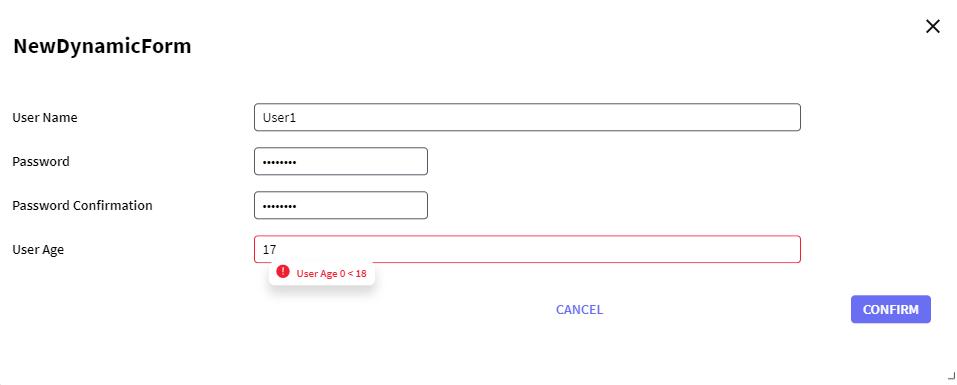
Finally, test your form. To do so, Create a new Process Instance and execute it.
GXflow Dynamic Forms
GXflow Form Definitions