This article explains how to create a new menu in GXflow Client.
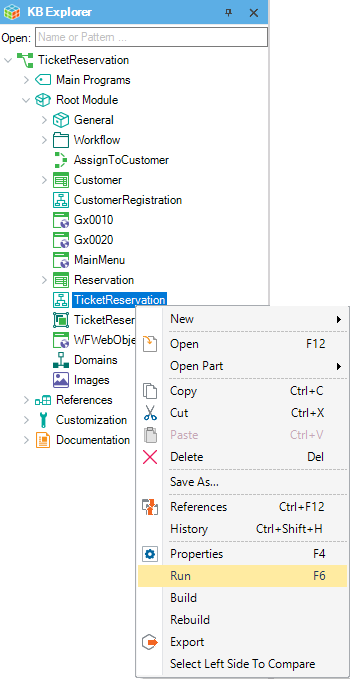
First, open your GXflow Standard Client application. To do so, right-click on a Business Process Diagram object and select Run:
Log in with a user that has the role GXflow Backend Administrator —see GXflow Management Console for details on how to manage users and roles— for example the WFADMINISTRATOR user.
Open the Menus component by selecting it —it is located under the GXflow Backend node.
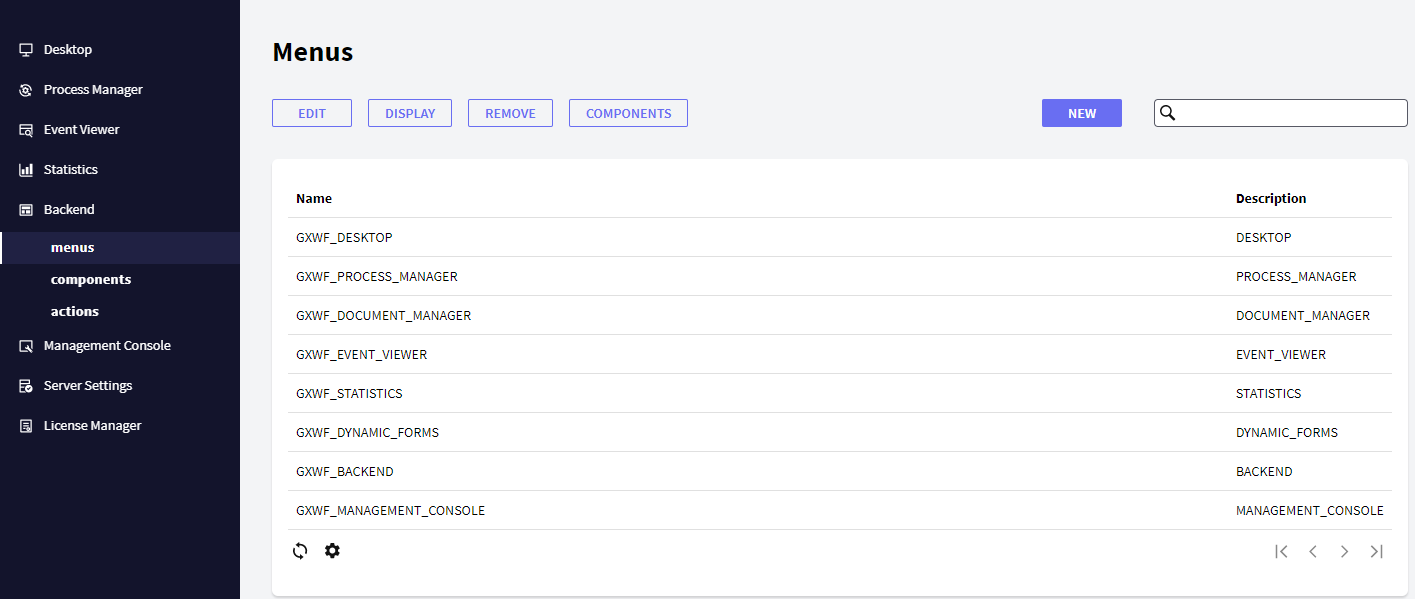
The GXflow Menus dialog will be opened.
Press the "NEW" button, and set the properties as follows:
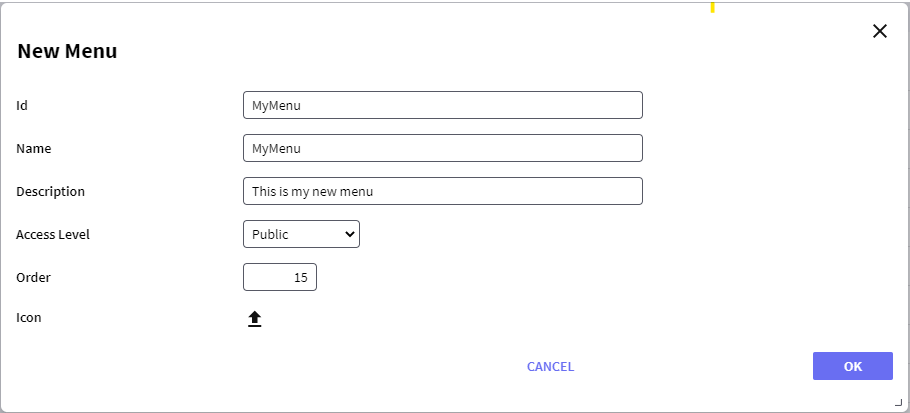
Note: When using GAM a permission will be created once the menu is created. The permission will be created with the name "{MENU_ID}"; in this case: "MyMenu".
Next, in order to use the newly created GXflow Menu you must add some components to it. For simplicity purposes, add to it some existing GXflow Components.
To do so select the new menu and press the "COMPONENTS" button. A dialog will be displayed for you to select the component to be added or removed from the menu:
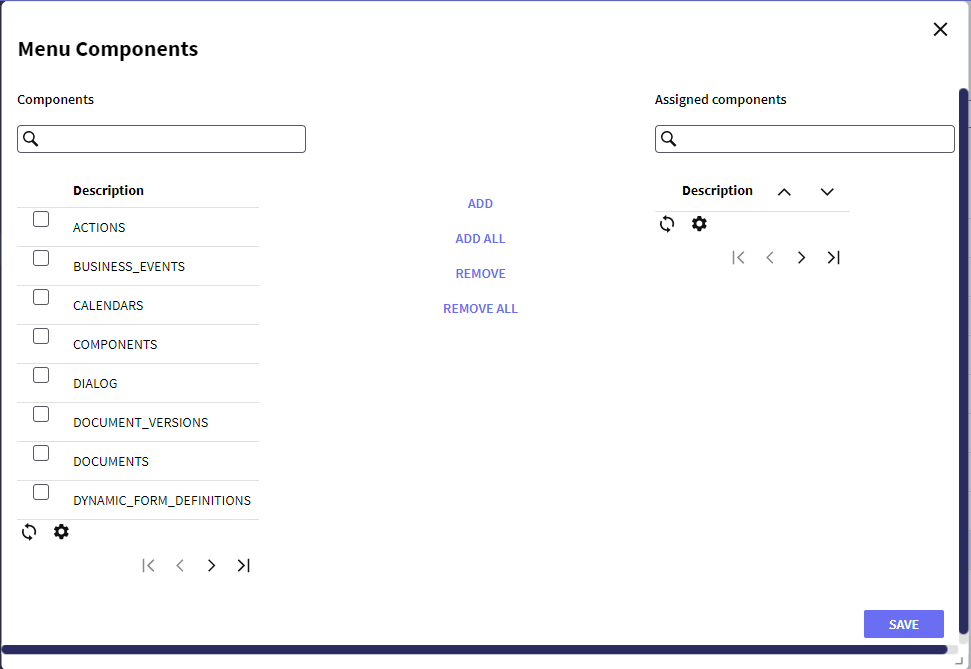
Note: you can rearrange the components by selecting them and using the arrow buttons.
Lastly, test your menu. To do so, add permissions for the "MyMenu" menu to a role, and log in with a user that has permissions to use the newly created menu— for example use WFADMINISTRATOR. Then open it.
GXflow Backend
GXflow Menus
GXflow Components
GXflow Actions