To build your GeneXus application in Java, you can choose to have JDK version 17 or higher installed and use Spring Boot or require the following:
- Oracle JDK or Open JDK 1.8 or higher
- Apache Tomcat (7.0.67 or higher) installed from setup
Below are the steps to follow:
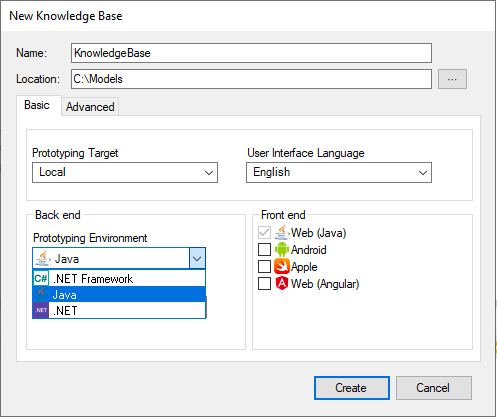
Step 1: Create a new Knowledge Base and in the Prototyping Environment Combo Box select: Java Environment.
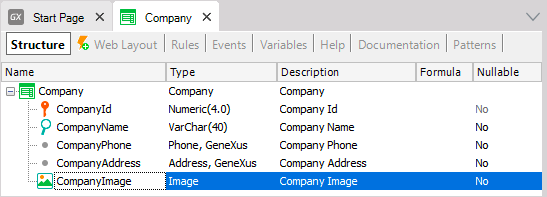
Step 2: Create a new Transaction object (Company).
Step 3: Select one of the following options:
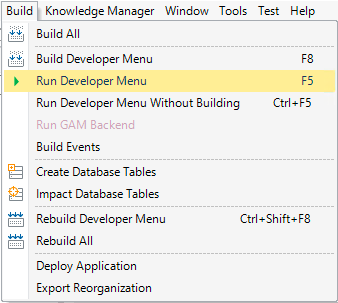
Step 4: Press F5 or select Build > Run Developer Menu.
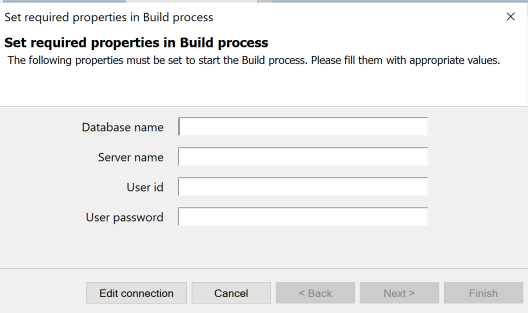
Step 5: Set the Database information properties and press the Finish button.
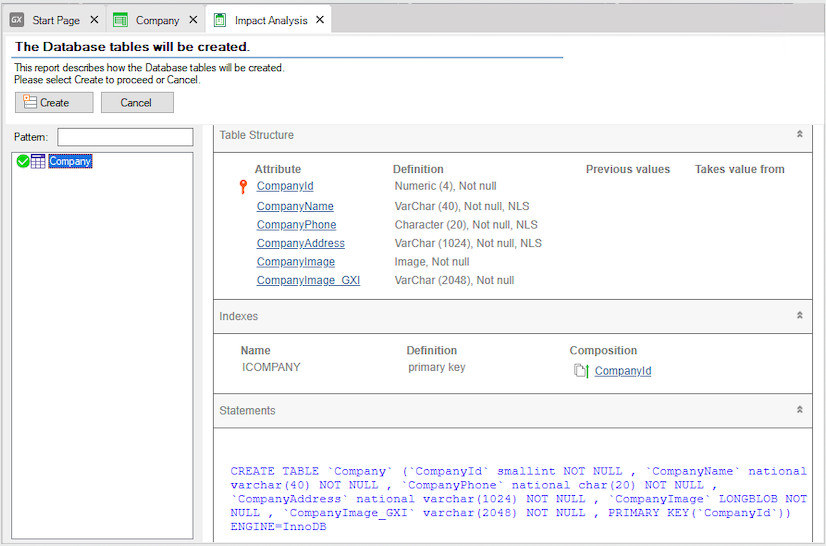
Step 6: GeneXus will start the Build process and show an Impact Analysis. Press Create.
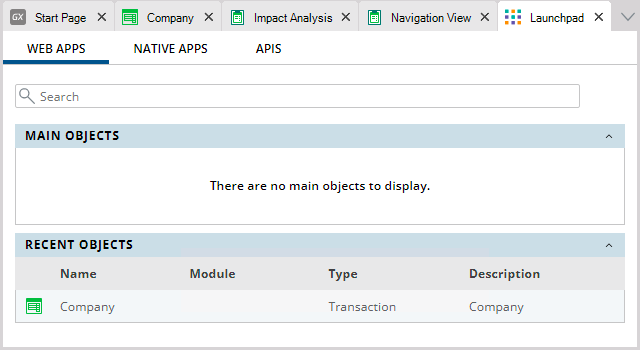
The generated application will be displayed in the Launchpad Tool Window.
Manually configuring Tomcat
GeneXus 18 hardware and software requirements
SAC #31319: Consequences of setting Servlet Directory property with a non-Default value