The Build > Deploy Application menu option allows you to deploy a web application as an Azure WebApp (formerly known as an Azure WebSite).
The following document explains the process of creating an Azure WebApp from the Azure portal and deploying your GeneXus web application there.
If you are deploying on a .NET Environment, make sure that you have MSDeploy installed on your machine.
Go to the Azure portal and follow the instructions provided there to create a new WebApp:
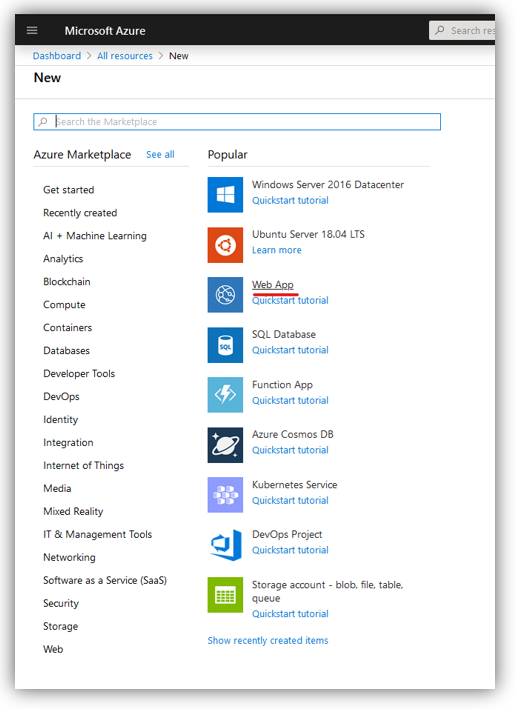
Under the Runtime Stack combo use the following table to select the right stack for your environment.
| Environment |
Runtime stack |
Operating System |
|
.NET Framework (C#) |
ASP.NET V4.7 (or higher) |
|
|
Java |
Java 8, Java 11, Java 17 |
Windows, Linux |
|
.NET |
.NET 6 (prior to GeneXus 18 upgrade 7)
.NET 8 (since GeneXus 18 upgrade 7) |
|
Take into account that when selecting the Java version, you must select a Tomcat version. In GeneXus any of the Tomcat combinations in the combo are supported.
It will take a few seconds for the WebApp to be created. After that, you will have the settings and data of your recently created WebApp.
Click on the "Get Publish Profile" link to download the .PublishSettings file, which contains the credentials needed to deploy the recently created WebApp. Remember that GeneXus will ask for that file afterwards.
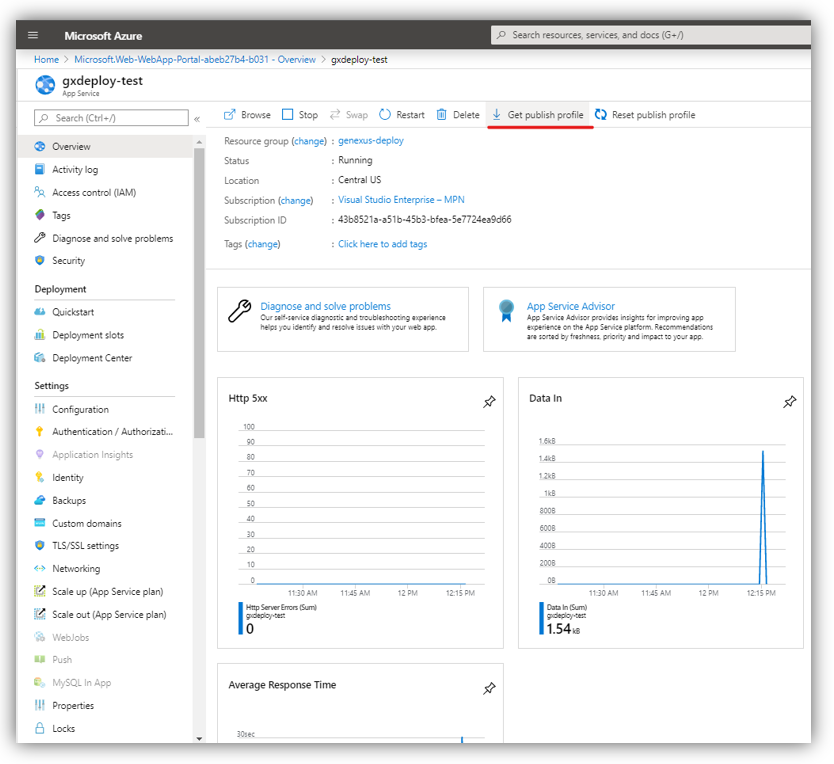
Note: You may get an error trying to download the Publish Settings, that says "Basic Authentication is disabled".
In this case you need to go through "Settings --> Configuration --> General settings and turn the Basic Authentication on.

That's it from the Azure portal.
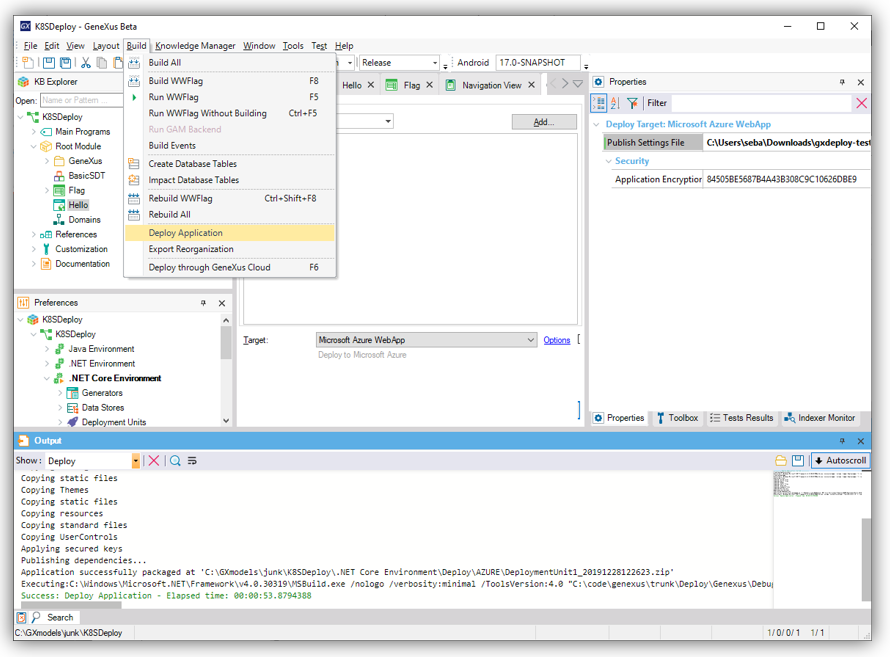
Now, go to GeneXus and select Build > Deploy Application in the main menu.
Remember to select the appropriate Tomcat version or Servlet specification version:
Generic Servlet 3.1 (to use Tomcat 9.0)
Tomcat 10.0
Tomcat 8.x (to use Tomcat 8)
At the Publish Settings File property, you have to enter the .publishProfile file you downloaded in step 3 of this document. Select that file and that's it: GeneXus will gather all the necessary information to transfer your web app to the cloud.
Note that you can then manage other app settings at the Azure portal.
Note: If you are deploying to
.NET in Linux, you need to set the Startup Command under the Configuration panel to:
dotnet bin/GxNetCoreStartup.dll
Run the application.
Once the application gets deployed, you can access it by going to your web app URL plus your object. For instance, if you have deployed a WebPanel called Hello, add hello.aspx to your URL if your deploy was either
.NET Framework or
.NET. If it's
Java, make sure you add servlet/<java package name>.<object name>