Patterns empower applications by easily adding new features.
When a pattern is applied, GeneXus creates all the necessary objects to provide the desired behavior without the need of programming them.
GeneXus offers the Fiori for Web pattern that can be applied to a Transaction object or a Web Panel object. In this case, it is applied to a Transaction.
For example, consider that in a Transaction object called Country, you apply the Fiori for Web pattern (using the Horizon version), as explained in HowTo: Apply the Fiori for Web pattern for the first time.
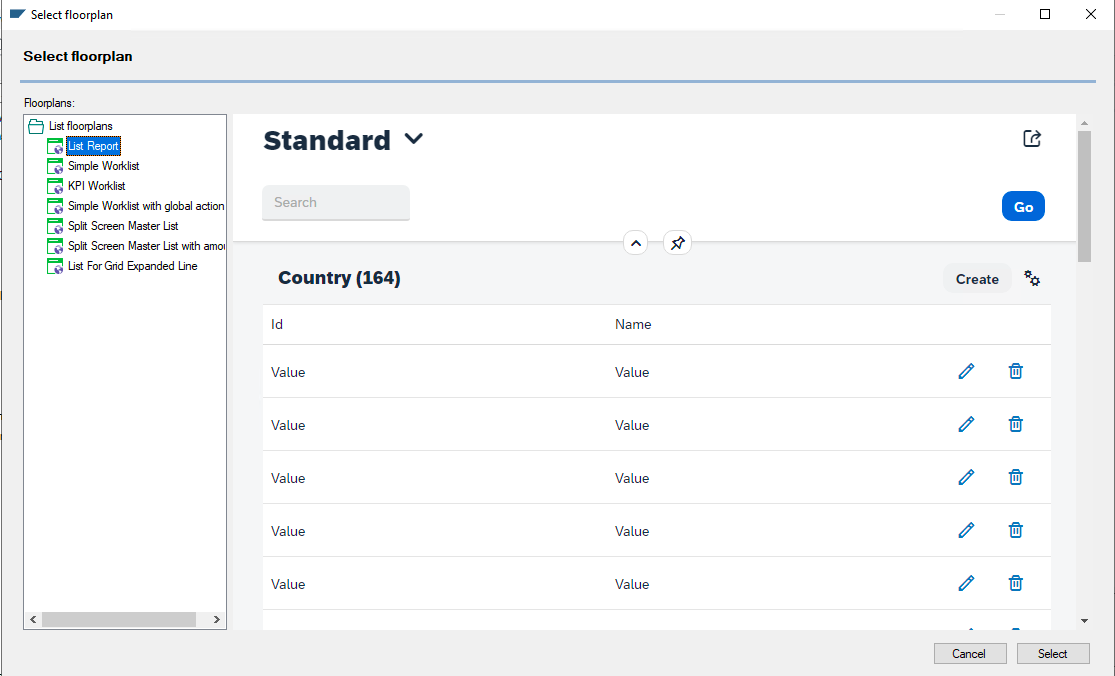
You can choose from the following List floorplans. In this case, use the List Report:
Do not forget to click on “Apply this pattern on save” and save.
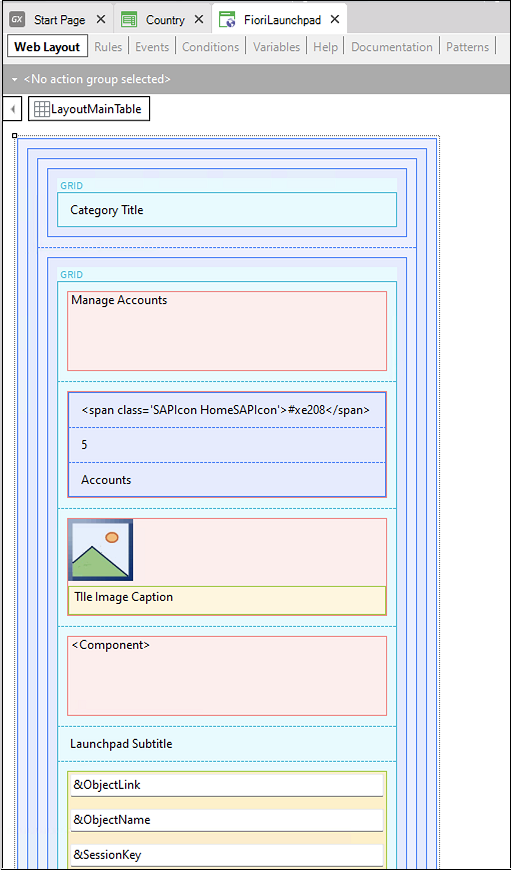
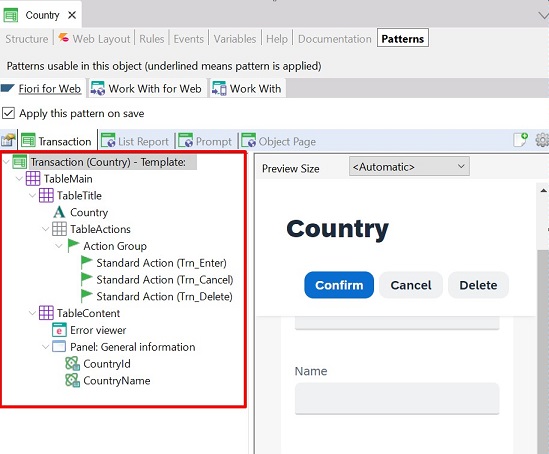
Now, if the Country Transaction is placed here:
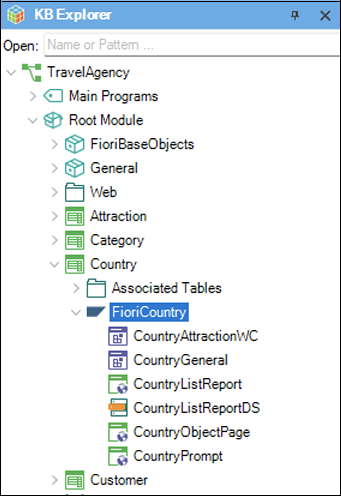
you can see several objects below the Transaction, which were created by GeneXus when the pattern was applied. These objects implement the web screens.
Before pressing Build All, note that GeneXus has configured the FioriLaunchpad object as Startup Object.
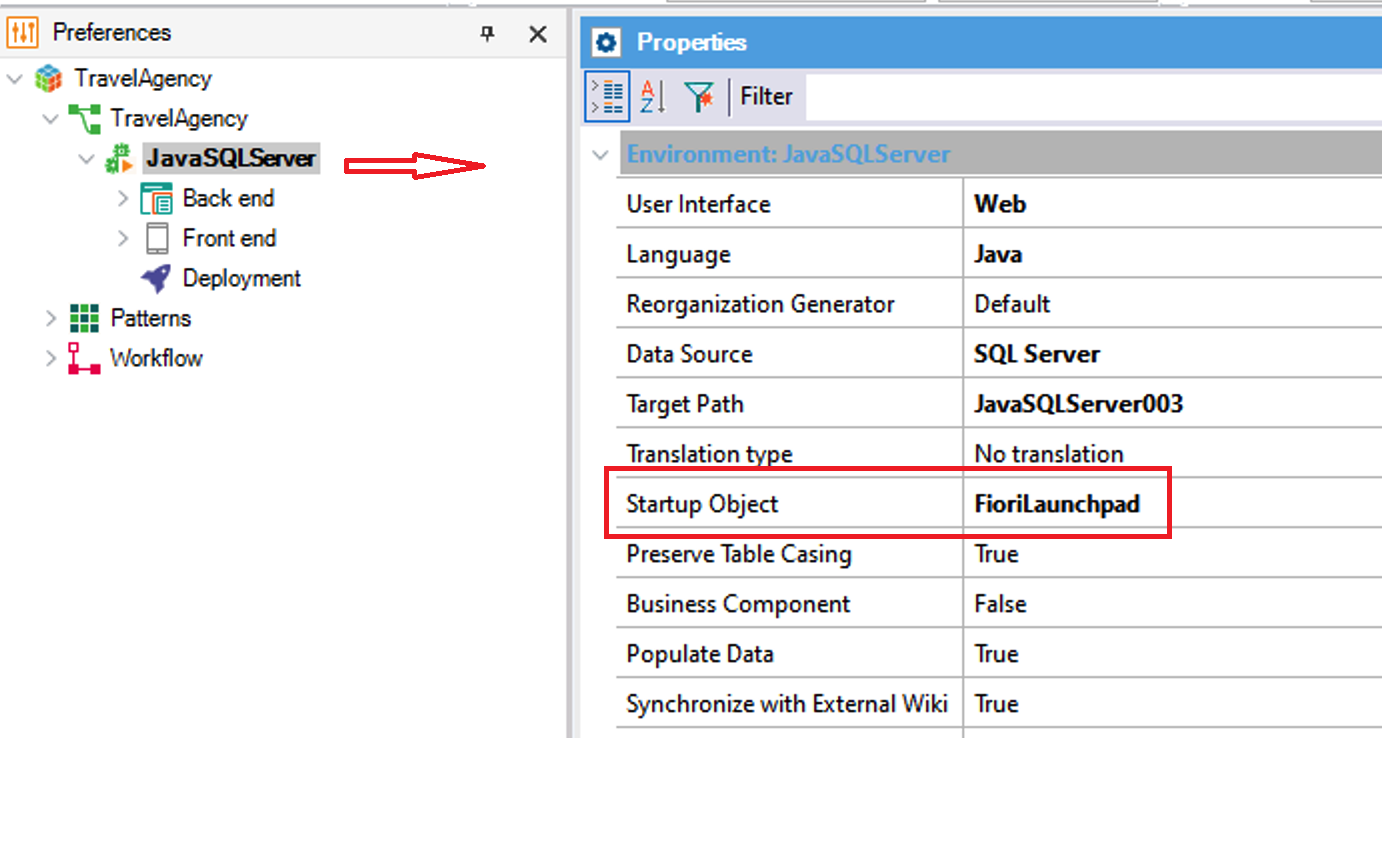
Therefore, this object containing the references to all the Knowledge Base objects that the GeneXus Fiori for Web pattern is applied to will be compiled and run instead.
This FioriLaunchpad object is a GeneXus object that was automatically created and can be found in the FioriBaseObjects Module.
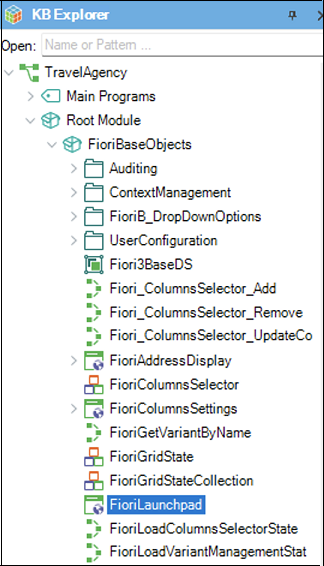
It is a Web Panel object. That is to say, it implements a web screen.
Now, press F5 to view everything that has been automatically generated by applying the pattern at runtime.
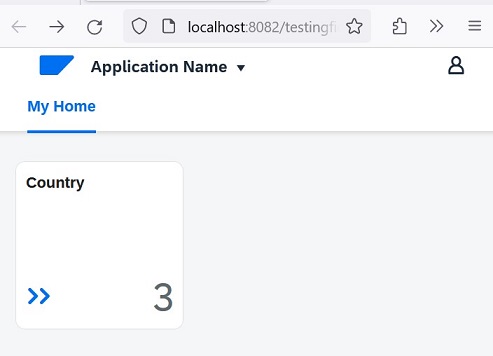
The Launchpad with Fiori design is displayed in the browser, offering a tile with a link to work with countries. In addition, it shows the number of registered countries:
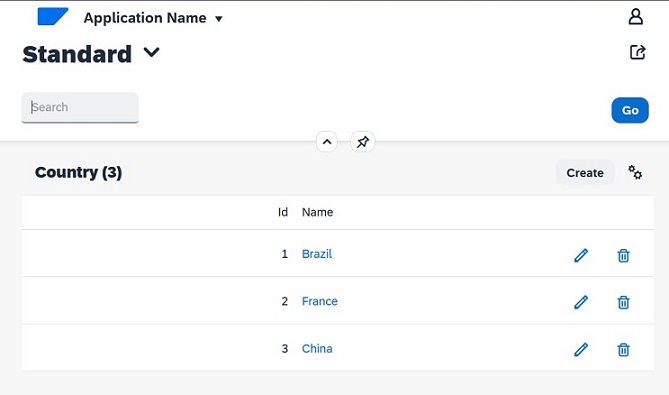
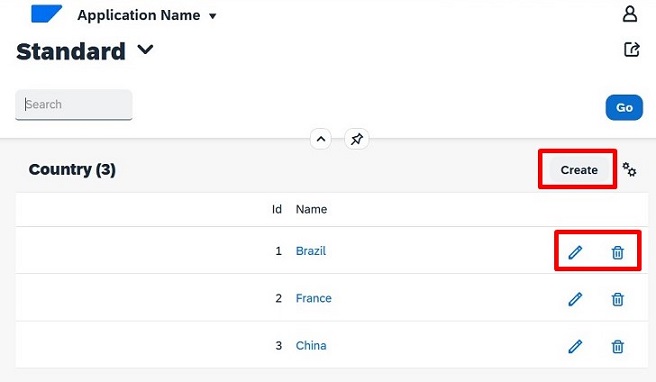
When clicking on the Country tile, a page shows all the existing data:
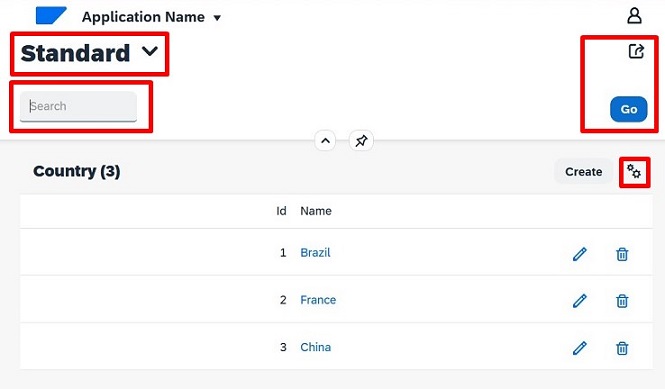
It will filter data by country name and many other options,
You can also add a new country, change an existing one, or delete it:
Operations such as the following can be performed in it:
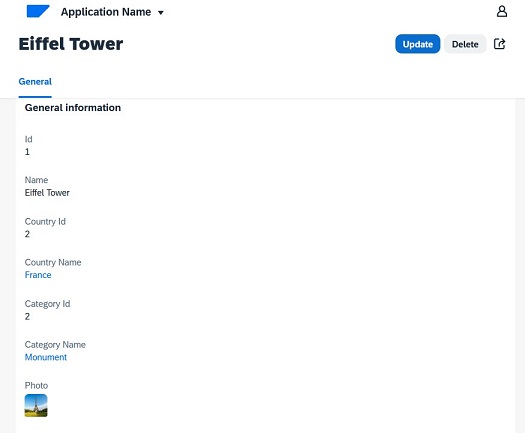
View the entire details of a country, such as France:
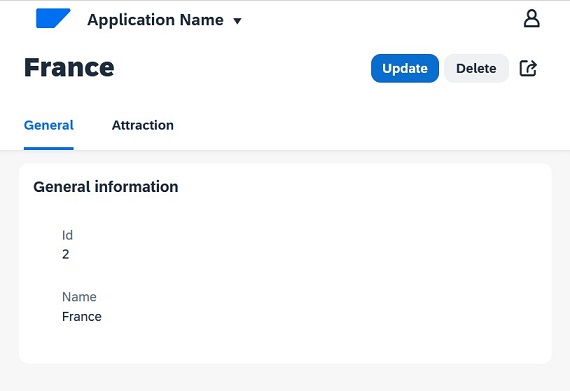
There's a General tab that shows general information about the country and buttons to Update that information or Delete the country.
This screen belongs to the Country Transaction, where the navigation buttons have been hidden because you're positioned in the selected country.
Likewise, the country can be deleted. Since it is calling the Transaction object in DELETE mode and the country has related attractions (the Louvre museum and the Eiffel tower), deleting it is not allowed. If you tried to delete Brazil, which doesn't have any attractions recorded, you could do so by simply selecting Confirm. Press CANCEL, so as not to delete it and you're taken to the list of countries again.
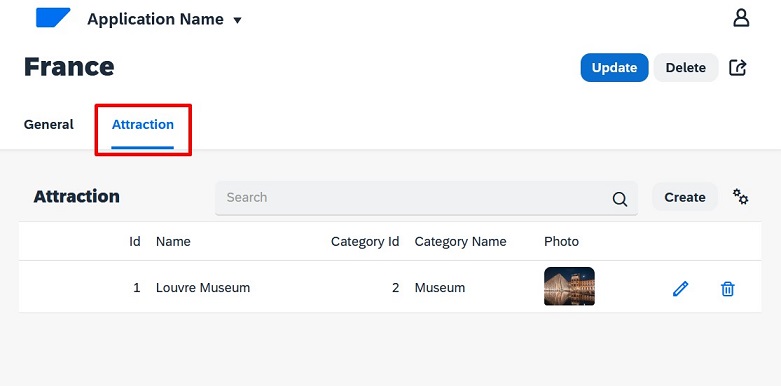
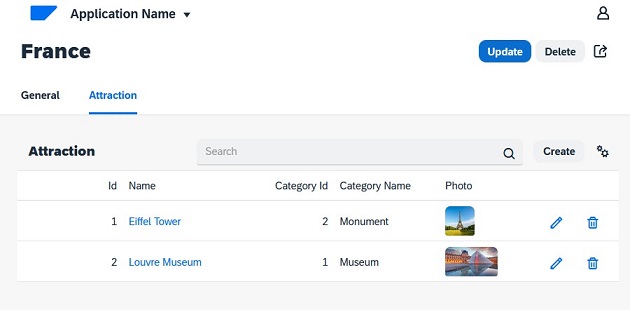
Also, there is an Attraction tab that will show all the attractions recorded for the country being displayed:
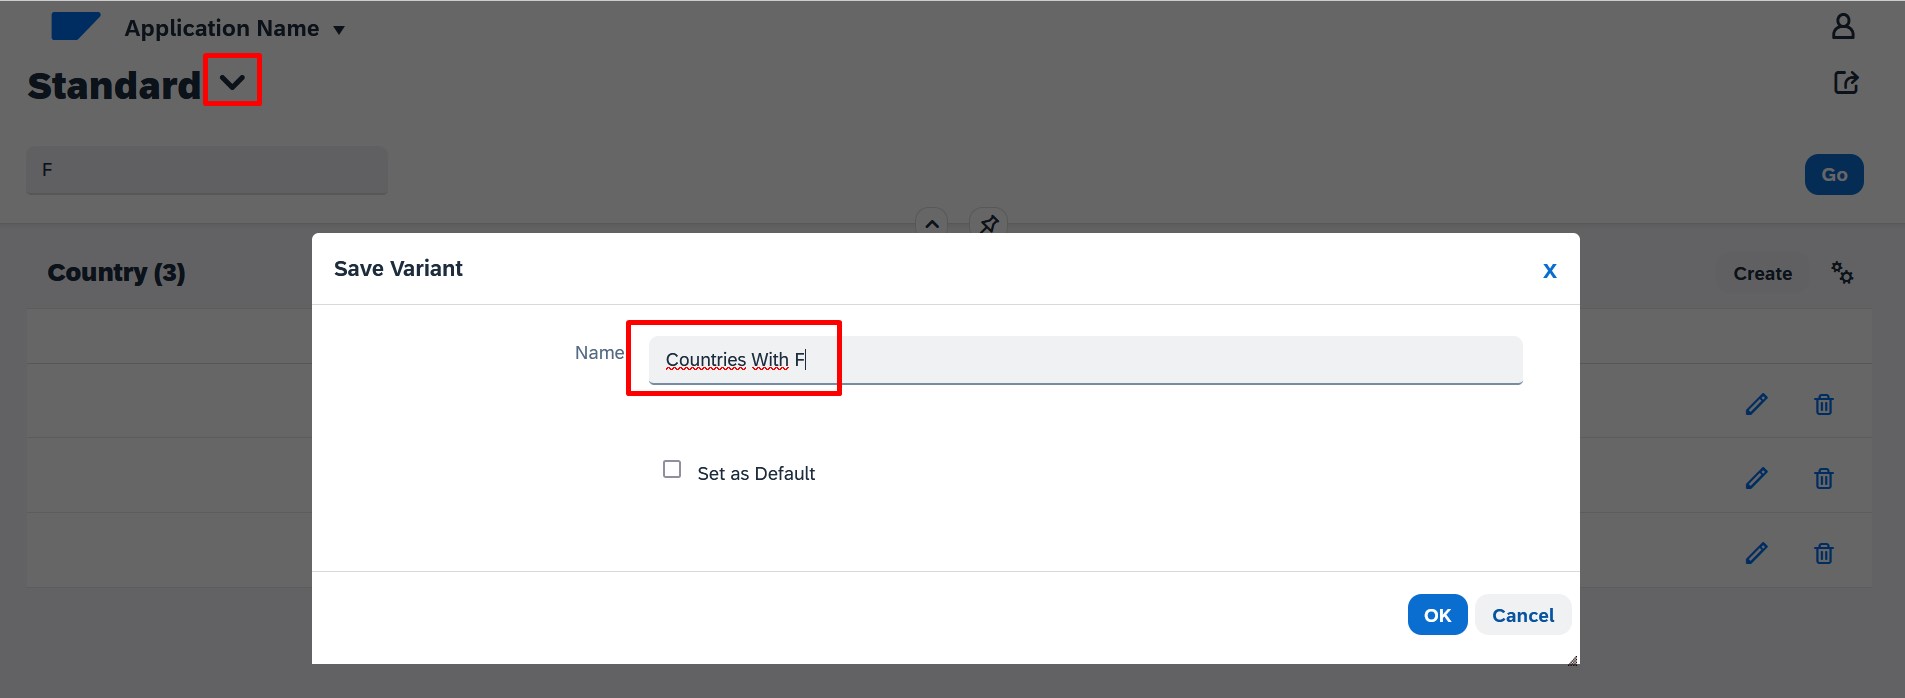
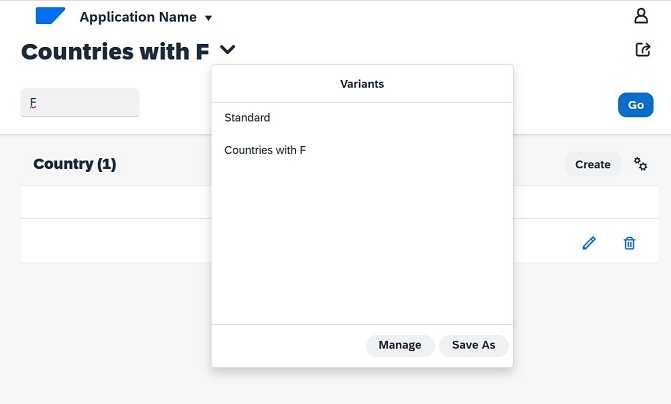
You can save a specific User Filter, giving it a name
and use one of the saved filters or the standard ones
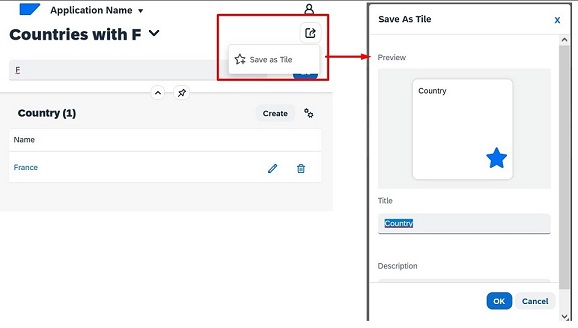
You can also save a specific List Report Option as a Tile in order to have it in the Fiori Launchpad
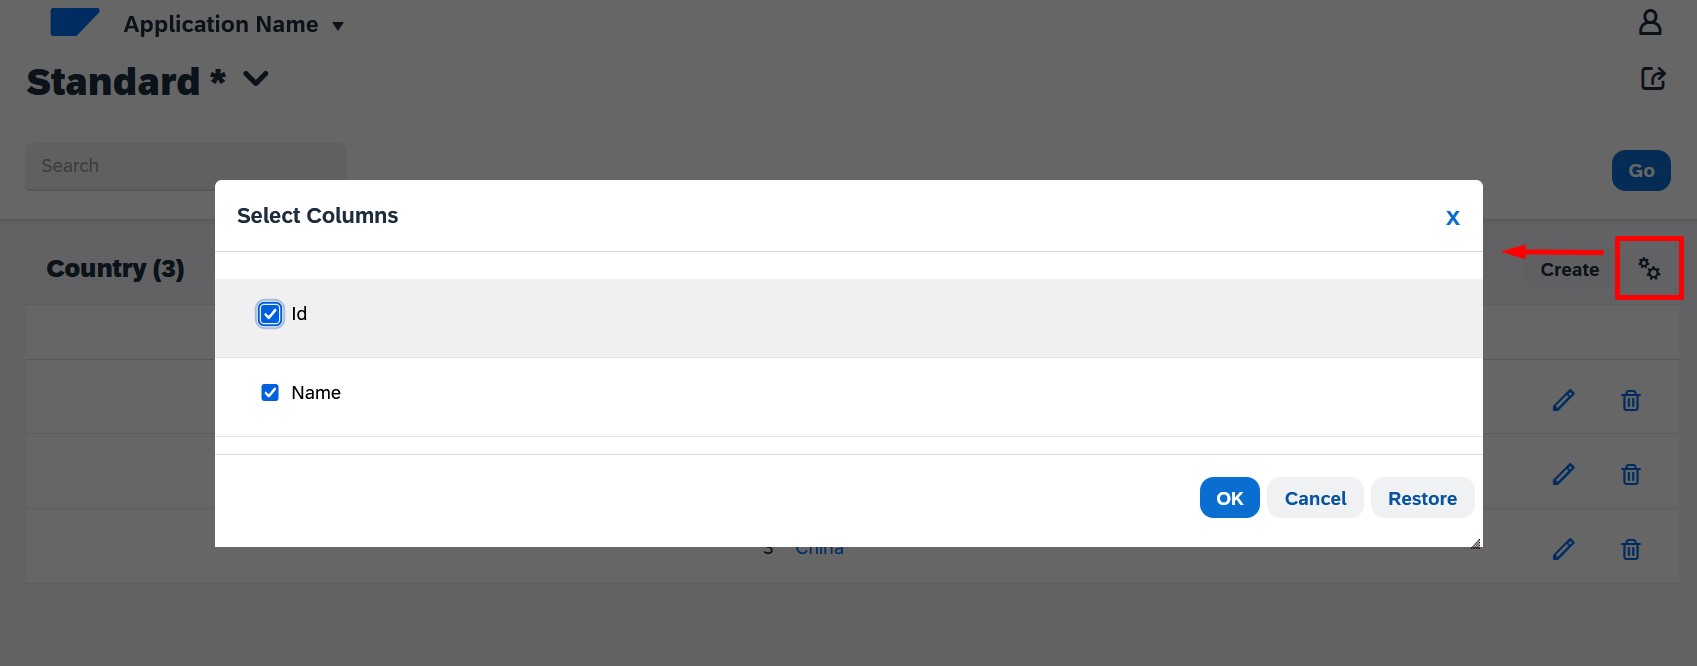
and customize the data grid as you wish, for example, hide a column:
The pattern was easily applied to the Country Transaction, and now you need to apply it to the Attraction Transaction in the same way as done before.
Press F5.
Just like in the previous case, you are offered the tile to “Work With Attractions” with the number of attractions recorded.
Again, if the screen size is changed, the information displayed is adjusted. In this case, instead of showing all the Attraction attributes, only the name is displayed.
These are the same query features shown for “Work With Countries”.
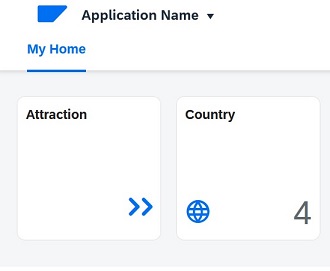
What is displayed and the behavior of all these screens can be customized. For example, suppose you don't want the indicator of the number of attractions to be displayed in the Launchpad, and in the tile corresponding to the countries, you want to show another icon that represents them, here:
So far, you have only selected “Apply this pattern on save” without paying attention to this tree of configurable values:
Everything you see at runtime is determined here. For example, by clicking on the root you will see the properties of the pattern applied to this Country Transaction:
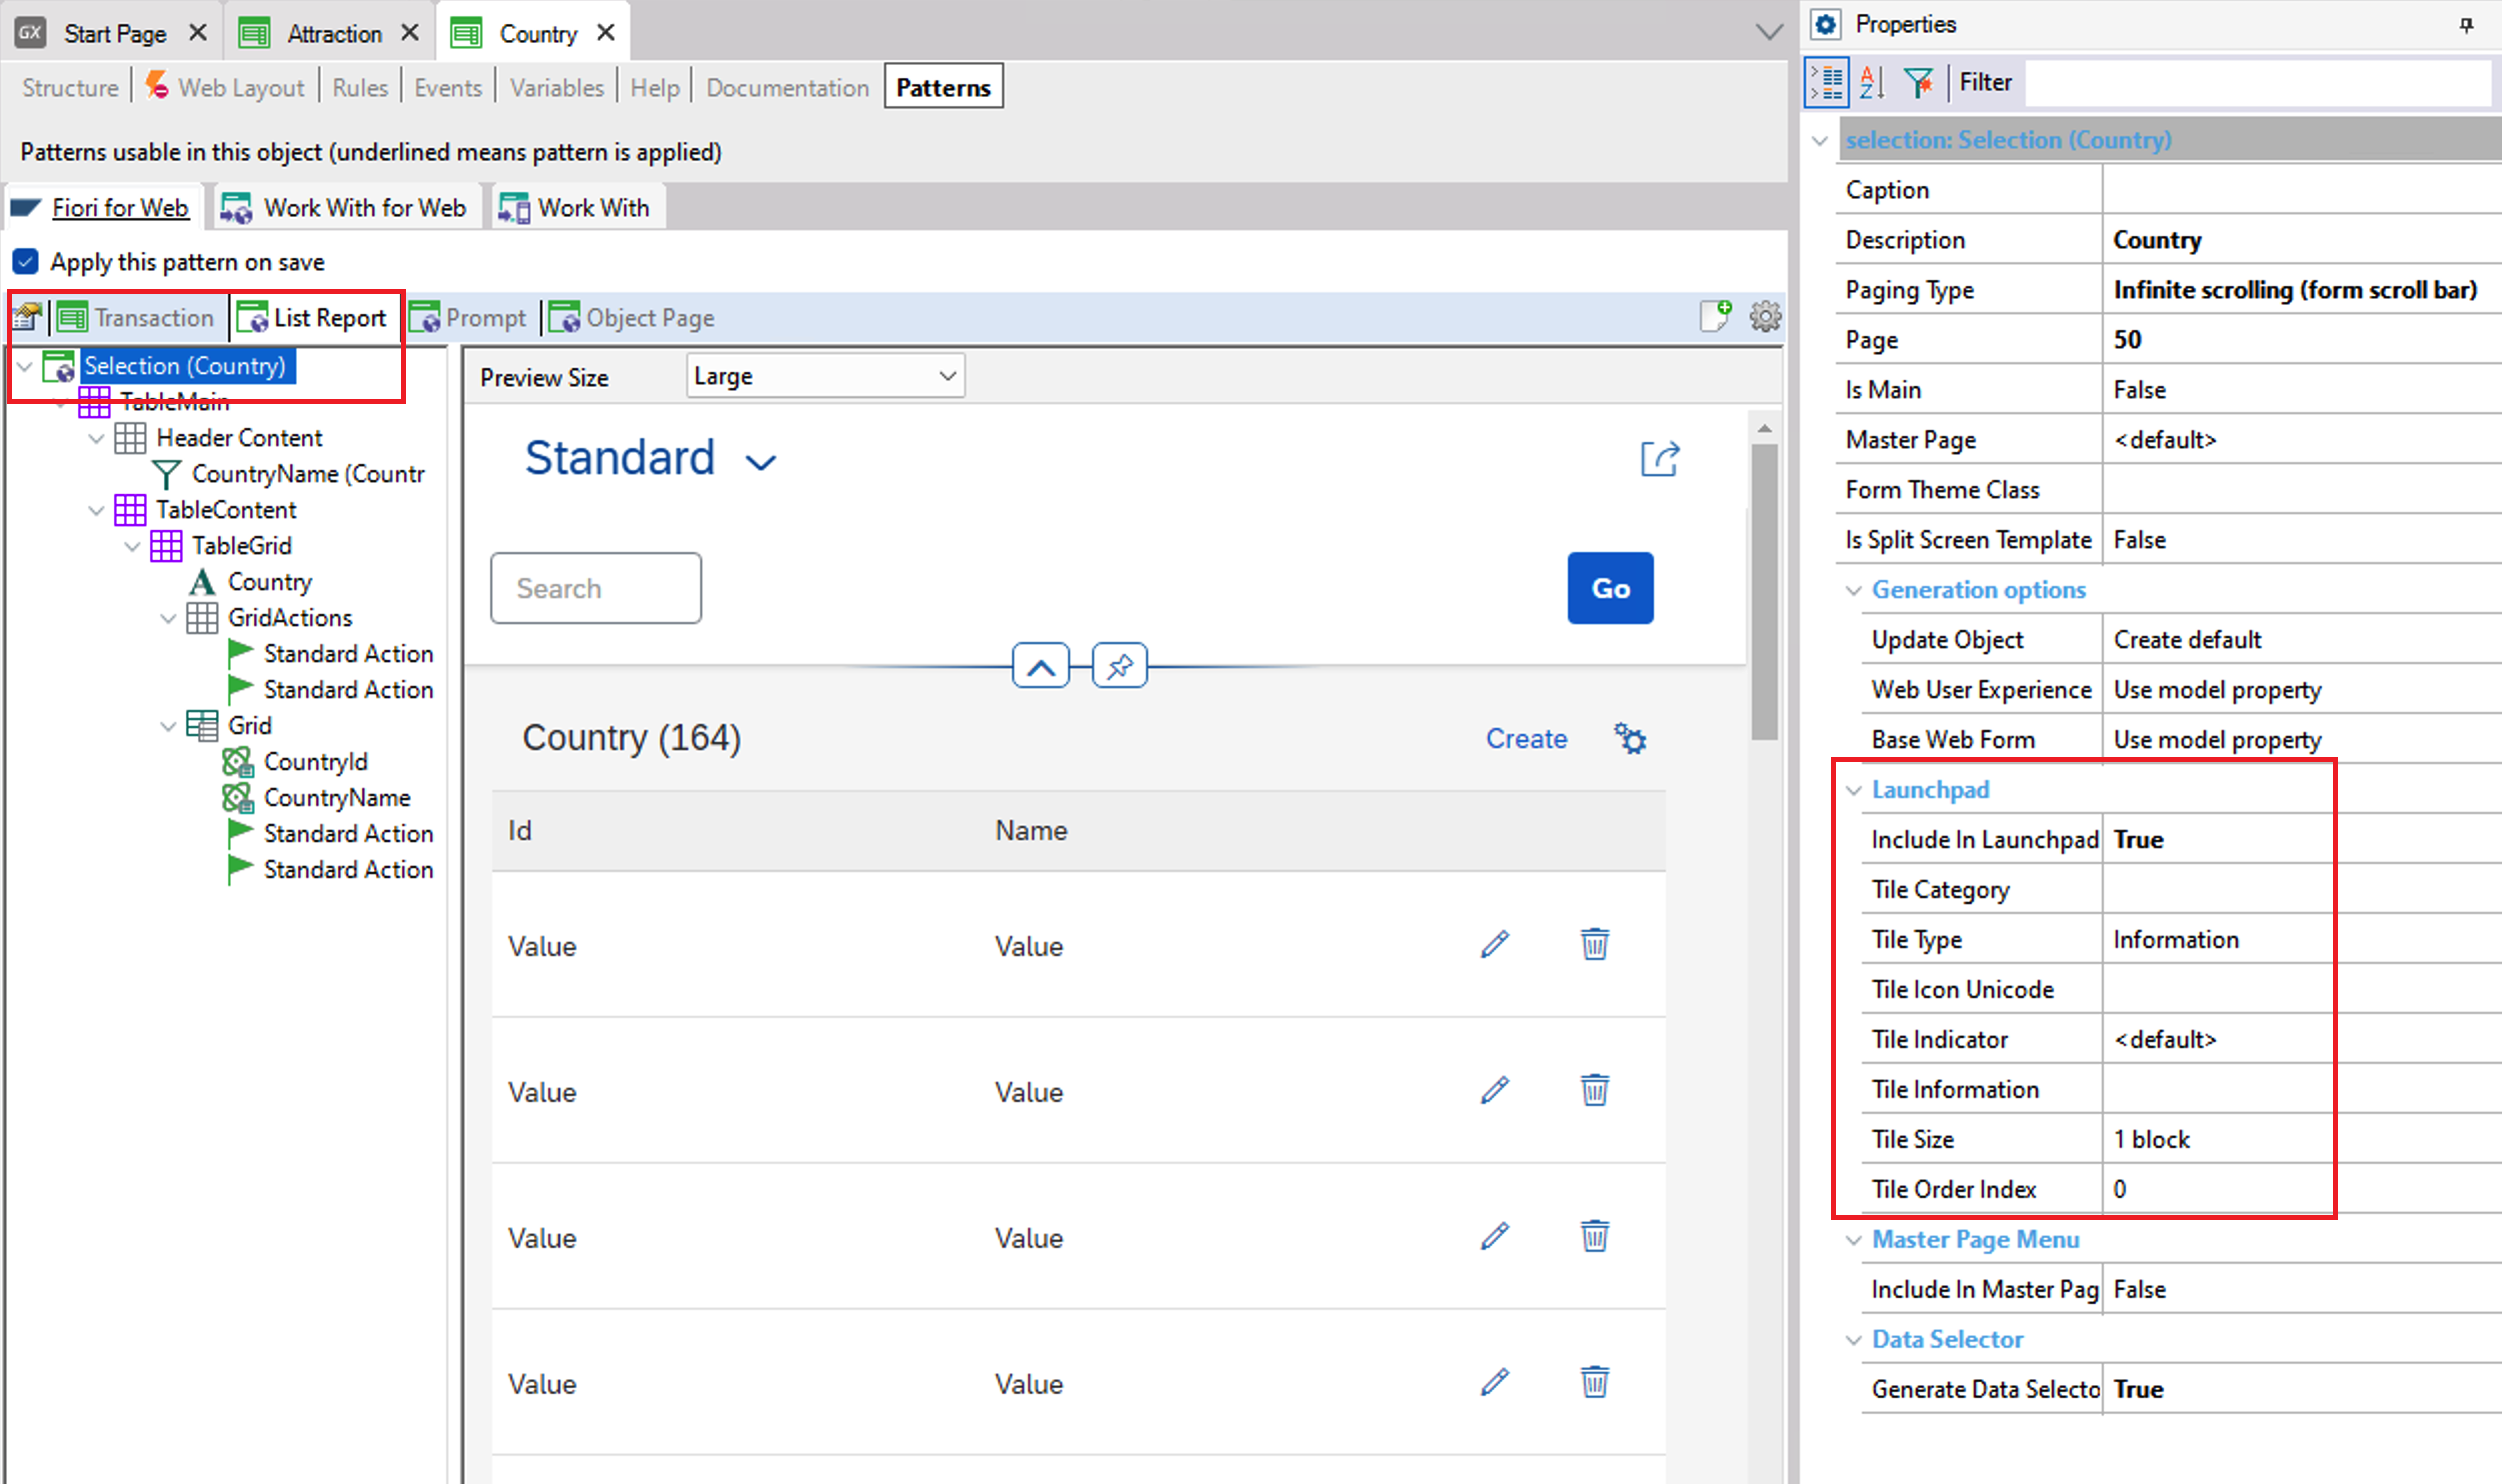
The Include in Lunchpad property determines if the Objects List Report option will be included in the Launchpad as a Tile.
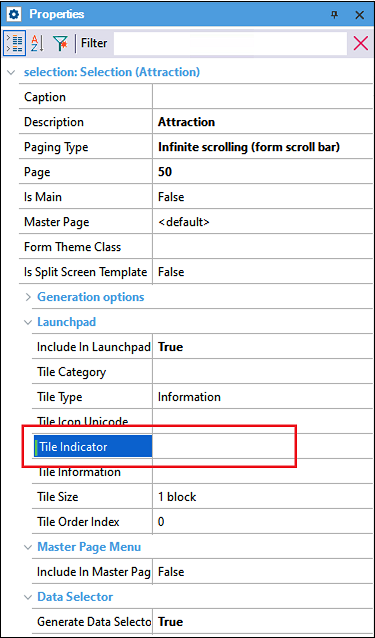
The Tile Indicator is to specify whether an Indicator will be included in the Tile (<default> is a count of the base table, but you can indicate a formula or nothing here).
Tile information property is to modify the default description of the Tile and the Order index is to choose in which order it will be shown in the Launchpad.
The Tile Icon Unicode property sets an icon. Here, the icon's code is set according to the Fiori design guidelines:
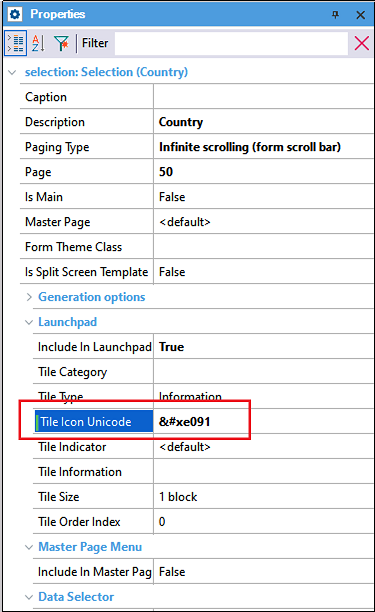
Note: That icon is based on the SAP Font and what is set, is a specific character of that font so that at run-time the corresponding icon is shown.
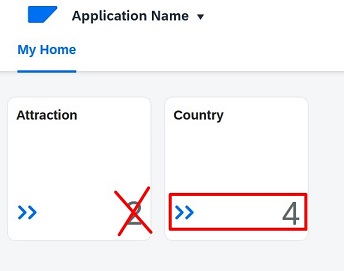
Remove the number in the Attraction pattern:
Press F5. At runtime, it looks like this:
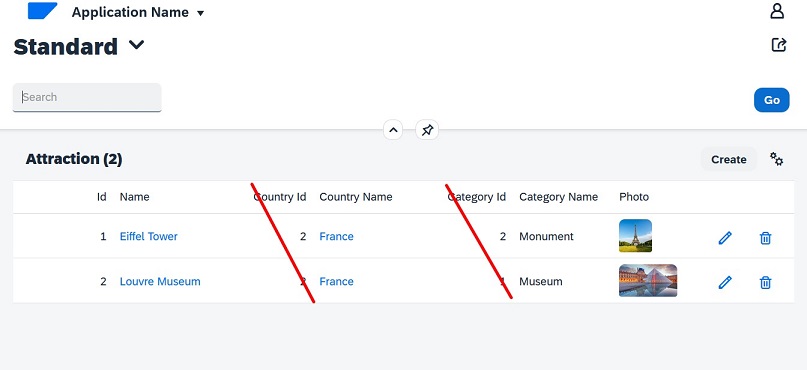
In addition, suppose that you don't want the Attractions List Report to show the country identifier or the category identifier:
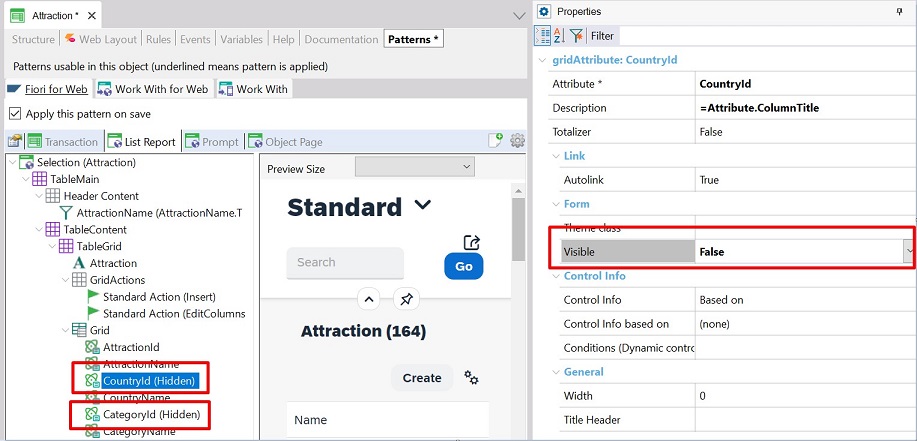
To do so, open the List Report node and under the Attributes subnode you will find all the attributes displayed in the form when the screen size allows it. Delete those you don't want to see (or set the property Visible to False):
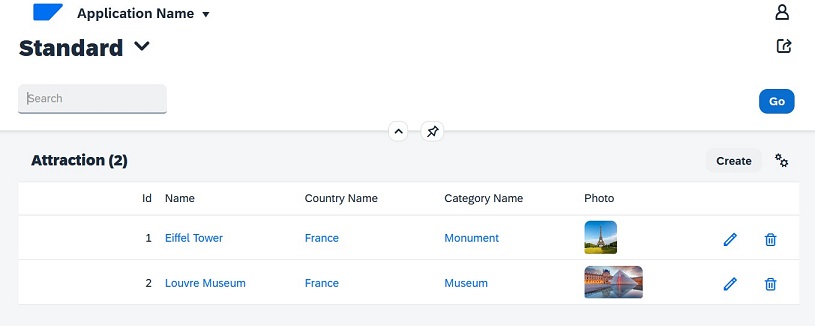
And press F5.
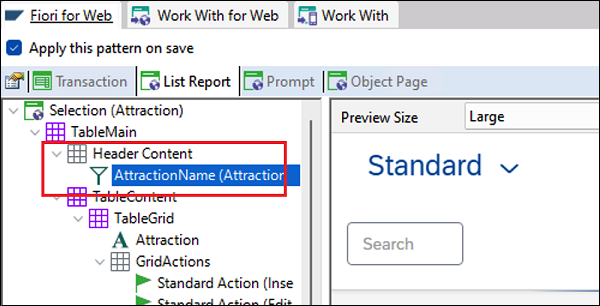
Looking at the Header Content in the Attraction Fiori pattern > List Report tab, you can see all the automatically created filters:
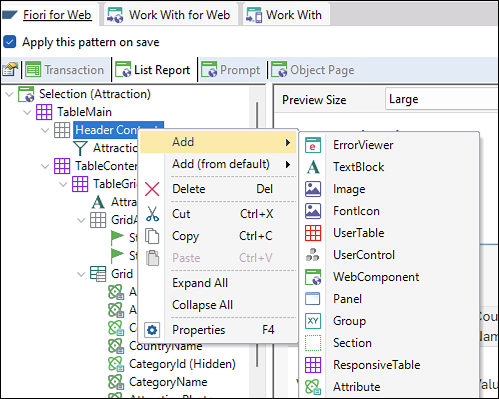
but you can change it or add a new one:
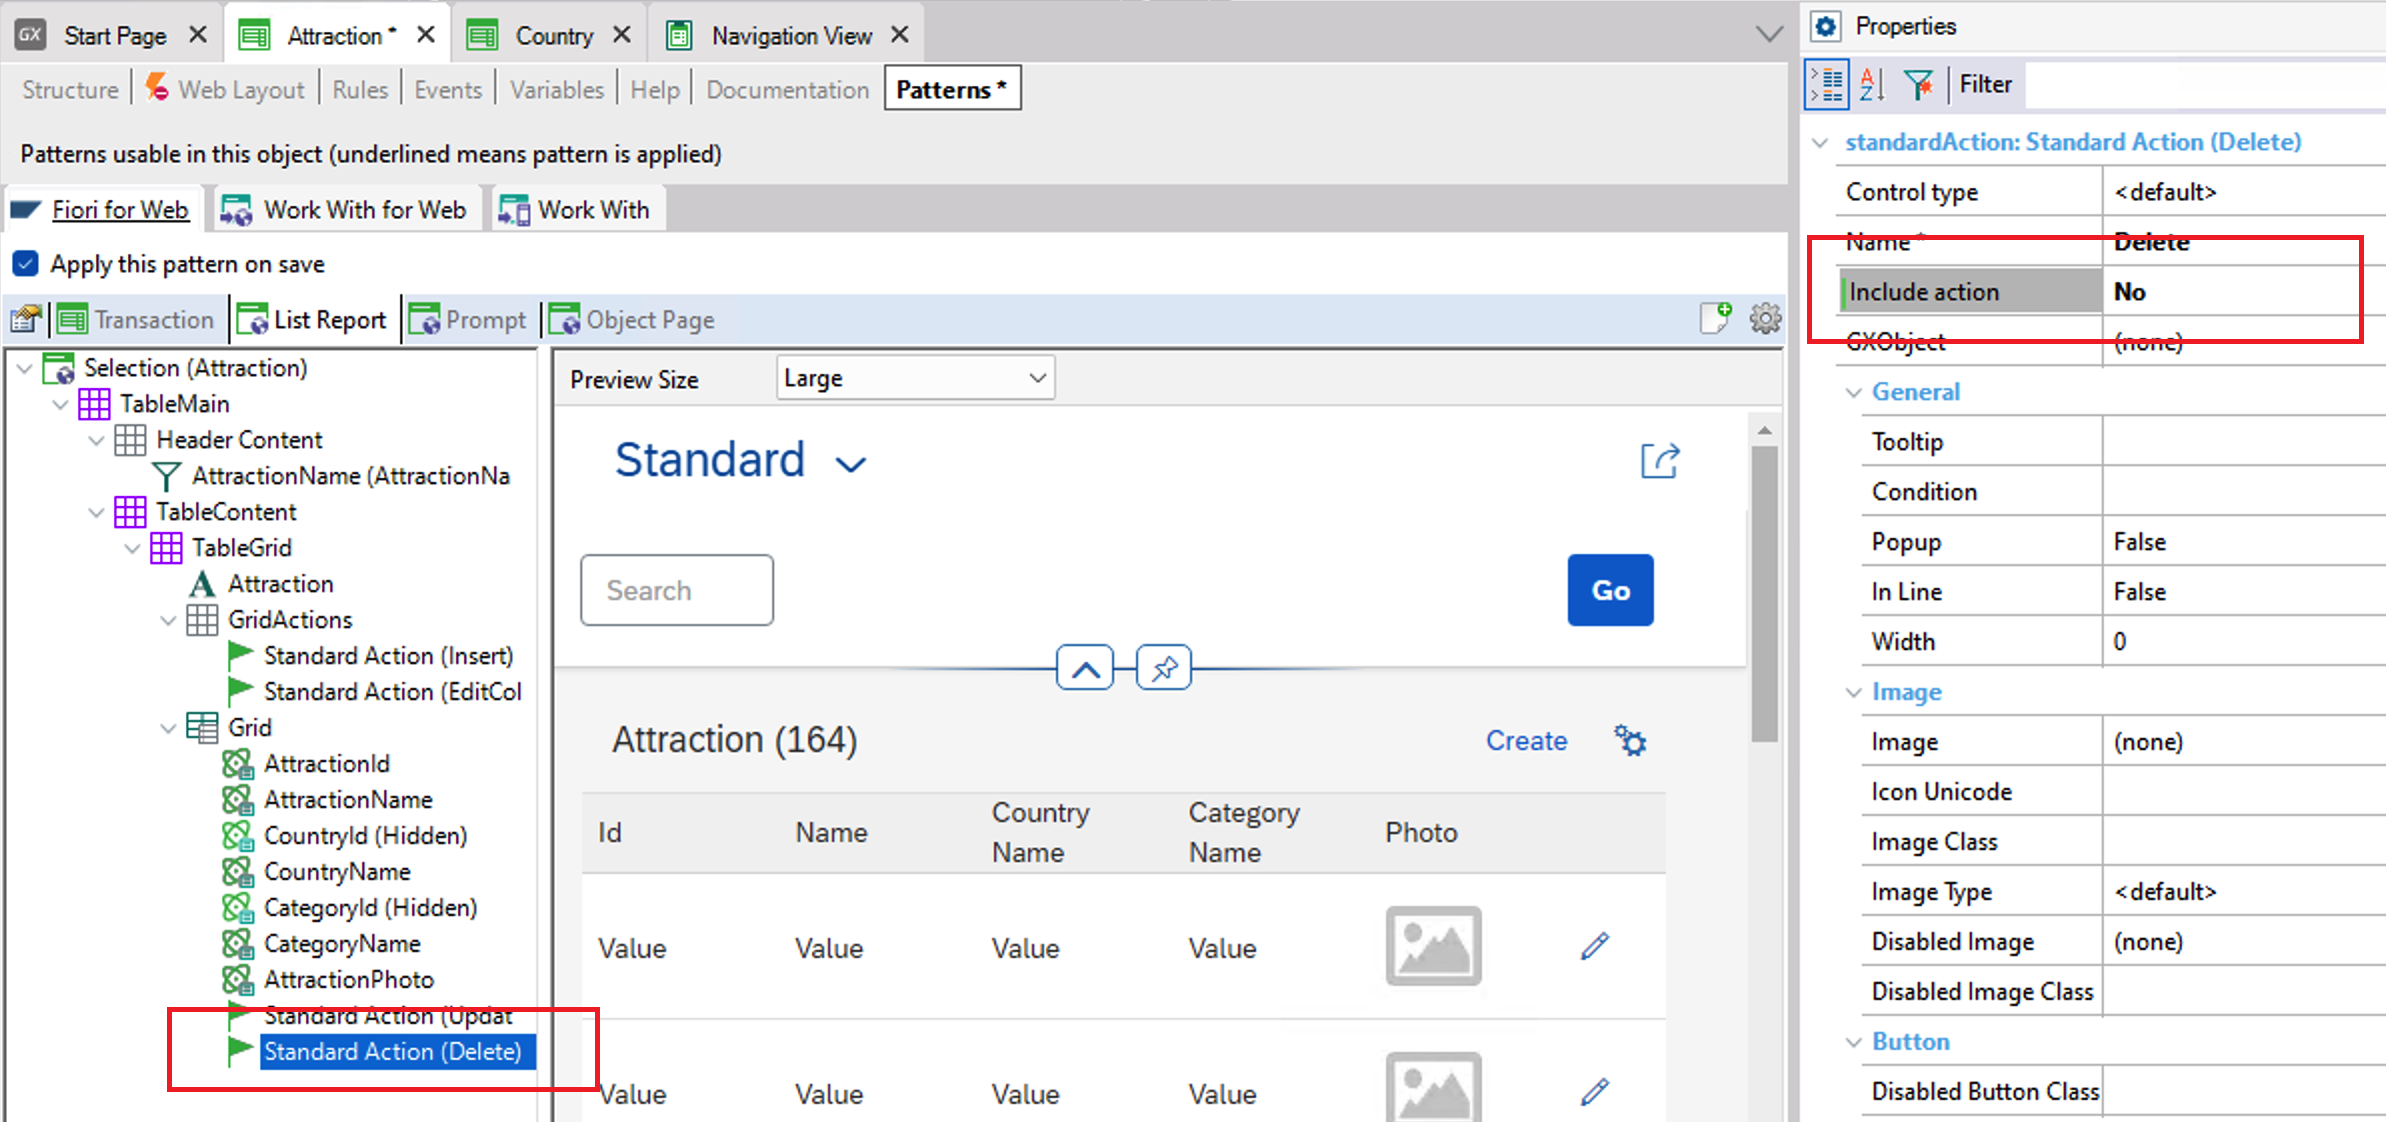
You may also want to disable some or all the Insert, Update and Delete actions for this Panel. To do so, go to the List Report > TableGrid node and change the value of the corresponding property (include action in this case):
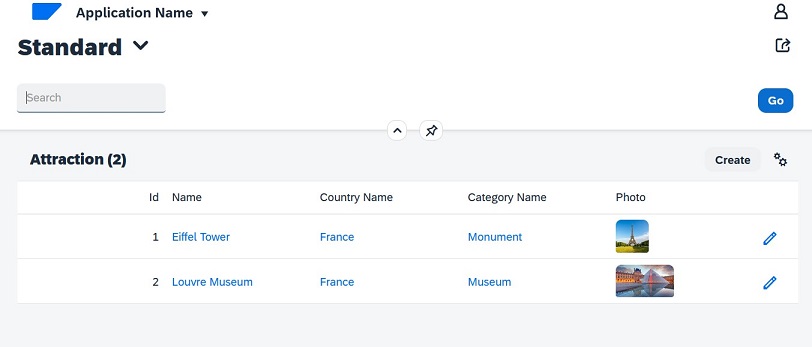
In this way, the DELETE column will be deleted:
There are more customization options available that are worth exploring.
Here you have only seen some of the List Report Panel of Attractions, but the Panel that displays the details of the selected attraction can also be customized:
This Panel's definitions are located under the Object Page tab and two subtabs, Object Page and General:
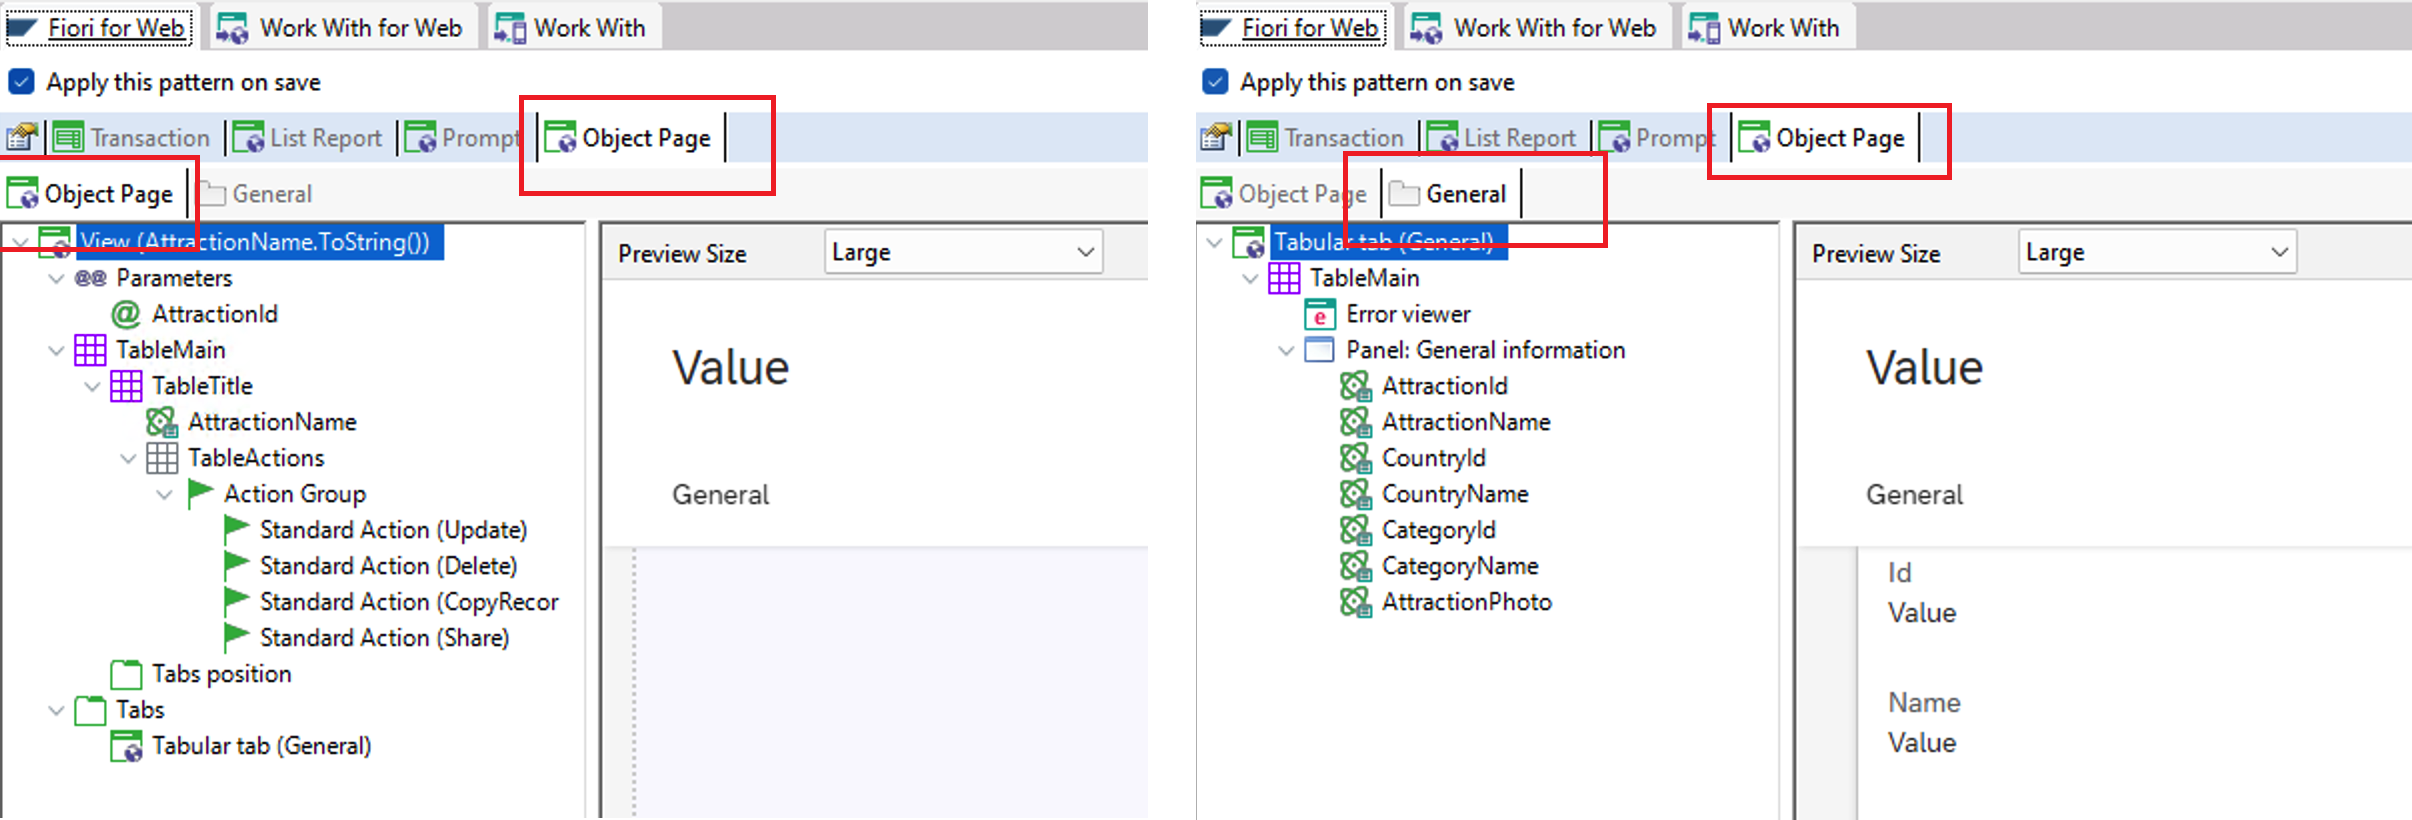
In this case, there is a single subtab called General, because an attraction doesn't have any more related information.
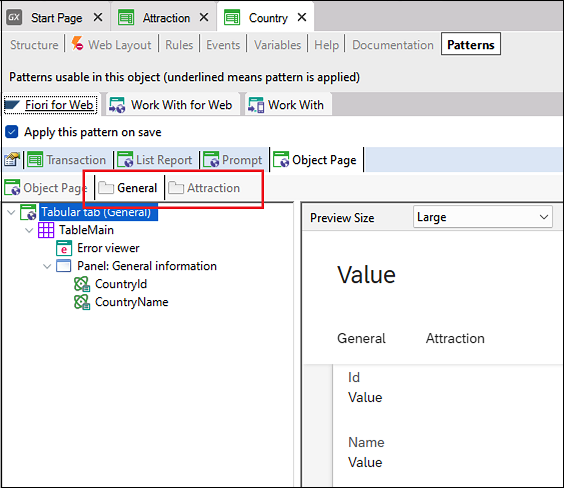
However, note what happens for a country:
It has a tab for the country's general information and another tab to show the related attractions.
In GeneXus, the tree includes both tabs:
This is only part of what can be easily achieved. Next, you will see the equivalent pattern for the native app in a mobile environment.
Before leaving the web application, note something important: the Launchpad only includes tiles for objects with the Fiori Horizon Pattern applied in the Knowledge Base. For example, in this case, you haven't applied the pattern to the Customer Transaction, so you can't invoke it from the Launchpad. There is an object in the Knowledge Base, generated automatically —the Procedure called ListFioriPrograms— which obtains the collection of programs to be included in the Launchpad:
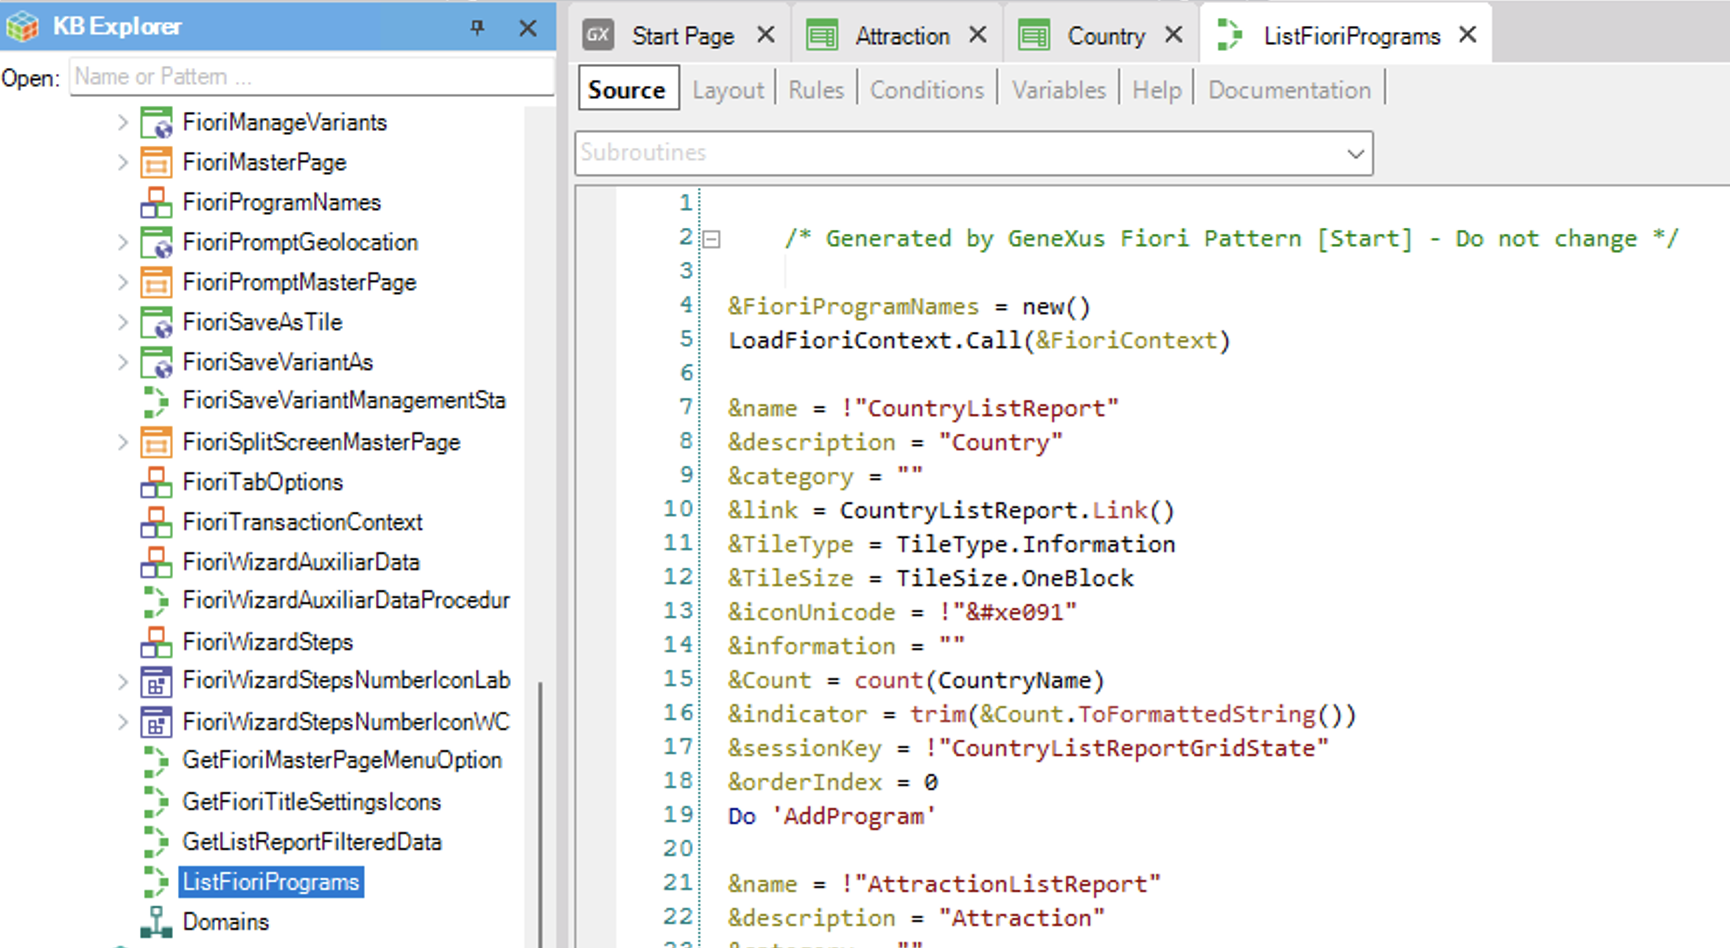
When the pattern Fiori List Report for Web is applied to a new Transaction, this Procedure is modified to include a tile with the new pattern.
Since the launchpad will be the main object of the web application, it will surely require tiles to invoke other objects, in addition to those listed (for example, Web Panels created by the developer). You may even want some of the Fiori List Reports not to be displayed on the launchpad.
You can easily achieve it by creating an object of Procedure type that receives a parameter the list of programs created by ListFioriPrograms, and handles it according to the launchpad's requirements. For example, it may delete some of the programs (tiles) or insert new ones.
Add a tile to invoke the Customer Transaction. To do so, create a Procedure called ListFioriProgramsUsr.
Define the rule that indicates the parameters received and/or returned by the object. In this case, define an input/output variable that will assume the predefined structured data type ProgramNames (because the same name as the data type is given). This data type allows recording the collection of programs to be invoked:
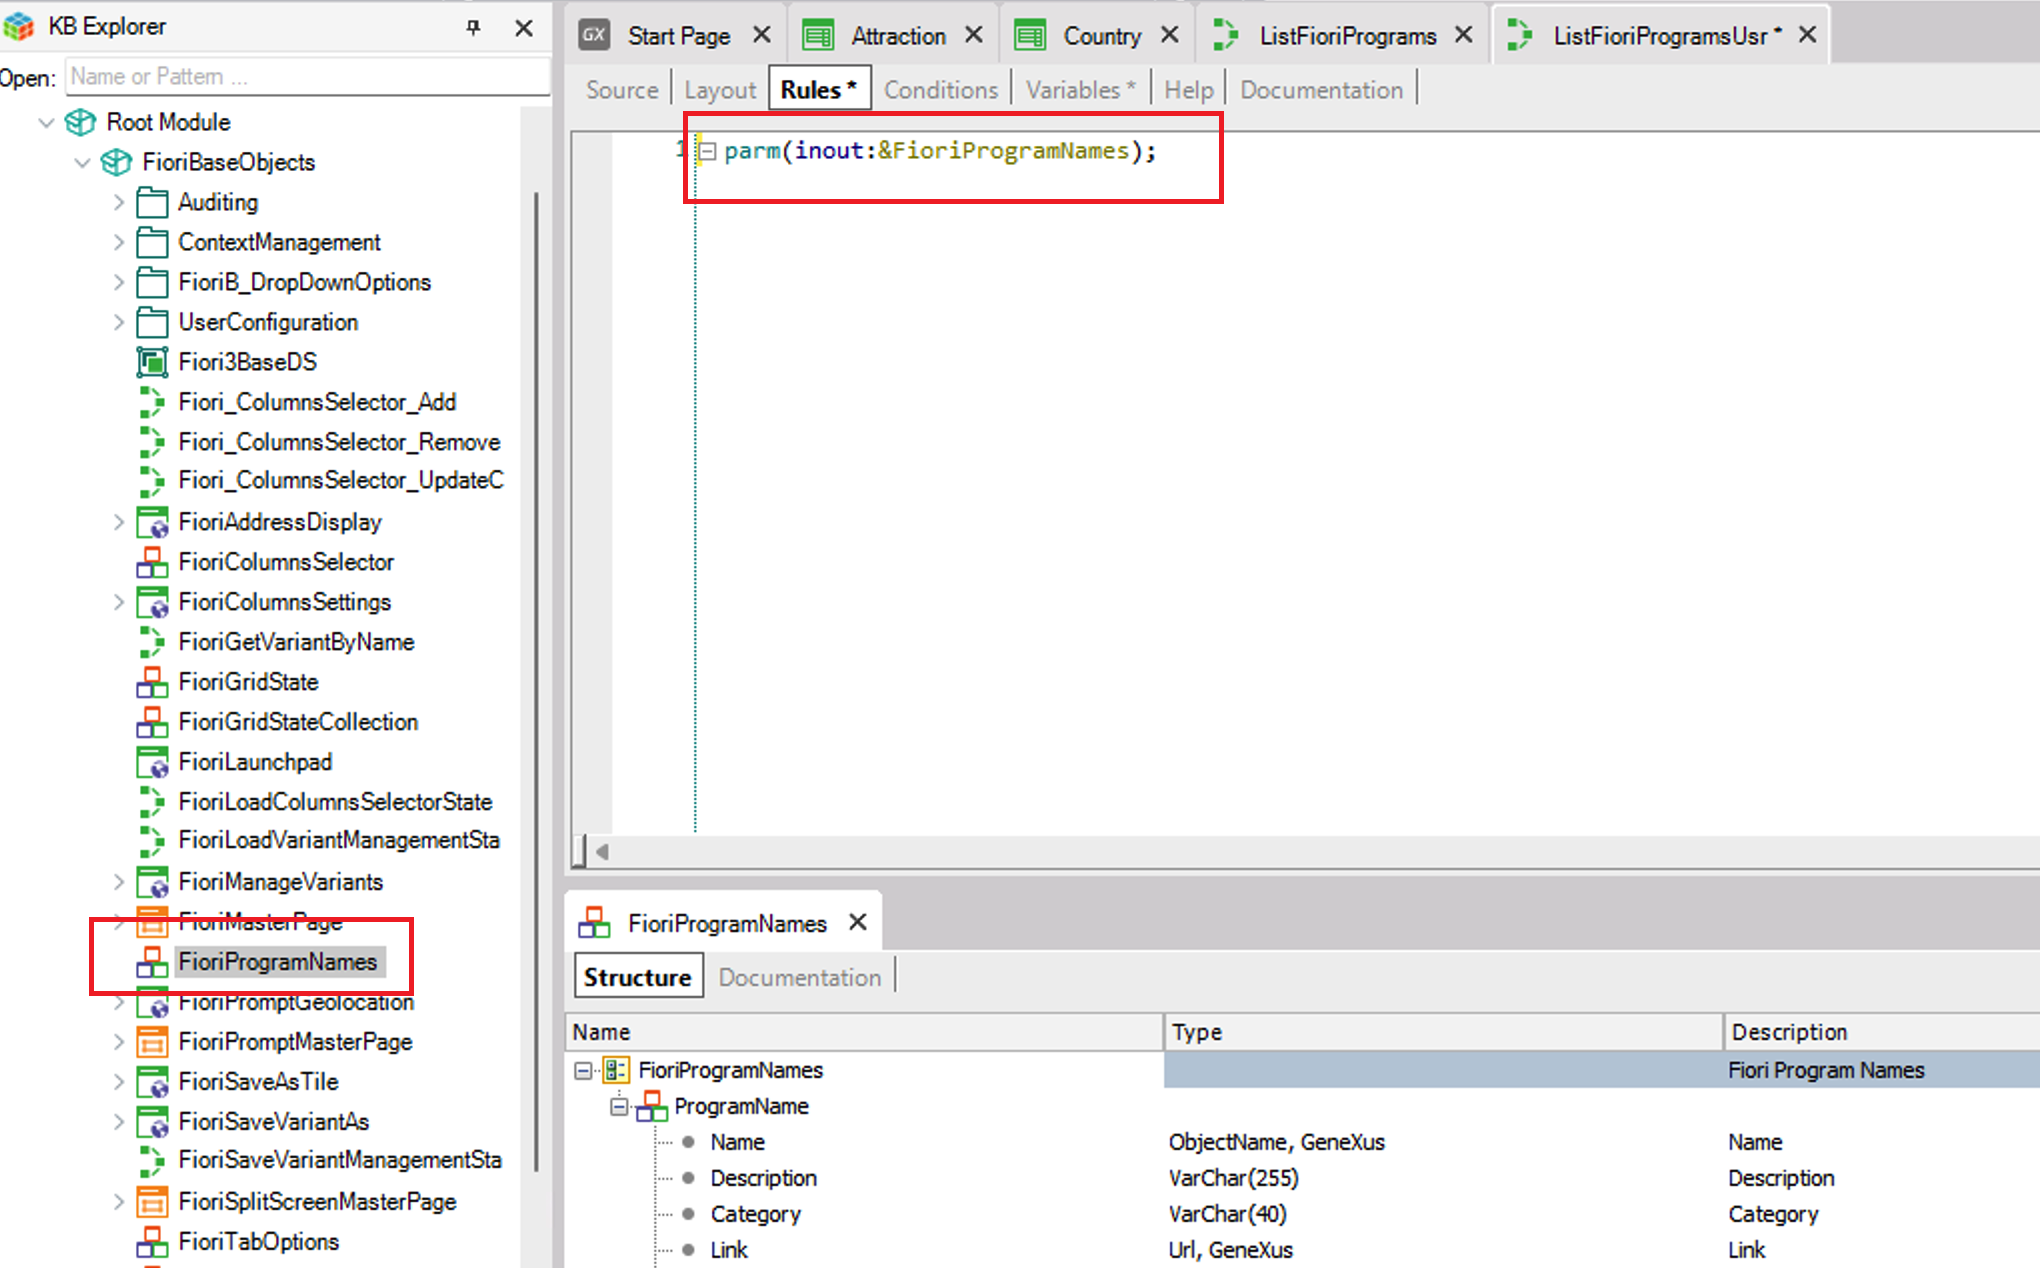
As you can see, it is a collection of a simple Structured Data Type corresponding to a tile's information.
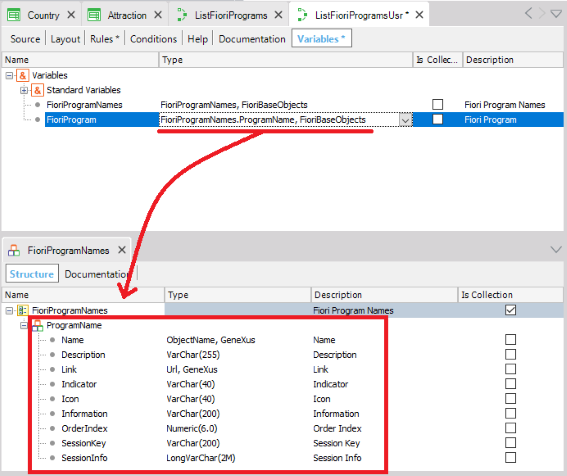
An internal variable of the Procedure for this data type also needs to be defined:
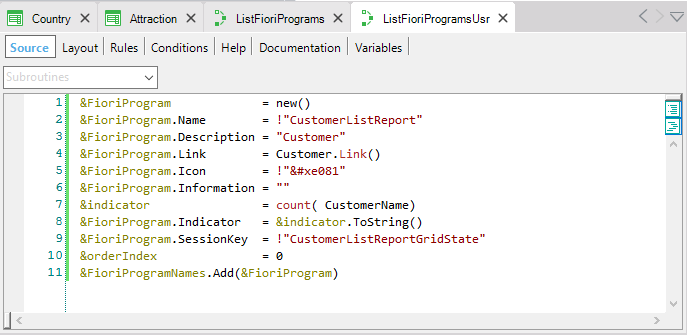
Load the necessary elements of the tile you want to add in the Procedure Source. Here, for the number of customers indicator, the same Count formula is to be used again. However, note that this time it is a local or inline formula; that is to say, it is not associated with an attribute, and it is only triggered in this Procedure when this statement is run).
Next, add this “tile” to the collection of ProgramNames:
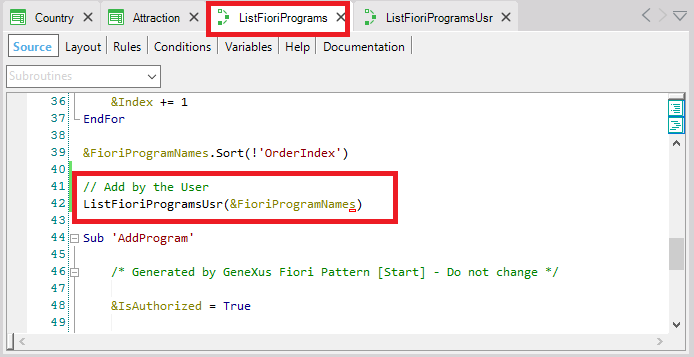
Lastly, include a call to that Procedure (ListFioriProgramsUsr) in the Procedure generated for the Pattern (ListFioriProgram), at the end of the source (outside the /* Generated by GeneXus Fiori Pattern Start - Do not change */ - /* Generated by GeneXus Fiori Pattern End - Do not change */ comments).
Press F5.
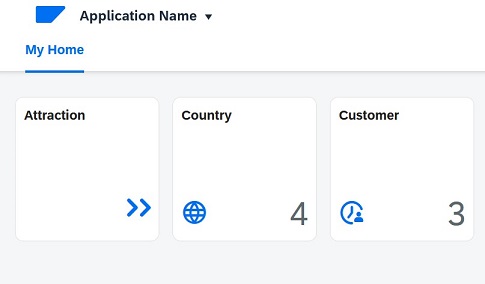
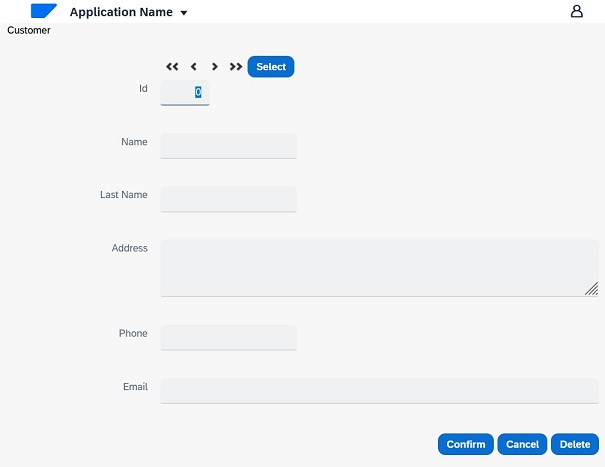
The Customers tile is invoking the Customer Transaction:
In the next document, you will see what happens when the mobile pattern is applied.