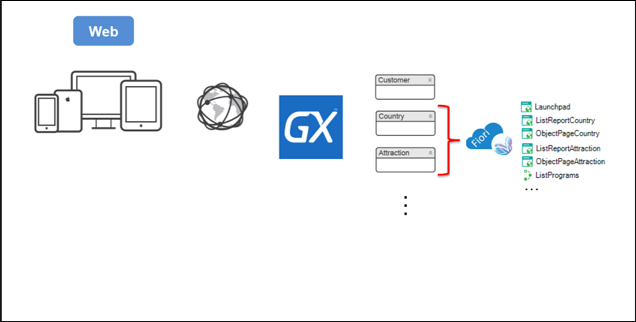
You have been developing a web application for a travel agency. To do so, you have created Transaction objects, applied the Fiori pattern that creates objects as Web Panel, Procedures, etc., and you will continue to work in this way, developing objects until completing the web development.
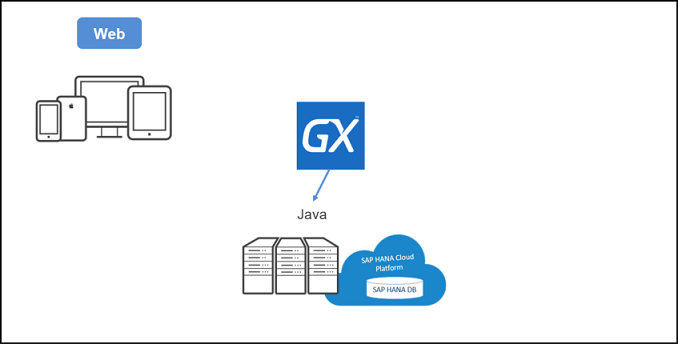
In this case, you have prototyped in a local server that accessed a Hana database through SAP Business Technology Platform. See How to use SAP HANA Database on SAP Business Technology Platform
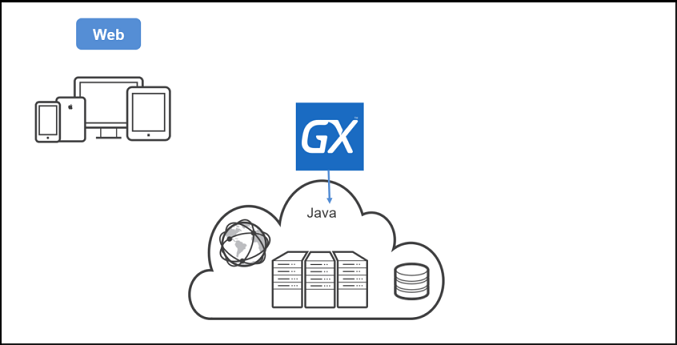
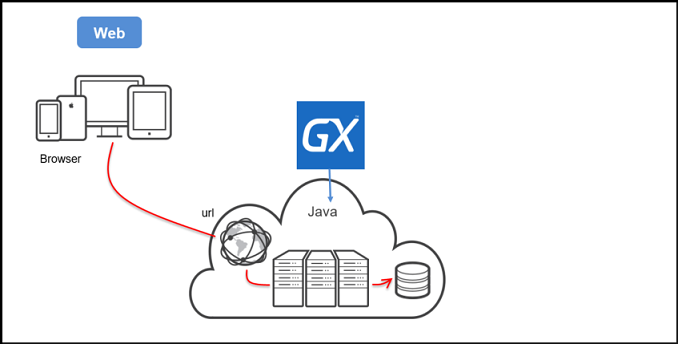
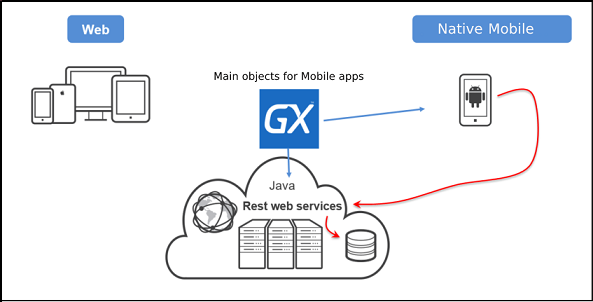
However, when the application is deployed, the programs built by GeneXus in Java will be saved in a server that can be accessed from the web.
Therefore, the end user, with a browser and the URL of some of the app's pages will be able to run the corresponding object (built by GeneXus in Java). If necessary, it will make requests to the database and return the data to the browser so as to build the page with the retrieved data and display it to the user on the device screen.
How is an application similar to the web application but native for Android and/or Apple devices obtained?
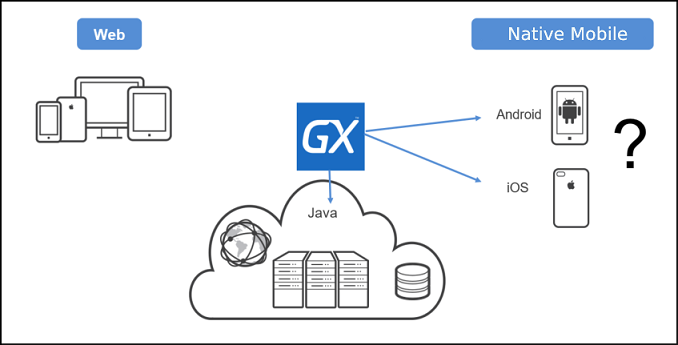
This will be done by developing some specific GeneXus objects for mobile that will be compiled from a main object. GeneXus will compile that main object in Java for Android if the application is built for that platform, and in Swift for Apple if necessary. What is more, for these native apps to be able to access the data stored in the centralized database, one part of the web app (Java) is exposed as Rest services.
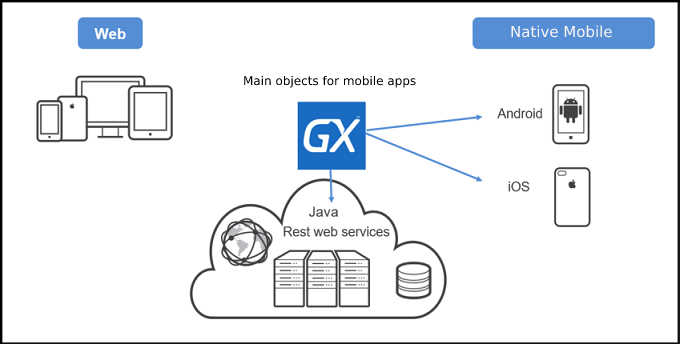
Therefore, when the Android or Apple app needs data from the database, it will have to consume the corresponding Rest services. You doesn't need to worry about this, because it is hidden inside the logic of the GeneXus objects for mobile.
See this with an example:
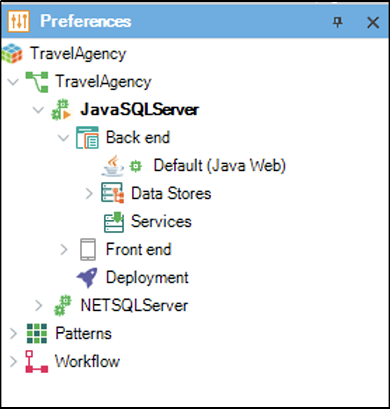
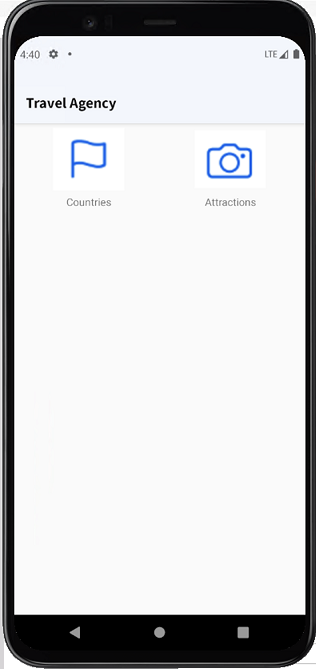
To review what has been done in the web application, there's the app's home object –the Launchpad, which is a sort of menu.
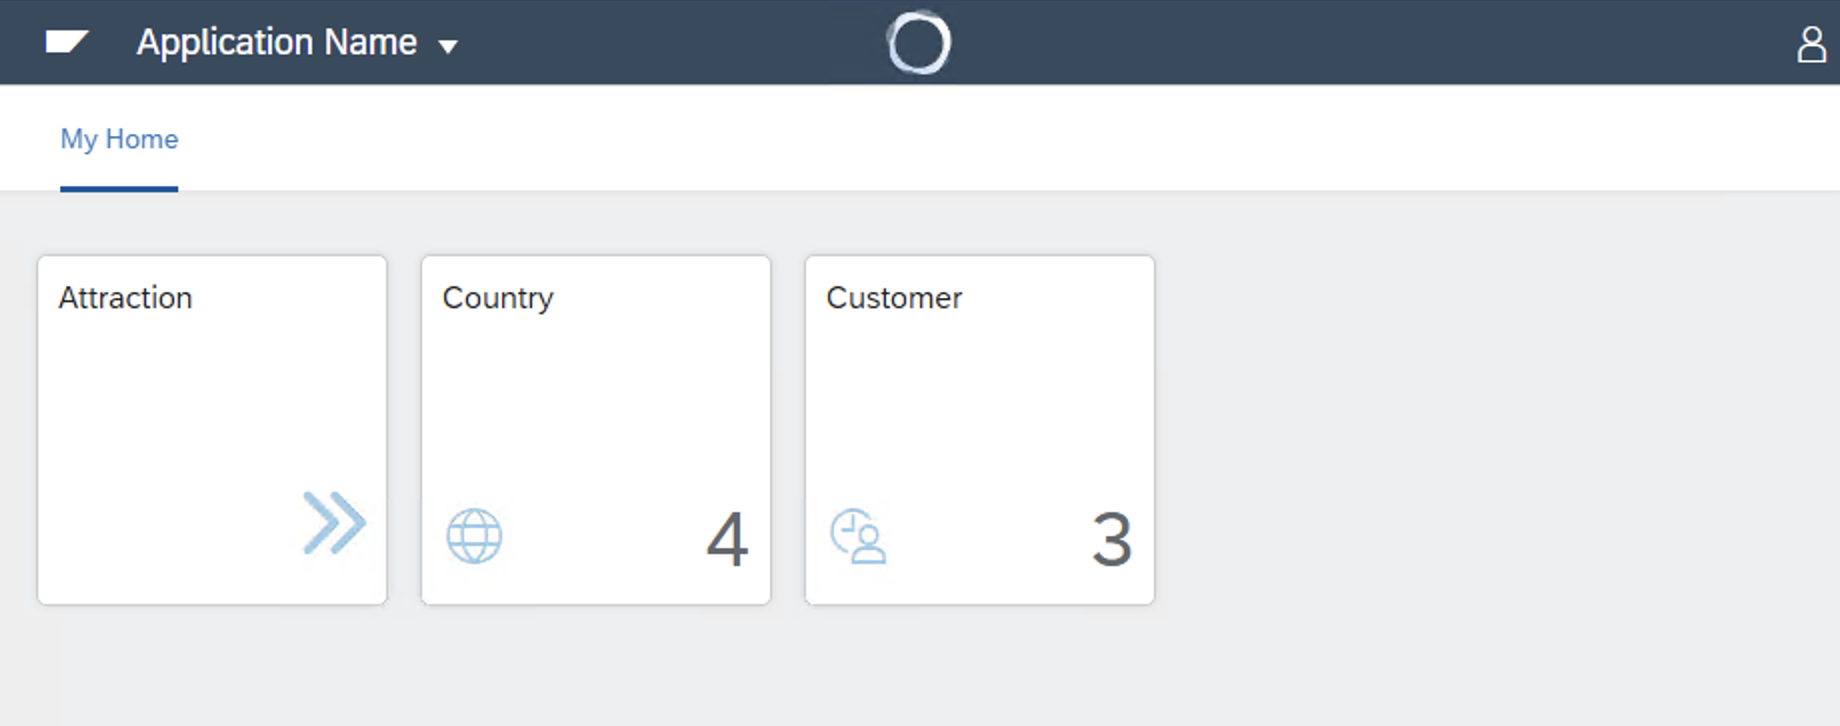
From this object, various lists (the Fiori List Report of countries and attractions) are invoked. The invocation to a Transaction called Customer has also been explicitly added. That's left aside here as something similar, but for mobile, is required.
To do so, first, the equivalent pattern to the Fiori List Report of the selected Transactions needs to be applied.
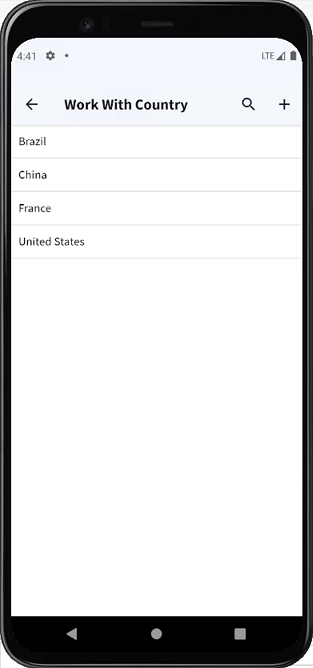
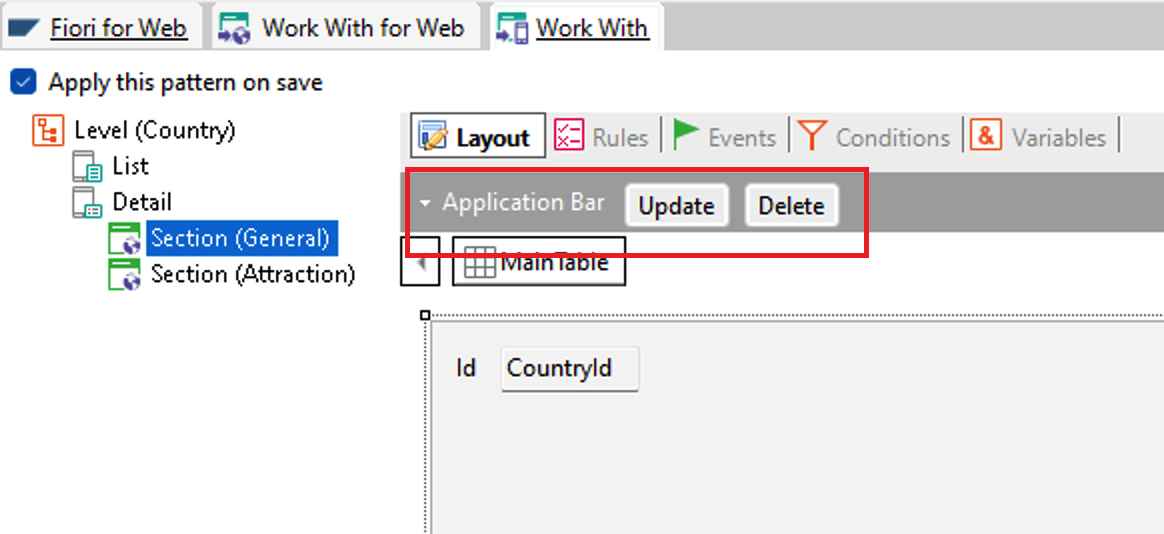
Open the Patterns section of the Country Transaction and then select the Work With tab.
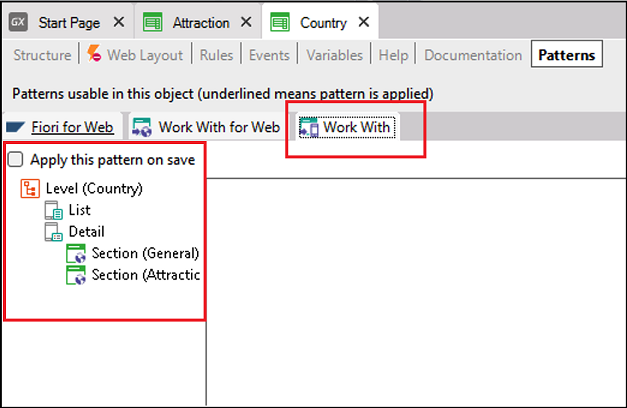
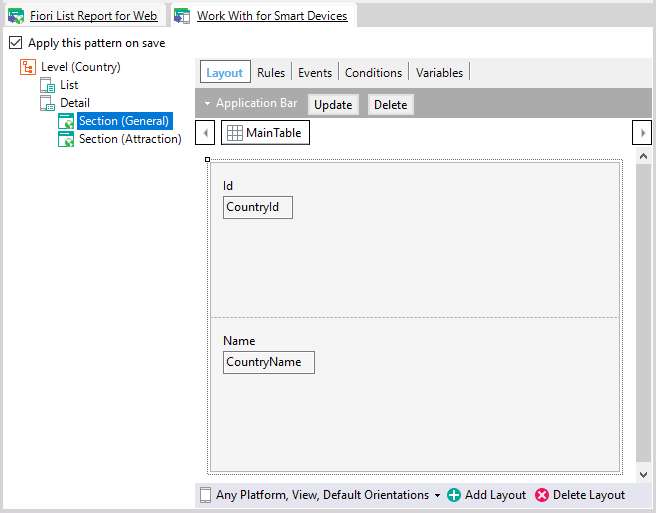
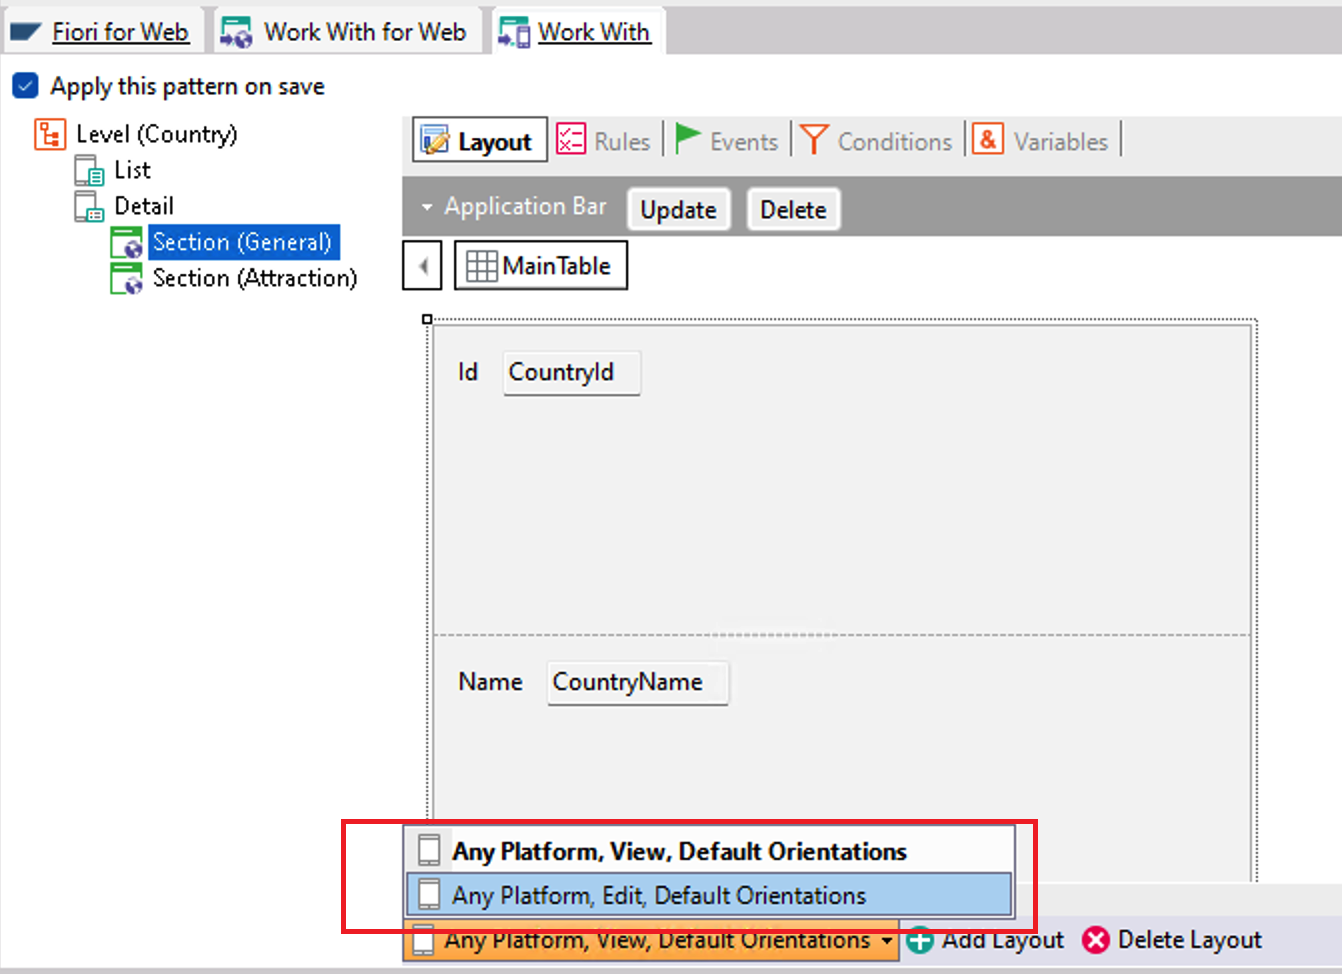
The two screens that will be generated are clearly seen: one for the countries List and another one with detailed information about a country, with their two tabs displayed as “sections”.
The great difference is that here, these nodes will correspond directly to the objects generated and will not be “declared” by you so as to have them implemented by GeneXus later. Instead, they will be directly implemented. So, if you click on the List node:
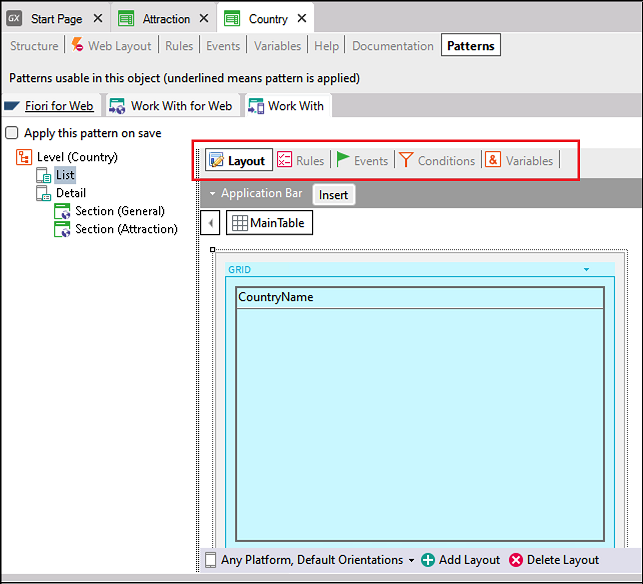
Here is its Layout, which has been initialized and has a grid that will show the value of the CountryName attribute of each country to be loaded from the database.
In addition, sections such as Rules, Events, etc. are enabled to define rules, events and other aspects of this object. That is to say, the sections that allow for its implementation are displayed.
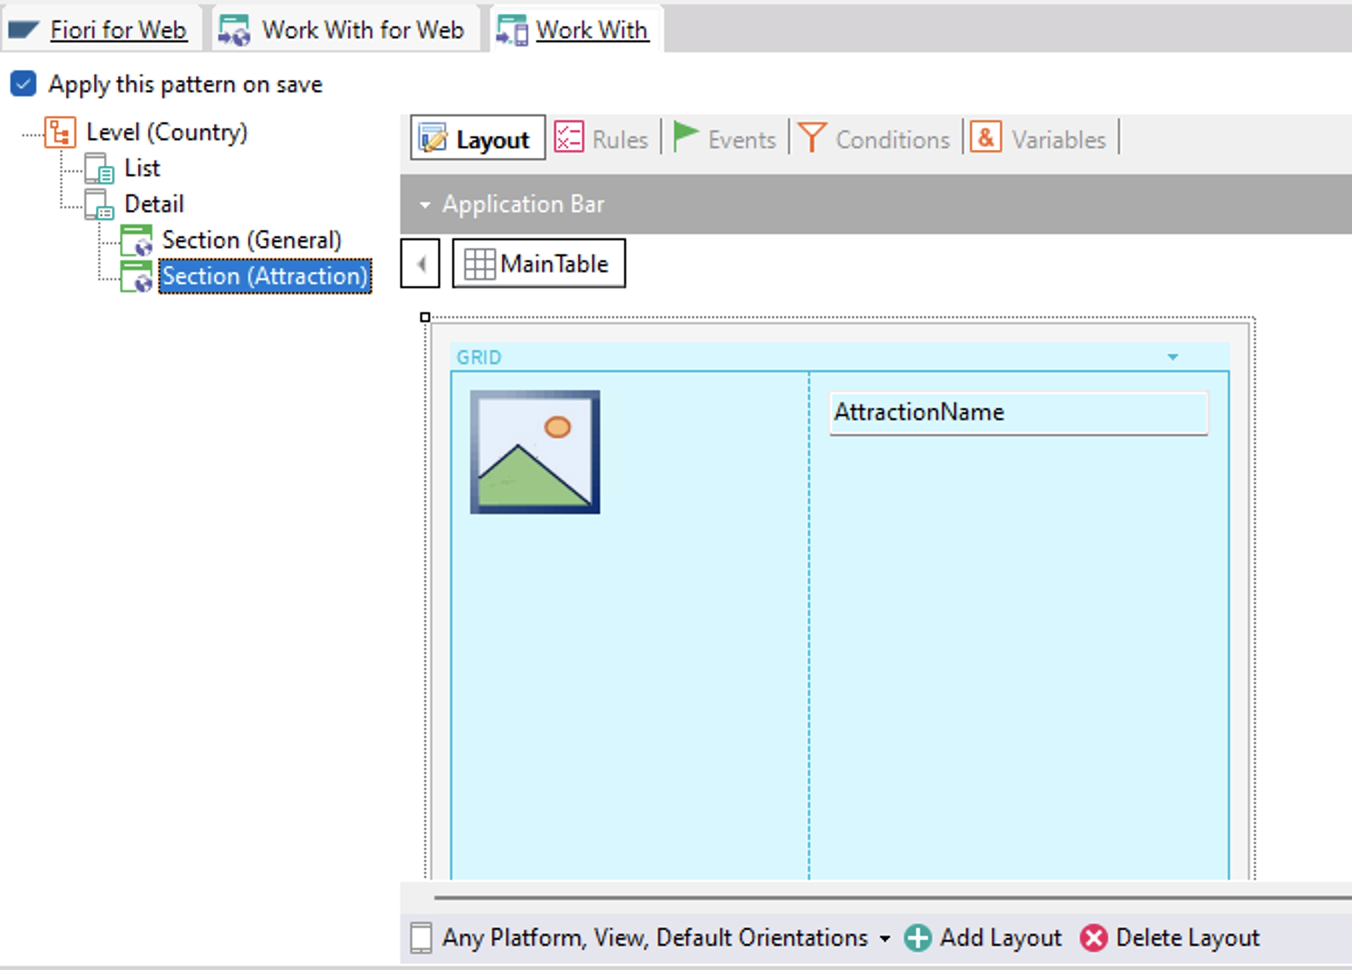
Moreover, if the Detail is opened:
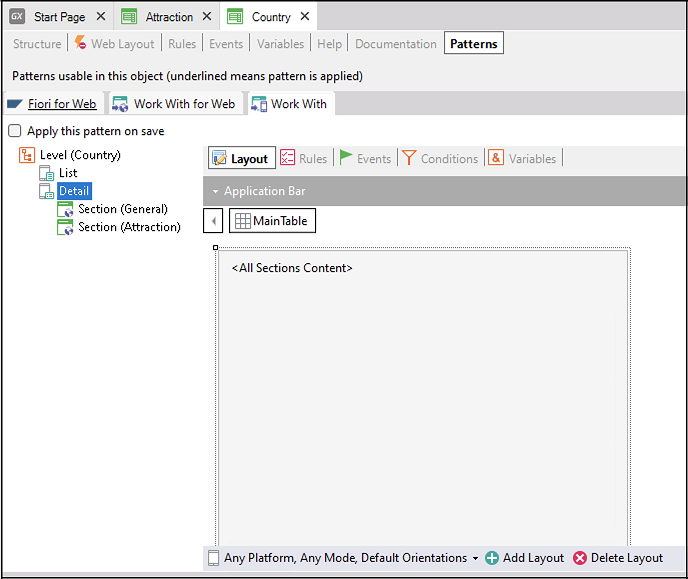
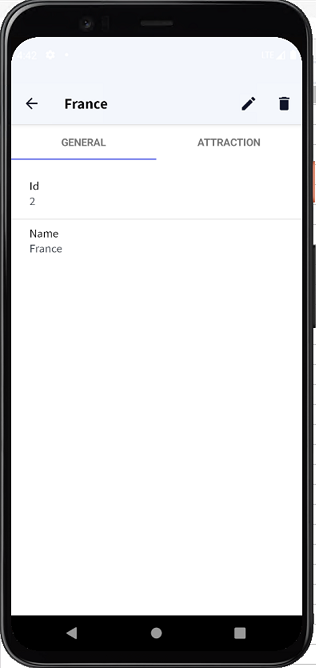
You can see that the screen object only contains a control called <All Sections Content>. All the sections contained in this Detail will be loaded in this control. Here, there are two of them: one that shows the country's general information:
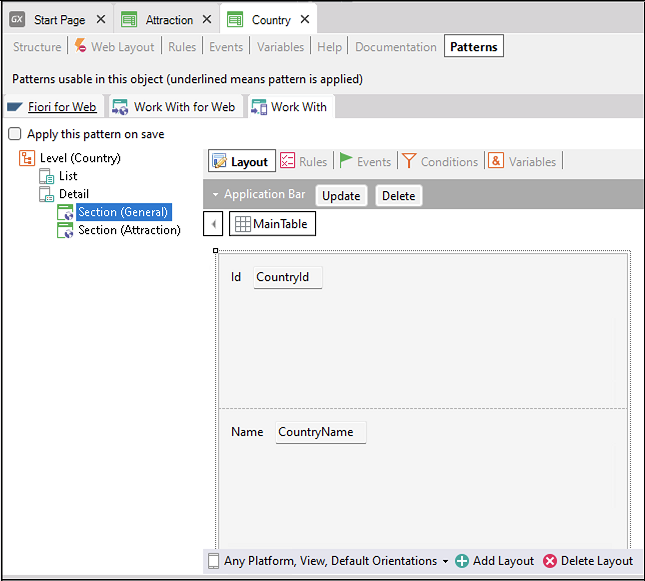
Here, the attributes CountryId and CountryName are shown.
And the other one shows the country's attractions in a grid:
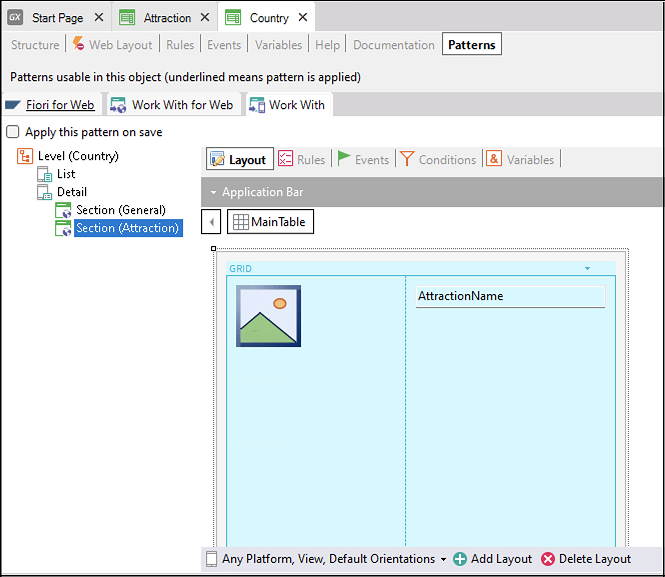
The attributes AttractionPhoto and AttractionName have been placed here.
It will be clearer when you run it.
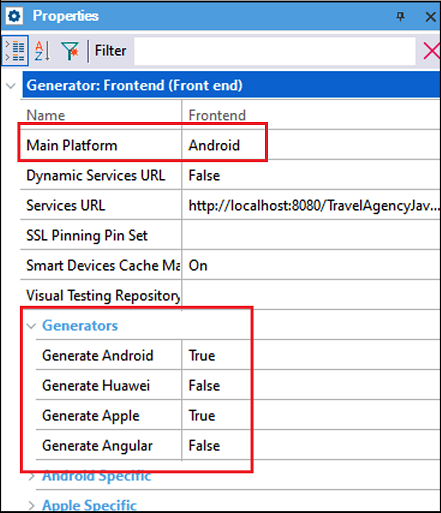
Select the check box to apply this pattern; before saving, take a look at the generators (of programs) that you have defined. So far, only one: for Web Java.
Now, save.
For the frontend Android and Apple has been automatically added.
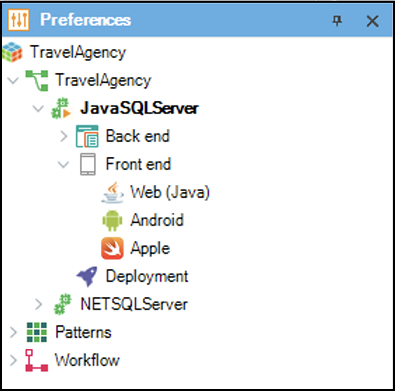
By default, it will generate for Android and Apple, but Android will be the main platform:
Note that below the Country node, the object WorkWithDevicesCountry is now displayed:
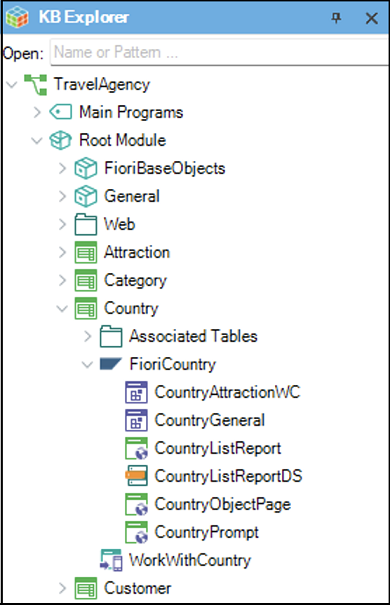
Unlike the web example, in which FioriCountry was only a declaration file and the objects that effectively implement the pattern features were built separately (they are listed below), in this case, it is a GeneXus object that will contain sub-objects that can be invoked independently using the corresponding syntax.
Apply the pattern to the Attraction Transaction and to Category.
How can you test this quickly? One option is to use a device connected to the computer in which GeneXus is running. Another option is to use the emulators provided by the platforms. For simplicity purposes, use this option (testing on an actual device will always be better because the emulators don't have all their features available).
It is missing a menu —in the web environment you had the Launchpad— to invoke the Lists you are interested in. This menu is not automatically created by GeneXus. You need to create it.
File > New > Object, filter by the objects for User Interface, and select the Menu, which is an object to implement menus. Call it TravelAgency:
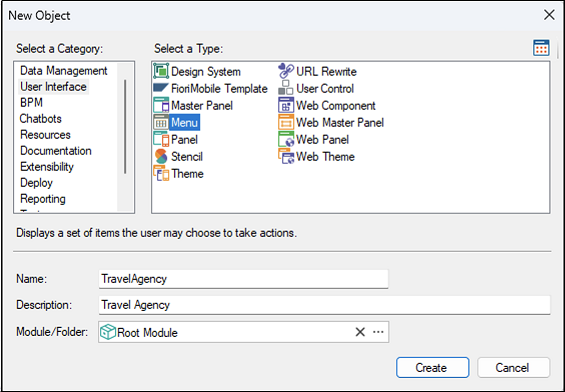
This will be the main object of the application for mobile devices. It will be the object compiled by GeneXus for Android and/or Apple and that the end user will install on his/her device, once the development work has been completed.
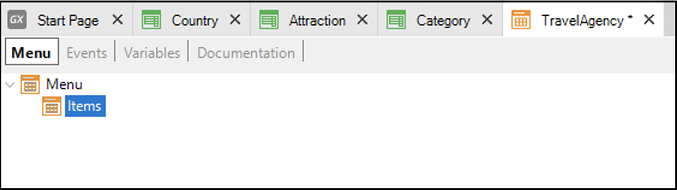
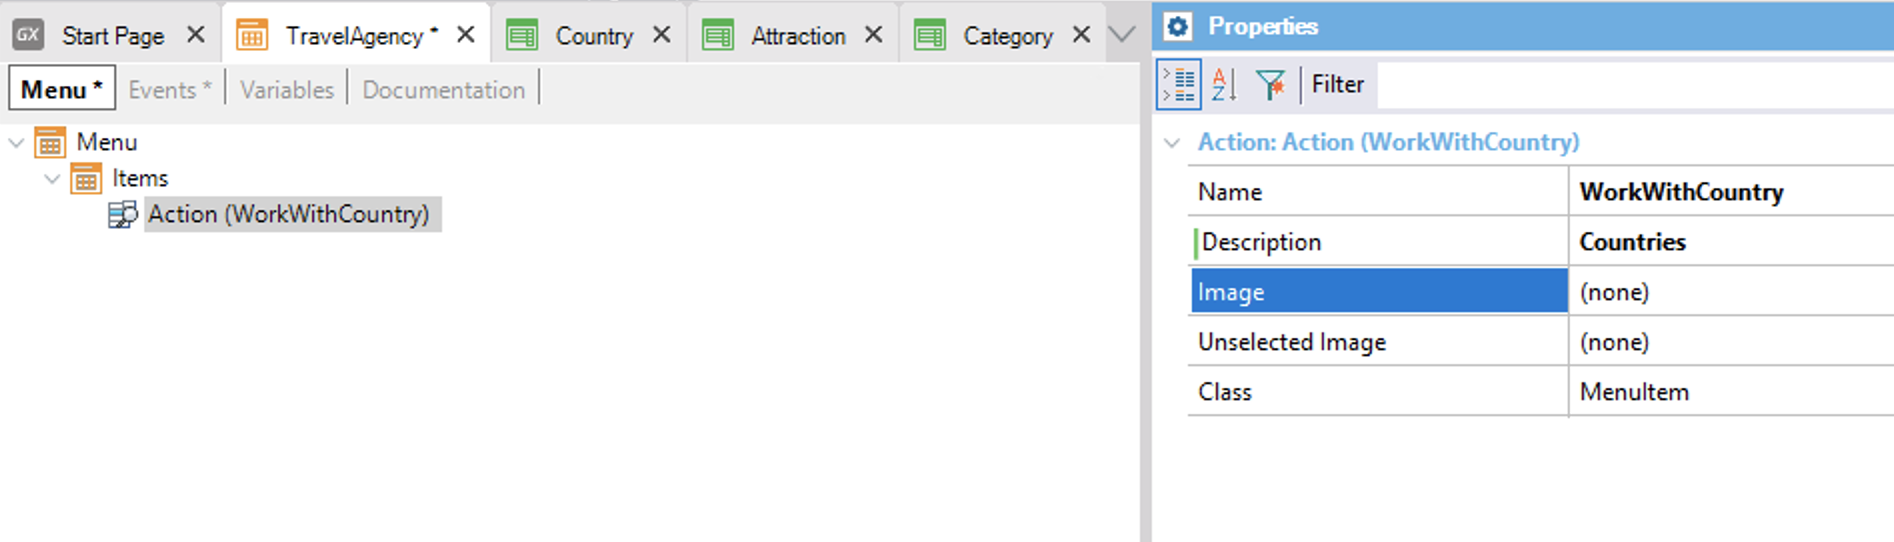
Enter the items you want to include in the menu:
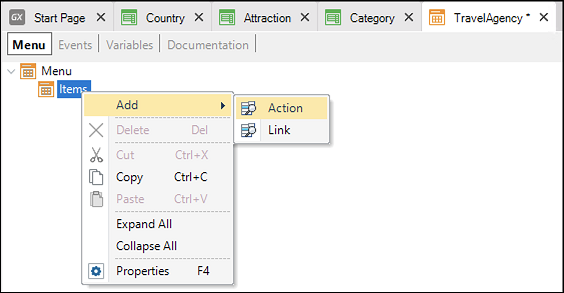
The first one will correspond to the action of invoking the List of countries:
A window is opened to select the object you want to invoke when the user selects this menu item. Filter by object type Work With:
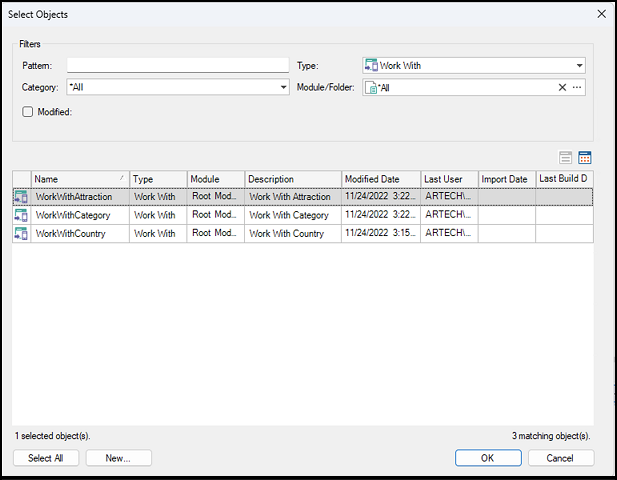
Select WorkWithCountry.
Now see this action, which by default receives the same name as the object invoked. This action —double-click— will be associated with an event that programs the invocation:
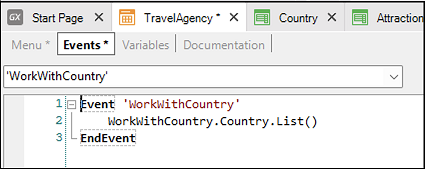
There, the List of the WorkWithCountry object is being invoked (not the Detail).
Open the action's properties and change the item Description, which will be displayed in the menu at runtime:
Bearing in mind that mobile apps tend to be much more iconographic than web apps due to the reduced screen size, choose an image for this option. The image must be imported into the Knowledge Base from an external file. Now, add an item to invoke the attractions List.
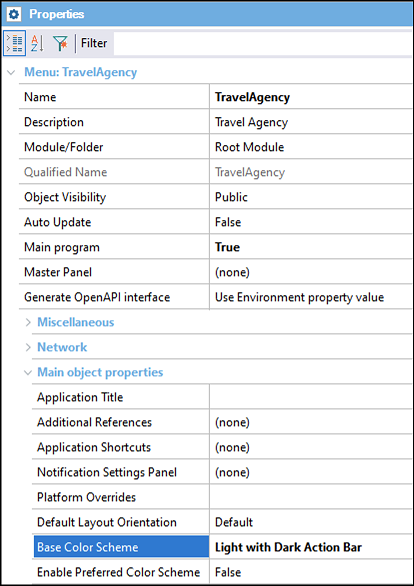
Before running it, replace the Android property, “Base Cholor Scheme”, with 'Light with Dark action bar' so that the screen background is white with a dark “Action Bar”:
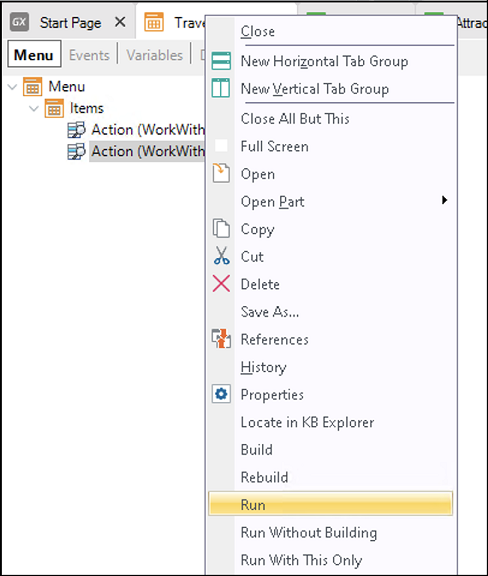
To run it, right-click on its tab and select Run:
To prototype this mobile application in Android please check Android Requirements.
If you have an emulator installed with the Android Studio, the compiled file will be automatically installed there and will be run.
Otherwise, the default emulator of Android's SDK will be opened and the same will happen.
So, here you can see the menu running with the two items defined with their images and descriptions:
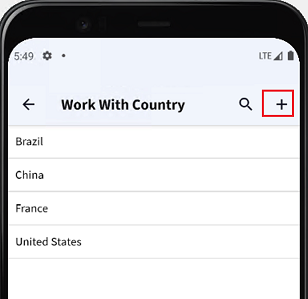
Tapping on “Countries” displays the List of countries, which shows each country's name in a grid:
As it was implemented, if a country is tapped:
its details are shown with two tabs: the general information in one (which is implemented here):
and the country's attractions in the other one:
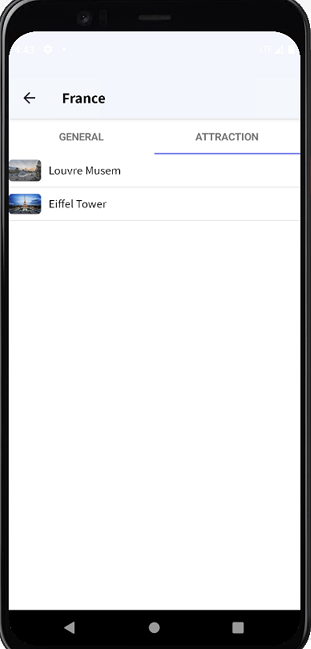
The attractions' photo and name is seen, as implemented here:
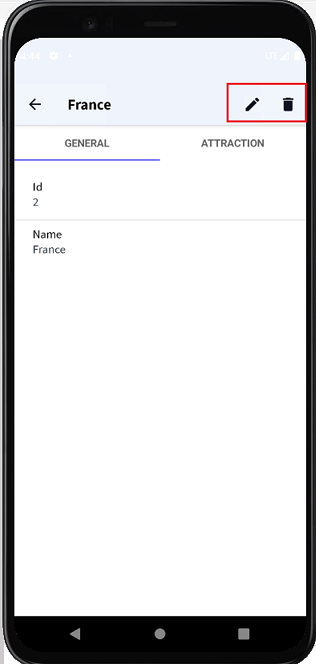
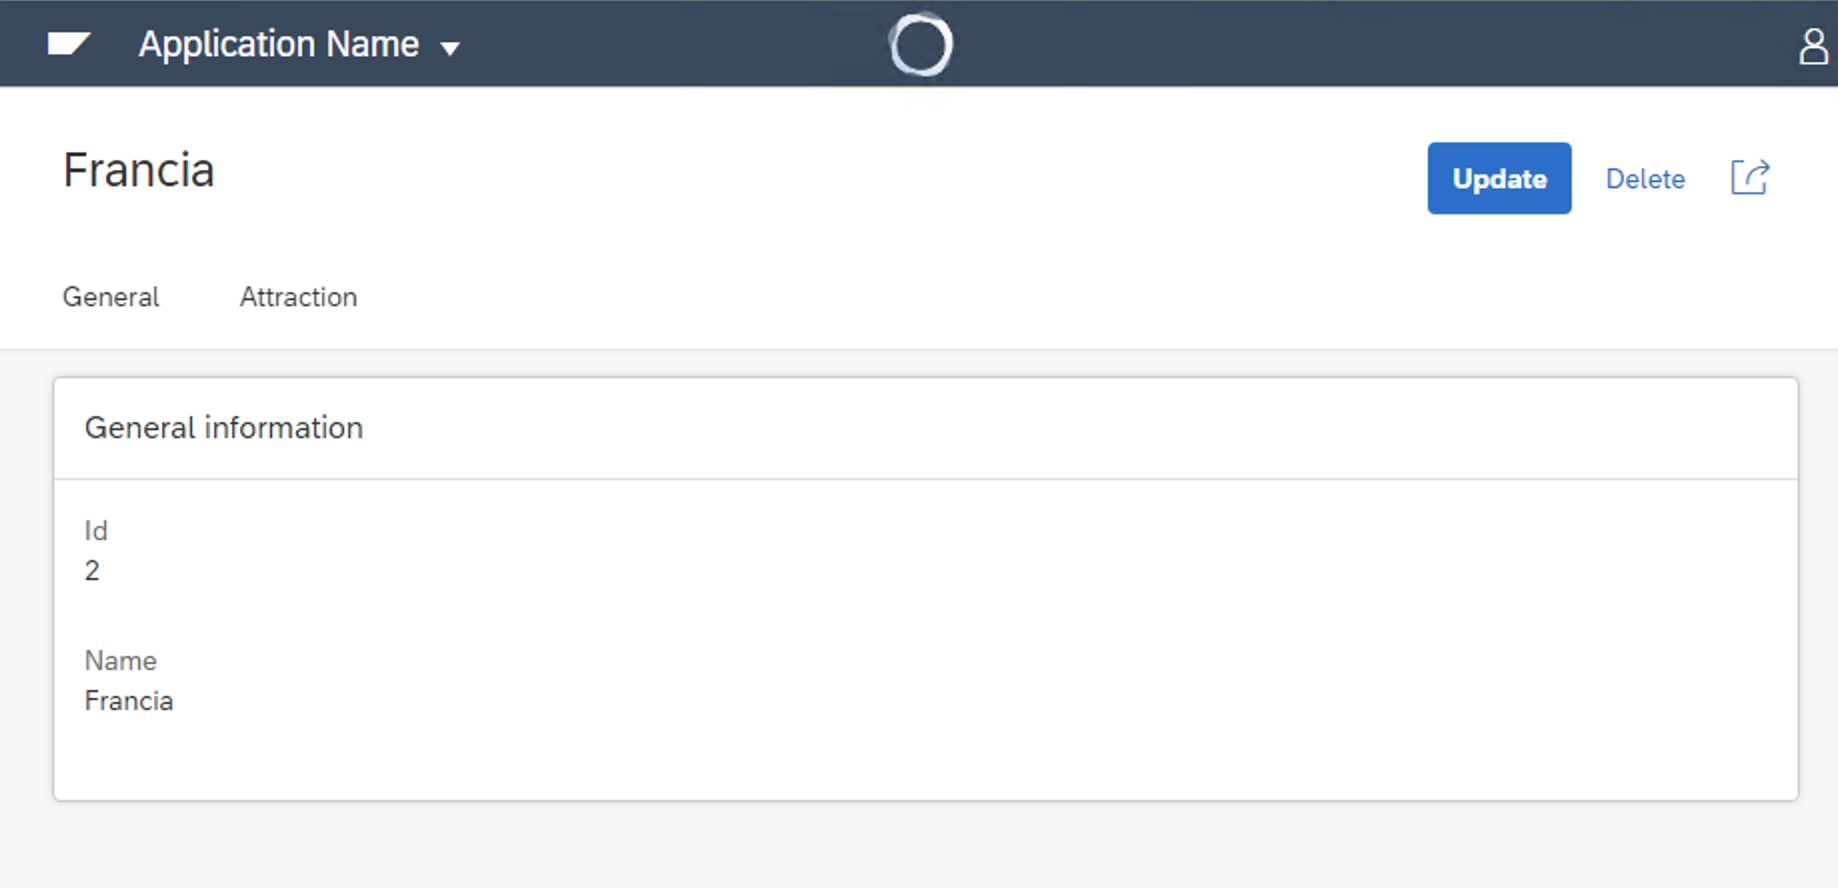
Note that you can change or delete the country's information from the General tab:
Change the name:
Confirm.
The object that updated the database was one of the Rest services mentioned at the beginning.
If you run the web application again and refresh the page:
Here it is!
The country's update and delete buttons are displayed here in the WorkWith, in the application bar area:
But, while in the web pattern the Transaction was invoked when trying to update or delete:

(For example, here it is invoked in UPDATE mode:
and what you're viewing is the Transaction form)
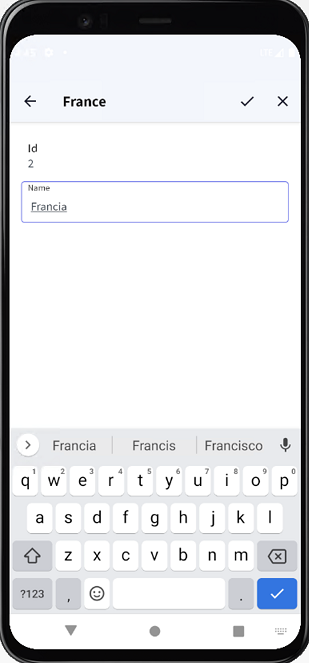
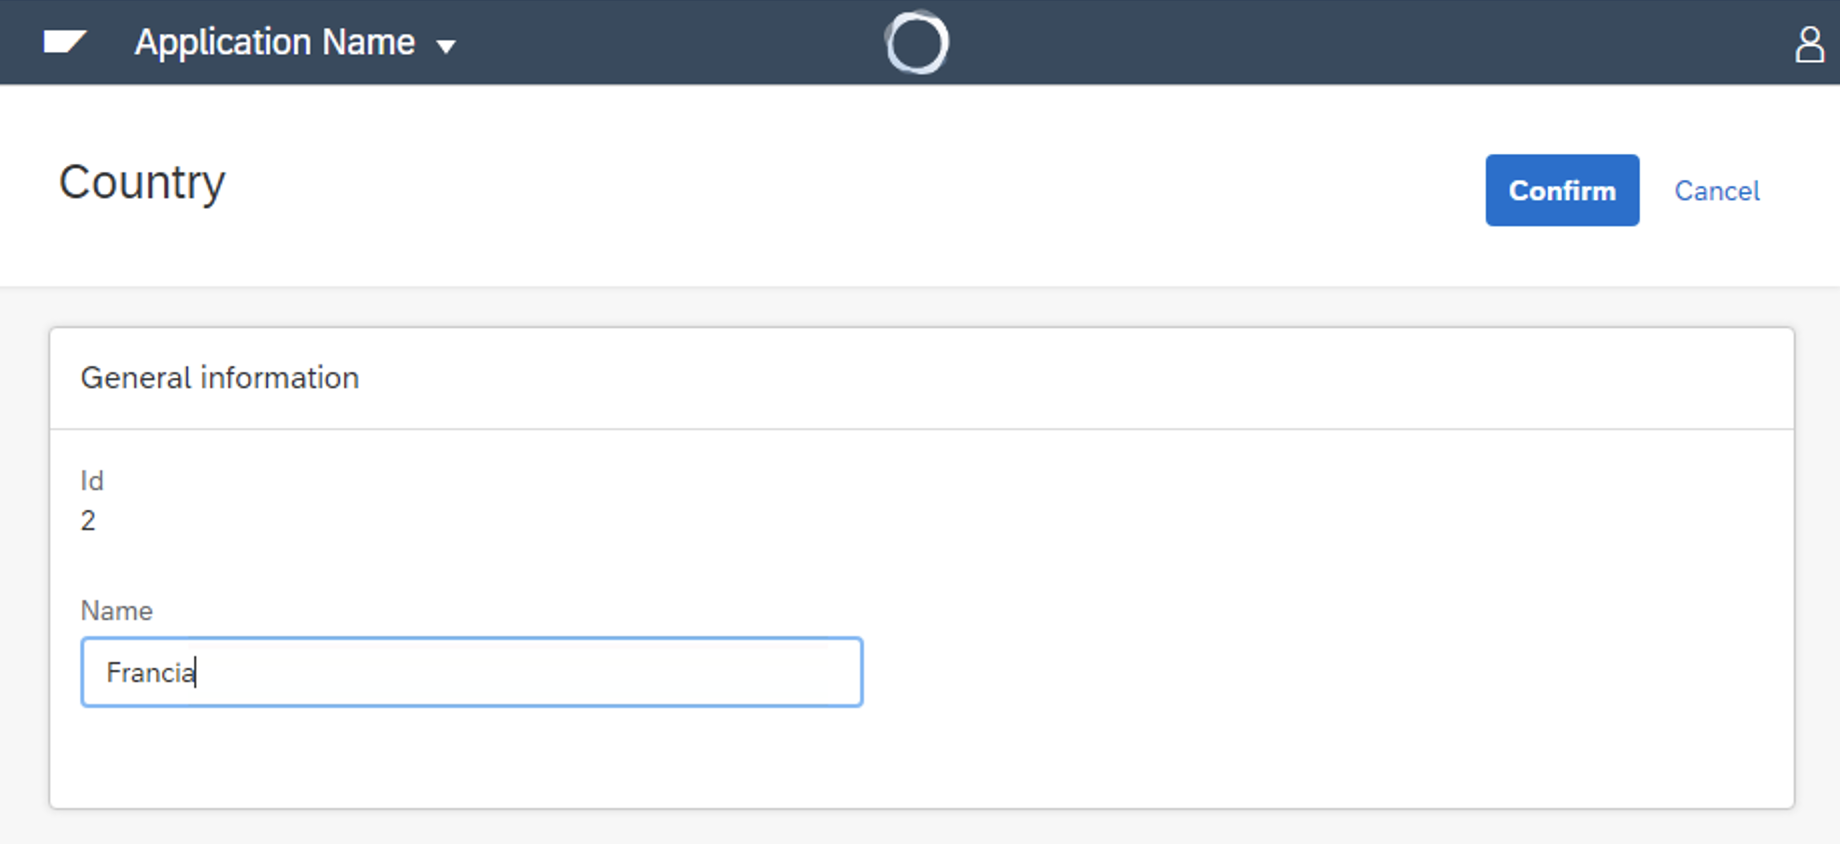
In native mobile applications the same Detail is opened but with another screen: the edit screen:
It looks exactly the same when initialized, except for the Save and Cancel buttons in the Application bar:
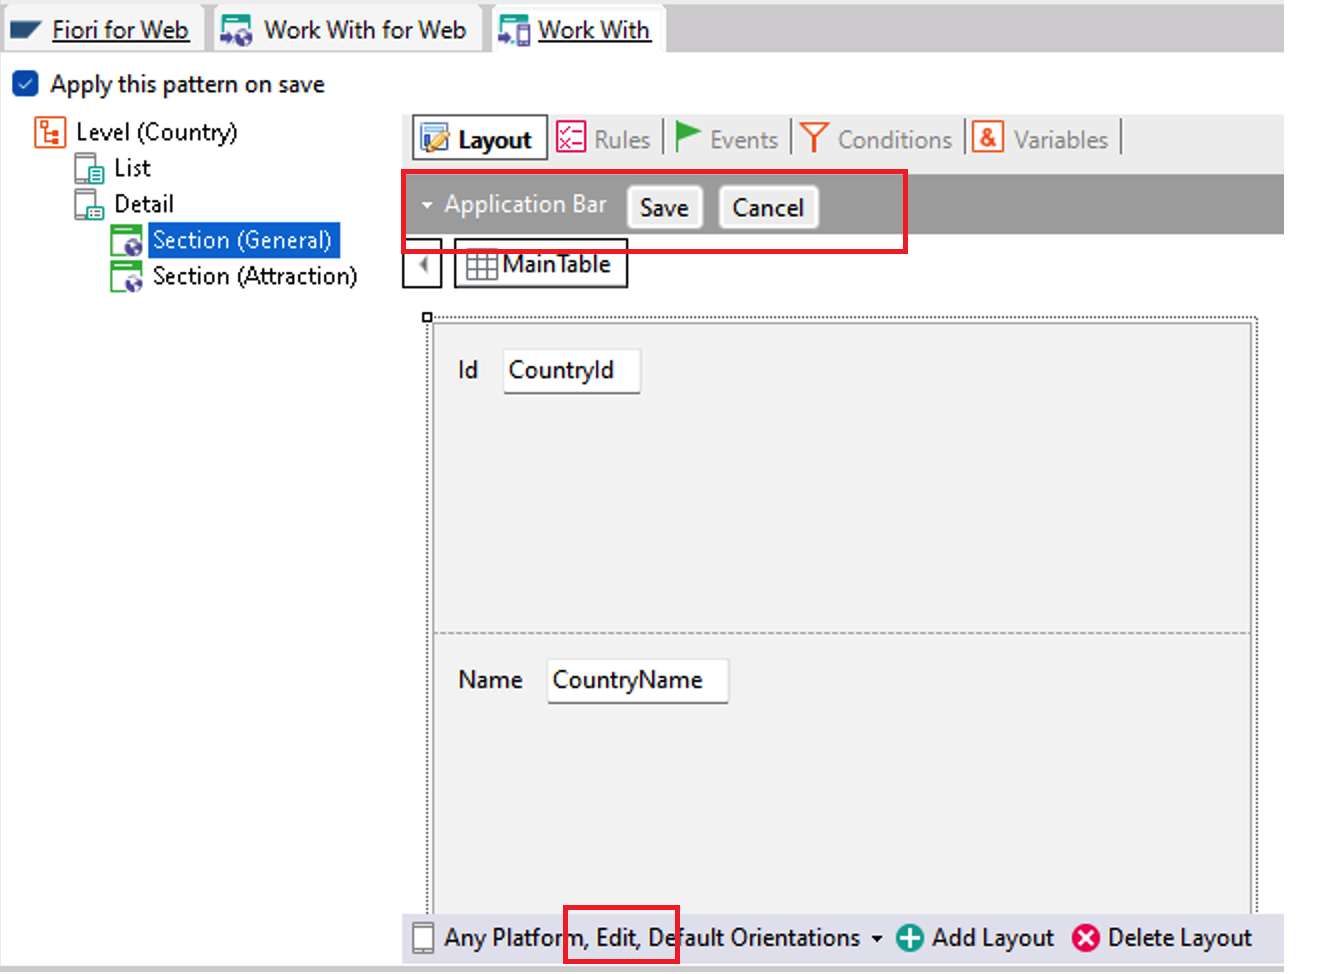

When the user clicks on the Save button, the device app will invoke, sending the data from this screen, the Rest service in the web server containing the Transaction logic, and therefore will update the information on the database. All this is done in a transparent manner, you will not have to worry about these low-level details.
Just like for the web pattern, if you return to the List, you will see that it is possible to add a new country:
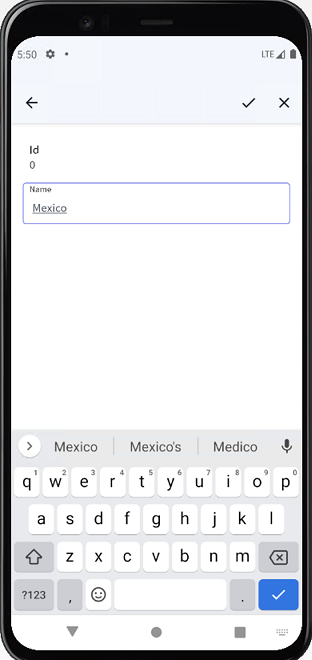
Here, the same screen is invoked for the Detail and for the Update.
Add Mexico:
This is what the pattern generates by default. It can be customized, though.
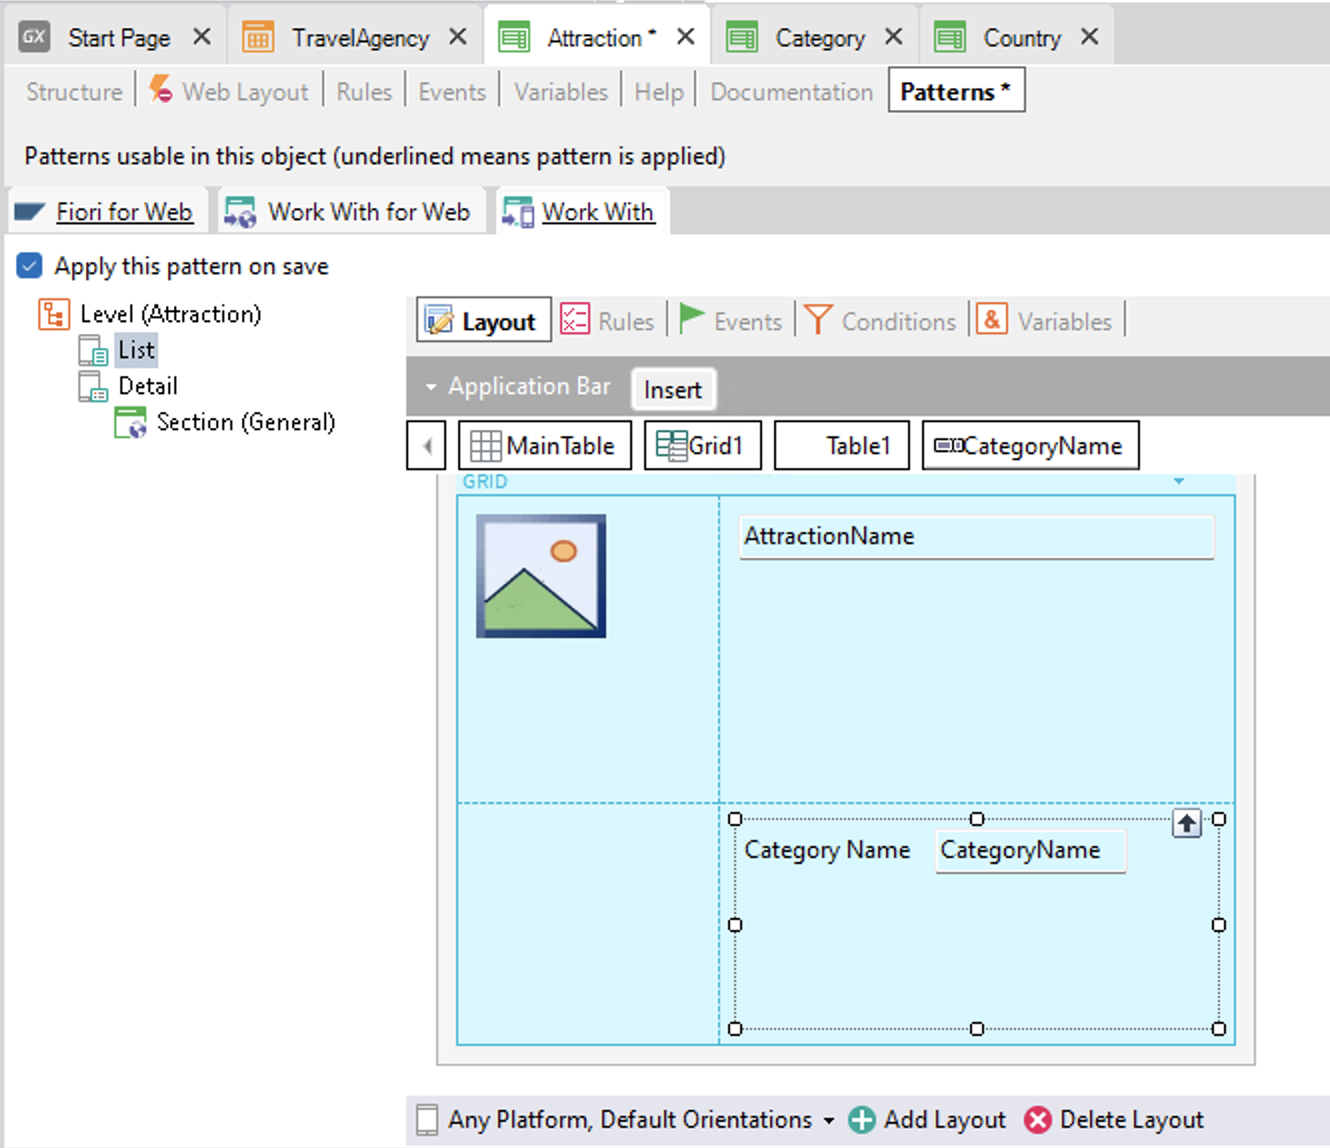
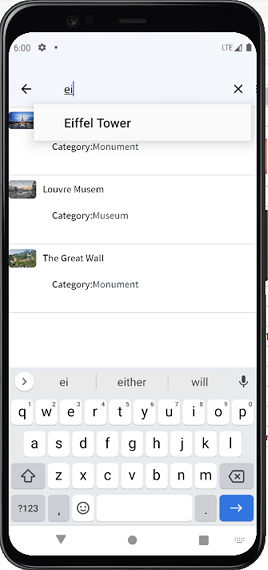
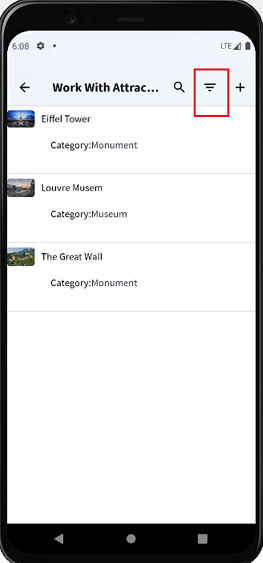
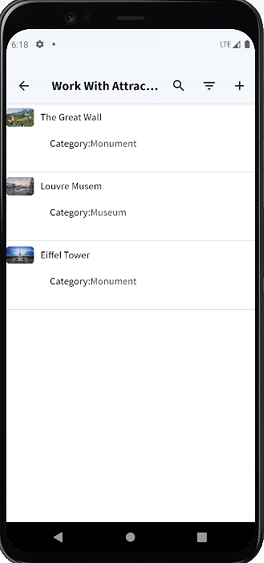
If you open the Attractions List:
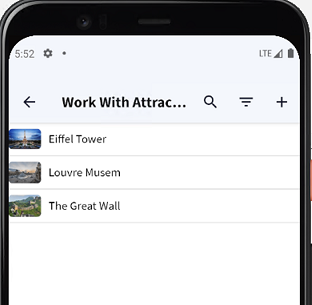
The attraction's image and name are displayed in the grid. You may also want to add the attraction's category.
To do so, open the toolbox, drag the Attribute/Variable control, and select the CategoryName attribute:
Change the Label Caption property:
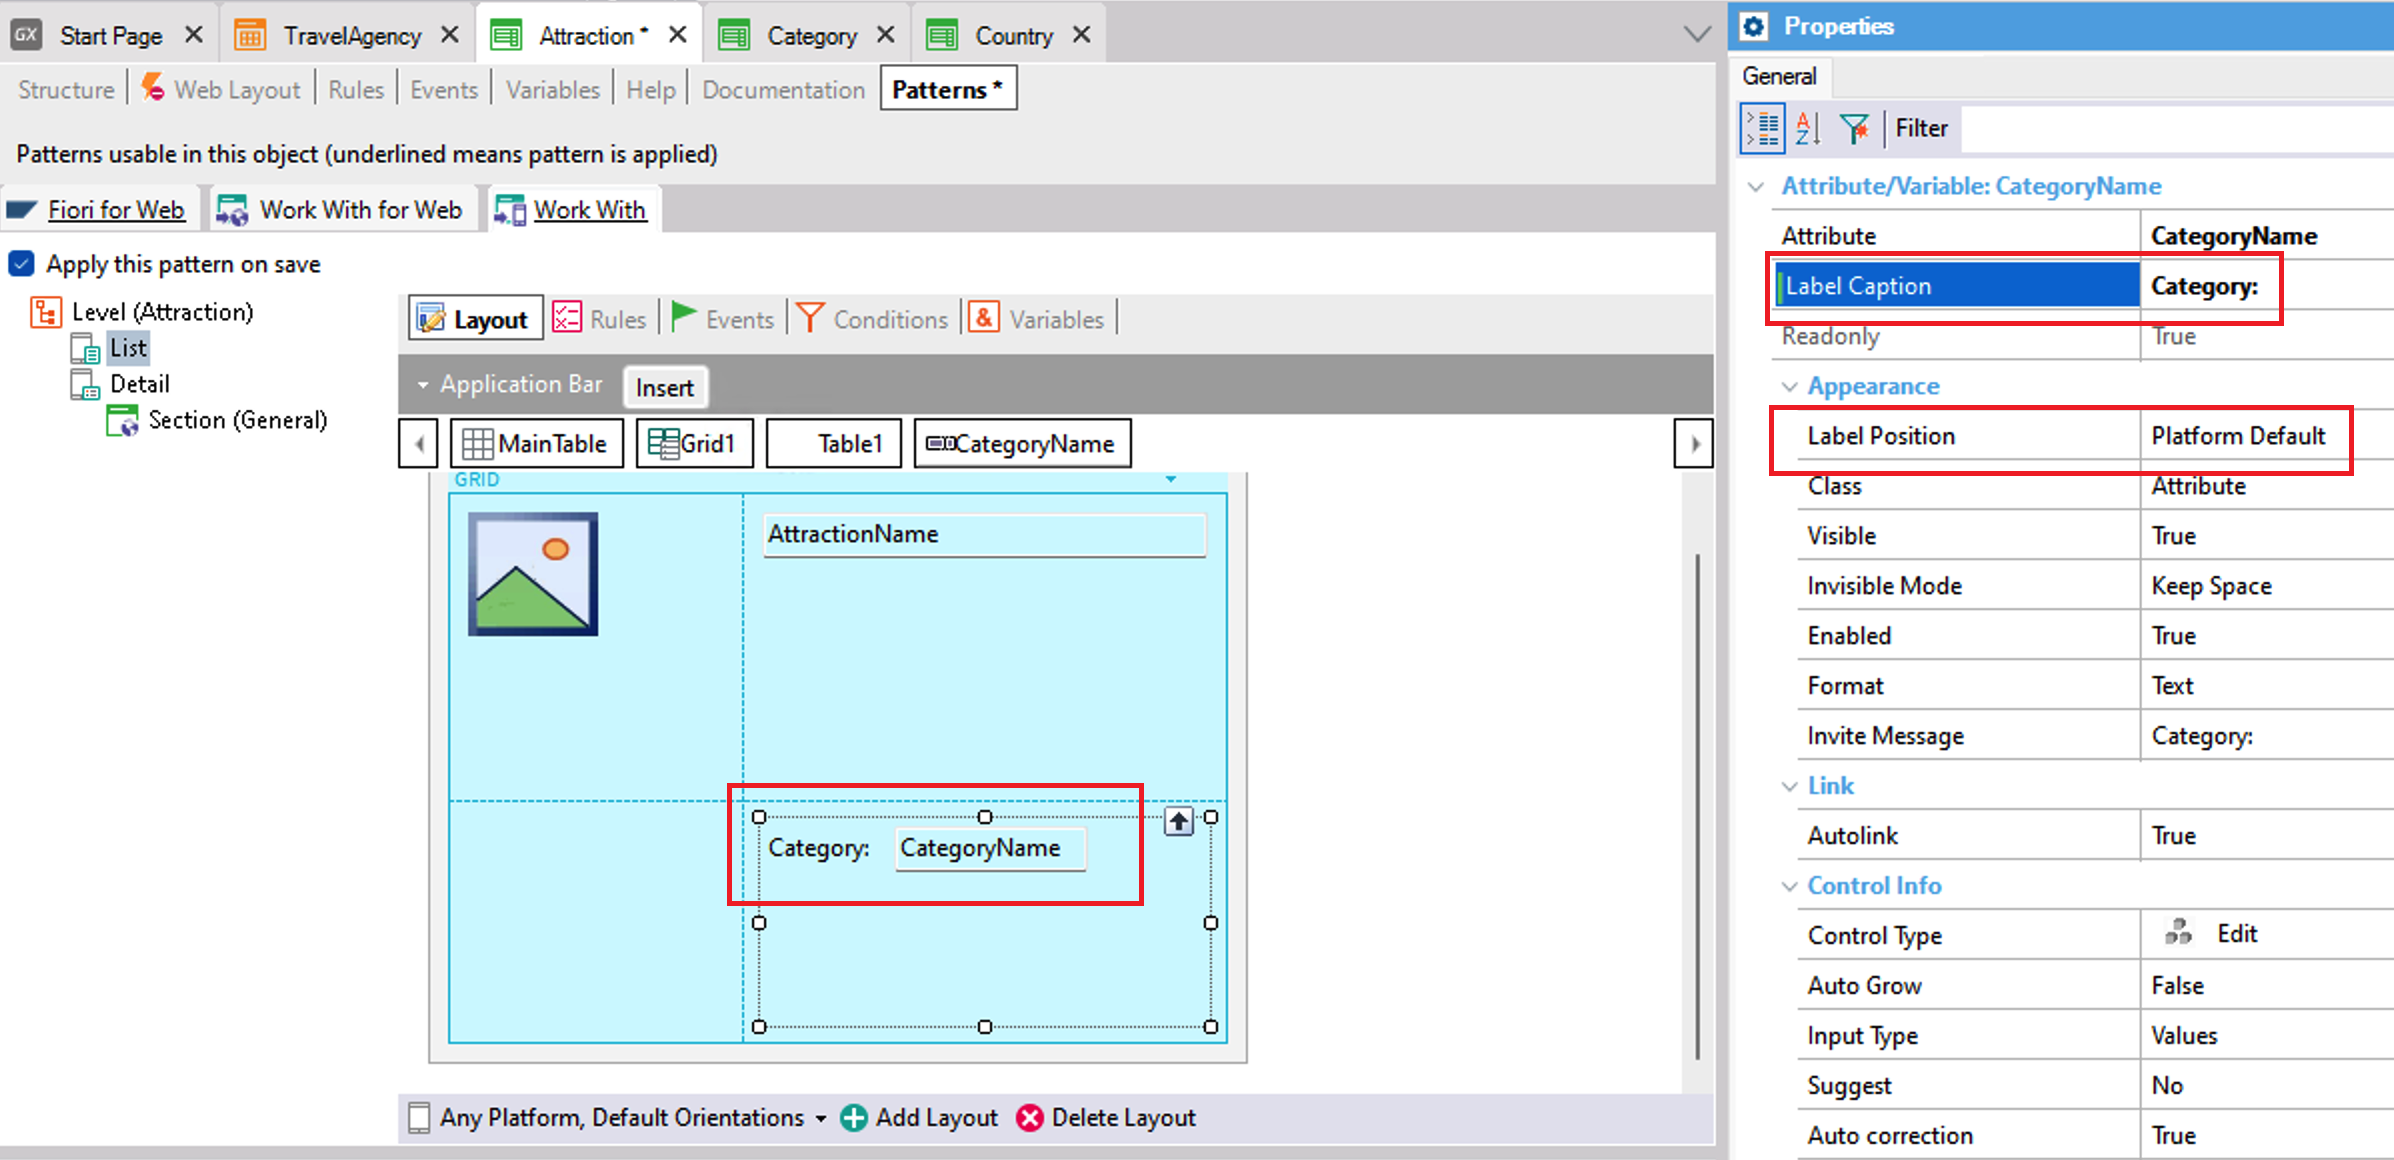
It could be deleted with Label position None.
Select Run, over the main object.

Note that by default the option to make searches by attraction name is offered:
This is configured in the grid's properties, here:
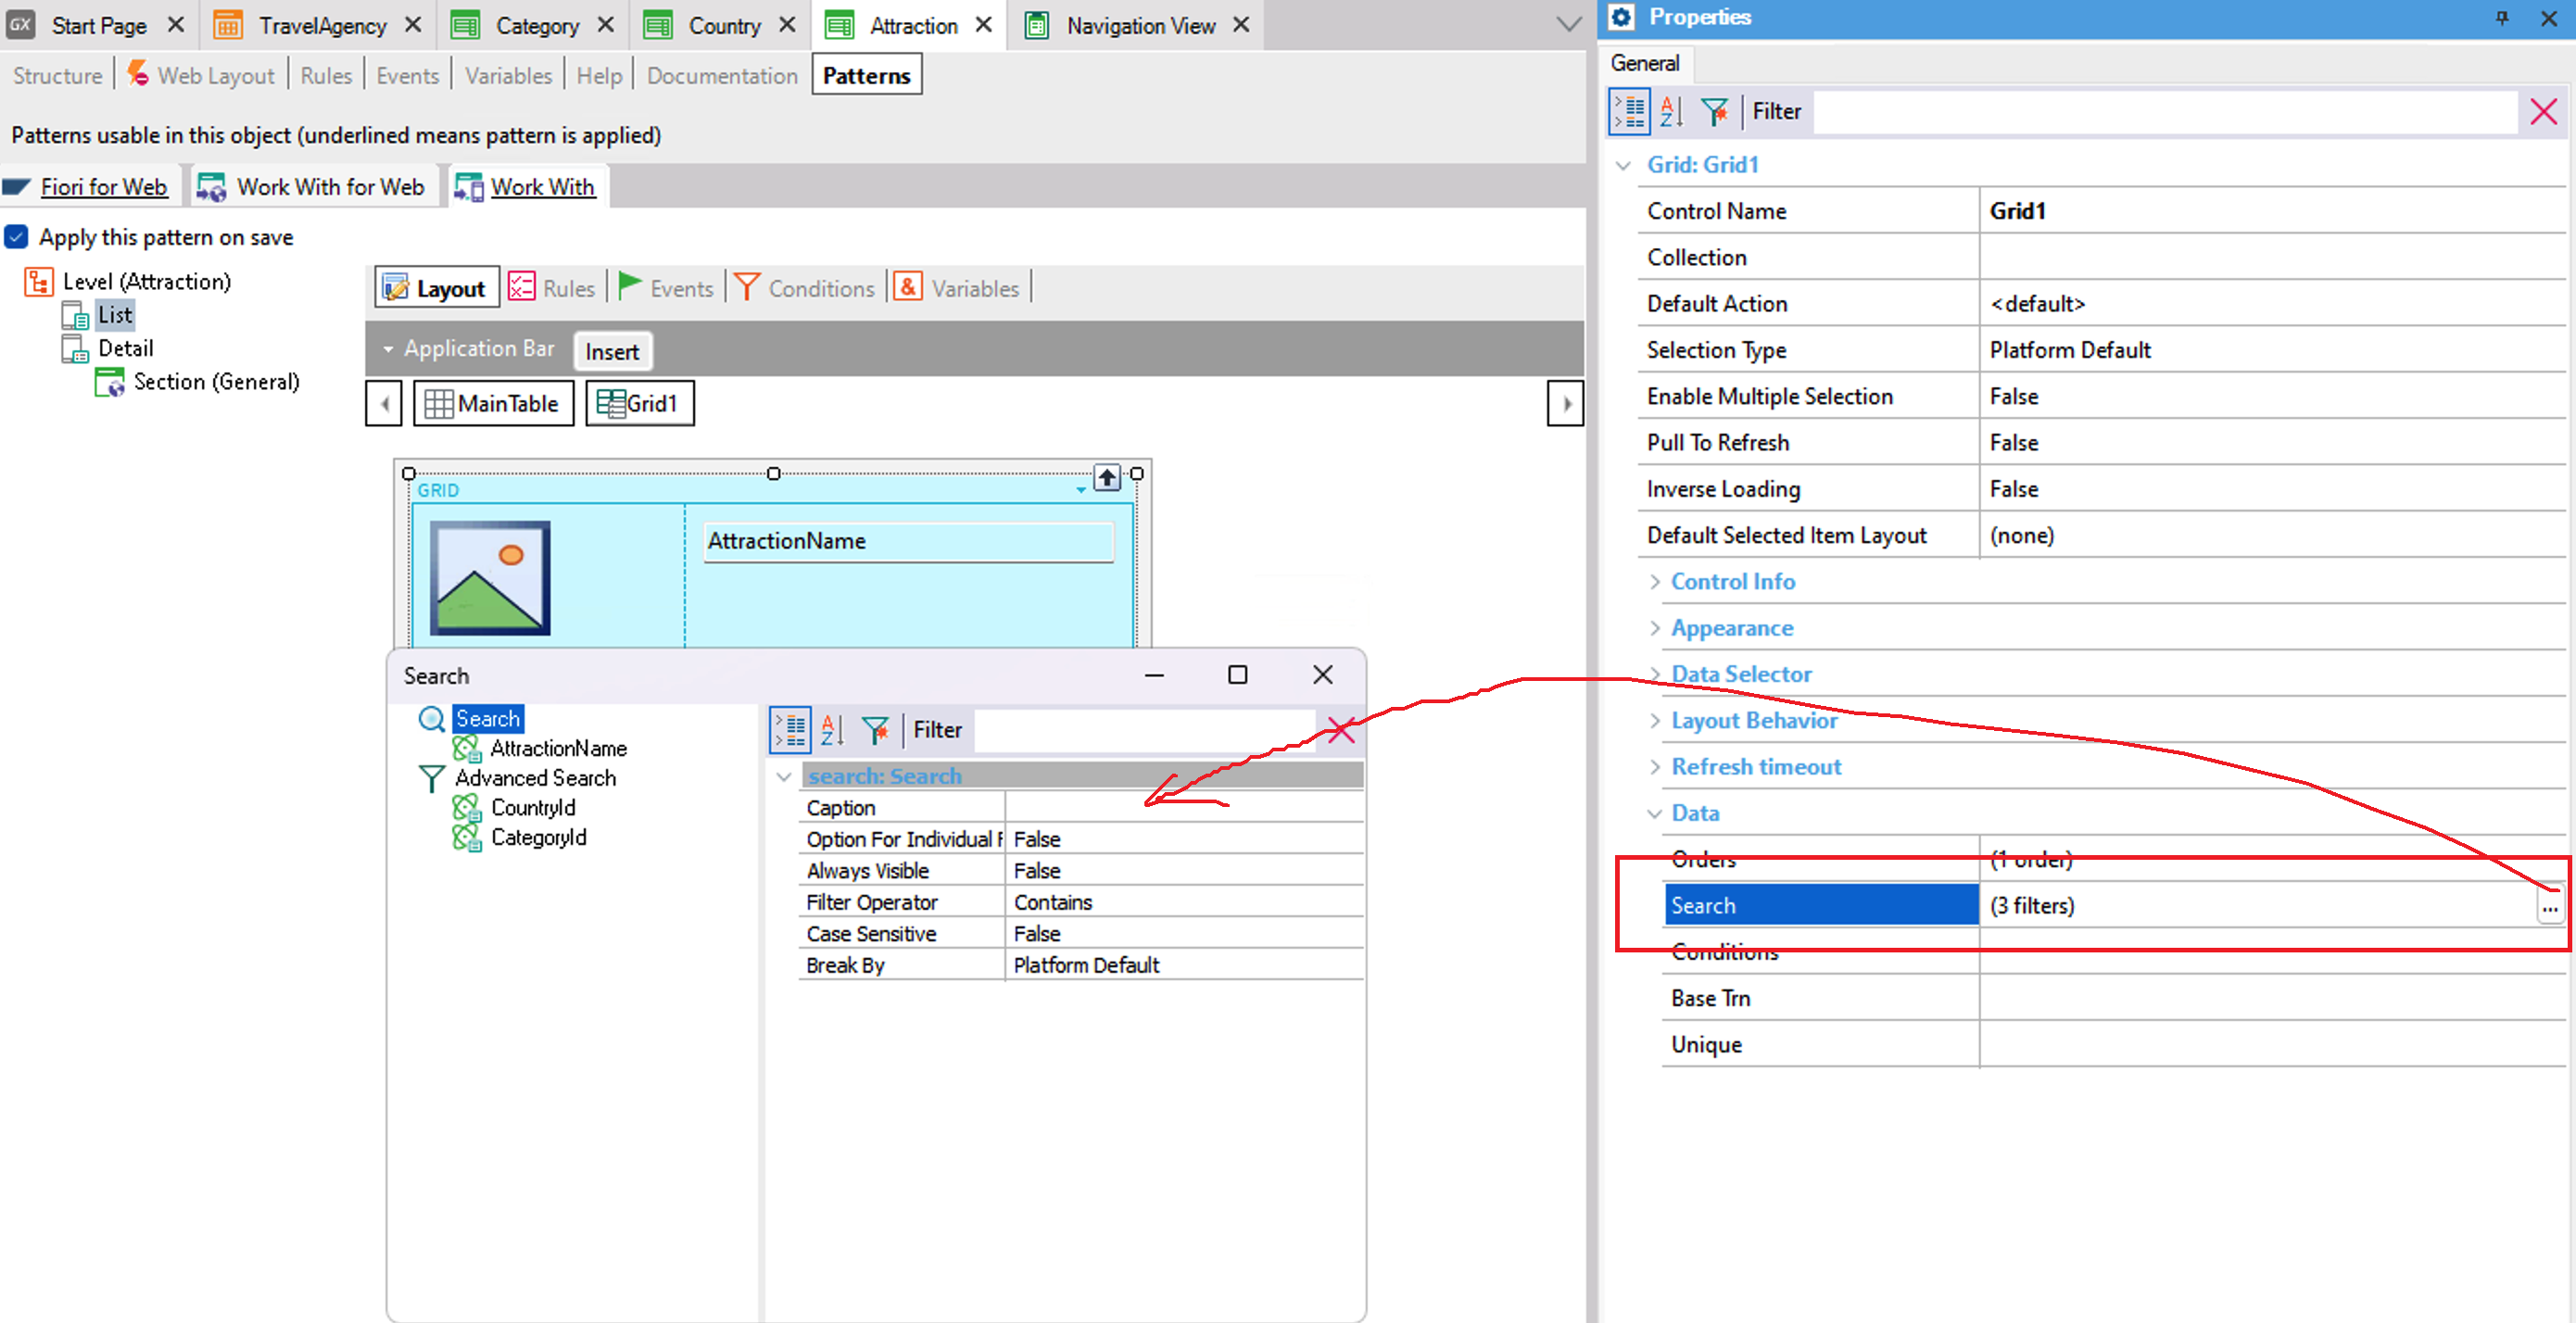
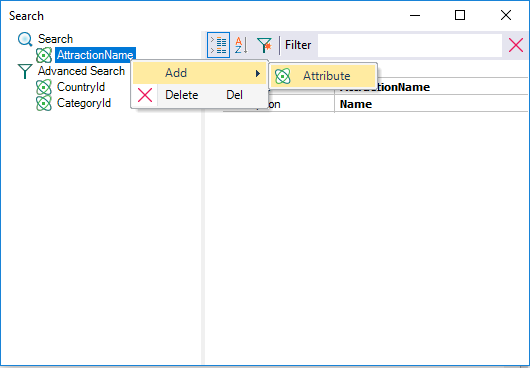
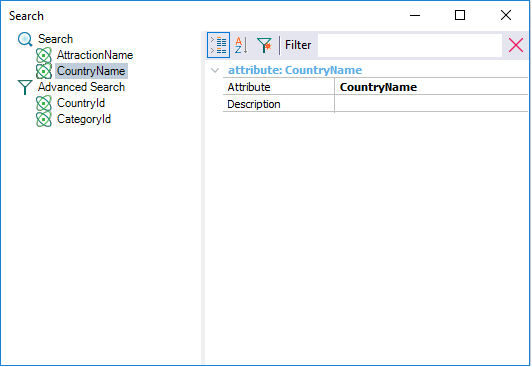
You could add CountryName, for example, to allow making searches by country name as well.
So, if you search “Fr”… France's attractions are displayed.
There are also advanced filters, by the attributes CountryId and CategoryId, which are the foreign keys of the Attraction Transaction. Change the description to Country and Category, respectively, and run the main menu again…
Open the attractions List and see that this option is available in the application bar:
If you look at the list, it is ordered by AttractionName. This is specified in the properties of the grid's Data group:
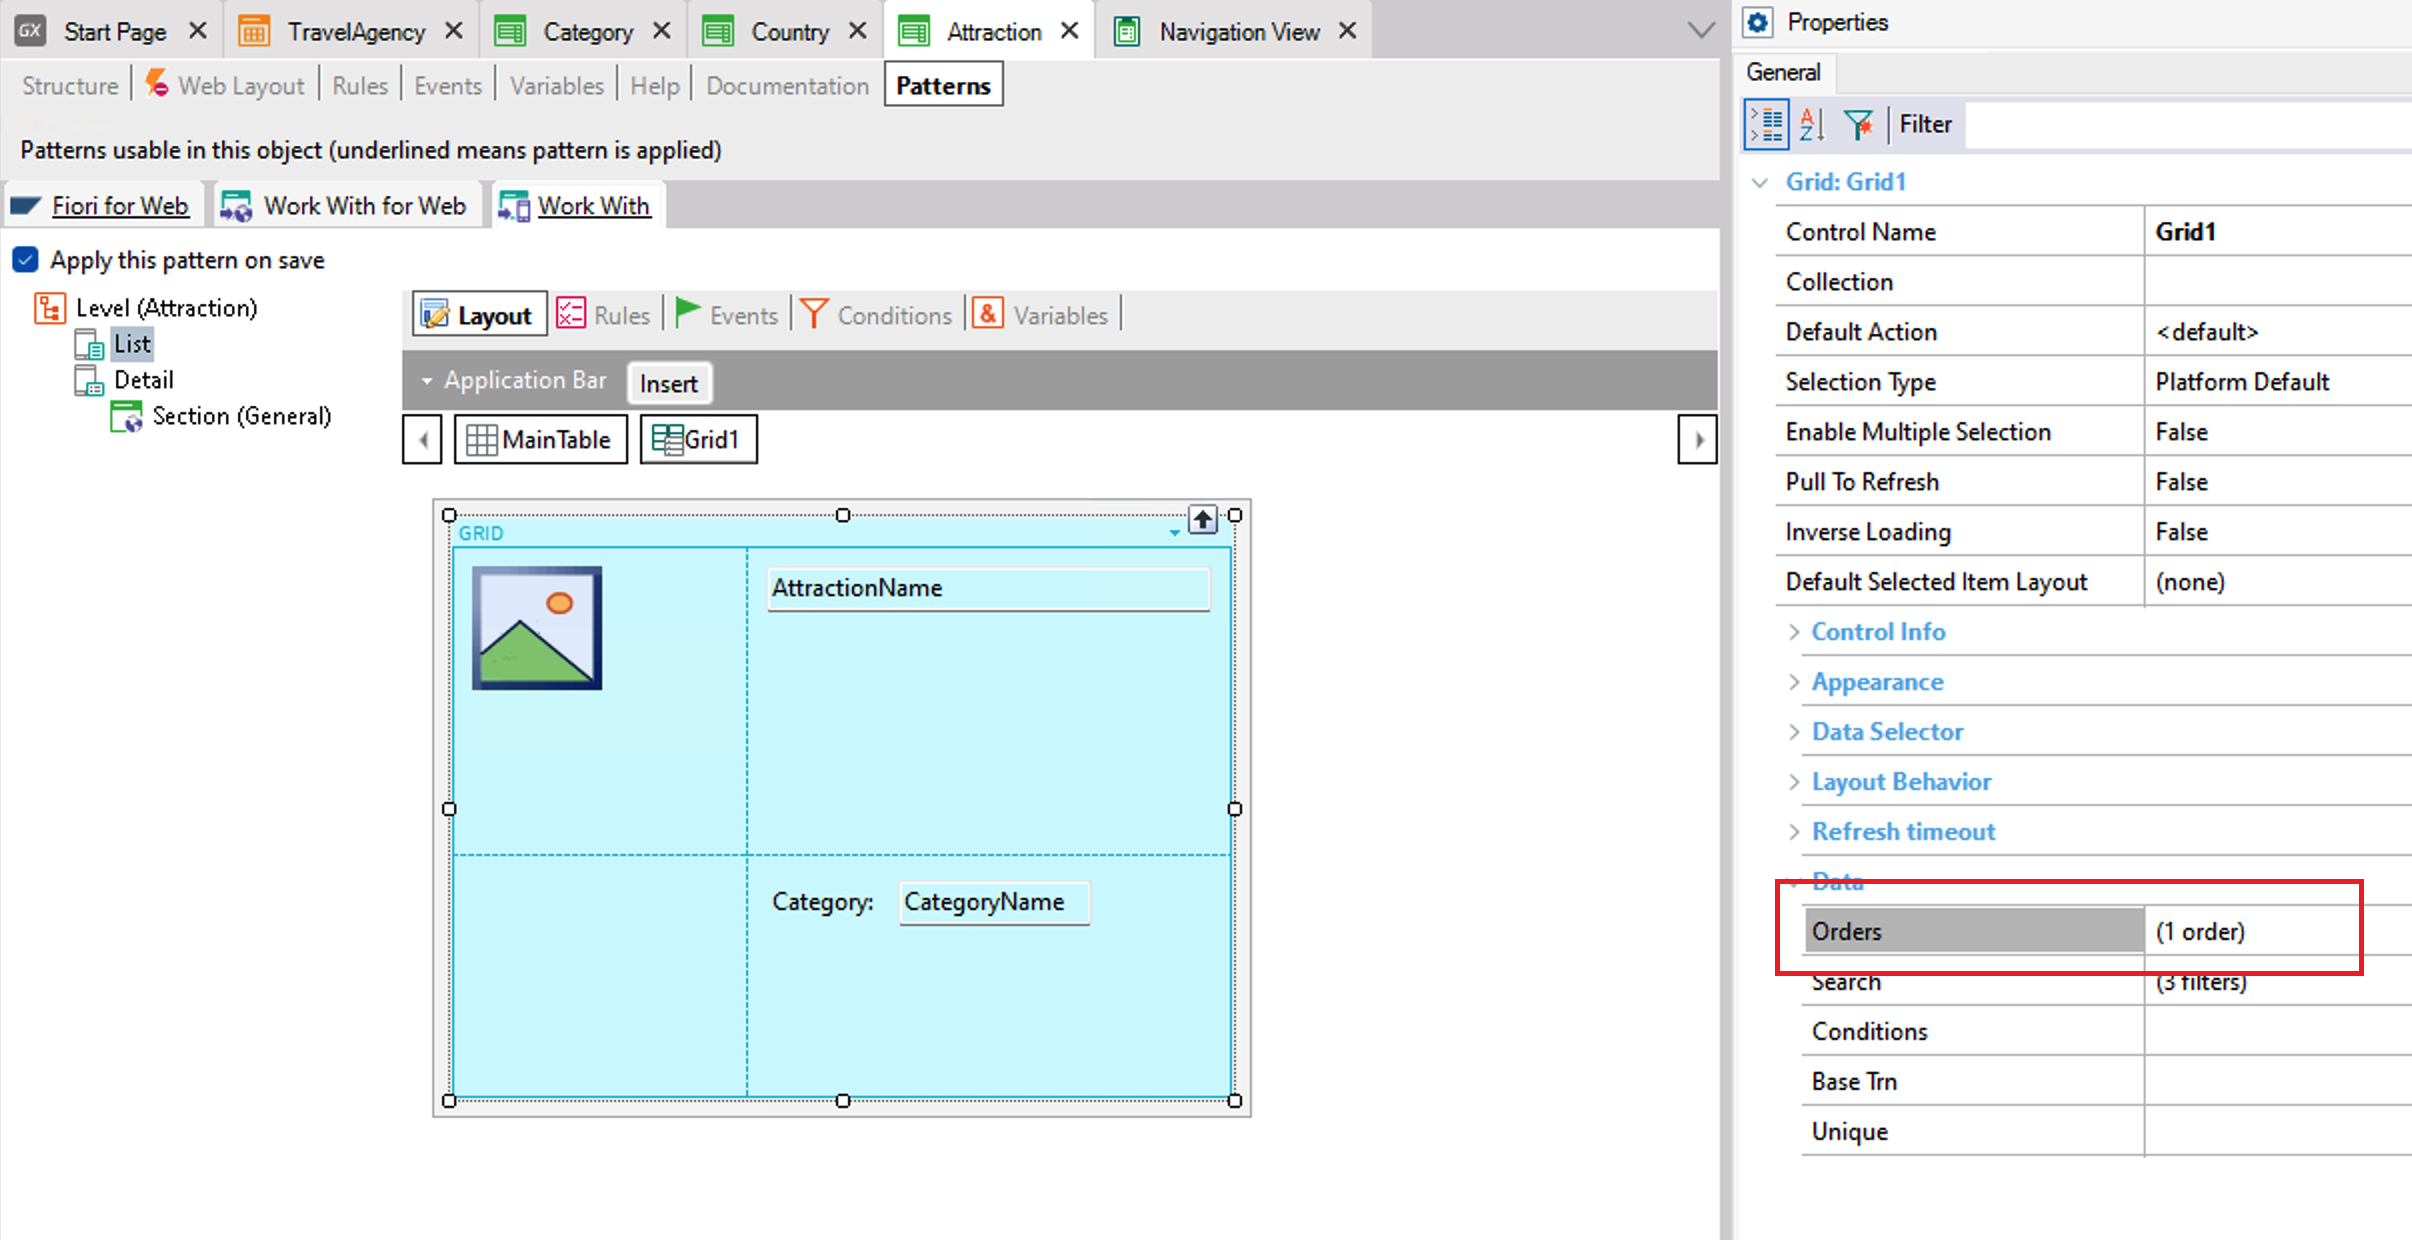
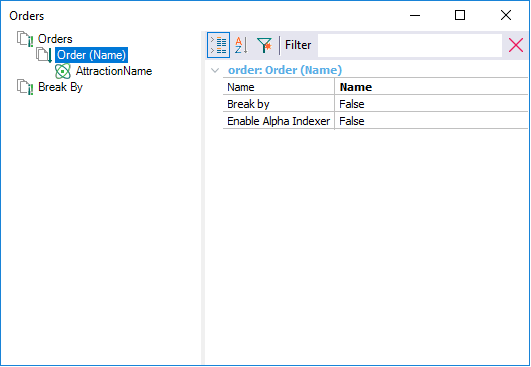
You may want to allow the user to order by country:
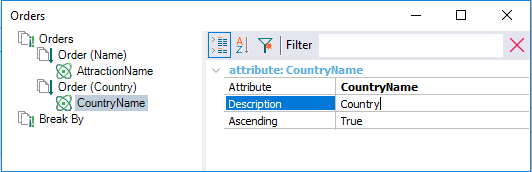
Choosing the same option used for filtering:
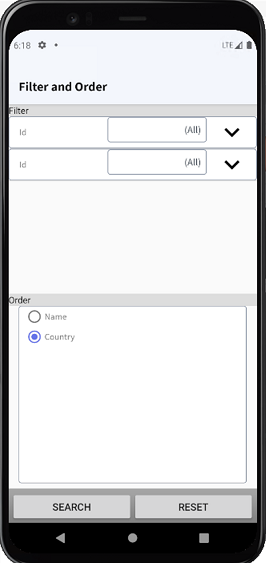
It can be ordered by Country:
The Great Wall of China and the two attractions entered for France are seen.
You can try the same application for Apple by only changing these properties.
This was just a small example of what can be done. Just like for a web application, there are more objects available to cover other features, such as Panels.