GeneXus 9.0 Upgrade Course
Forget about coding: place your SDT or BC members directly on the screen or print block! The same applies to collections, so to display a collection just bind it to a Grid. No code required!
SDTs can now be inserted directly in the forms of objects such as web panels, work panels, transactions and reports. This means a substantial productivity improvement when developing with SDTs.
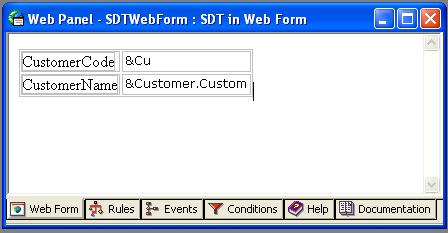
To show an SDT type variable in a form, insert the variable just as you would any other variable -through the Palette Toolbar shortcut, or through the Insert/Variable menu.
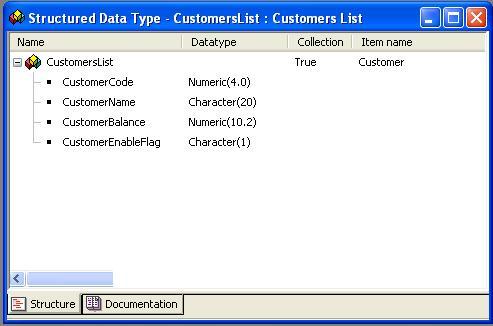
If you have the following SDT defined as a Collection:

You may define variables whose data type will be the SDT collection itself (CustomersList), as well as create variables whose type will be the simple SDT corresponding to the items (CustomersList.Customer):
After defining the variables &Customer (of CustomersList.Customer SDT data type) and &Cust1 (of CustomersList SDT Collection data type), you can insert any of them in a GeneXus form or print block.
Palette Toolbar Shortcut
In the Palette Toolbar shortcut, selecting one SDT type variable such as &Customer, enables the Control Name and Field Specifier options in the dialog box. They show the different SDT elements in a combo box where you can select one to display in the form.
If you select the collection variable &Cust1, only the first item of the chosen member will be shown (although you can select any other, typing the correspondent item number in the Field Specifier: ie: item(3).CustomerName)
Insert/Variable menu
No collection variable: It allows you to select the variable components that will be inserted in a form or print block in flat form.

Collection variable: After inserting the &Cust1 variable through the Insert/Variable menu, the following dialog box is displayed:
You may select several members of an SDT collection, and they will remain in a grid.
Only the Insert/Variable menu option allows you to select several (or all) items, while the selected elements remain in a grid, unlike the Palette Toolbar shortcut that lets you insert only the first item.
This behavior applies only to forms, not to print blocks. In a print block, the only way to show information in a repetitive way is through certain repetitive commands, by invoking the print block's print command (grid controls do not exist in print blocks).
You can change the associated SDT Collection into a grid by selecting the new SDT Collection from the Collection Combo Box.
Web grids: right-click on the grid/Columns.
Windows grids: right-click on the grid/Properties.
The items of the new SDT Collection remained as grid columns:
Note: If the variable is already loaded in an SDT Collection (for example, it is received through a parameter), code is not required to load it. It is automatically loaded by inserting the grid!
To load the SDT with data from the Customers table, program the following event to load the SDT Collection:
Event Start
    // To load all the Customers from Customers table
    for each CustomerCode
        &Customer.CustomerCode = CustomerCode
        &Customer.CustomerName = CustomerName
        &Cust1.add(&Customer)
        &Customer = new Customers.Customer()
    Endfor
EndEvent
The navigation report will be as follows:
The CurrentItem property has been added for those SDTs defined as a Collection, which allows displaying information about the selected members of a collection.
E.g.: in a &Cust1 SDT, to display the Balance of the Customer appearing in the selected line you can use the following event:
Event 'Selection'
    &msg = str(&Cust1.CurrentItem.CustomerBalance)
    msg(&msg)
EndEvent
Note:
- When working with a Web model, you should set up the AllowSelection = True grid property to select the line to be displayed.
- Since GeneXus Salto this property is assignable in Smart Device user events (only for Android Generator).
- Last method for paging in Grid based on SDT is not implemented.
Languages: .NET, .NET Mobile, Java
Objects: Transactions, Web Panels, Work Panels, Reports
Interfaces: Web, Win