Consider the Customer Transaction object defined in GeneXus for SAP Systems - First Objects:
Customer
{
  CustomerId*
  CustomerName
  CustomerLastName
  CustomerAddress
  CustomerPhone
  CustomerEmail
}
This Transaction has to be tested.
GeneXus allows prototyping an application locally and in a cloud that is available to GeneXus users. Also, you can prototype in any of the programming languages supported.
To set the necessary information to connect with the Database and the web server, select the Preferences tab or press F5. In the Preferences tab, you can see that the KB has only one Environment (it could have many but the KB was recently created with one Environment).
If you look at the Environment properties, you will see one named Startup Object that indicates the Main Object of the application to be executed as the entry point.
Before initializing Fiori, the Startup Object property is set to "(none)". This means that the GeneXus Launchpad will be displayed when pressing F5. On the other hand, after initializing Fiori, the Startup Object property will be completed with the FioriLaunchpad Web Panel object (you can find it inside the "FioriBaseObjects" Module).
Press F5. This window will open asking for the server and Database details:
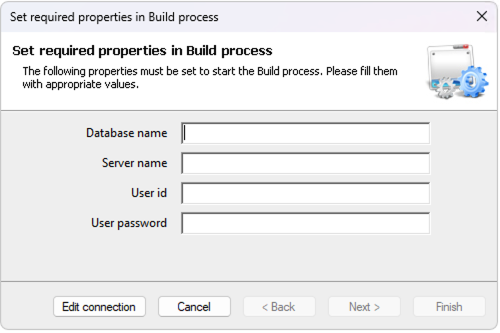
Note: In this guide, the environment was created with Microsoft SQLServer as the Database to prototype the application. One way of building applications that use
SAP HANA Database is through the Cloud platform available from SAP, called SAP Business Technology Platform. To learn all about how to create the Database in SAP Business Technology Platform and how to obtain the connection data to be used in GeneXus, see:
How to use SAP HANA Database on SAP Business Technology Platform.
Press Finish after setting the connection information.
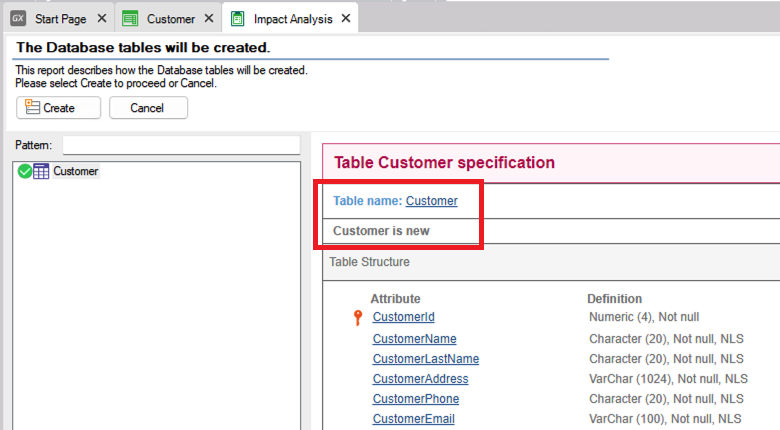
A report called Impact Analysis is displayed. If you examine the report, you can see that a new table called Customer will be created with the following attributes:
As you can see, GeneXus will also create an index by CustomerId automatically.
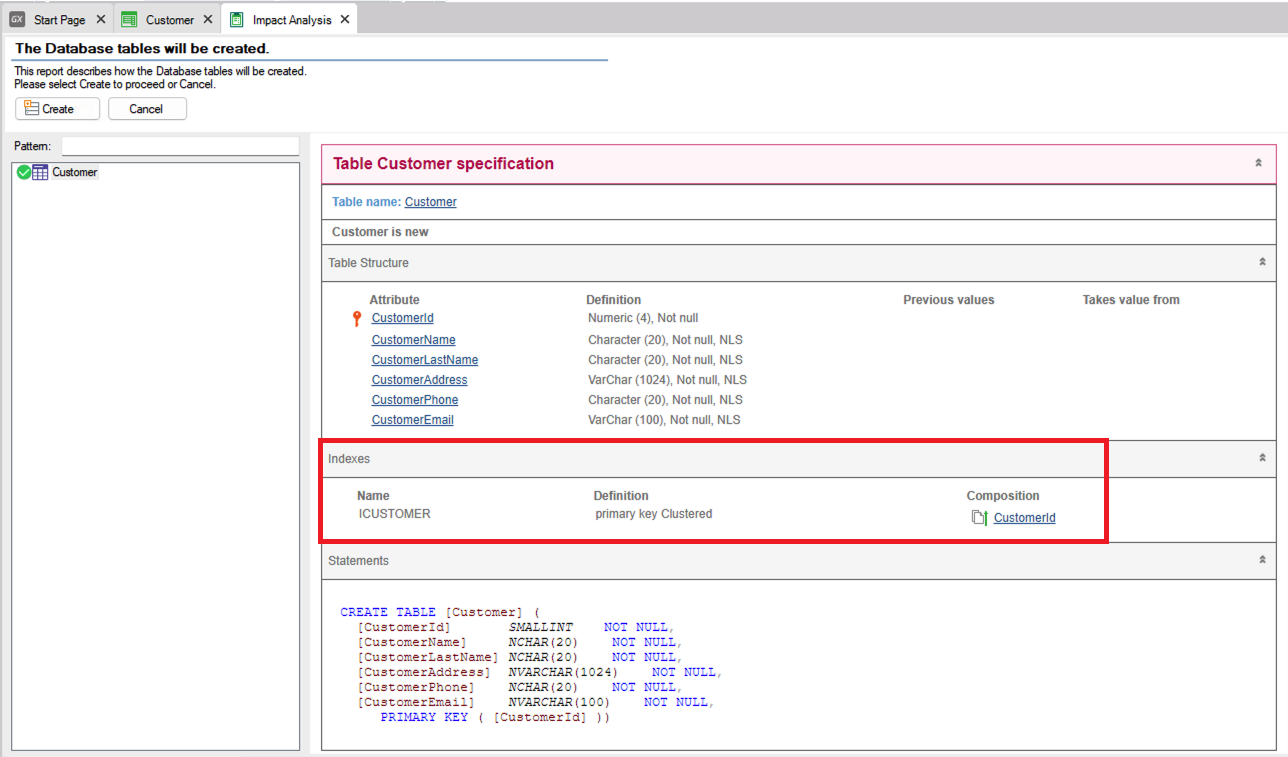
If you agree to create this table with this definition in the Database, click on the Create button. GeneXus starts to generate the necessary programs to create the Database and the Customer table with this structure. Next, GeneXus executes those programs.
Then, GeneXus generates other programs (that is to say, all the necessary lines of code in the selected language to implement the application which in this case corresponds to the Customer Transaction and its logic). Also, you are informed if the result was successful, or if there were any errors or warnings.
Afterwards, depending on the following:
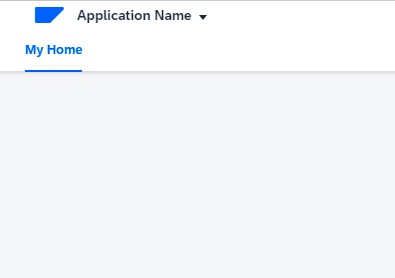
- If you have not initialized Fiori, the GeneXus Launchpad is opened, offering a link to execute the Customer Transaction:
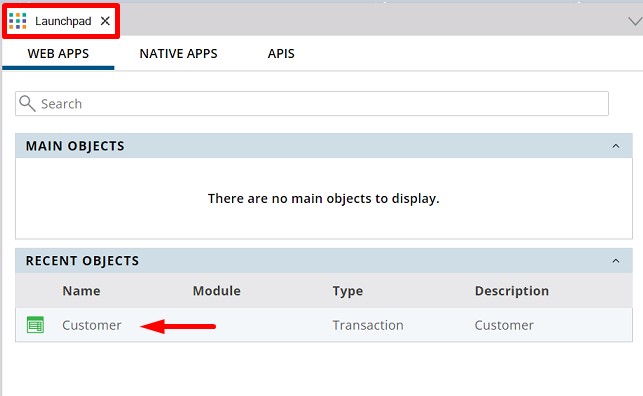
Click on the link to run the Customer Transaction to insert, update, and delete customers.
- If you have initialized Fiori, your default browser is opened, showing the FioriLaunchpad Web Panel object containing links to run all the objects' Fiori List Reports.
Note: If you have not applied the Fiori for Web pattern to any Transaction yet, the FioriLaunchpad Web Panel is empty and it is not useful at this time.
To solve this situation, you have two options:
1. Apply the Fiori for Web pattern to the Customer Transaction and press F5 again.
2. Open the GeneXus Launchpad to run the Customer Transaction (to do so, select View > Other Tools Window > Launchpad). Click on the link to run the Customer Transaction to insert, update, and delete customers.
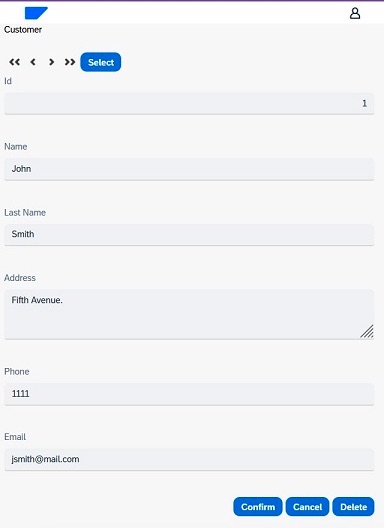
Finally, you are running the Customer Transaction. You only have to enter customer data.
Customer # 1:
- Name: John
- Last Name: Smith
- Address: Fifth Avenue
- Phone number: 1111
- Email address: jsmith@mail.com
Customer # 2:
- Name: Susan
- Last Name: Brown
- Address: Seventh Avenue
- Phone number: 2222
- Email address: sbrown@mail.com
Note that if the screen size changes, the controls are adjusted to the available space.
This means that GeneXus generates responsive web applications, or sensitive applications, which offer optimum viewing, navigation, and use of screen space.
This is achieved with design features that allow viewing all the information on the screen, using the functions provided by GeneXus to this end. They show different layouts depending on the screen size of the device.
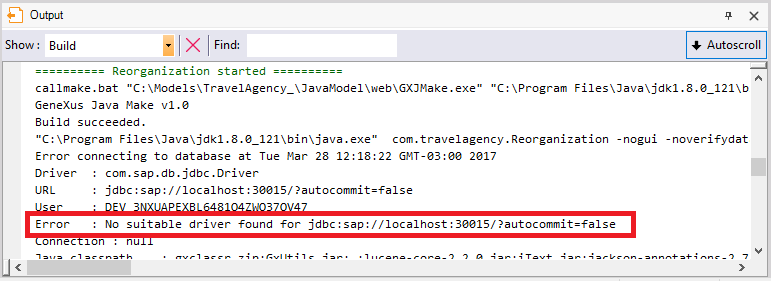
If you are using SAP HANA Database to generate your application, the first time that you try to create the database this error may appear in the output window:

You're informed that the driver to connect to the database hasn't been found within the folder containing all the necessary files to run this application:
To solve them, follow the steps below:
1. Download the required files from SAP's website.
2. Copy the downloaded files to the folder where everything related to HANA is stored.
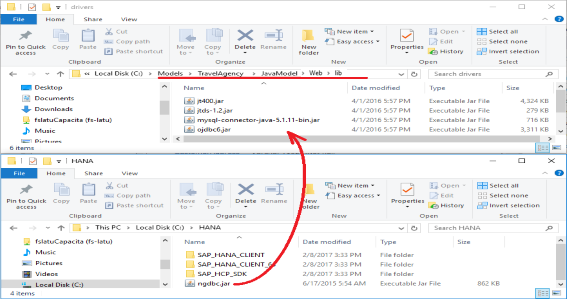
2. Go to Tools > Explore Target Environment Directory to open Windows Explorer.
3. Copy the ngdbc.jar file to the lib folder.
4. Rebuild All again.