Note: Since Neo has been deprecated by SAP, this documentation will become obsolete, see Deploy to SAP Cloud Foundry - SAP BTP instead for a more up-to-date documentation.
Until this moment we have deployed an application to SAP Cloud Platform for prototyping purposes directly from GeneXus.
Another alternative is Deploying the App outside Genexus, in order to take it to production.
Specifically, we are going to see the following steps
- A developer preparing the environment for deployment,
- An operations manager then
- make the application ready for production with the SAP Cloud Platform utilities,
- and then deploy it using them.
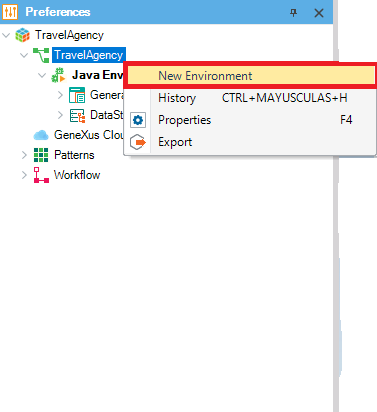
First, we need to create a new Environment in the IDE.
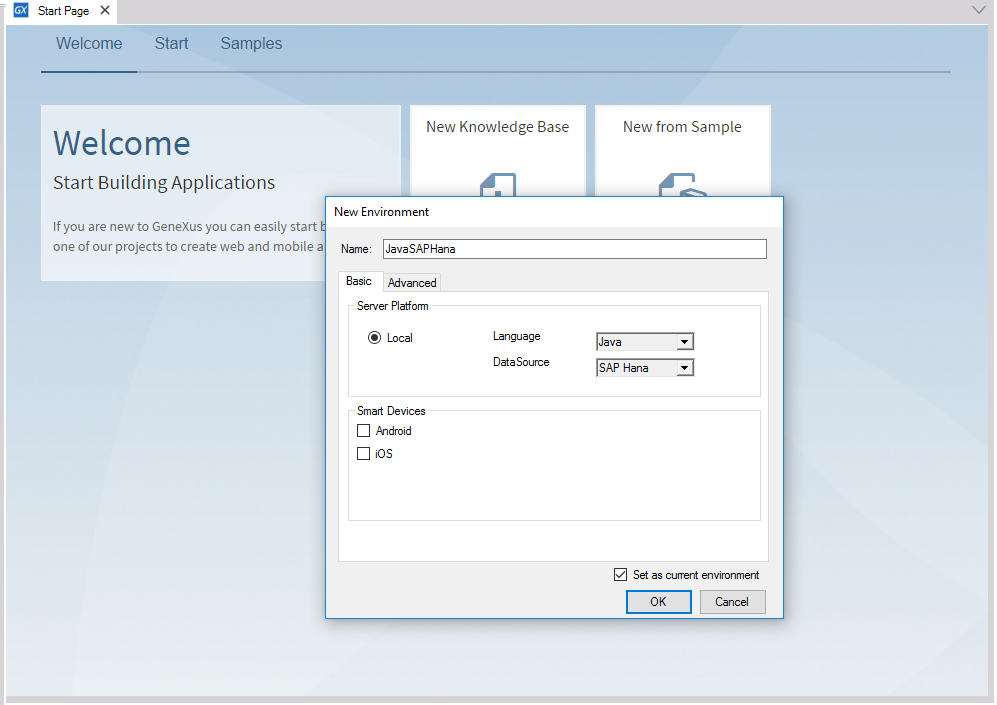
We have to select Java with the SAP Hana DB for the Environment:
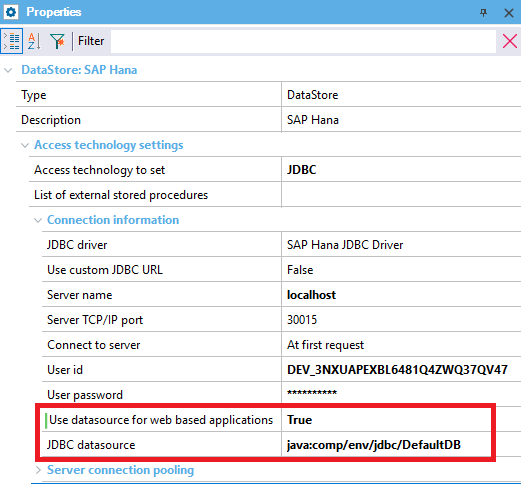
We need to set the property “Use data source for web based applications” to True because the database will be accessed through JNDI, and to this end, Datasource Binding will be set between the application and the database schema used.
When doing so, this new property called “JDBC data source” is enabled. There we need to specify “java:comp/env/jdbc/DefaultDB”, the way in which SAP Cloud Platform finds the database schema that will be associated with the application.
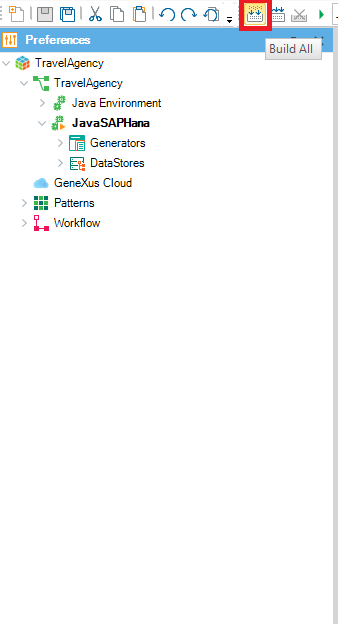
After this, we change to the new Environment created, and we only need to run a Build All to have the programs built taking this data source into account.
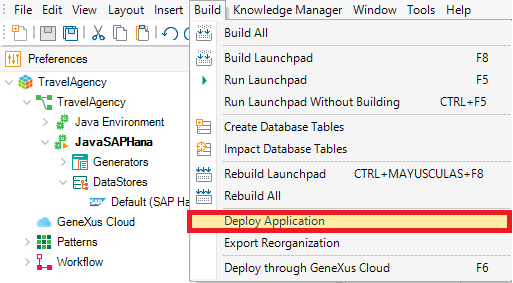
Next, we have to Deploy our Application, we can do it by selecting Build / Deploy Application in the Toolbar:
Now we add all the files needed for the deployment and we deploy it with SAP Cloud Platform target:
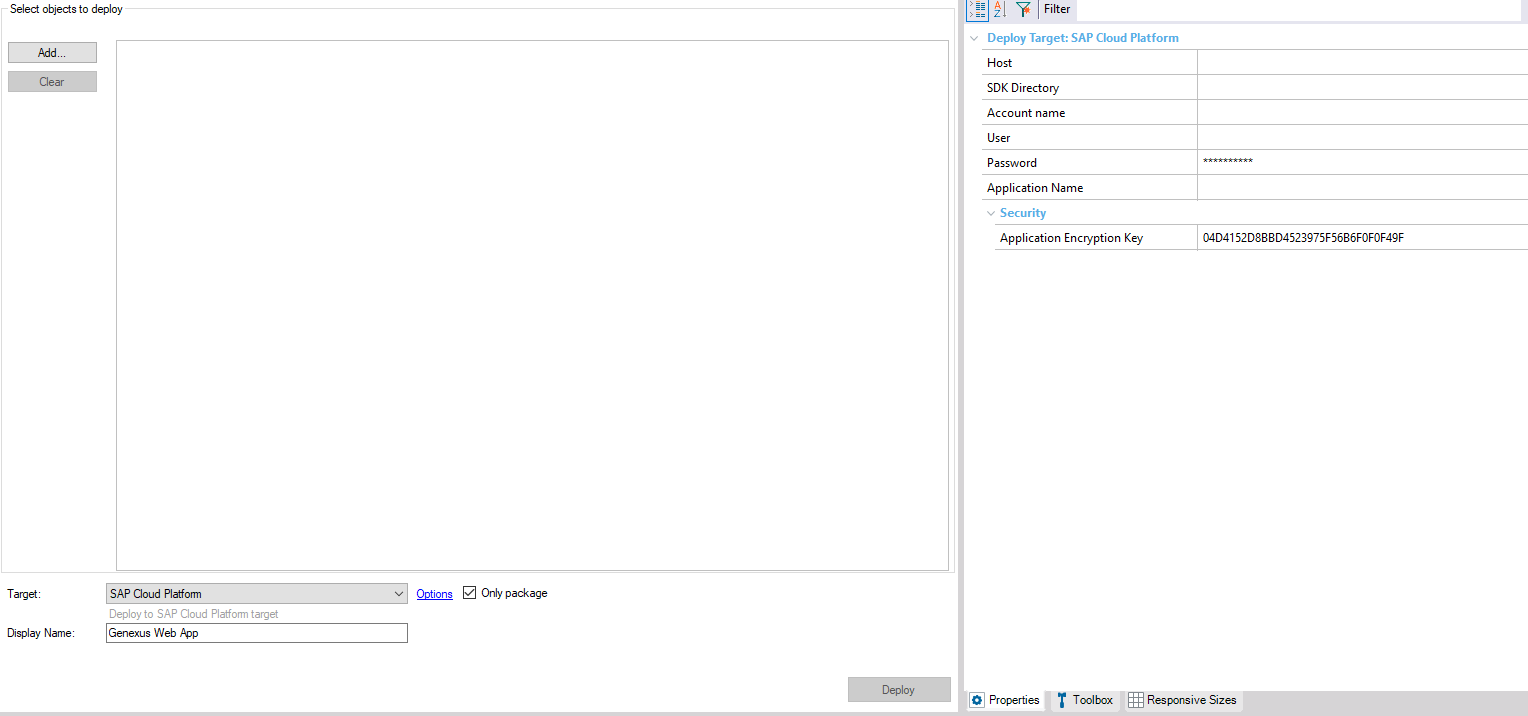
Mark "Only package" to create the .war file needed for the deployment in SAP HANA Platform.
Note: If yourself have access to the production environment, you may provide the credentials in the Deployment Properties (like show here and deploy it right from GeneXus.
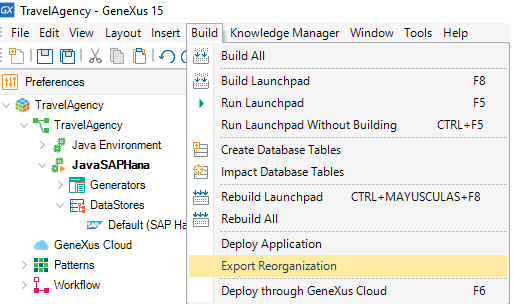
Also, an export of the reorganization must be done, and it can be done by selecting Build / Export Reorganization:
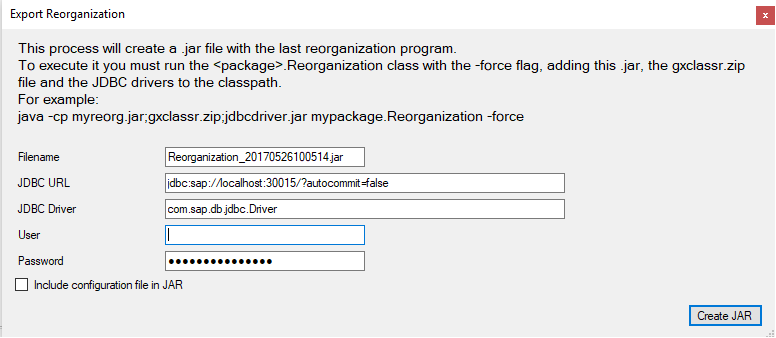
We have to provide the credentials for the SAP HANA DB that was used:
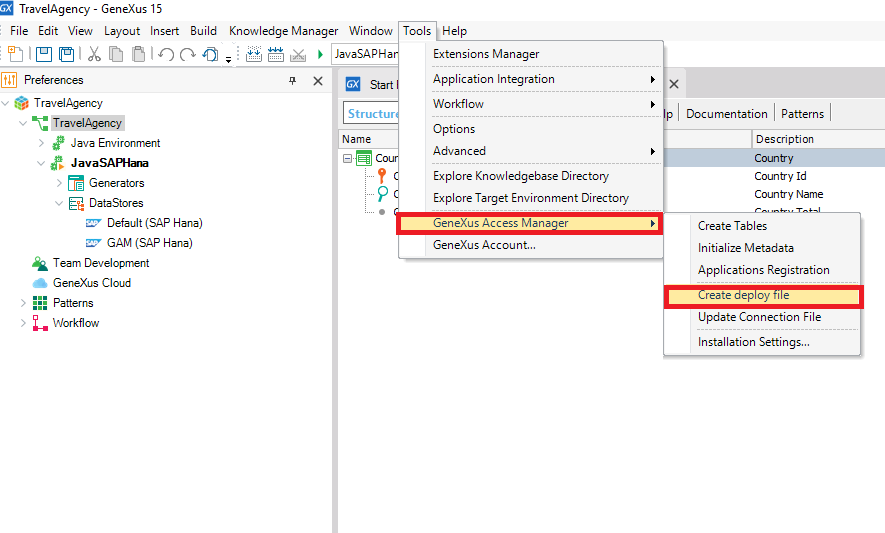
If you are using GAM a Create Deploy File must be done as well:
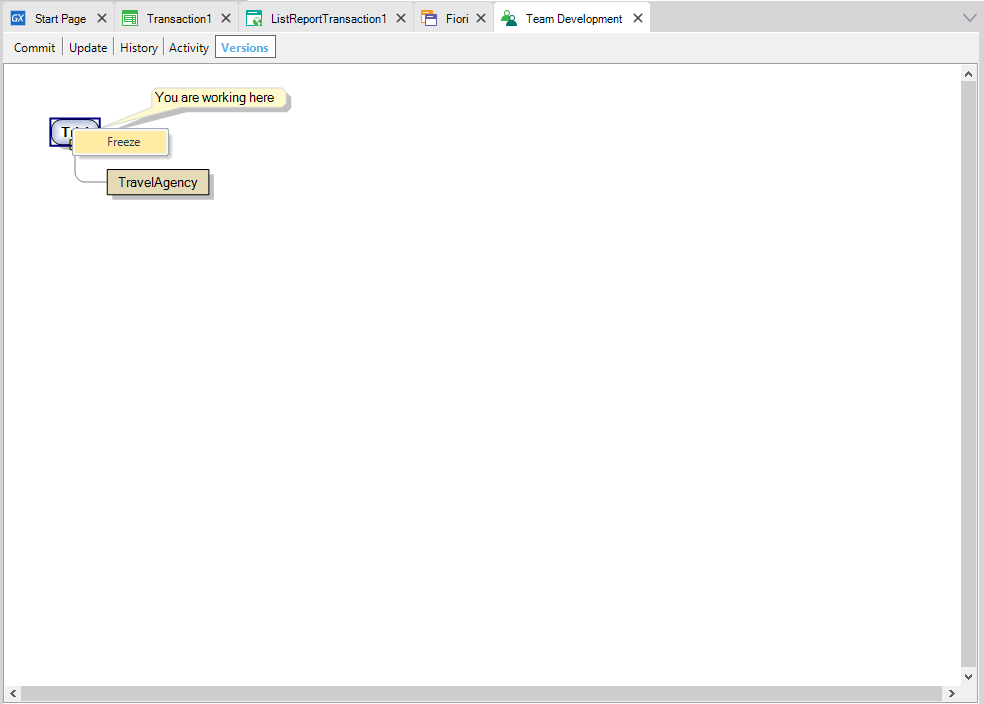
Finally, as we are using GXserver we freeze the KB:
Note: All the previous steps can be automated by using MSBuild Tasks
After preparing the Environment we need to prepare the settings for production outside GeneXus.
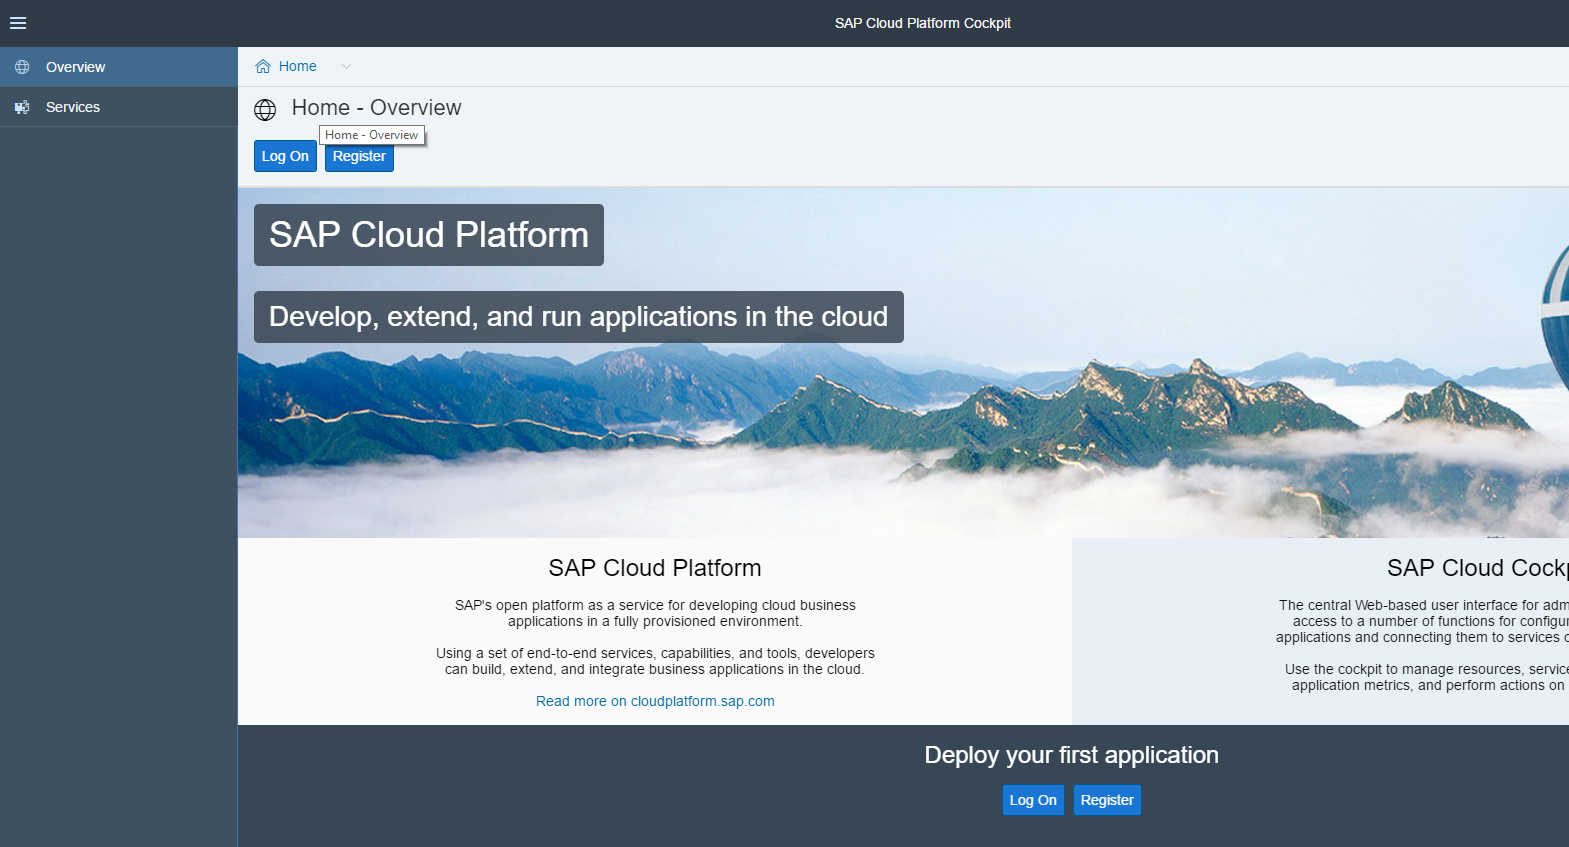
We need to have an account on SAP Hana Cloud Platform, and Login there:
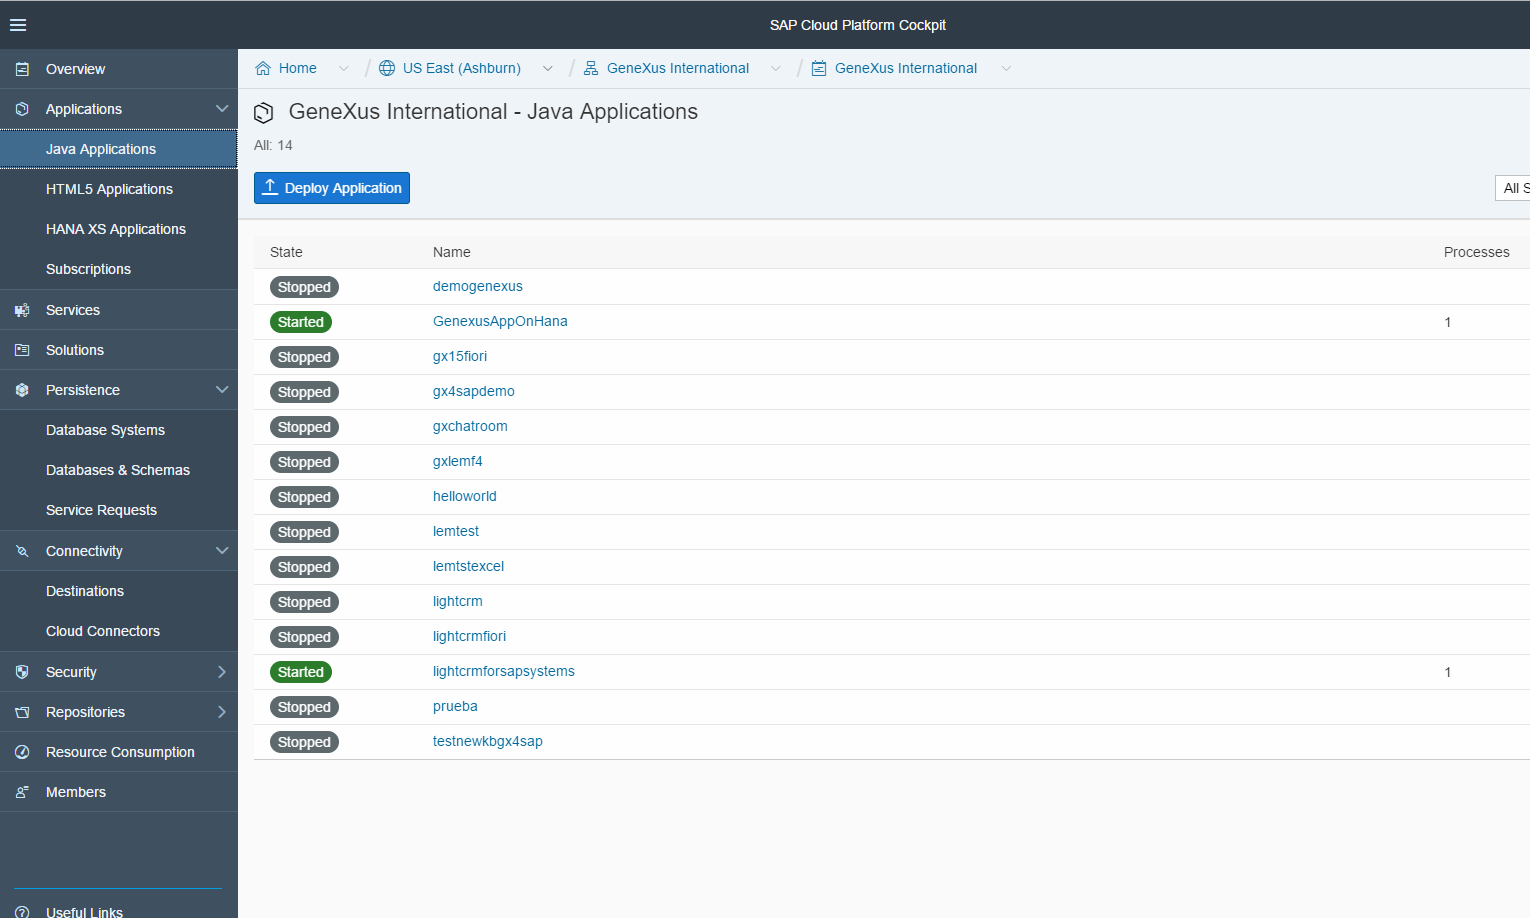
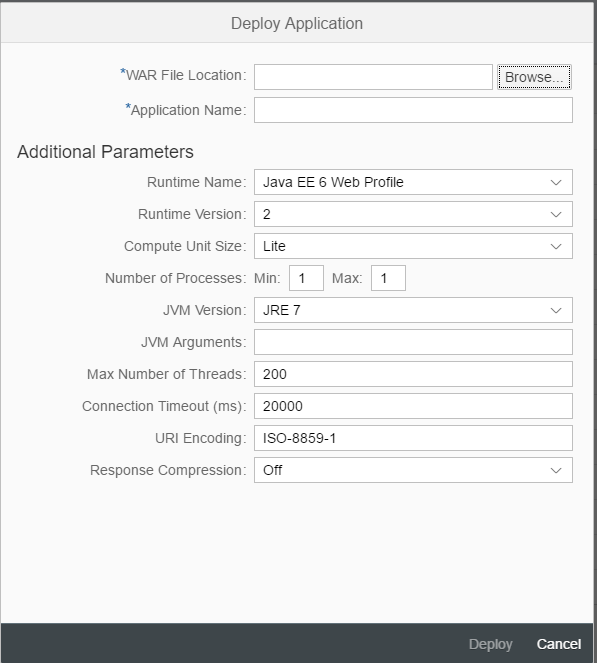
Now that we have all prepared for the Deployment, we need to go to our Java Applications and deploy the application:
And we need to provide the information for the deployment adding the WAR file and Application:
After Deploying the app, we need to provide the data binding in order to connect the application with de database
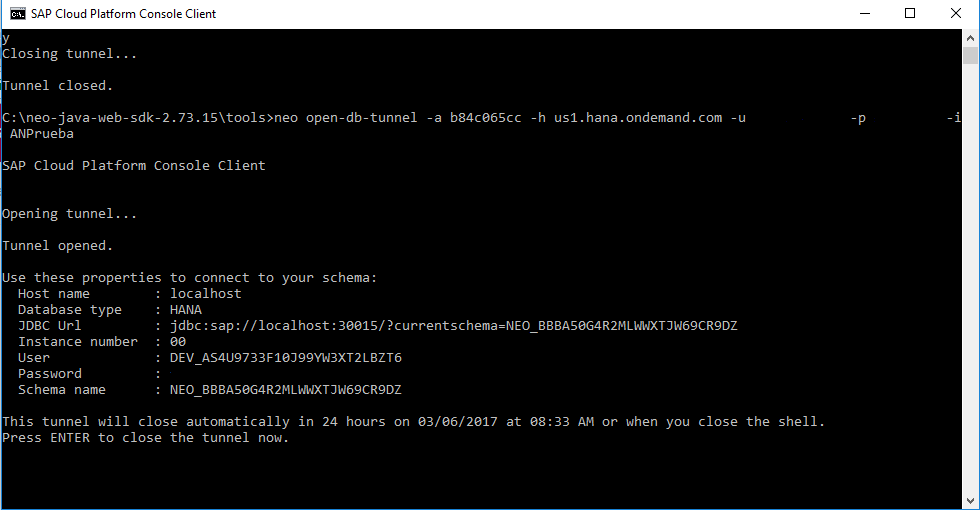
To do so, we need to perform the Reorganization in the database via the command line:
First, we select the database schema used for the Deploy Reorganization.
After this, a tunnel must be opened to perform the reorganization
We now have to change the credentials for the new database created in the reorg.cfg file created in the Reorganization Deployment in order to reorganize the new database in SAP HANA.
CS_SCHEMA=<Schema Name>
USER_ID= <User ID>
USER_PASSWORD=<Password>
After this in another console, we run the following command that will carry out the reorganization:
java -cp Reorganization.jar;gxclassR.zip;<driver JDBC>.jar <package name>.Reorganization -force
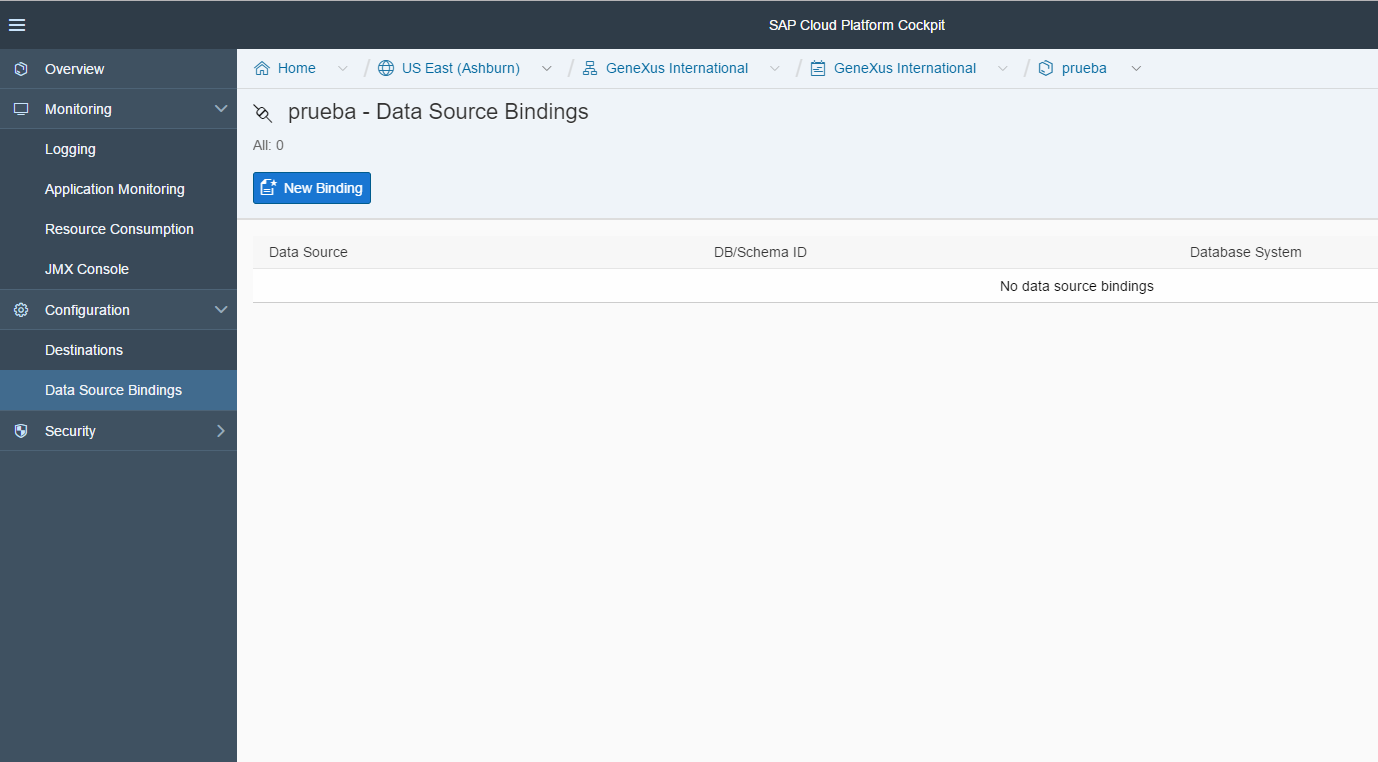
Now that we have the database ready, we have to provide de data binding to merge the application with the database.
We need to go to the application / Data bindings and choose the binding of the database schema:
NOTE: If you are using GAM you need to use GAM - Deploy Tool for the database as well.
The final step it's to run the application and now you have your application ready to be consumed.