The List Report Floorplan is a set of layouts that allows you to query, view, insert, update, and delete data.
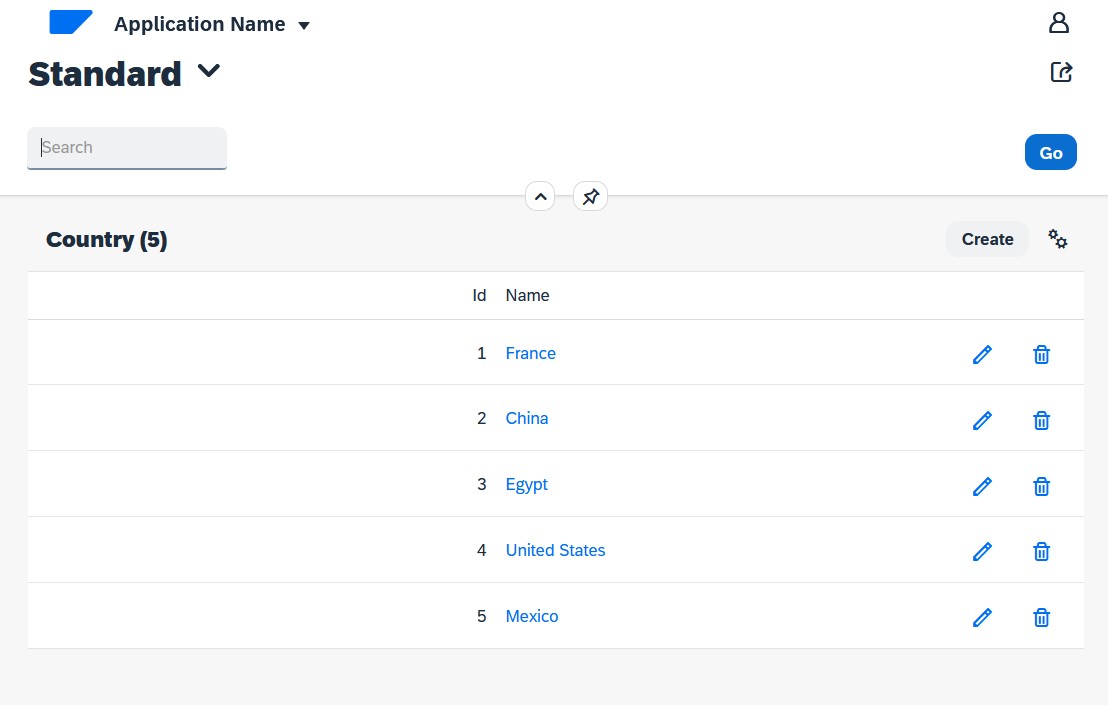
This article describes how to apply it to a Transaction object or Web Panel object and how to customize it to obtain a page like the following:
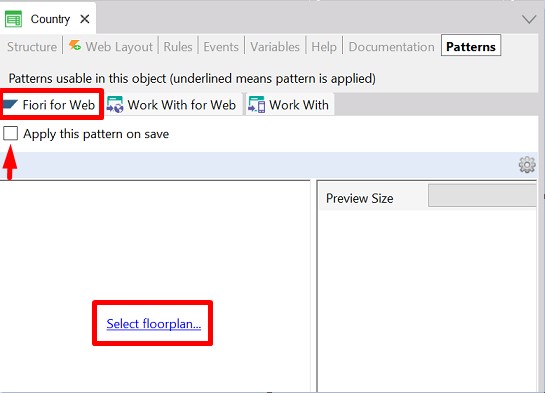
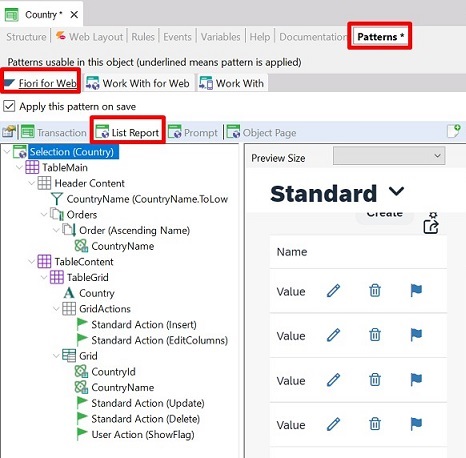
Look at the Patterns tab of the Country Transaction. If you have never applied the Fiori for Web pattern in your Knowledge Base before, read this article: HowTo: Apply the Fiori for Web pattern for the first time. Otherwise, by positioning on the Fiori for Web Pattern tab, check the Apply this pattern on save checkbox and select the offered link to choose a floorplan:
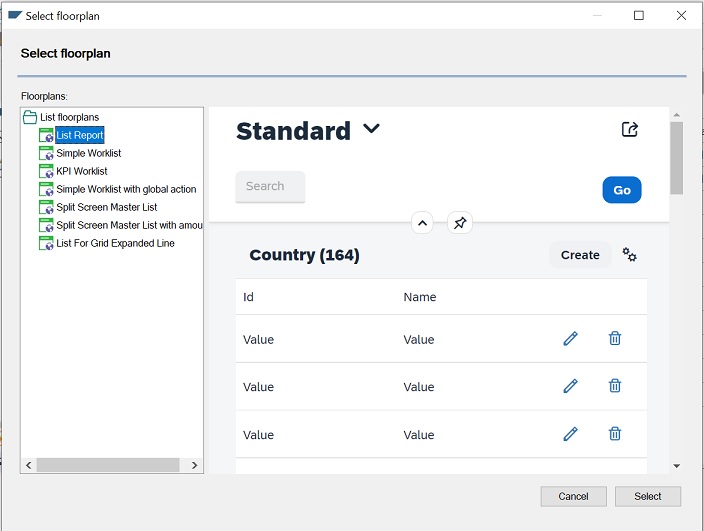
You can choose the List Report floorplan from several offered floorplans:
When it is applied to a Transaction, everything is analogous to when it is applied to the traditional Work With GeneXus (but with more power), automatically creating all the necessary objects and functionalities.
Learn how to apply it to a Web Panel.
The following section explains how to customize your List Report.
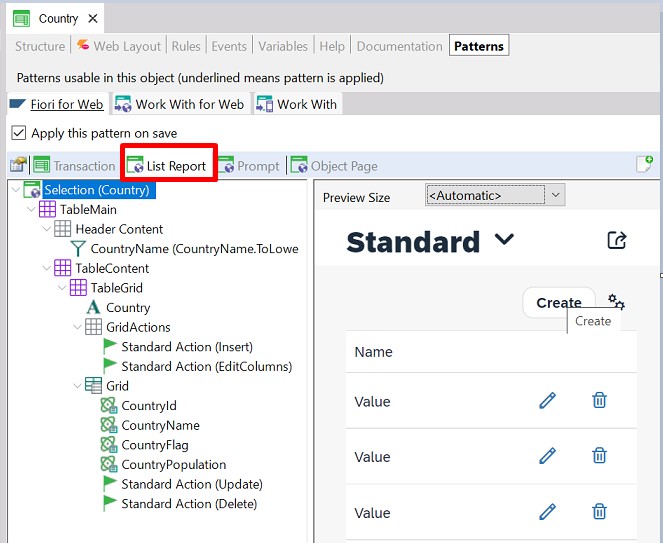
After selecting the Floorplan List Report, you will see several tabs in the Fiori for Web pattern: Transaction, List Report, Prompt, Object Page.
Focus on the List Report tab in order to manage filters, orders, customize the information to be shown in the list, add, modify and delete actions:
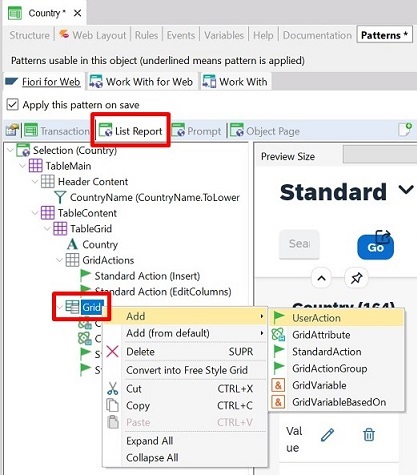
You can add, modify or delete actions by positioning on the List Report tab.
To add actions, right-click on the GridActions node and then select Add > UserAction from the contextual menu. The action will be added outside the grid (in the section where is located the button to insert).
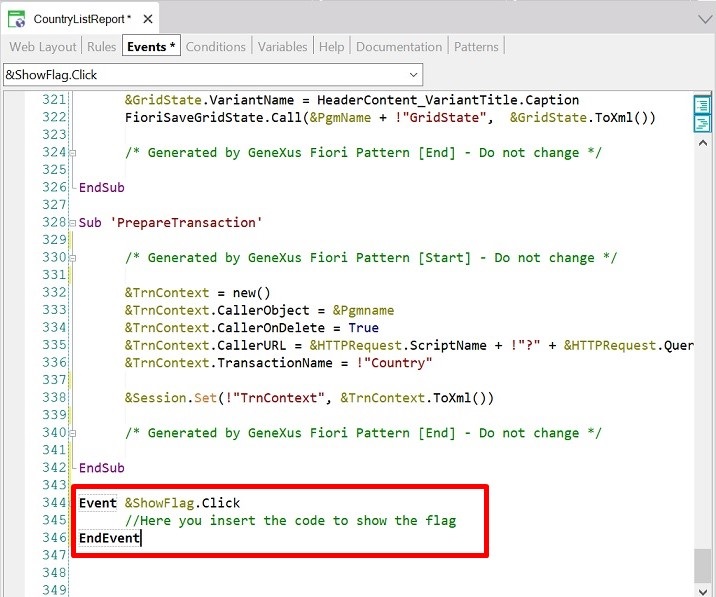
To modify these actions, right-click on the action node and select the 'Go to Event' option. Then, you can modify the event code, but remember to do it outside the code generated by GeneXus (to avoid being overwritten by GeneXus).
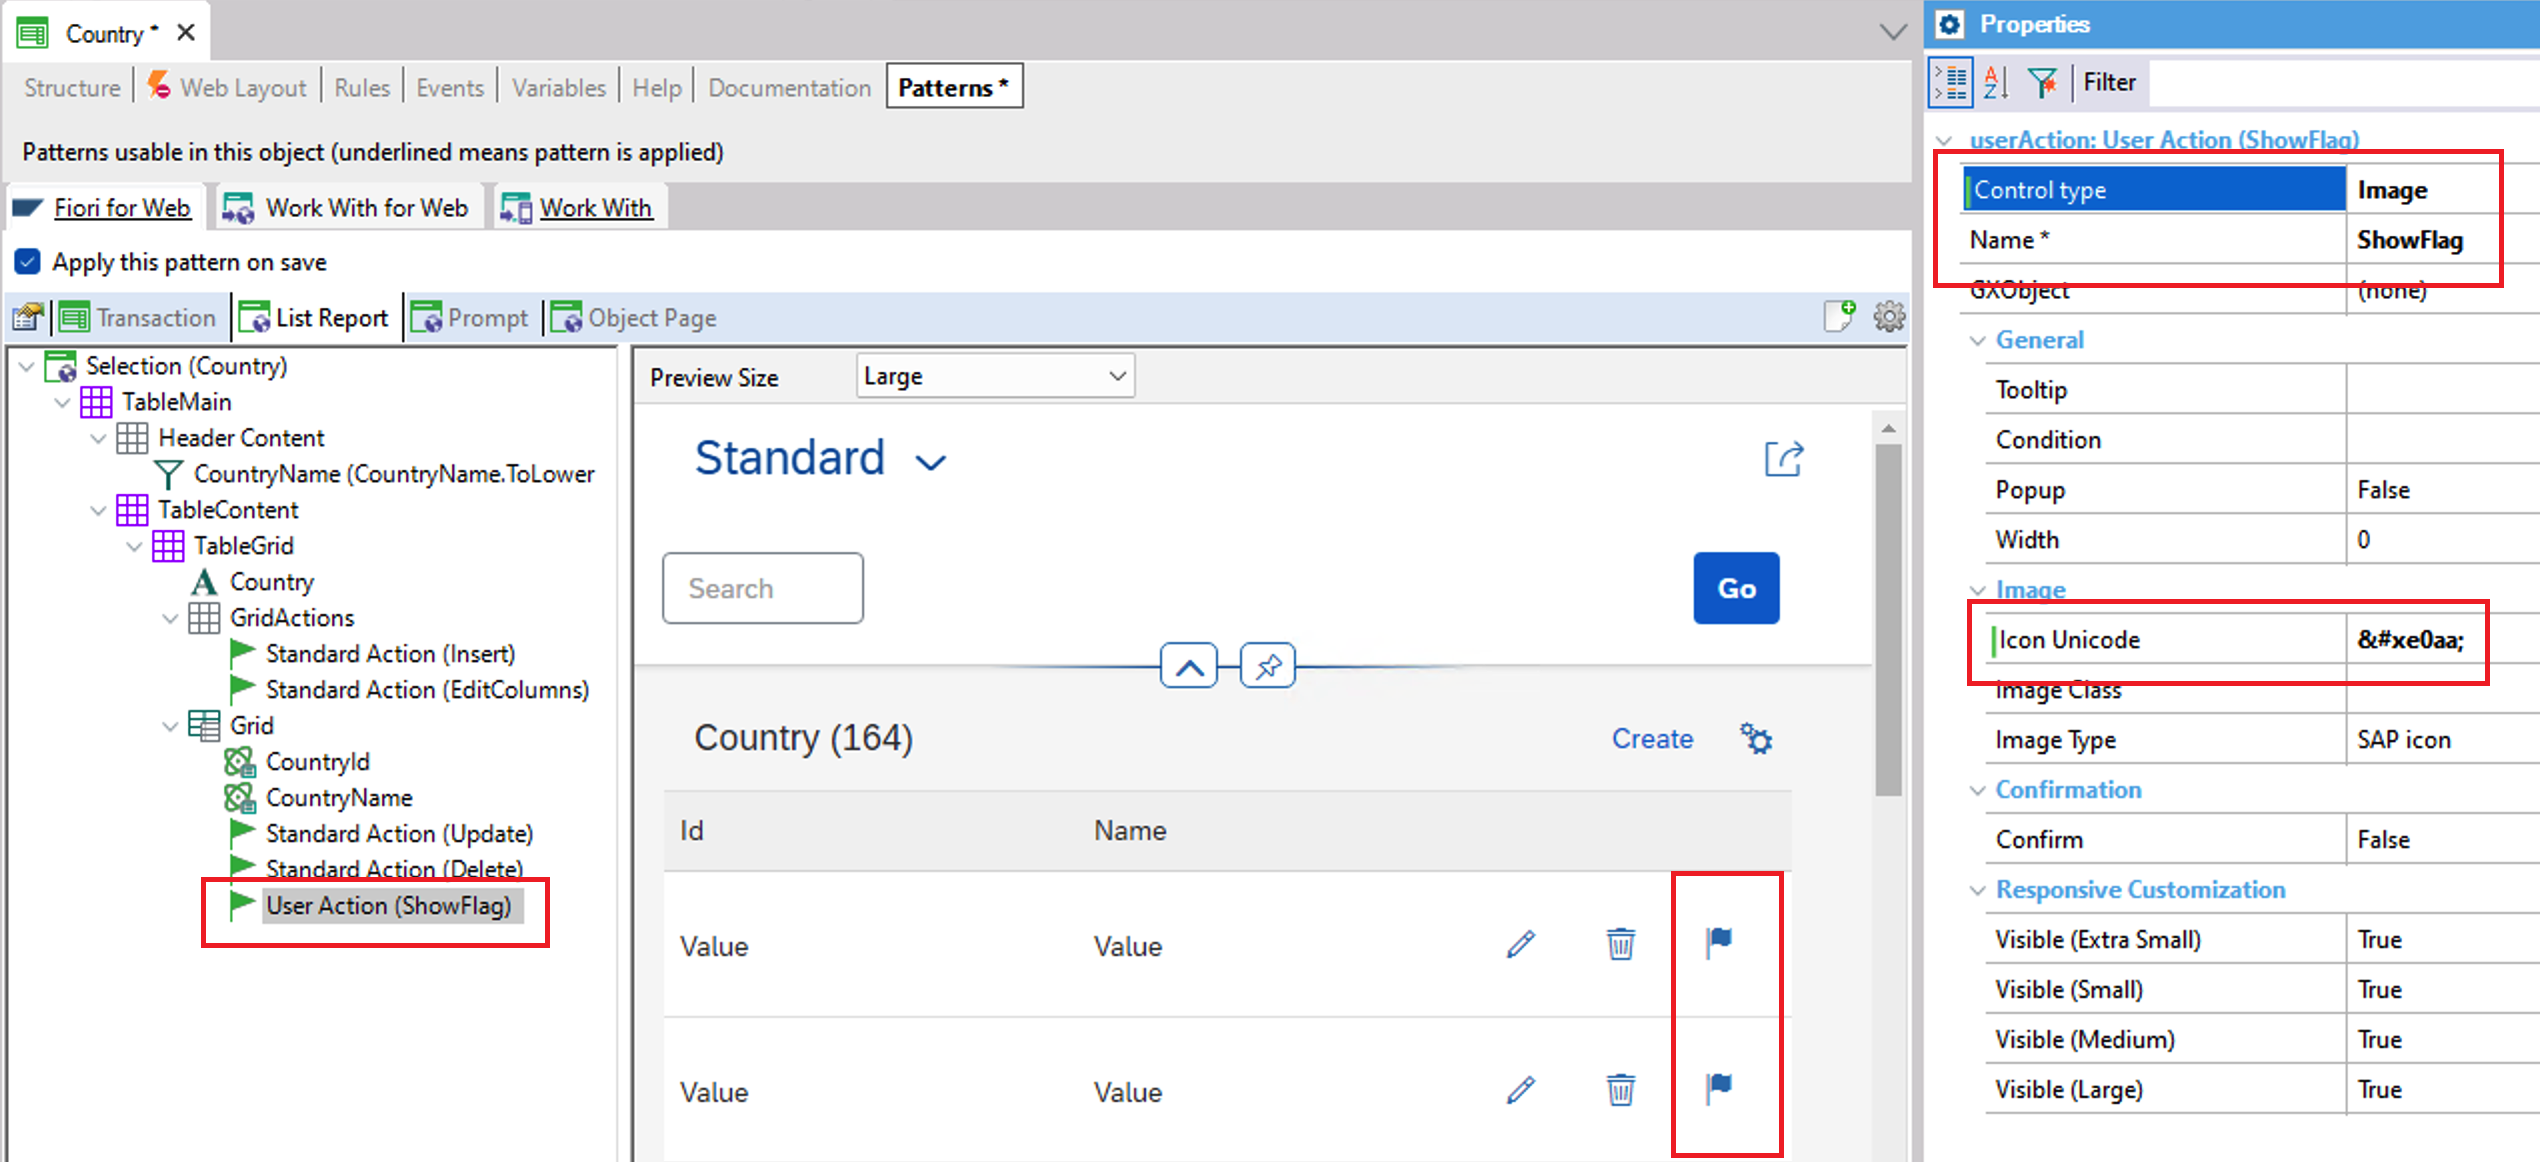
If you want to add an action inside the grid for every line, right-click on the Grid node and select Add > UserAction from the contextual menu:
To show this action as an image in the grid, set the Control type = image and also set the Name and Icon Unicode properties:
In order to modify these actions, you have to follow the next steps:
1. Right-click on the List Report tab and select Open YourObjectNameListReport. 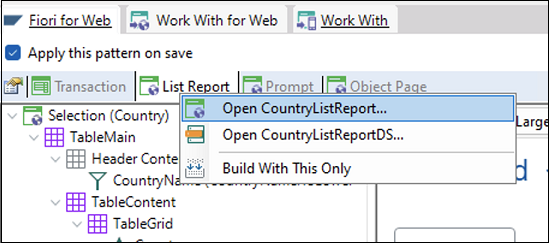
2. Being in the List Report Web Panel, go to the Events Section.
3. Once there, you only have to create the click events for your customized actions.
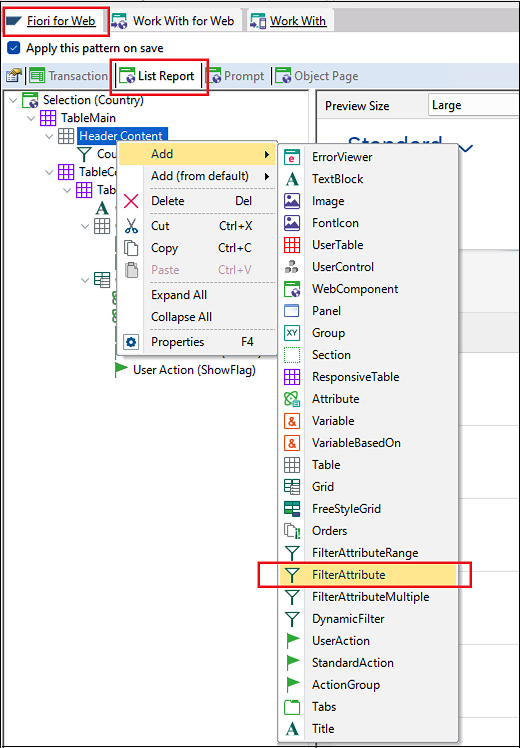
You can manage the Filters by positioning on the List Report tab.
To add filters, right-click on the Header Content node. In the contextual menu, select: Add, and then select the kind of filter you want.
For more information, see GeneXus For SAP Filters.
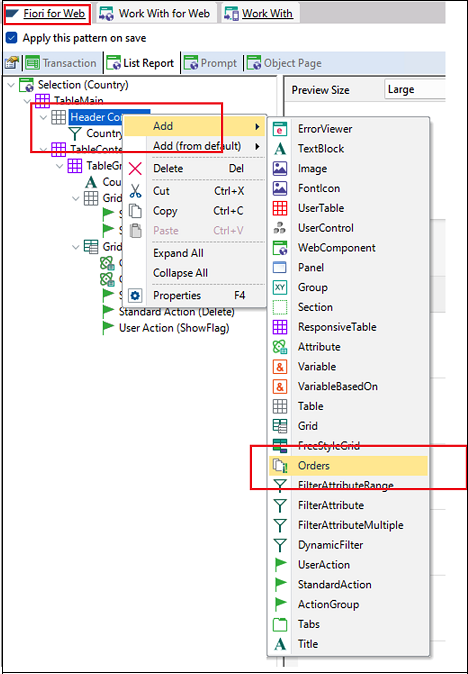
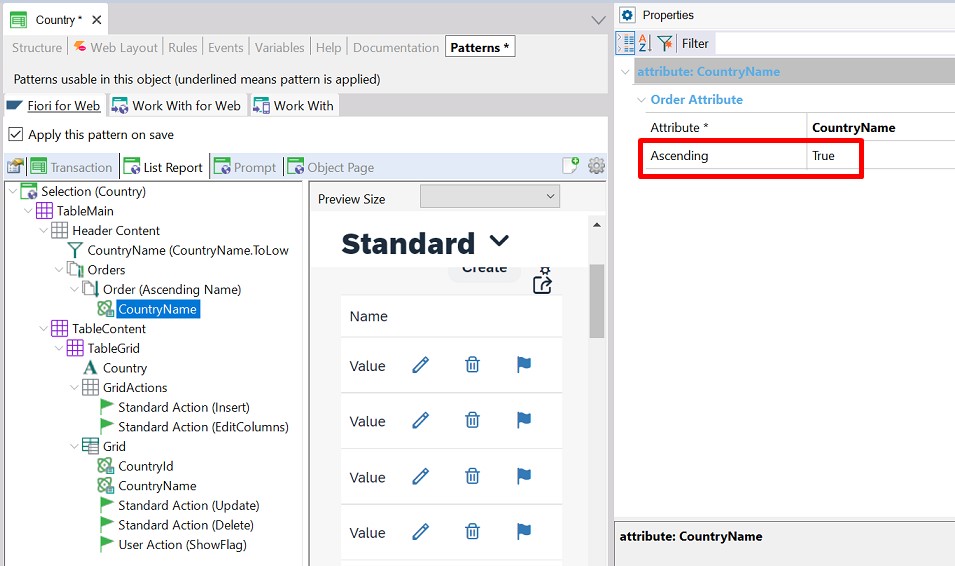
You can manage the Orders by positioning on the List Report tab. Once there, right-click on the Header Content node and then select Add > Orders.
After having created the Orders node, right-click on Orders and then choose Add > Order in order to add a new one.
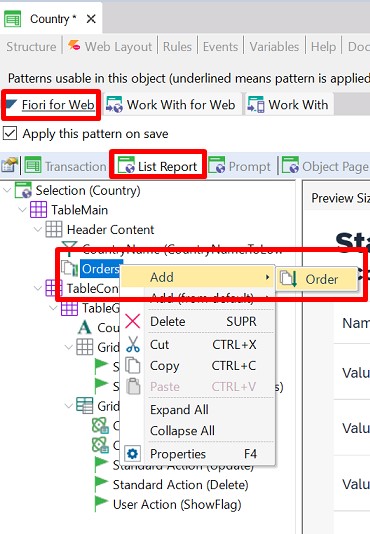
For each order you create, you have to complete its Name property, and you have to add the attribute(s) by which the list will be sorted:

For each attribute, you can change the Ascending property to choose whether you want the list to be sorted in ascending or descending order considering that attribute(s) value(s).
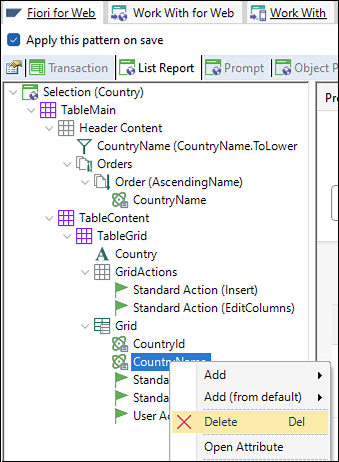
You can manage which attributes to show by positioning on the List Report tab.
To prevent attributes from being shown on the list report, right-click on the attribute and select Delete. Don't worry, it will be deleted from the Web Panel, not from the Transaction.
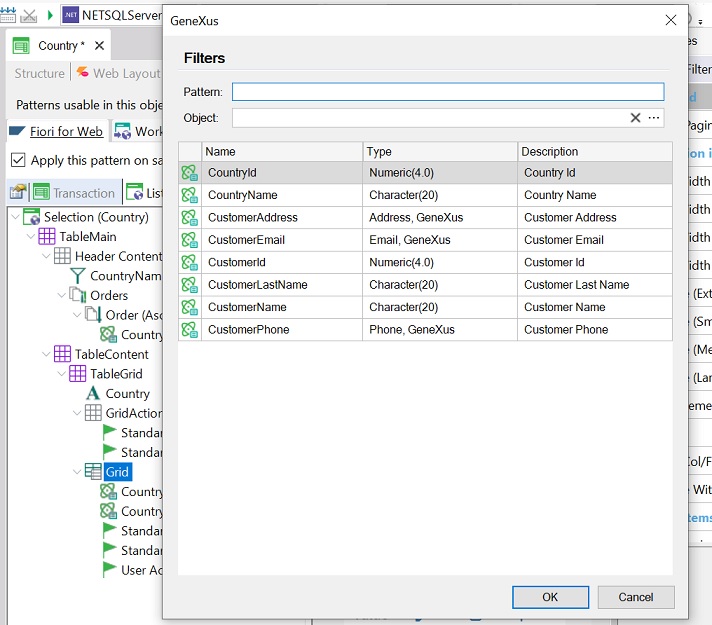
To add attributes to be shown in the list, right-click on the Grid node, then select Add > GridAttribute:
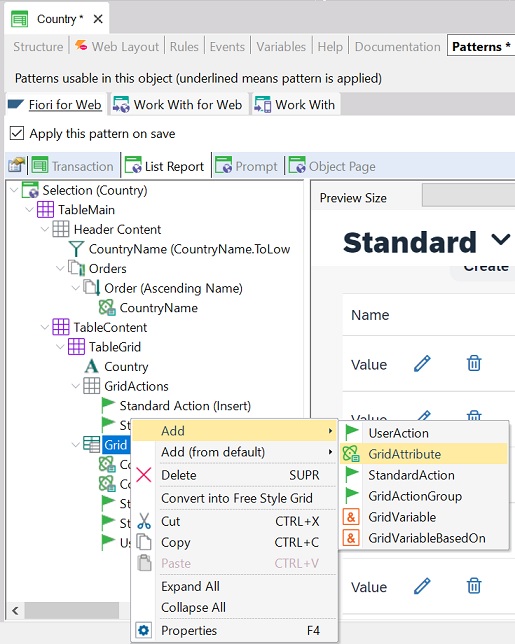
Then, GeneXus will display a list of attributes for you to choose which ones you want to add.
There are other functionalities generated by GeneXus when you apply the floorplan.
- Pin the Header
- By clicking on the pin button, you prevent the header from collapsing when you scroll.
- Save as Tile
- By clicking on the Save as Tile button, you create a new tile for the Web Panel generated by GeneXus with the List Report Floorplan. It will always be at the beginning of the Launchpad, so as to have it at hand.
GeneXus For SAP Systems - FioriLaunchpad object
GeneXus For SAP Systems - Simple Worklist Floorplan
GeneXus For SAP Systems - KPI Worklist Floorplan
GeneXus For SAP Systems - Simple Worklist with global action Floorplan
GeneXus For SAP Systems - Split Screen Master List Floorplan
GeneXus For SAP Systems - Split Screen Master List with amount Floorplan
GeneXus For SAP Systems - Wizard Floorplan