Prerequisites:
To deploy a GeneXus Application to SAP Cloud Foundry, follow the steps described below:
- Cloud Foundry Configuration
- Data Store Configuration
- Application Deployment
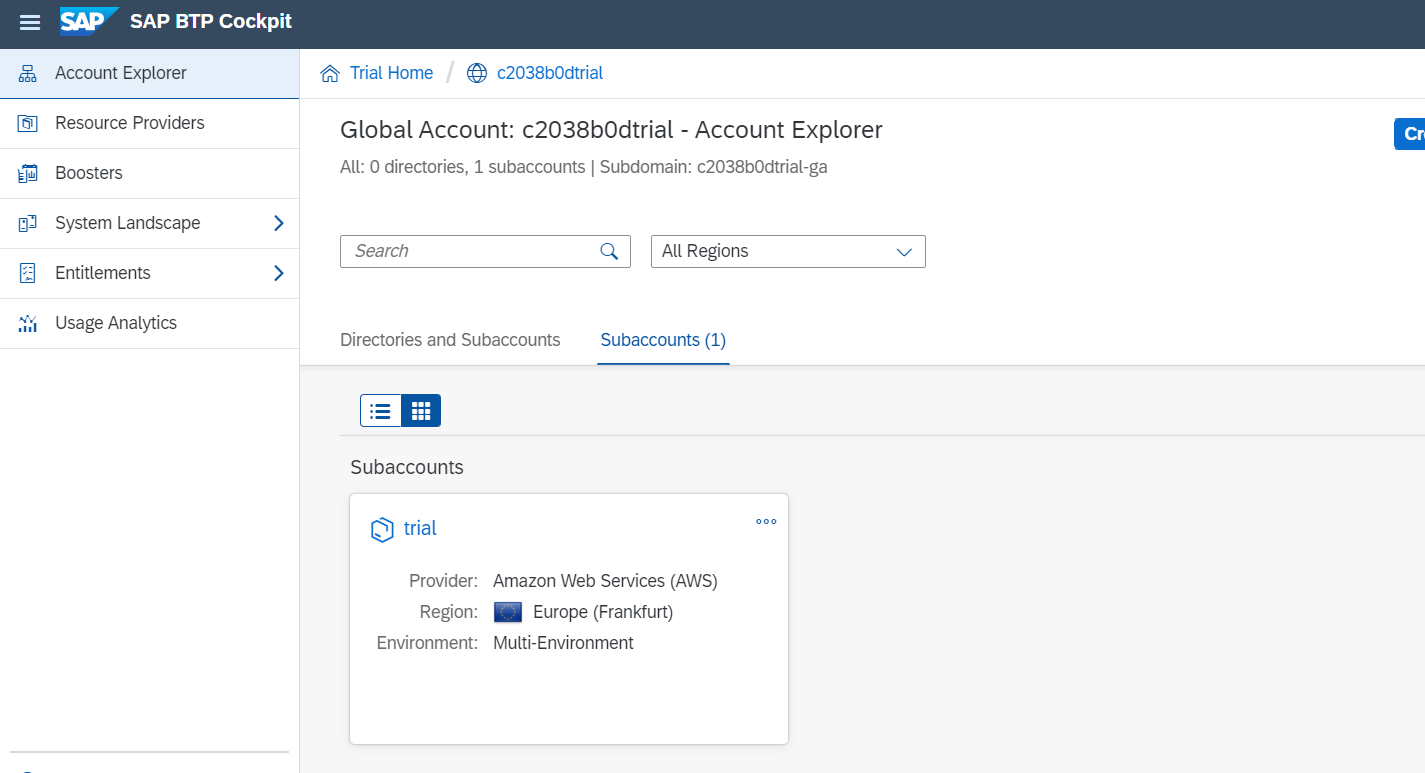
Log into SAP Cloud Foundry Trial (if you do not have an account, you have to create one). Once there, select trial:
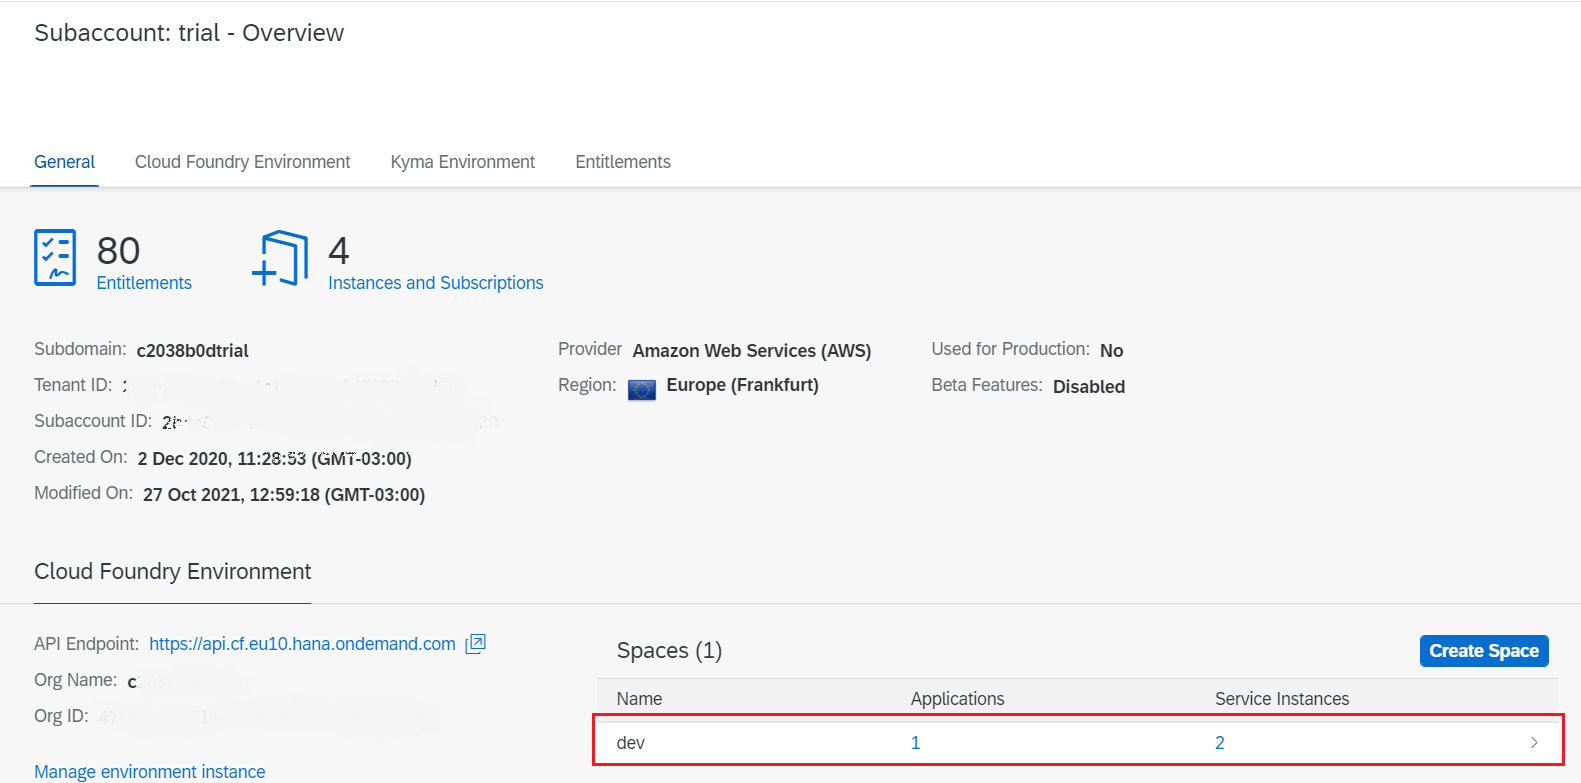
Then, select the dev Space as shown below:
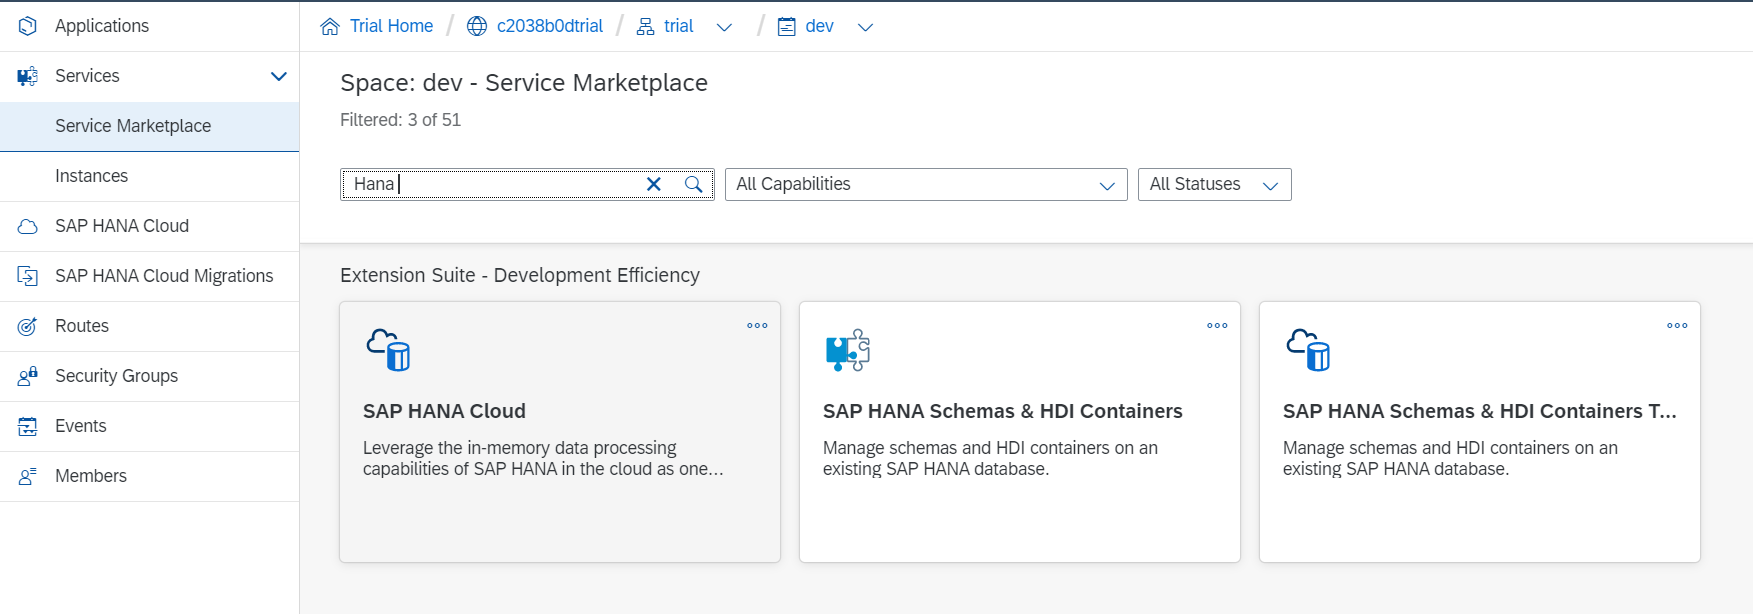
In the left menu, select Services > Service Marketplace. Then, search for Hana using the search box, and select SAP HANA Cloud:
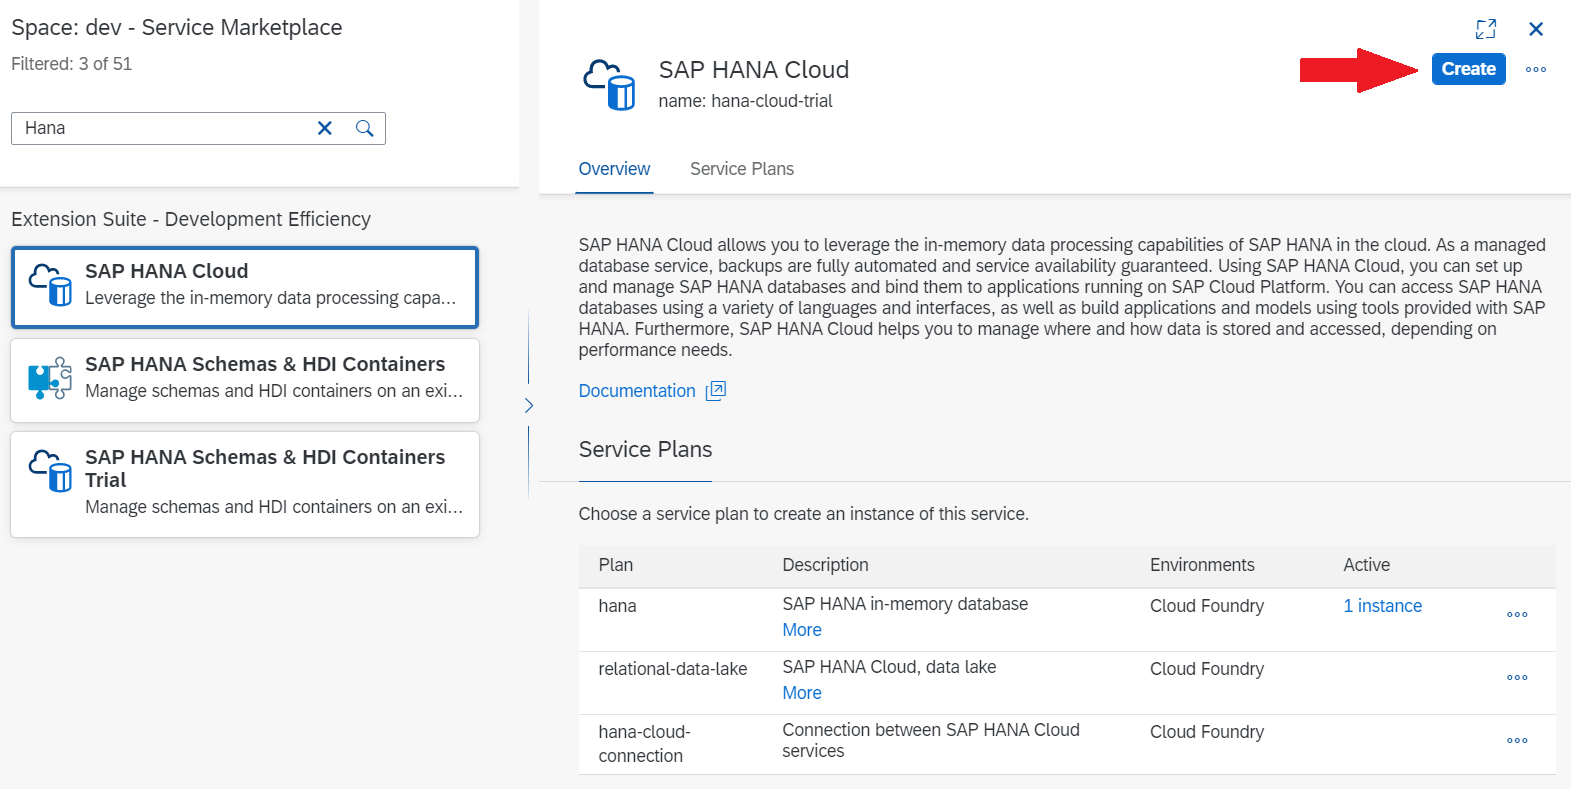
The next step is to create a new instance of the service. So, select Instances and press the New Instance button:
This will open a Popup Wizard that will inform you to follow a link if you want to manage SAP HANA Cloud Instances, click on that link.

This will redirect you to a new page and ask to select an account to login with
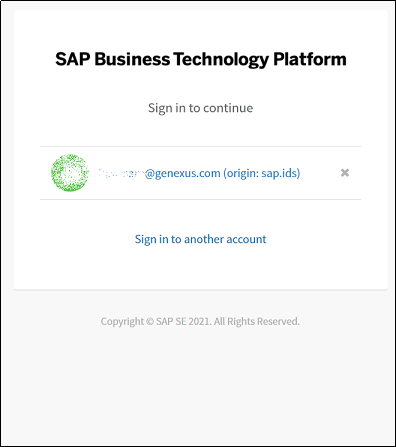
Log in or select an account and continue.
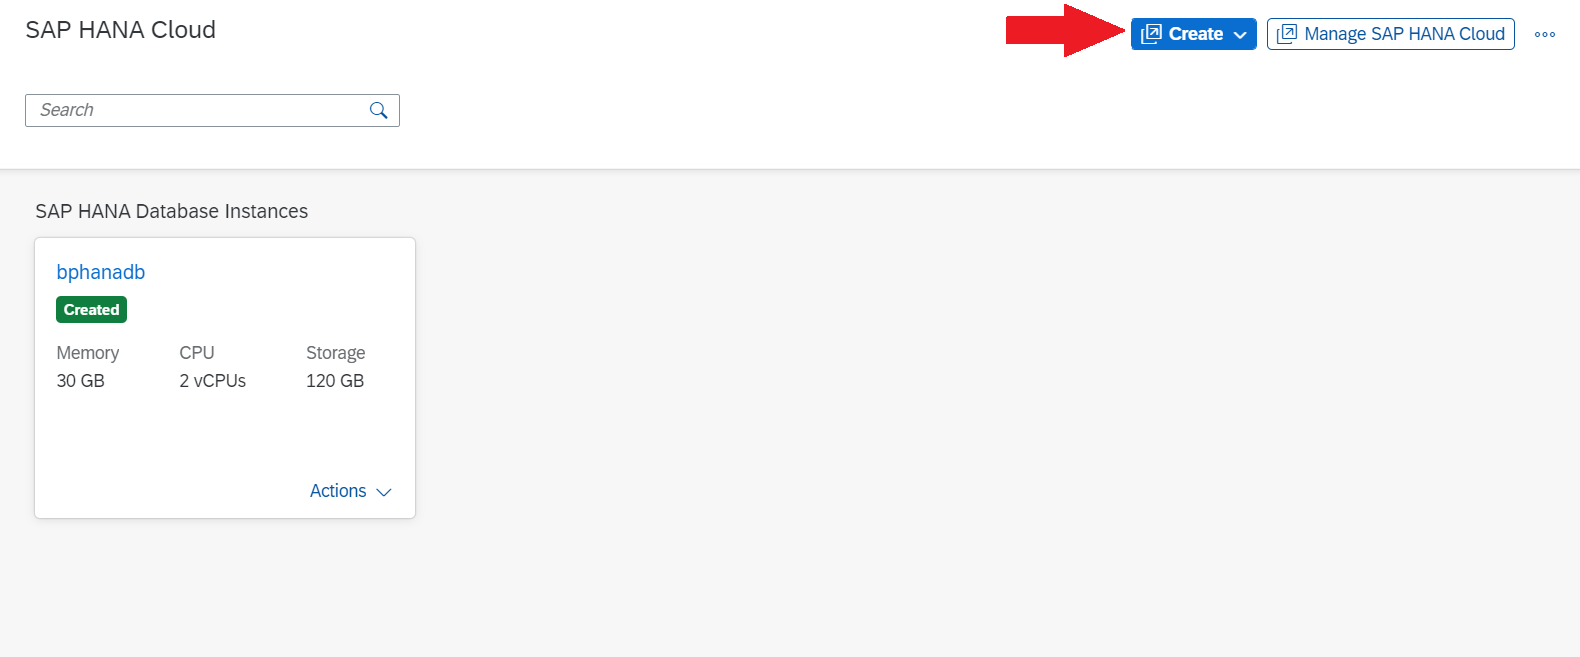
SAP HANA Cloud Central will load, on this page select Create
This will launch a new Wizard, to set up the new HANA database to be created.
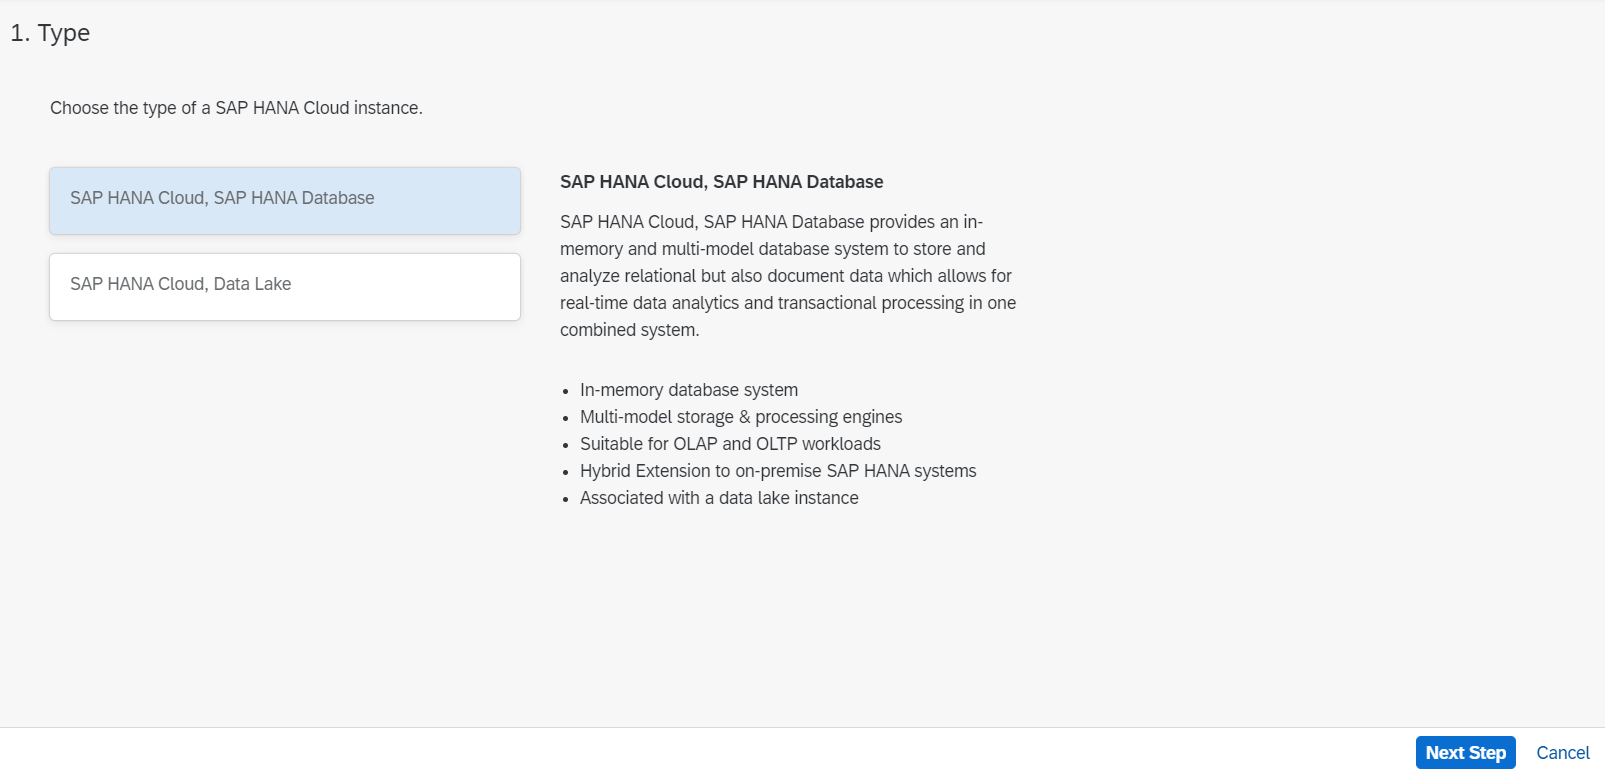
On the first step, select SAP HANA Cloud, SAP HANA Database and proceed to the next step.
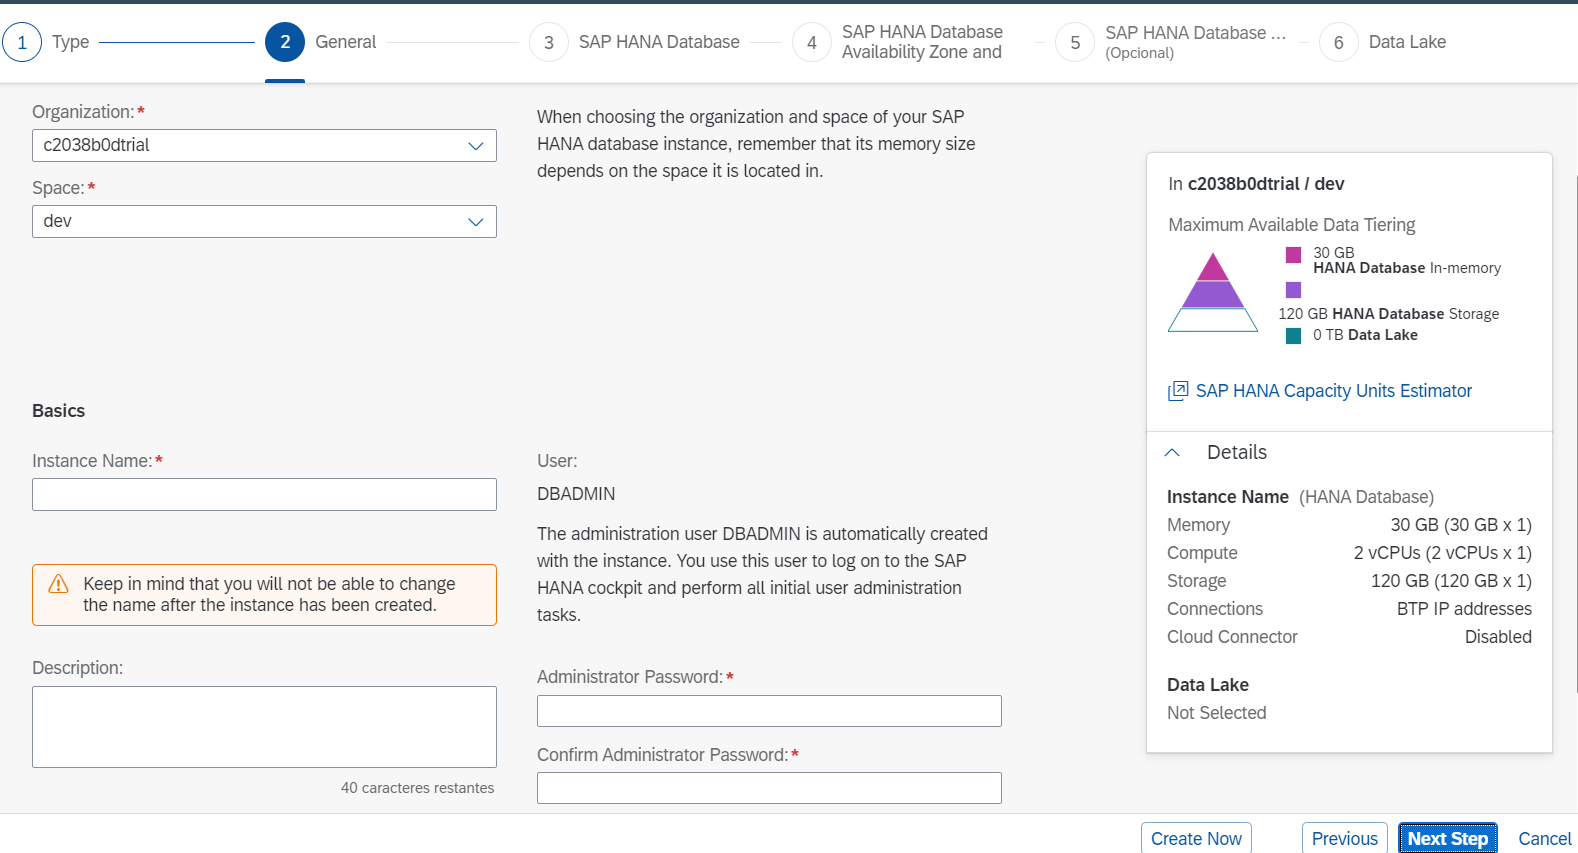
On this next step lets setup the HANA instance name and the password of the DBADMIN (Save this password somewhere you will use it later)
After setting these properties up, continue to the next step.
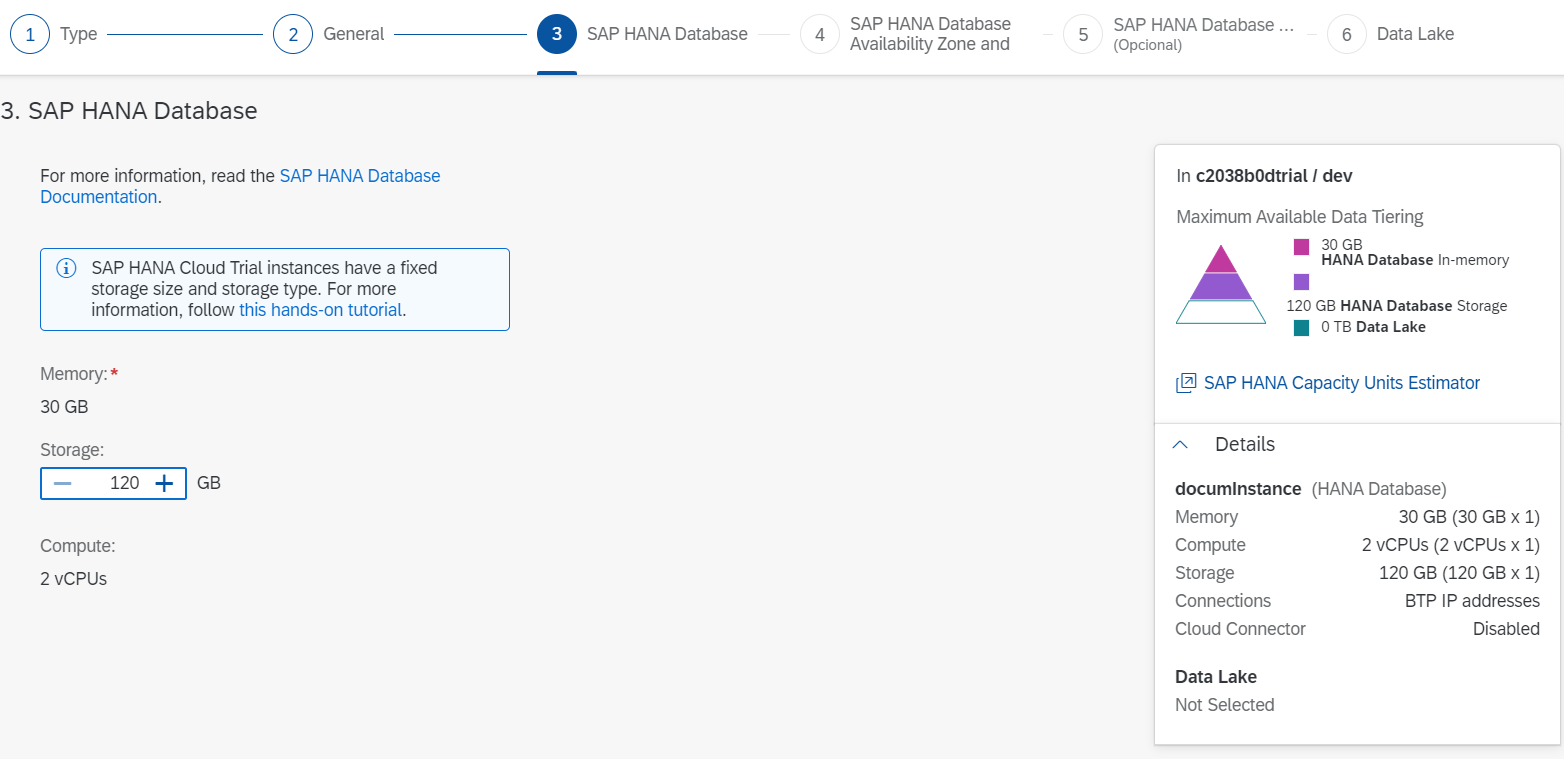
This step it lets you configure the space that will be assigned to the database (by default it is 120Gb).
After setting this up (if you decided to change the default) continue to the next step.
On the 4th step, the Wizard lets you set up replicas, but this functionality is unavailable for trial instances.
Proceed to the 5th and last step.
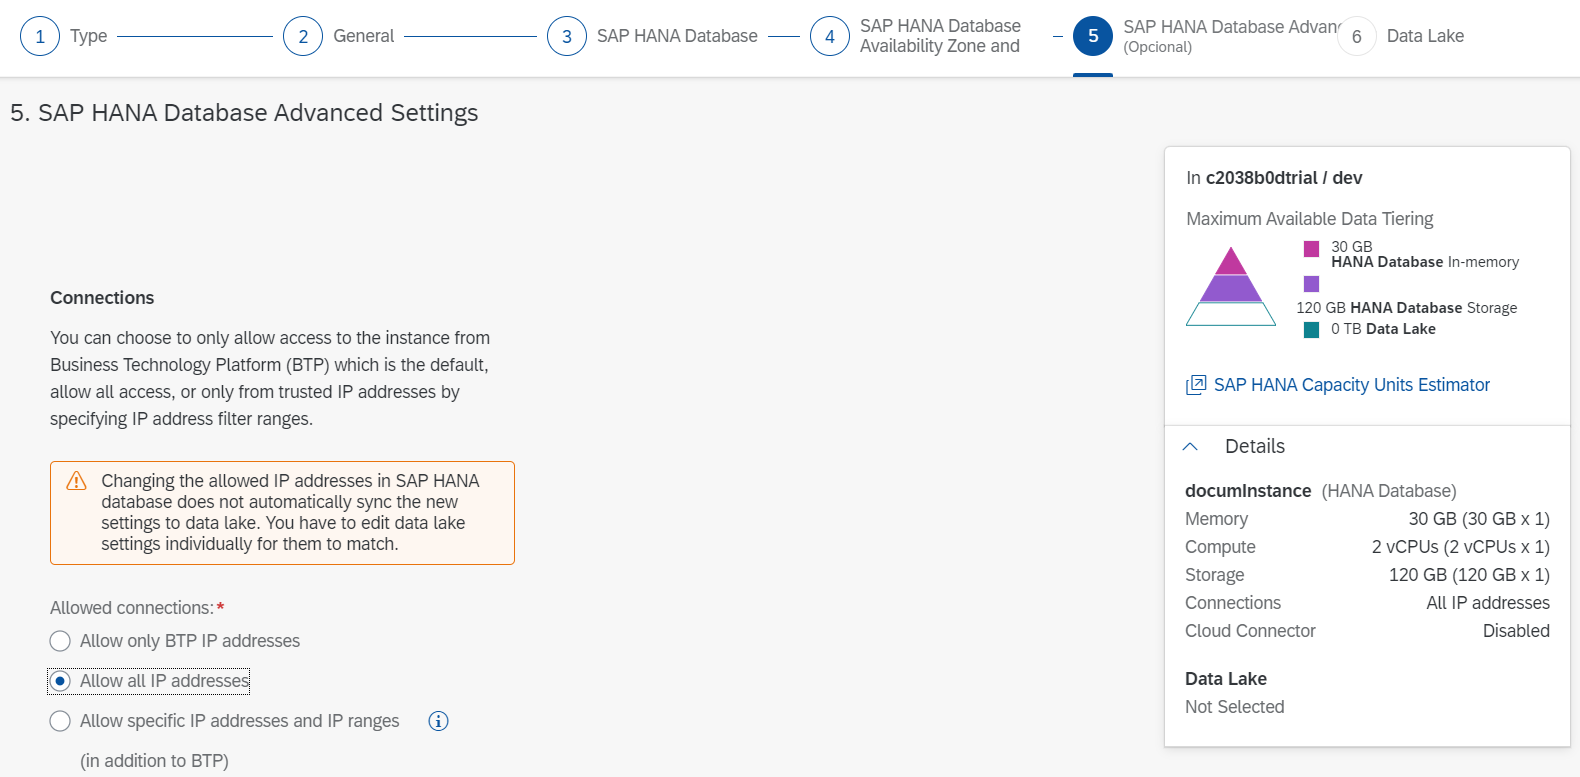
This step allows you to set up the accessibility to this database. For you to be able to reach this database from GeneXus, you will have to select Allow all IP addresses.
After this last step, select Create Now. While the database is being created, go to Service Instances of the SAP BTP Cockpit.
Here, you will see the new database as an instance. Select the 3 dots and Create Service Key:

This will open a Popup to create de Service Key. Select the name you want for the Service Key and then click on Create:
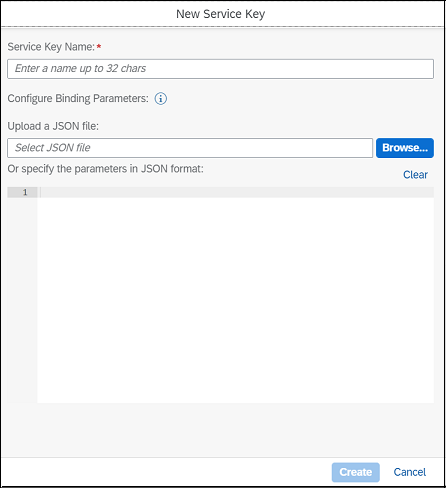
After creating the Service Key save its JSON, because you will need it to configure the database on GeneXus.
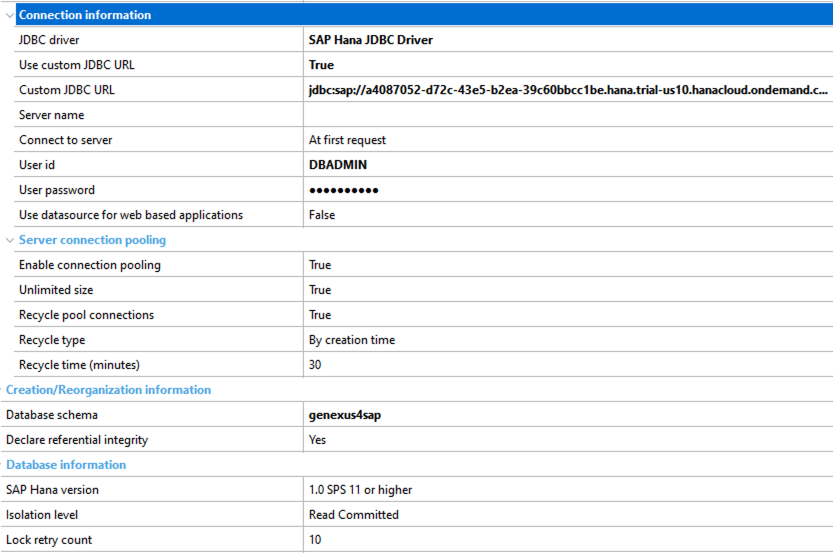
To be able to use the HANA Cloud, you need to configure the Data Store. To achieve this, go to the Knowledge Base Preferences and select the Environment you want to deploy. Then, select the desired Data Store, and set the following properties with the values you have on the JSON you retrieved from the Service Key:
Use Custom JDBC URL = True
Use Custom JDBC URL = JSON URL field (you must set to false the validateCertificate parameter, for example, jdbc:sap://ad72c-43e5-b2ea-39c60bbcc1be.hana.trial-us10.hanacloud.ondemand.com:443?encrypt=true&validateCertificate=false )
User Id = DBADMIN
Password = DBADMIN password that you created.
Database Schema = The schema name you want to use.
You should have something like this:
To connect with SAP HANA database you must use the latest SAP HANA JDBC driver, you can download it from here and then copy the ngdbc.jar, for example the ngdbc-2.14.10.jar, inside the folder \Web\lib in your target environment.
This allows you to work on your application using the SAP HANA Cloud directly, even if you are still developing on your PC and have not deployed yet to SAP BTP.
After executing all the queries, you are ready to deploy the application to SAP BTP.
Important:
- You must verify that the Java platform support property is set with "Java EE" and the JDK Directory (JAVA HOME) property is configured with the path to a JDK 8 directory and then rebuild all if necessary. The default version in SAP BTP when using the sap_java_buildpack is Java 8 as documented here.
- You must include the reference to include the JDBC driver file as explained in Application Deployment tool in the section Deployment of additional files and directories. For example, in the file gxdproj you must add:
<ItemGroup>
<AdditionalFile Include="lib\ngdbc-2.14.10.jar">
<RelativeTargetDir>WEB-INF\lib</RelativeTargetDir>
</AdditionalFile>
</ItemGroup>
Next, you must copy the ngdbc-2.14.10.jar to the environment Web\lib directory.
To deploy the application, go to Build > Deploy Application and select the objects you want to deploy. Select SAP Cloud Platform (Cloud Foundry) as Target.
Then, you need to set up the following Deploy Properties:
Cloud Foundry CLI Directory = the directory where you have installed the Cloud Foundry client (e.g.: C:\Program Files\Cloud Foundry)
API Endpoint = endpoint where your Cloud Foundry account is located.
Organization name = organization name of your Cloud Foundry account (e.g.: p123456789trial).
Space name = space name of the Cloud Foundry (e.g.: dev).
Origin = Specifies the name of the identity provider to use when logging in. This value is optional and will depend on how the SAP BTP Identity Provider is configured. (e.g.:ldap)
User = user account used to log into the SAP Cloud Foundry.
Password = user's password.
HANA Instance Name = name of the service created (e.g.: myHANAdb).
Application Name = name you want to give to the application.
In the routes field, it will show you where the app has been deployed, and you can access it by adding /servlet/com.<Knowledge Base name>.<object you want to access>
(e.g.: https://deploycf-wacky-klipspringer.cfapps.eu10.hana.ondemand.com/servlet/com.deploycf.fioribaseobjects.fiorilaunchpad).