This article describes how to create a Dynamic Scripted Chatbot, which can be defined since GeneXus 18.
First, create a Conversational Flows object.
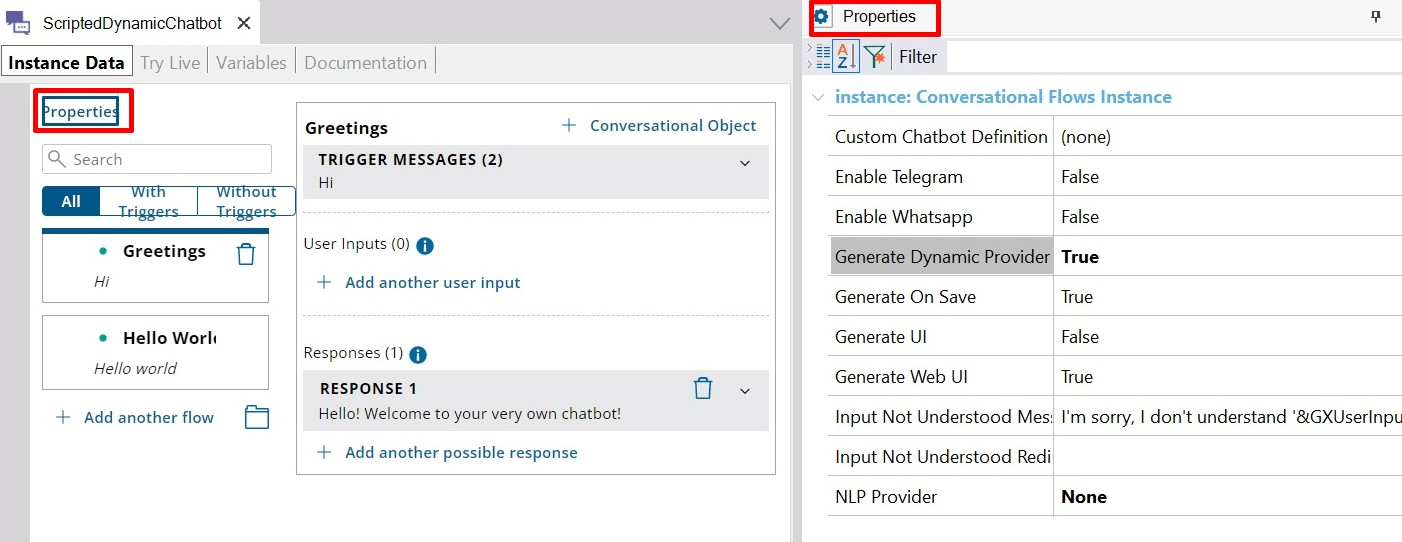
To configure the chatbot as Scripted, set the NLP Provider property to “None”. To enable the generation of a dynamic scripted Chatbot, set the Generate Dynamic Provider property to True.
Note: The “Properties” button inside the Conversational
Flow instance helps you view the Properties window.
After saving the Conversational object, the necessary resources to develop the Dynamic Scripted chatbot will be imported and generated.
Note that within these resources, the necessary Transaction objects to access data related to chatbot instances are included.
Select “Run” (F5 on your keyboard) to start testing the edition of the wizard at runtime. The Launchpad Tool Window will be shown, including the links to execute the associated Panels:
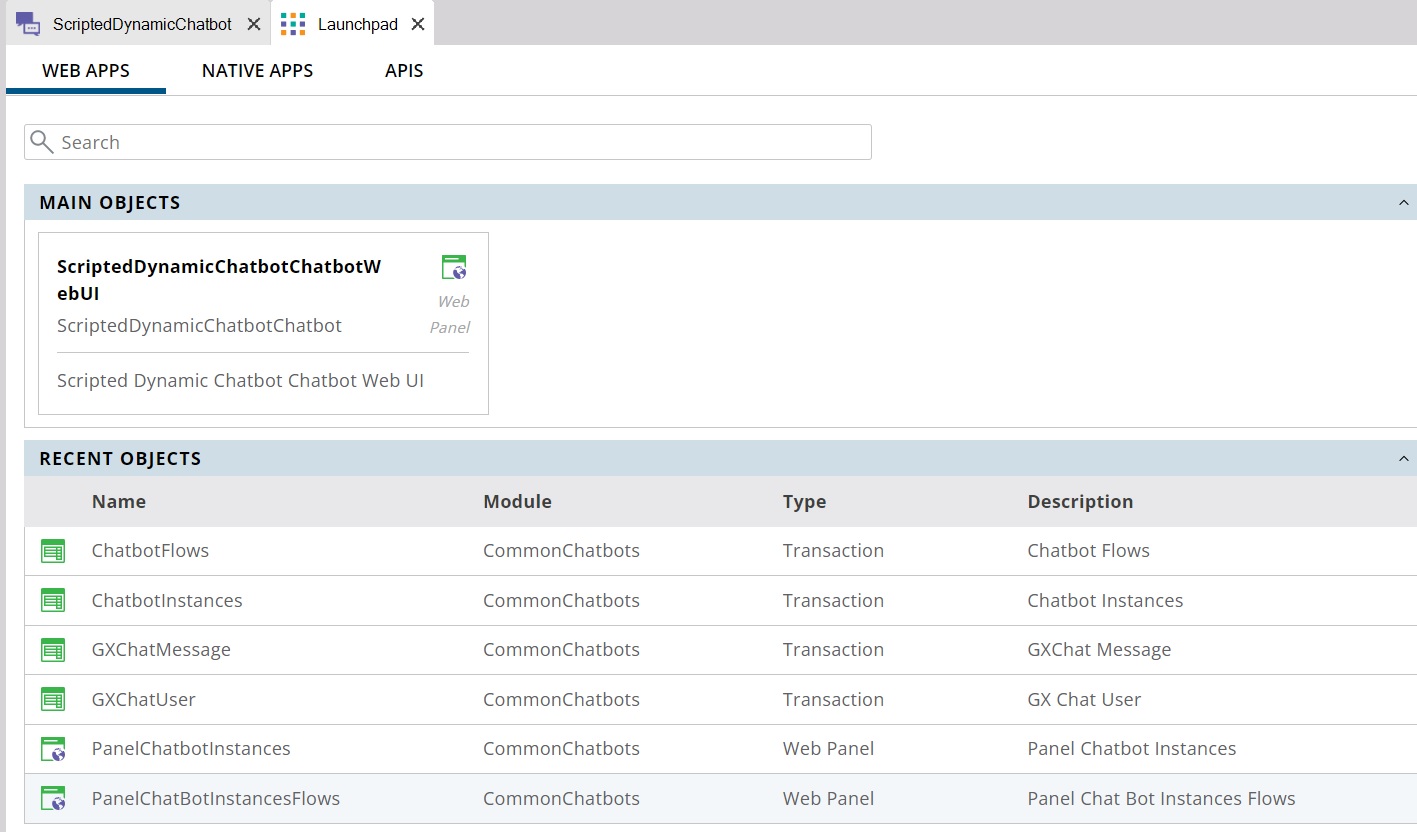
By clicking on the Main object, the following Panel (PanelChatbotFlows) will be executed:
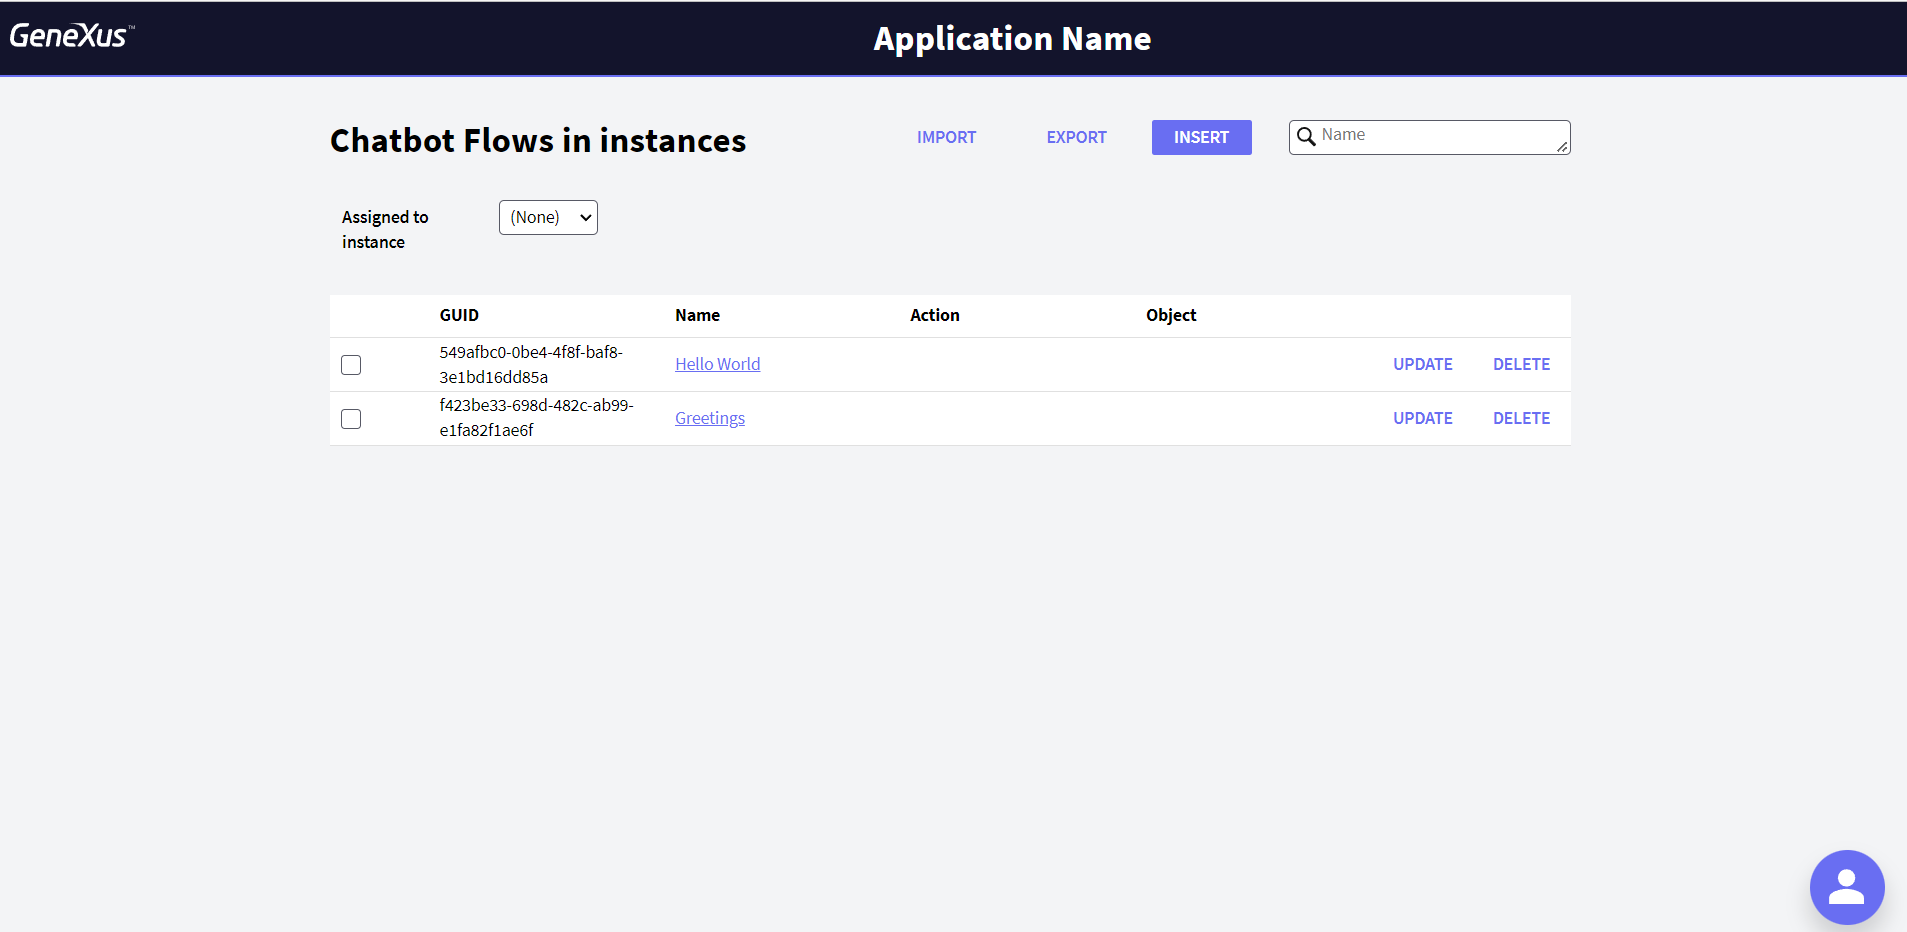
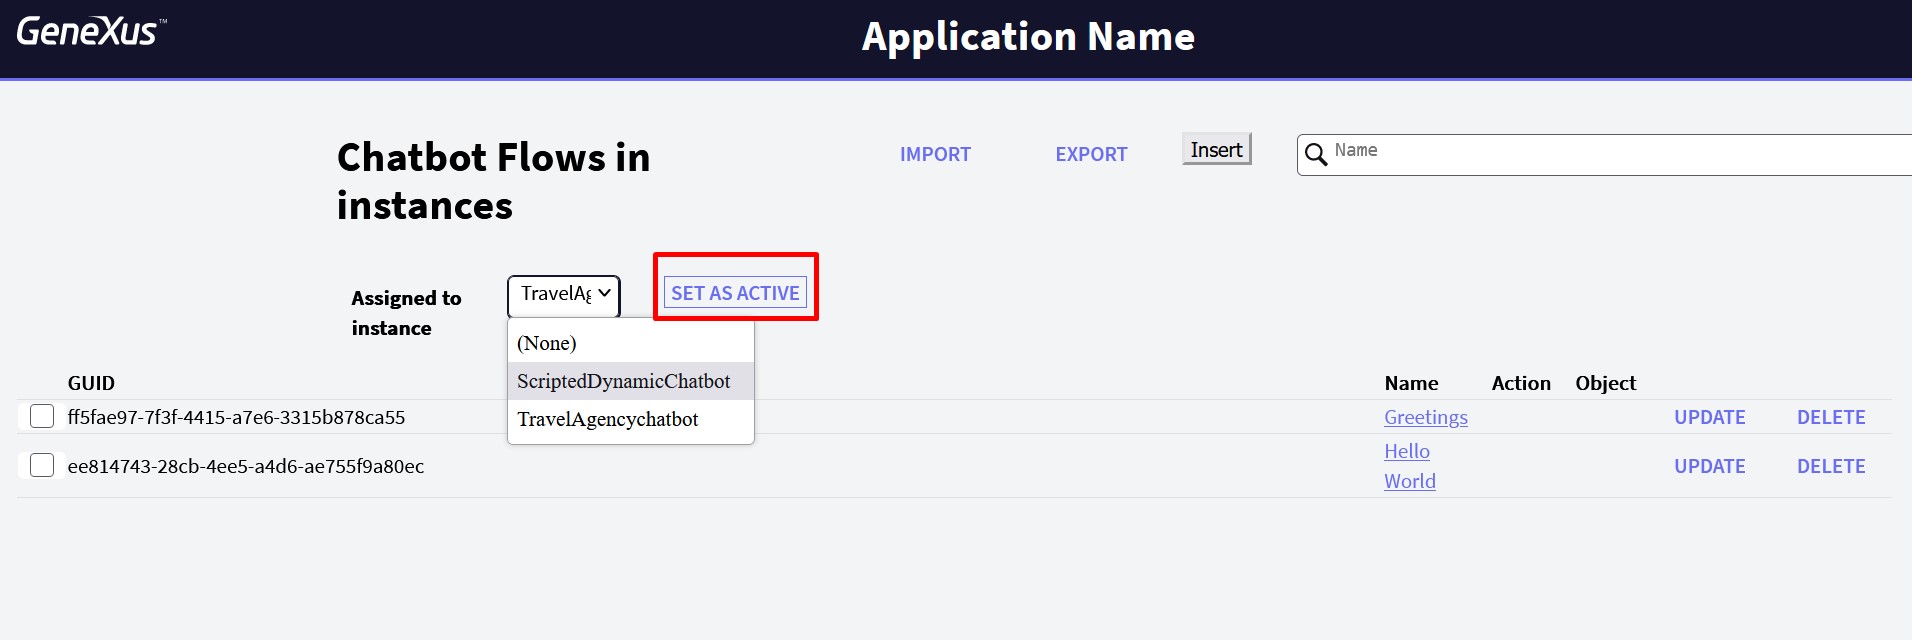
The purpose of this screen is to show all those Flows related to at least one instance. In addition, this Panel allows you to create a new Flow, choose an existing one, edit one, and even delete it.
As you can see in the picture below, there is an “Assigned to instance” combo box, which allows you to filter by a particular instance, or display all Flows (None).
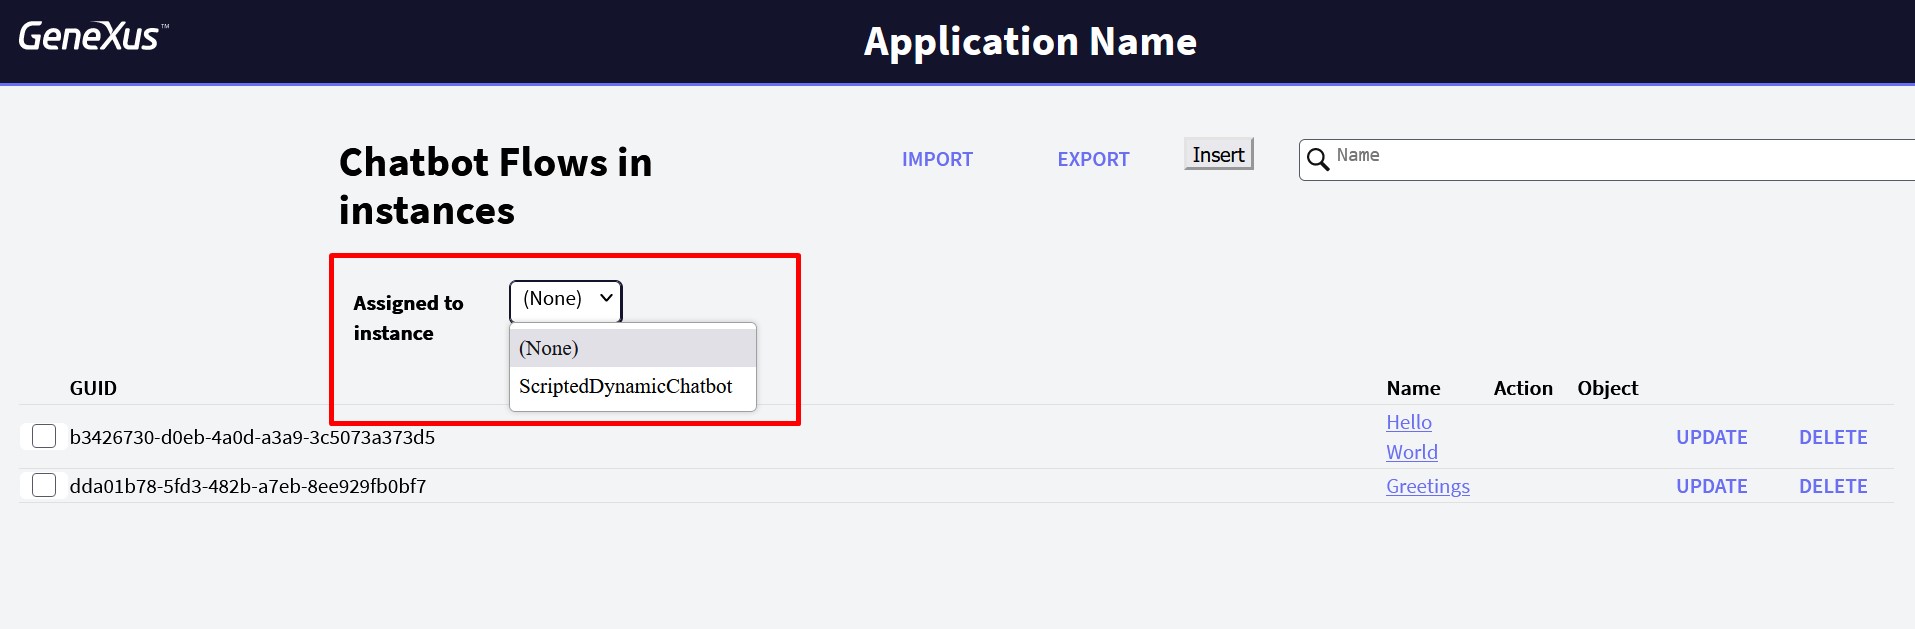
When selecting a specific instance, the “SET AS ACTIVE” option will be also enabled, which allows you to define that you want to work with that particular instance. The new Flows to be inserted and the chat available are associated with that selected instance.
It is also possible to Export/Import Flows. To export, select the desired Flow or Flows and click on the “Export” button. This will generate a .json file with the necessary data.
When clicking on the “Import” button, a .json type file will be requested with the necessary information to add the desired Flows. By default, you will see two Flows already created in the PanelChatbotFlows Panel: “Hello World” and “Greetings.” You can associate them with an instance by using the “Assigned to instance” combo box.
Click on the “INSERT” button in the “PanelChatbotFlows” Panel to create a new Flow.
Note: It is possible to create a Flow associated with a previously selected instance or create a Flow without the need to have an instance activated. In the last case, the following warning will be shown:
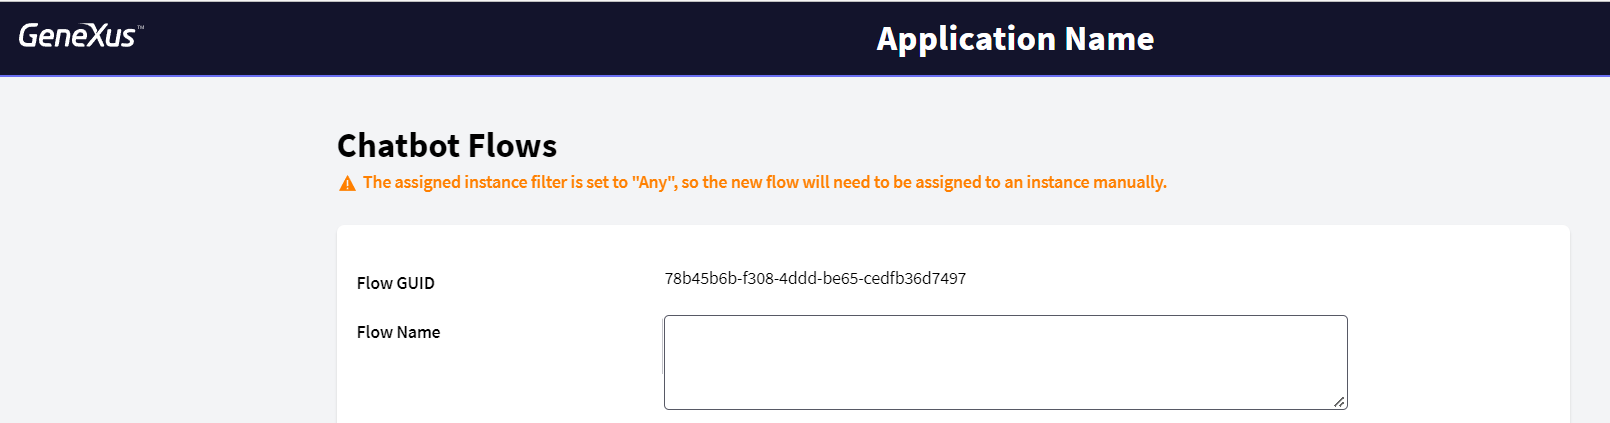
Note that a Flow can be associated with several instances because they can be reused.
After clicking on the “INSERT” button to create a new Flow, the following screen will be displayed for you to configure the data associated with a Flow.
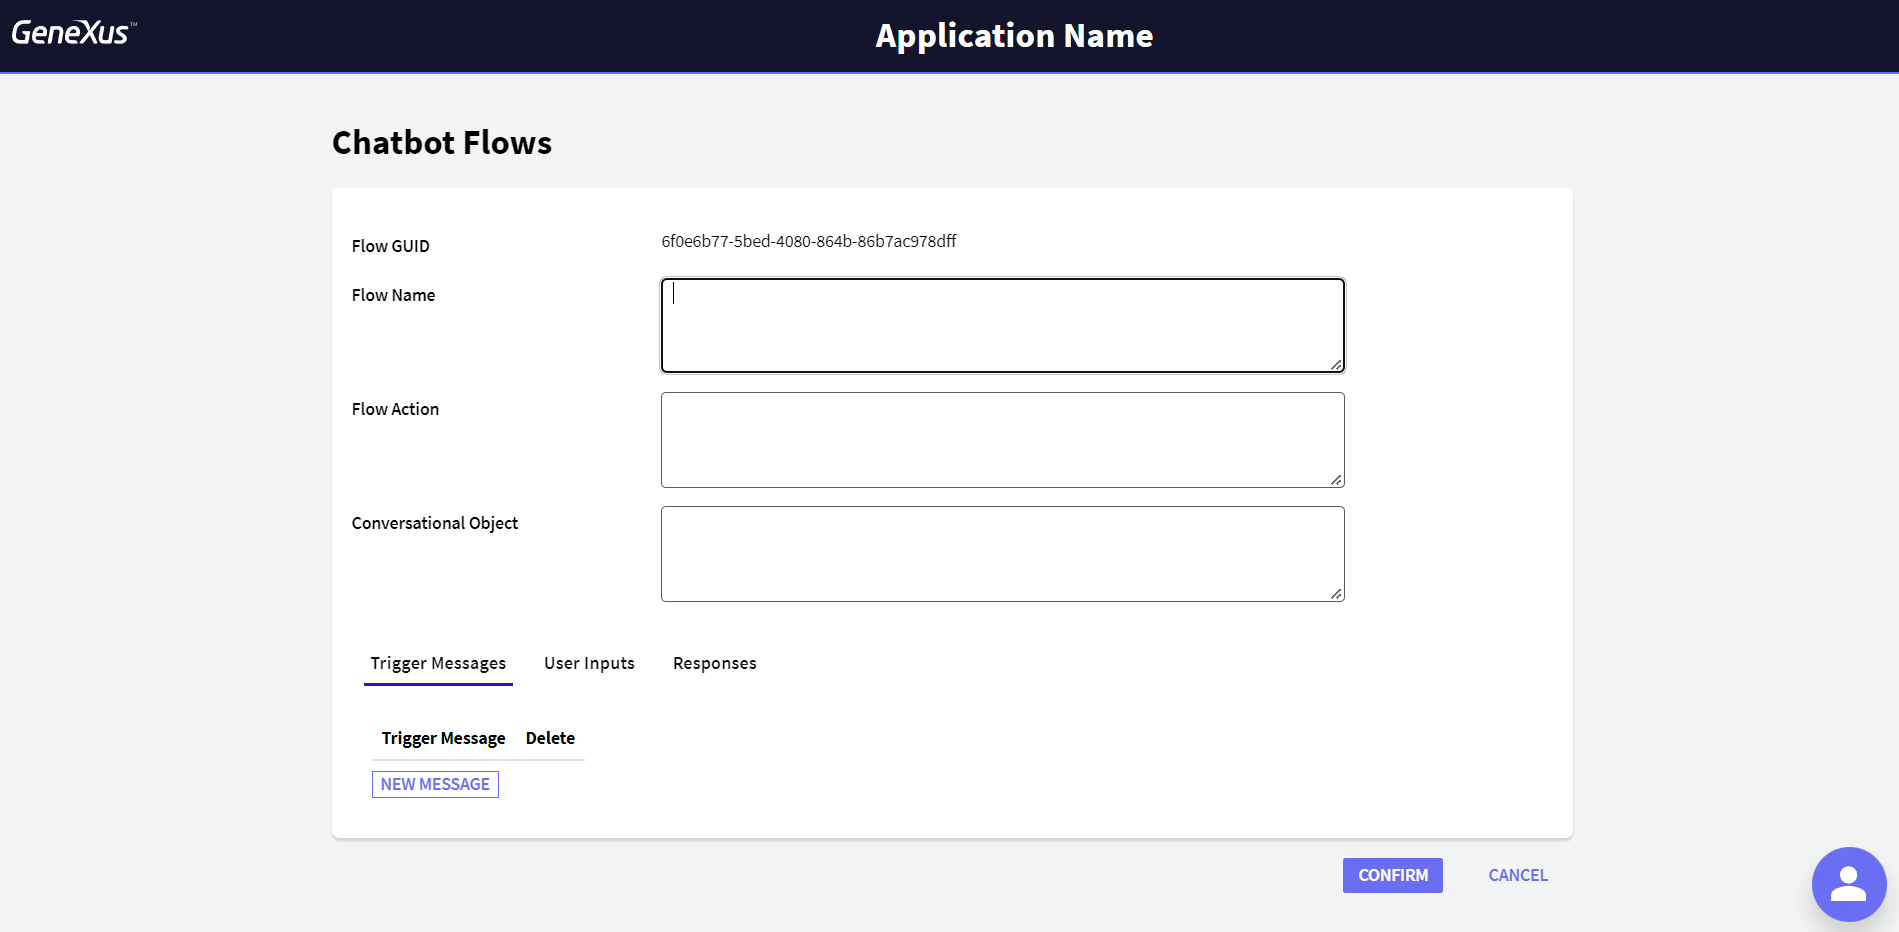
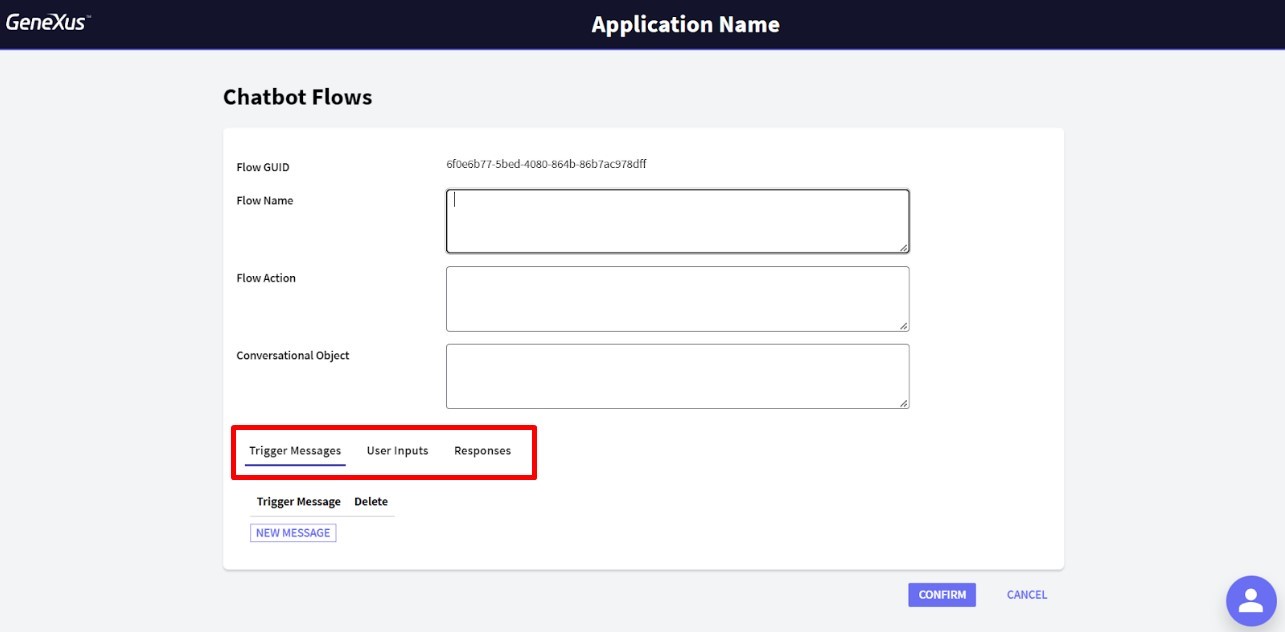
This dialog contains three tabs where you can configure Trigger Messages, User Inputs, and Responses for that particular Flow.
These are the messages you expect users might type in the chatbot. A Scripted chatbot checks that the Trigger Message matches the messages entered by the user.
When clicking on the Trigger Messages Tab in the Dynamic Scripted Chatbot, the following will be displayed:
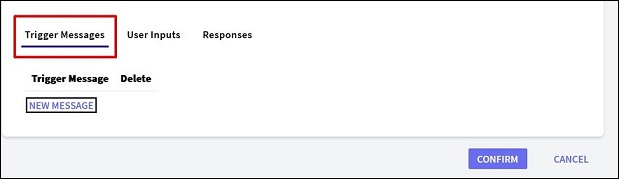
To add a new Trigger Message, click on the “NEW MESSAGE” button and this other dialog will be shown:
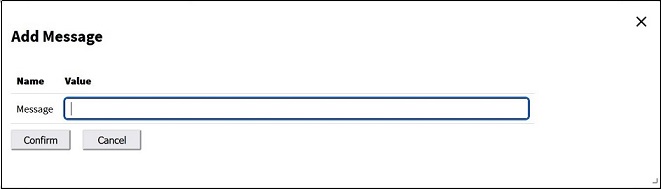
In this screen, you can configure the newly added message for the Trigger messages of that Flow.
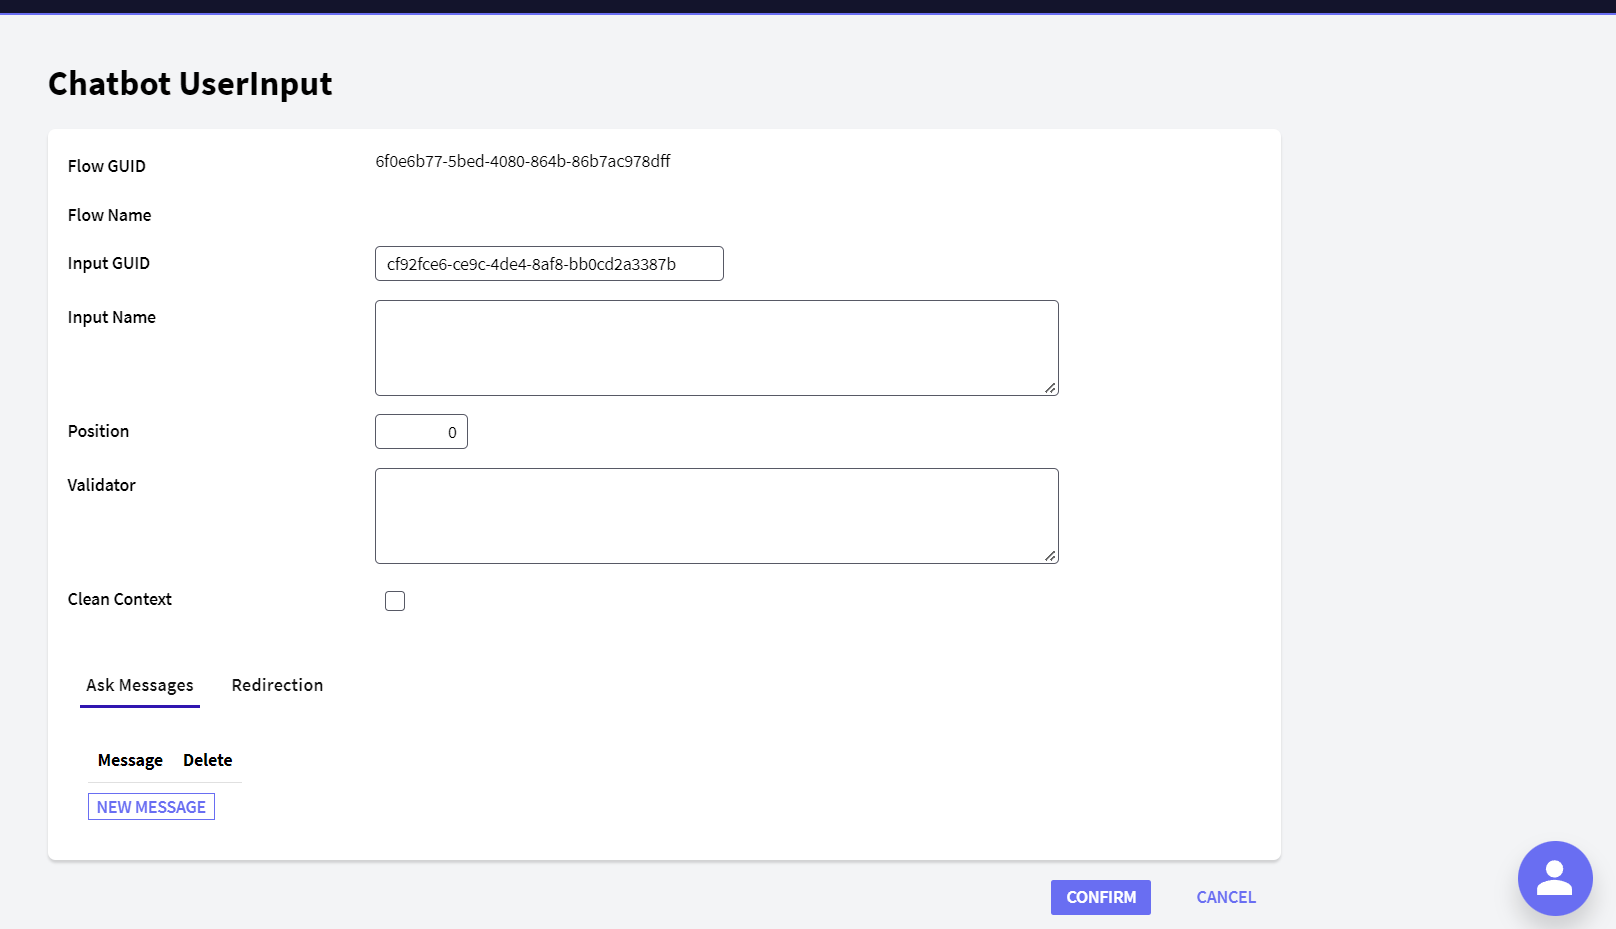
When clicking on the User Input tab and then on New User Input, the following screen will be visible to configure the corresponding data:
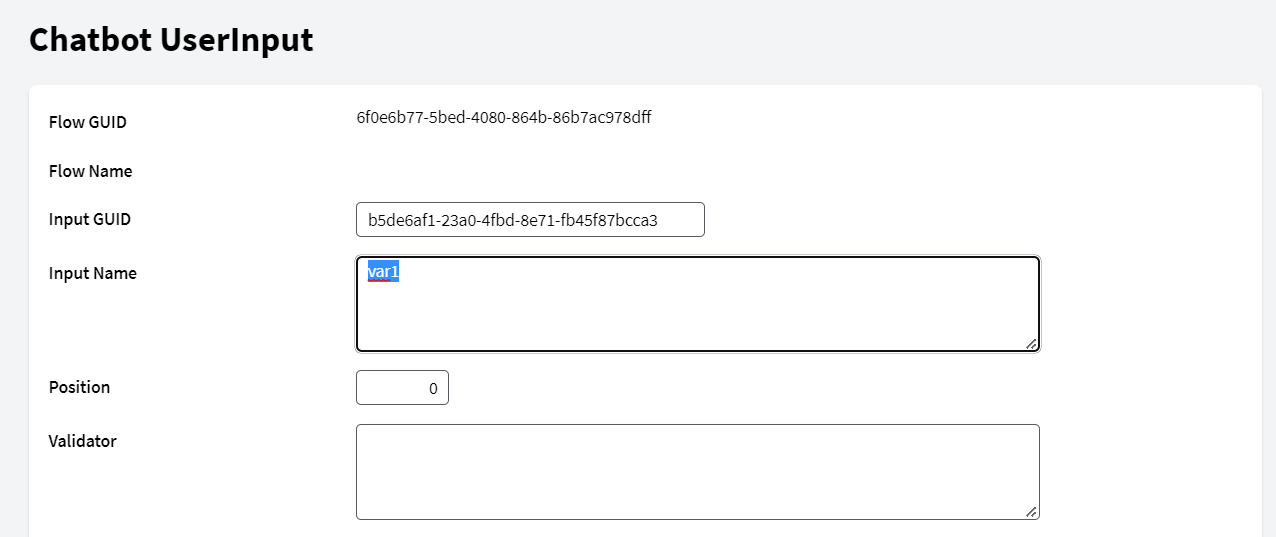
In the “Input Name” field, the name is configured without the &; for example: var1.
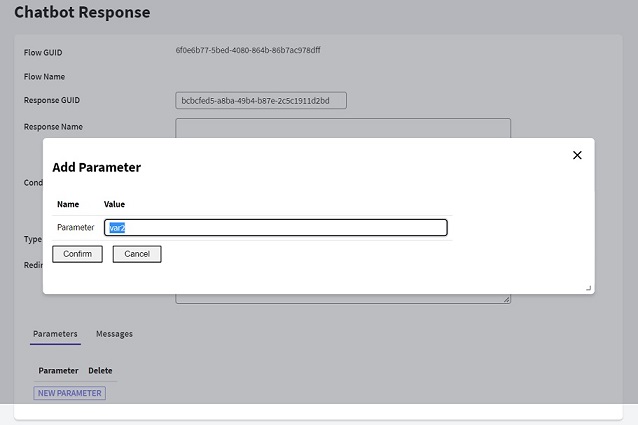
When clicking on the “Responses” Tab and then on “New Response”, the following screen is displayed:

In the Parameters tab, the Output parameter and output message are configured. The output parameter is configured in the same way as the User input without the &; for example: var1. To reference an output variable in the Messages—if necessary—add the &; for example: &var1.
Inside the New Chatbot Flow, complete the Conversational Object field with the “Qualified Name” of the desired Procedure object (search the Procedure Qualified Name property and copy its value).
Next, indicate the input and output parameters of the Conversational Object.
Consider a Procedure called “TestCO” that contains the following Parm rule: Parm(in:&var1, out:&var2);
Click on the “UPDATE” link next to your Chatbot Flow. Go to the User Input section, and click on “NEW INPUT.” Add the variable var1 and its corresponding Ask Message.
In the Position field, define the position of the parameter in the Parm rule of the Conversational Object.
Enter the output Parm “var2” in the Responses Tab as a parameter.
Important: The Procedure to be used as a Conversational Object must be previously generated in your KB.
Note: For Dynamic Scripted type Chatbots, it is only possible to configure a Conversational Object that uses String type variables in its Parm rule.
 Chatbots with GeneXus 18