Roles are fundamental to managing security and permissions within Globant Enterprise AI. They define which actions and functionalities users can perform based on their responsibilities within a project.
This section focuses on managing these roles, which control frontend access to assistants.
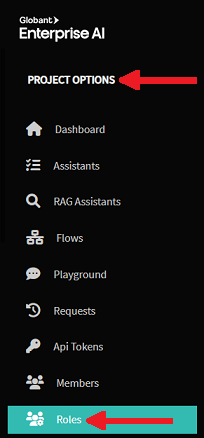
Location: Roles are created and edited within each Project. To achieve this, you must enter the Globant Enterprise AI Backoffice. On the left side of the screen, you can find the Backoffice menu. In this menu, click on Roles below "PROJECT OPTIONS".
Role Description: Each project has four default roles that allow different levels of access and functions: Project Member, Project Administrator, Access all Project Assistants, and Access for Project Assistants without Membership.
Role Origin: It takes the value System for the roles that are defined by default when creating the project. If you create a new role, the value will be user-defined.
Role Type: Roles are categorized as "Backend" or "Frontend". Backend roles implicitly grant Frontend access.
Permissions: Allows defining which assistants are available to each role with the 'Frontend' value in the Role Type column, ensuring that members who are assigned these roles can access only the configured assistants, from the Frontend interface.
Available only for the "Access for Project Assistants without Membership" role and for user-defined roles.
User Reference: Each role displays a quick reference to the users assigned to it. Clicking on the "USERS" column reveals the list of assigned users.
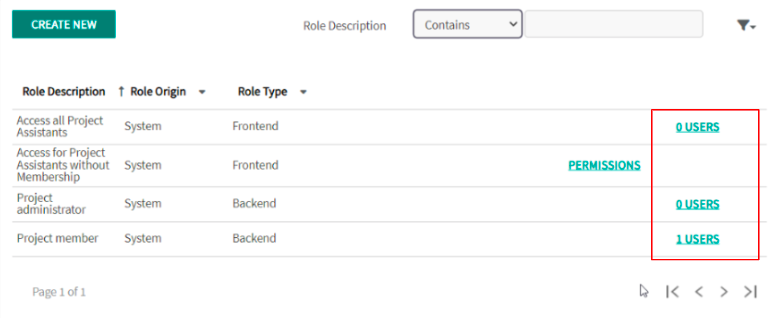
System-Defined Roles: Backend roles are system-defined. All roles you create will be "Frontend" roles.
Default Roles: Every new project starts with four system-defined roles.
Creating New Roles: To create a new role, follow these steps:
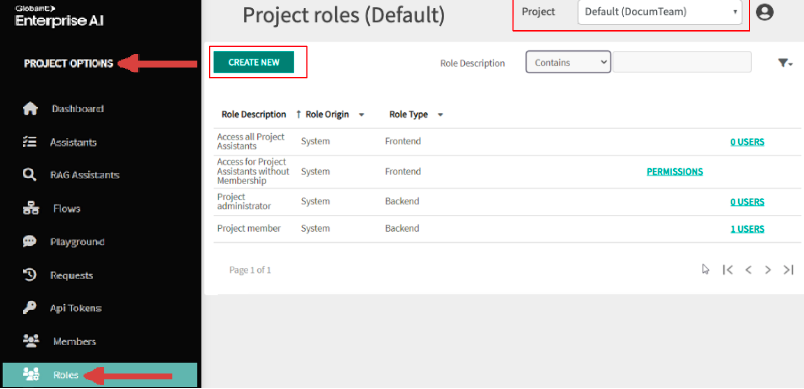
- Select Project: In the Project Dynamic Combo Box, select the project you want to work with.
- Navigate to Roles: Navigate to the "Roles" section below "PROJECT OPTIONS".
- Create New: Click on the "CREATE NEW" button.
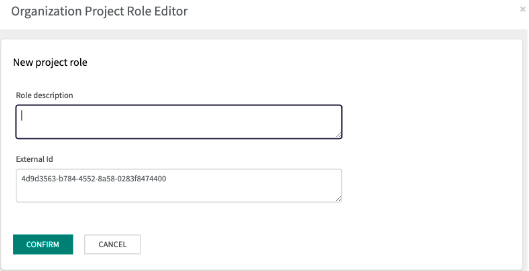
Role Details: When creating a new role, provide a description (which also acts as the name) and optionally an "External Id". The "External Id" defaults to the internal identifier of the role but can be used to map the role to a role in another IDP (like Microsoft Entra ID). You can update the "External Id" later by editing the role.
Editing and Deleting Roles: User-defined roles can be edited (name/description, external ID) and deleted, but only if the role is not assigned to any user.
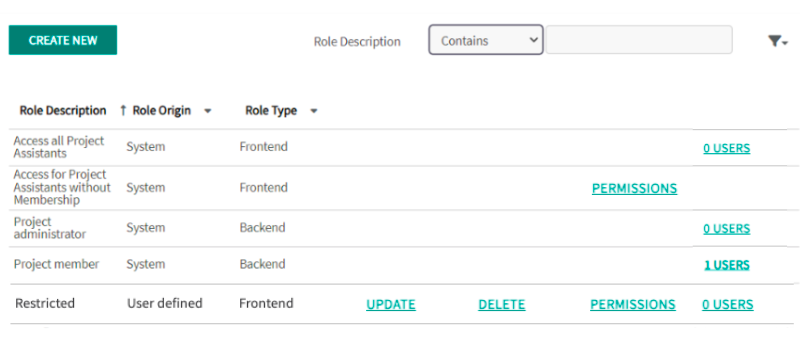
List of assistants: By clicking on "PERMISSIONS", a window opens where you can edit the permissions of a role, selecting from the list the assistants you wish to include.
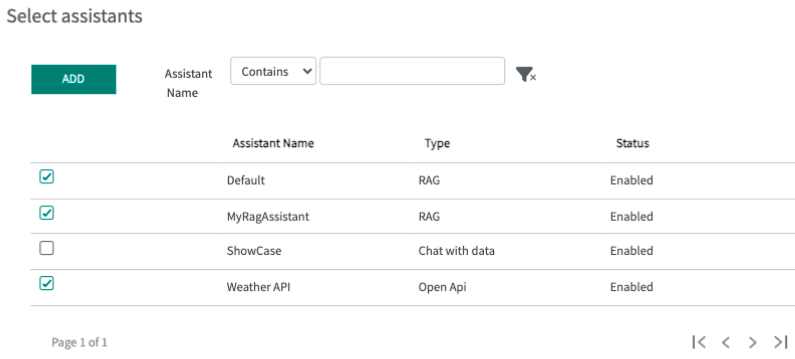
Confirmation: To confirm, click on the ADD button. Once you have confirmed the permissions, the list of assistants included in the role is displayed.
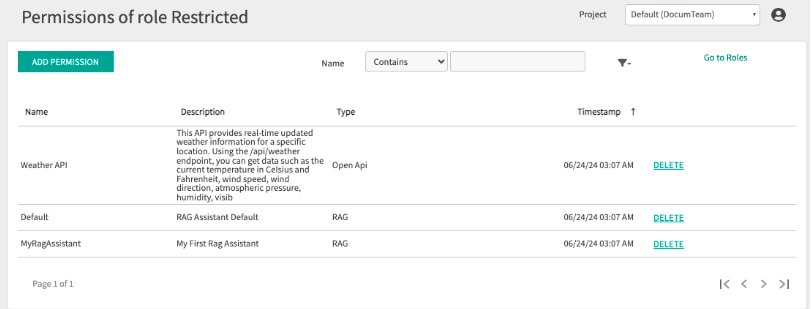
Deleting assistants: To remove an assistant from the list, use the "DELETE" action at the end of each item.
Assistant Visibility: Frontend users with a specific role assigned will only see the assistants included in that role when accessing the Frontend.
Multiple Roles: If a user has multiple Frontend roles assigned, they will see the combined list of assistants included in all their assigned roles, even if assistants are repeated across roles.
Backend role: Users who have a Backend role can see all the project's assistants in the Frontend. This is because Backend roles imply full access to the Frontend.