Each project user is assigned one or more roles, which define their level of access and the actions they can perform. The "Members" section is the central hub for managing users and their permissions within a project.
The "Members" section allows you to:
- View and manage the list of users who have access to a project.
- Assign and remove roles from users, granting them specific permissions.
- Invite new users to join the project and assign them appropriate roles.
- Track the history of user invitations and role changes.
This section explains how to manage project members in Globant Enterprise AI. Members are users who have been granted access to a specific project.
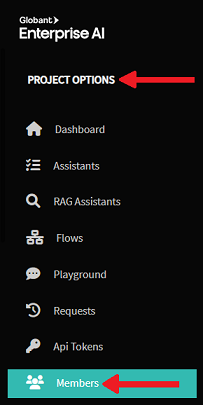
Location: You can manage project members within the "Members" section of a project. To achieve this, you must enter the Globant Enterprise AI Backoffice. On the left side of the screen, you can find the Backoffice menu. In this menu, click on Members under "PROJECT OPTIONS".

Member List: The "Members" section shows a list of users with permissions to interact with the project, either through the Backoffice or the Frontend.

Adding and Removing Roles: To add or remove roles for a user already in the members list, click on "ROLES" corresponding to its row in the grid. You can then select or remove roles from their assigned list.
Removing Membership: To completely remove a user's membership from a project, use the "DELETE" option instead of removing all their roles individually.
Access Type: This column summarizes whether a user has access to only the Frontend or also to the Backend, based on their assigned roles.
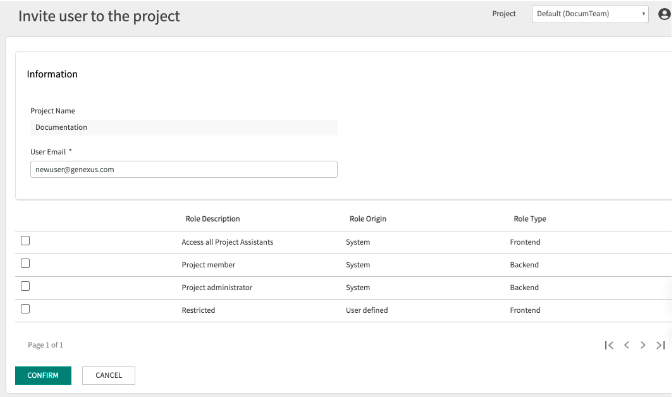
New Invitation: To add a new member, follow these steps:
- Select Project: In the Project Dynamic Combo Box, select the project you want to work with.
- Navigate to Roles: Navigate to the "Members" section below "PROJECT OPTIONS".
- Click New Invitation: Click on the "NEW INVITATION" button.

Invitation Details: Enter the email address of the invited user and select the roles you want to assign.

Automatic Processing: When confirming the invitation, if the user has logged into Globant Enterprise AI before, the invitation will be processed automatically without requiring them to log in again.
Pending Invitations: If the user is new to Globant Enterprise AI (never logged in), the invitation will be pending confirmation until they log in. Invitations have a 72-hour validity period. After that, they expire, and you'll need to re-enter the invitation.
Notification Emails: Notification emails are sent only when a user is new to the project (or new to the organization, for organization member invitations). Adding or removing roles from an existing user will not trigger notification emails.
Tracking Changes: The invitation history section tracks all member movements and roles Granted/Revoked/Expired. Every action performed for a member is recorded in this list. For example, if a user is assigned two roles, two invitations will appear in the list, and the same applies if roles are removed.

Invitation Details: The invitation history includes the email address of the user who generated the invitation (or made role changes for a user).