For every Transaction object, you have to define the attributes or fields that describe that object of reality.
Suppose you were asked to record, for each customer, his/her name, last name, address, phone, and email. Therefore, the data that must be recorded for each customer matches the attributes that have to be created for the Customer Transaction.
After creating the Customer Transaction object, you have two alternatives to define its attributes:
- Through the Source editor
- Through the Structure editor
The attribute definitions you make through one editor or the other will be reflected in both. You can choose to use the Source editor or the Structure editor depending on which editor you like to work with.
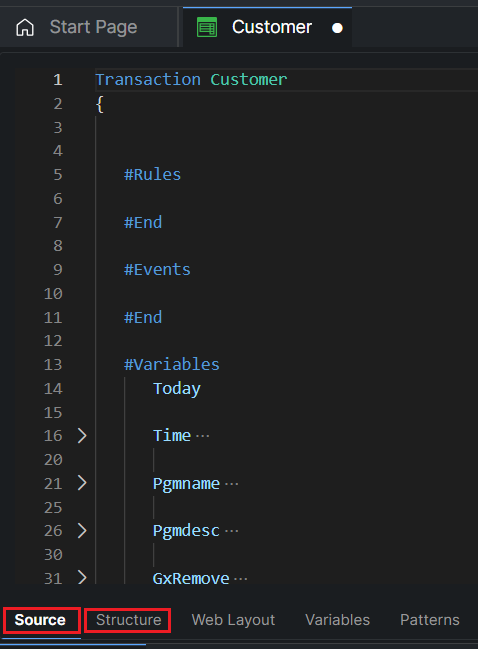
Below you can see the brand new Customer Transaction (recently created), ready for you to define its attributes. By default, the Source editor is open. You can select the Structure editor (by clicking on the Structure selector). You can also use both editors alternating between them.

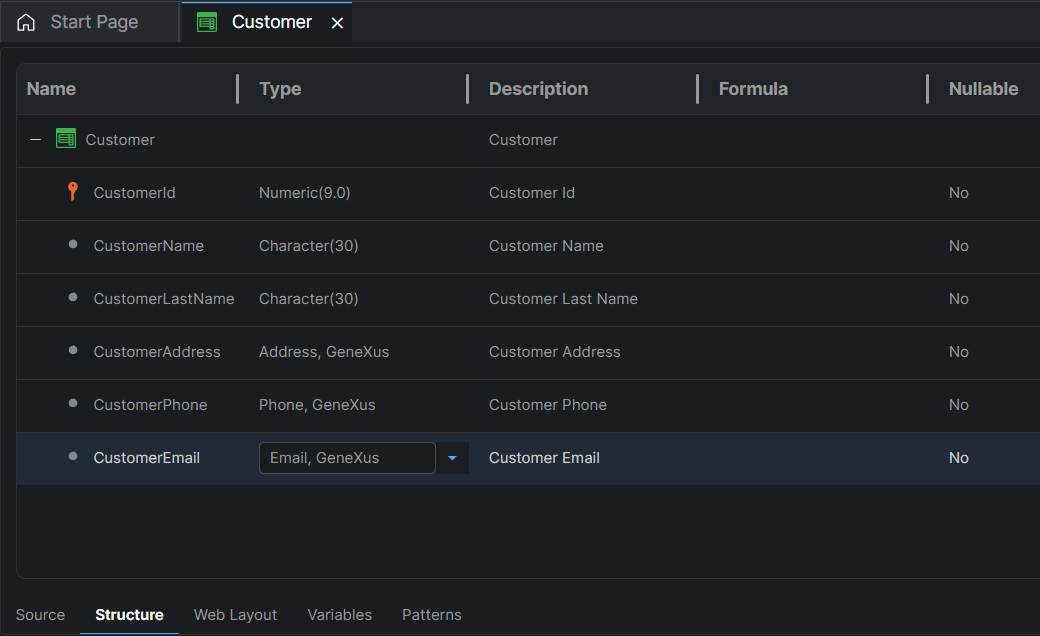
Continuing with the example that for each customer it is necessary to register his/her name, last name, address, phone, and email, below is the Customer Transaction Structure (the definition was made through this editor):

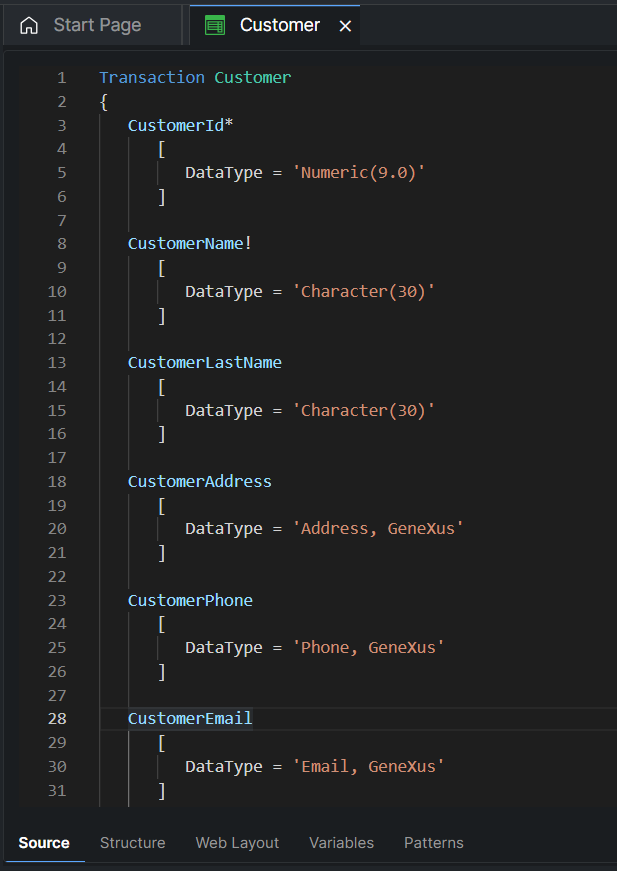
The Source editor was automatically completed with the same definitions:

Notes:
- When using the Source editor, not only can you type the data type, but you can also use the Properties Editor.
- Note the icons/symbols in both editors. Their interpretation is usually intuitive. Some particular symbols in the Source editor are:
Insert Attribute/Variable Dialog