This article explains the necessary steps to change the objects loaded by the GAM Backend menu.
In particular, this is useful when you want to use GAM - Examples instead of compiled objects.
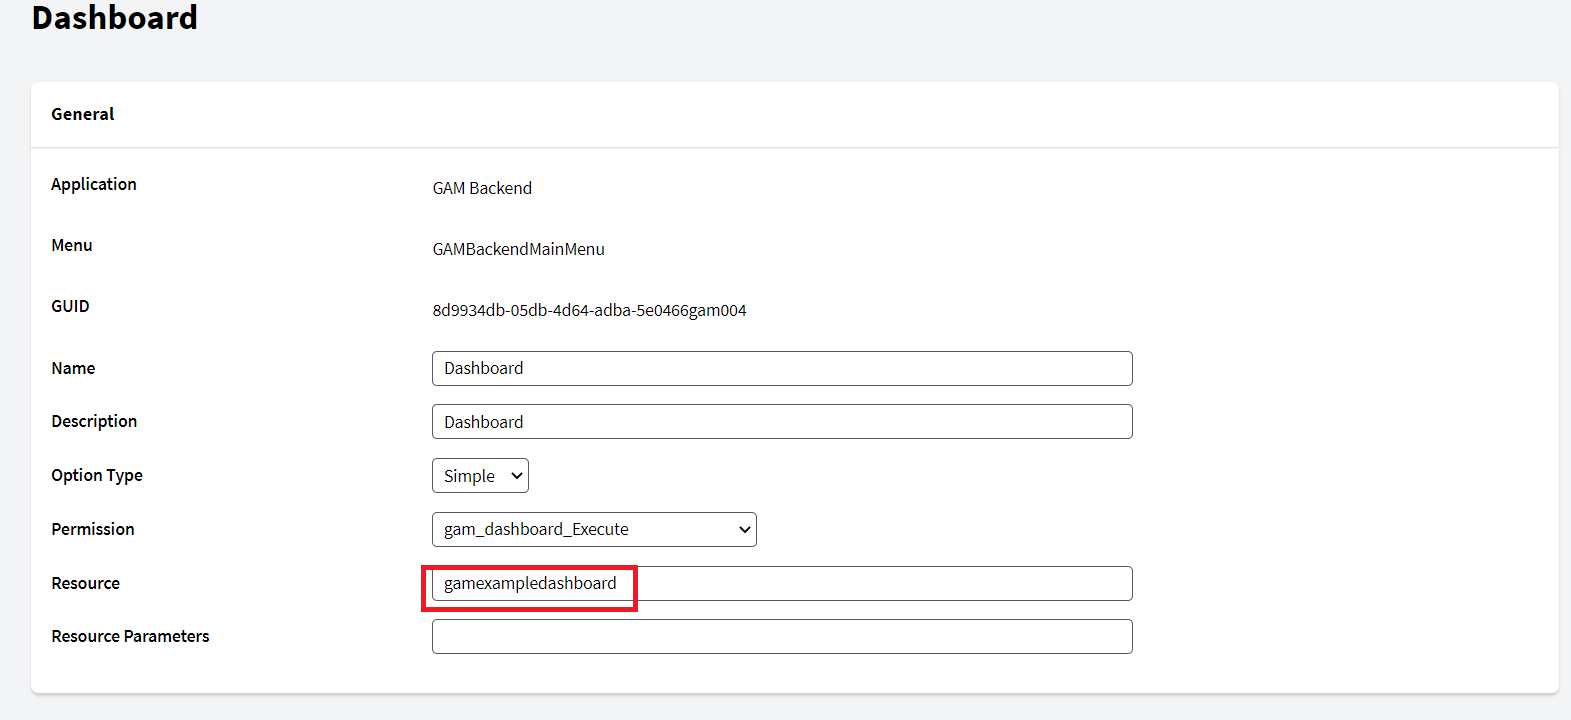
Instead of using objects named “gam_*,” which belong to the compiled Backend, the objects named “gamexample*” will be used. The latter belong to the examples that are distributed. (* = objectname).
Next, the “dashboard” menu item will be updated as an example, but all the menu items of each of them must be updated.
Steps:
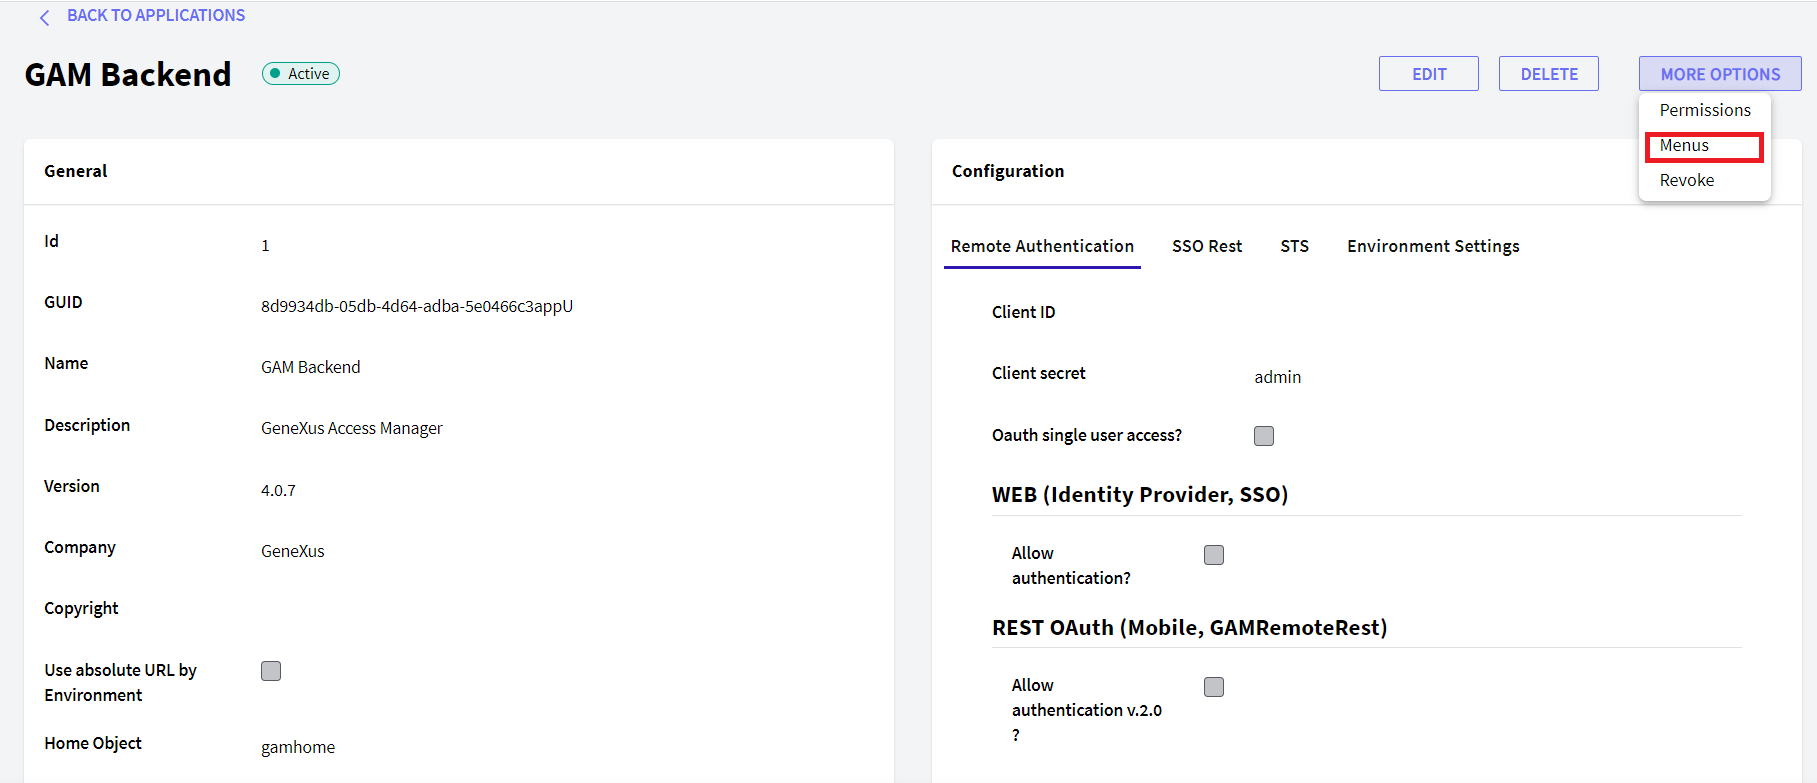
- Go to the GAM Backend application; there, click on the “More Options” button, and then on Menus.
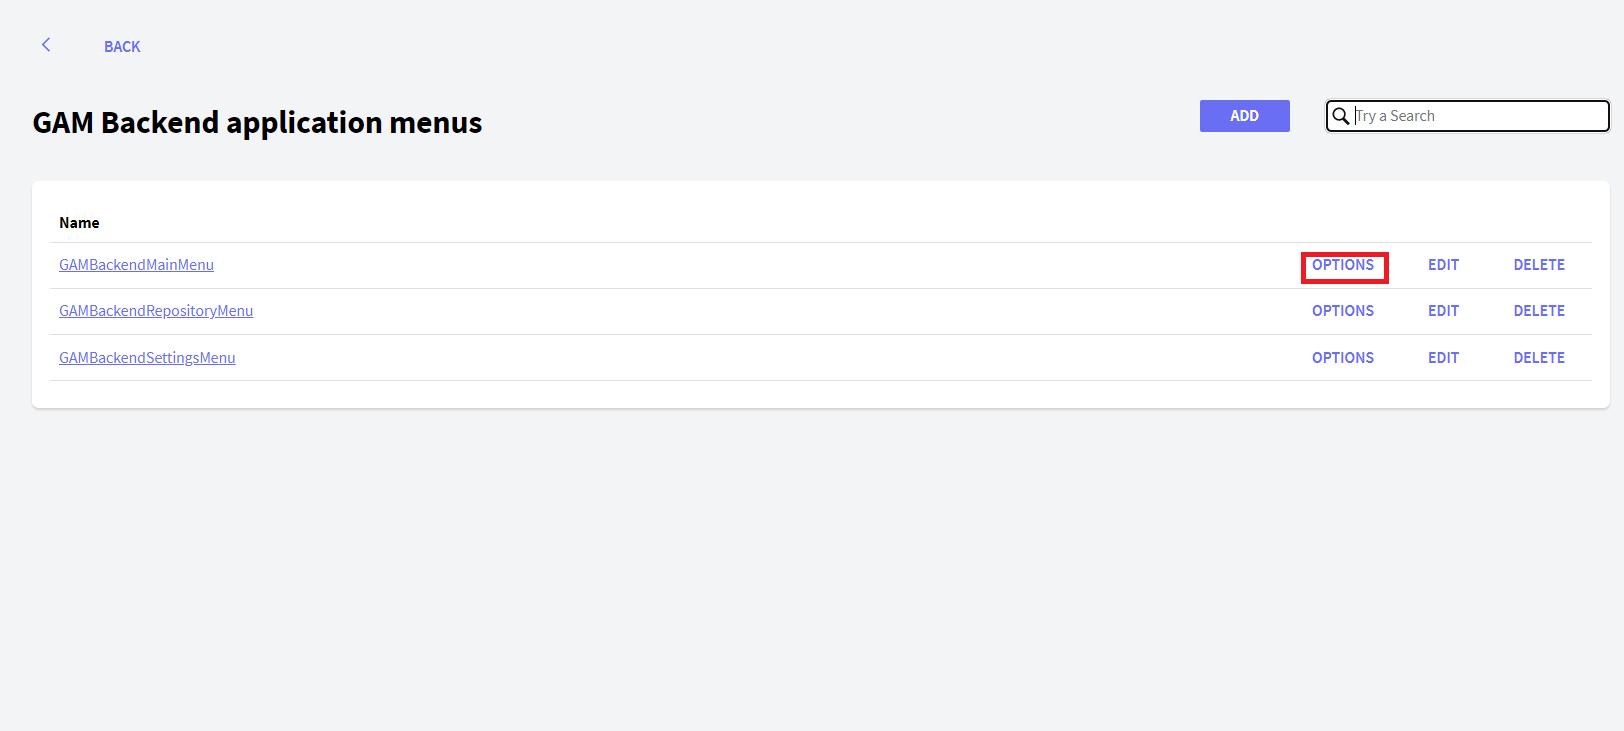
- Select the Menu you want to change and click on the “Options” button. (This step must be repeated for each Menu shown in the image, GAMBackendMainMenu, GAMBackendRepositoryMenu, GAMBackendSettingsMenu).
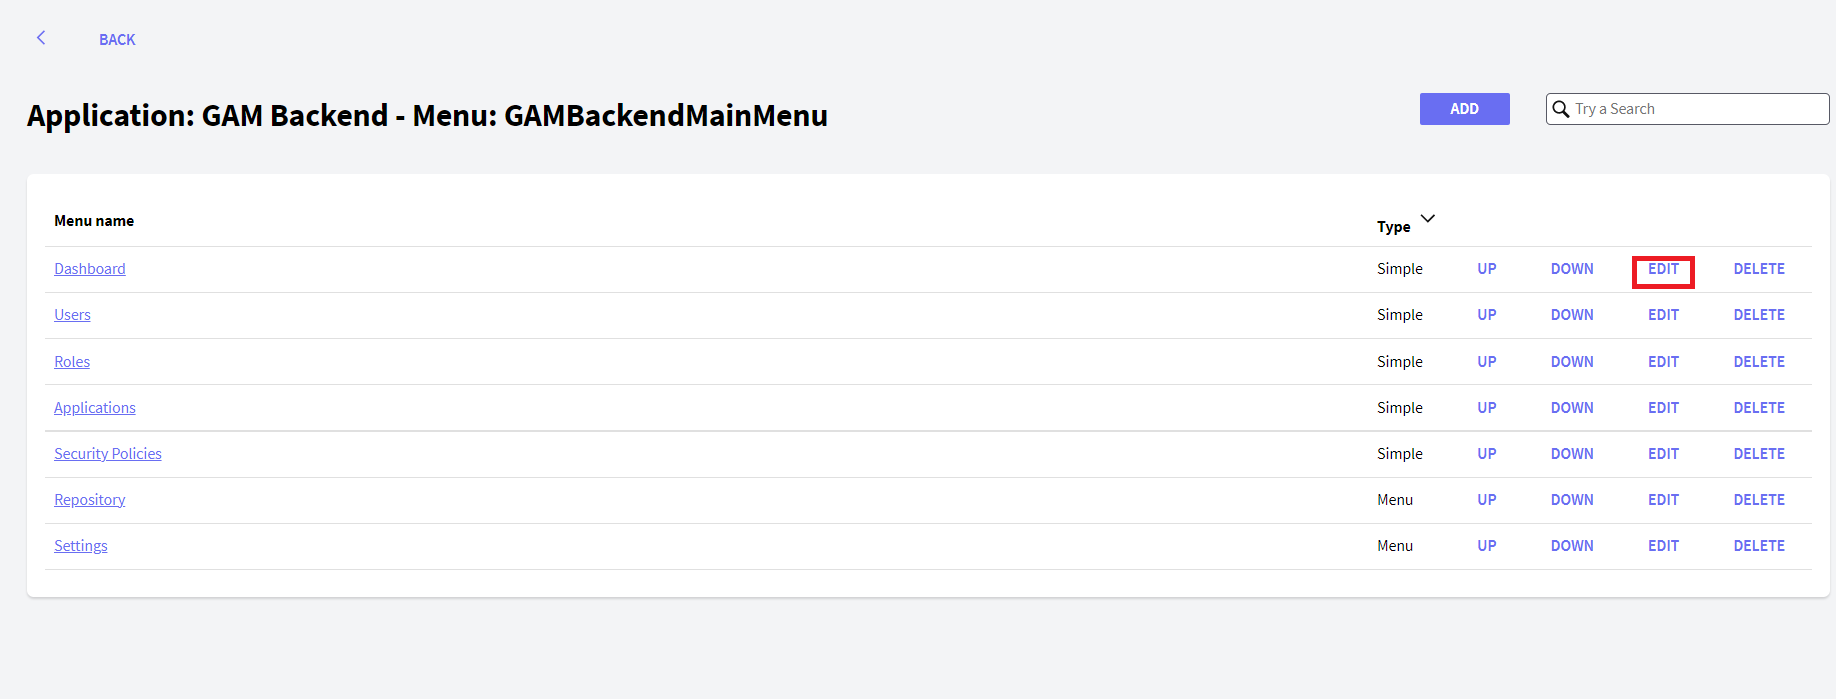
- Click on “Edit” for the Menu Option you want to update. (This step must be repeated for each Menu Option shown in the image).
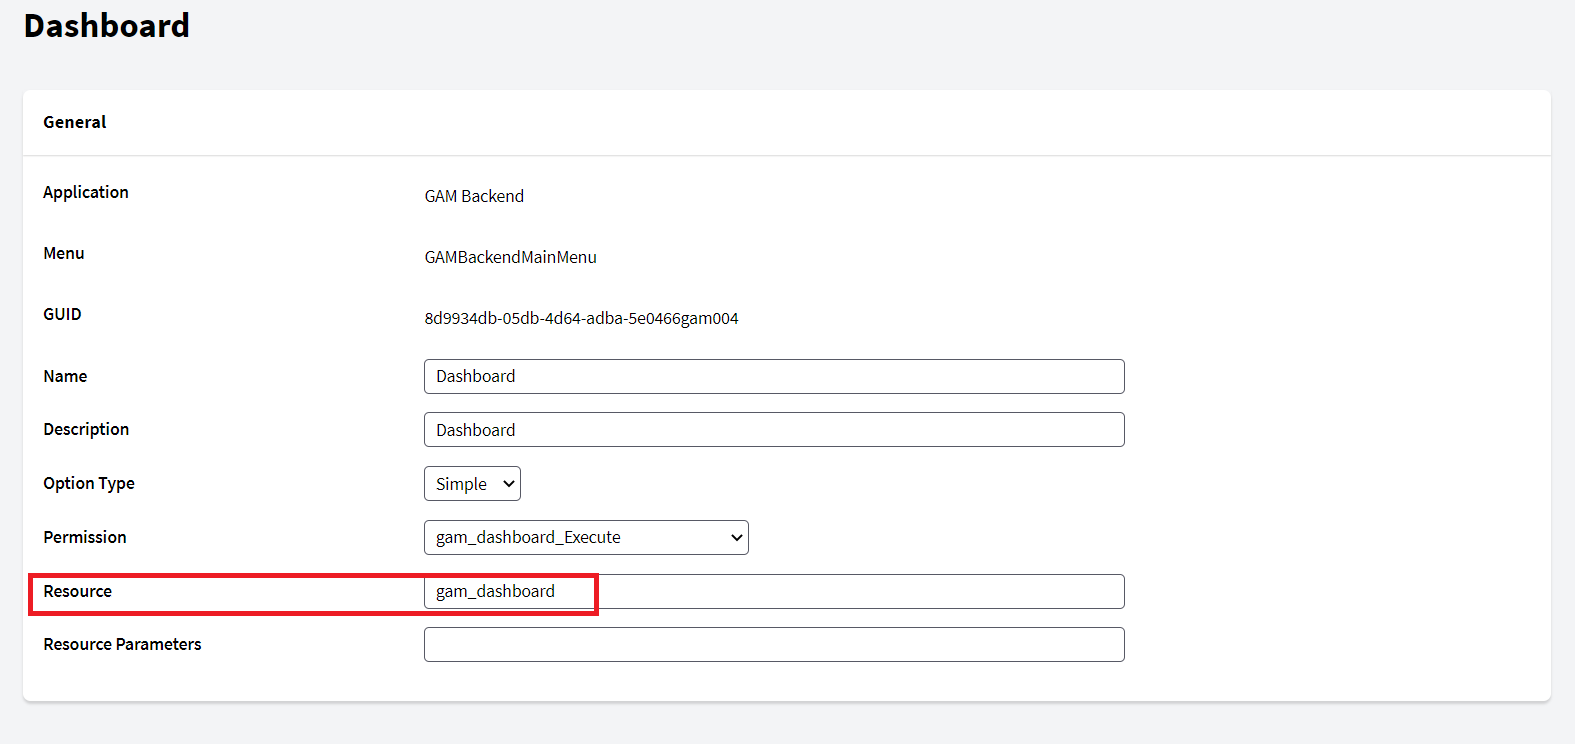
- Edit the value of the “Resource” field.
Original value:
New value:
Note: When using the Java generator, the Package property of the application must be taken into account, since it is part of the path to the objects.
This property is located inside the application, below the “Environment Settings” tab: 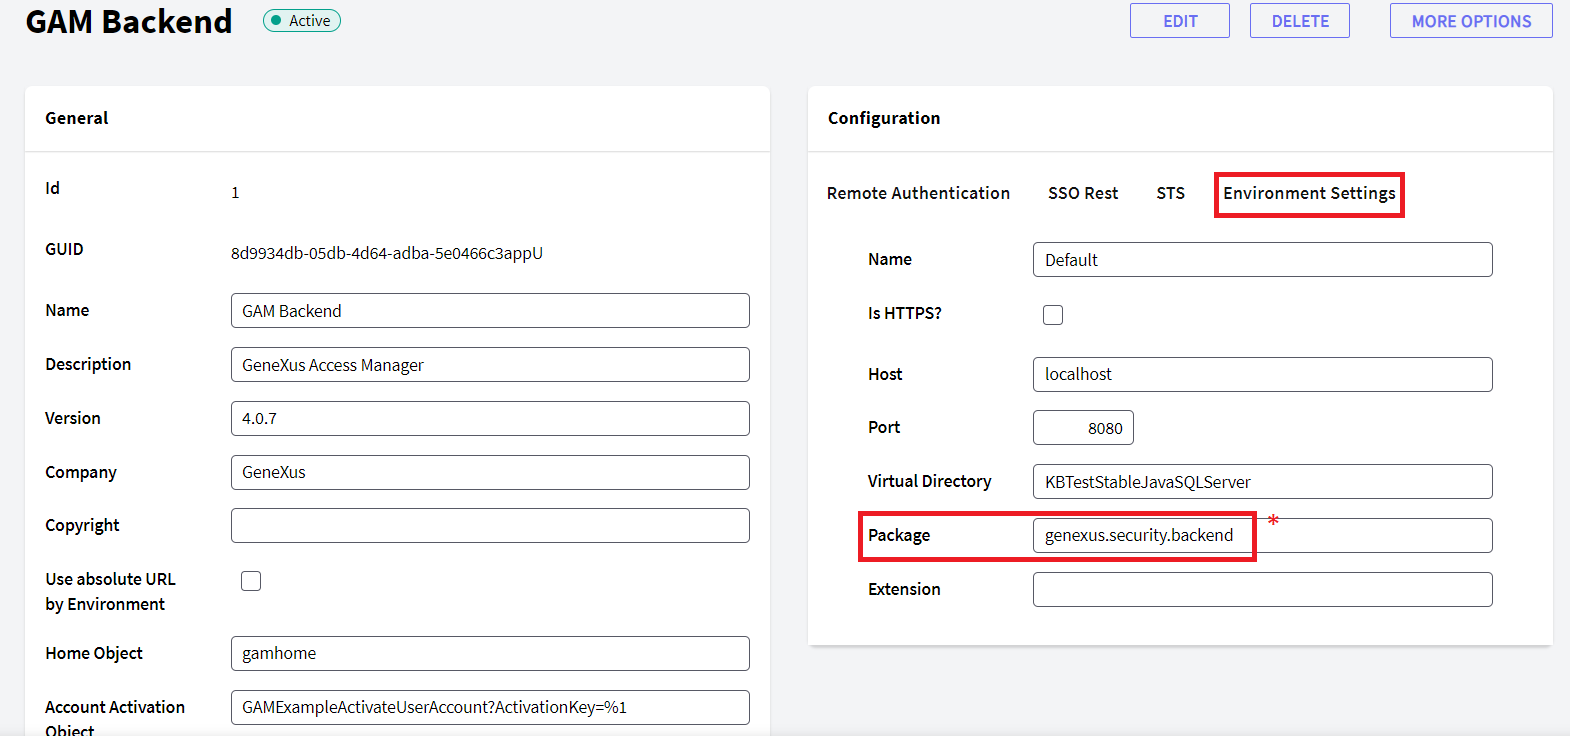
*In general, the value of the package must be changed to “com.kbname.”