This tutorial explains how to authenticate your users through the OpenID Connect protocol with Google using GAM.
You need to use OAuth 2.0 Authentication Type and do some configurations on the Google Cloud portal and the GAM's backend.
1. Create a new project in Google Cloud.
2. Fill in the basic information about your new project and Click on "Create".
3. Go to the "APIs & Services" section. There, select "OAuth Consent Screen" and fill in all the required fields.
4. Go to "Credentials", click on "+ Create Credentials", and select "OAuth client ID".
5. Select "Web Application" and fill in "Authorized redirect URIs".
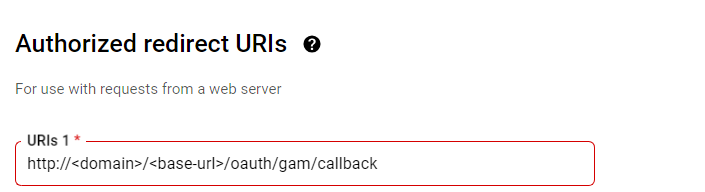
Redirect URI: http://domain/baseurl/oauth/gam/callback
6. Click on the "Create" button.
7. Save your Client ID and Client Secret, and click on the "Download JSON" button.
Your JSON will look as follows:
{"web":
    {
    "client_id":"670767917896-7s39fm48valskdasldkjpvmlm057ksn2.apps.googleusercontent.com",
    "project_id":"documentacion-391313","auth_uri":"https://accounts.google.com/o/oauth2/auth",
    "token_uri":"https://oauth2.googleapis.com/token",
    "auth_provider_x509_cert_url":"https://www.googleapis.com/oauth2/v1/certs",
    "client_secret":"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",
    "redirect_uris":["http://domain/baseurl"]
    }
}
The following steps will help you to obtain the certificate:
- Make a request to https://www.googleapis.com/oauth2/v1/certs in a browser or Postman.
- Choose one of the three different certificates that you will obtain and format it.
Tip: These certificates have "\n" in their body, so copy the certificate to an editor and change all these "\n" for "Enters".
- Finally, create a certificate.crt and copy the certificate that you edited in the previous step.
1. First, create a new OAuth 2.0 Authentication Type.
2. Configure the following in the General tab of the "Configuration" section:

3. Configure the following in the Authorization tab:
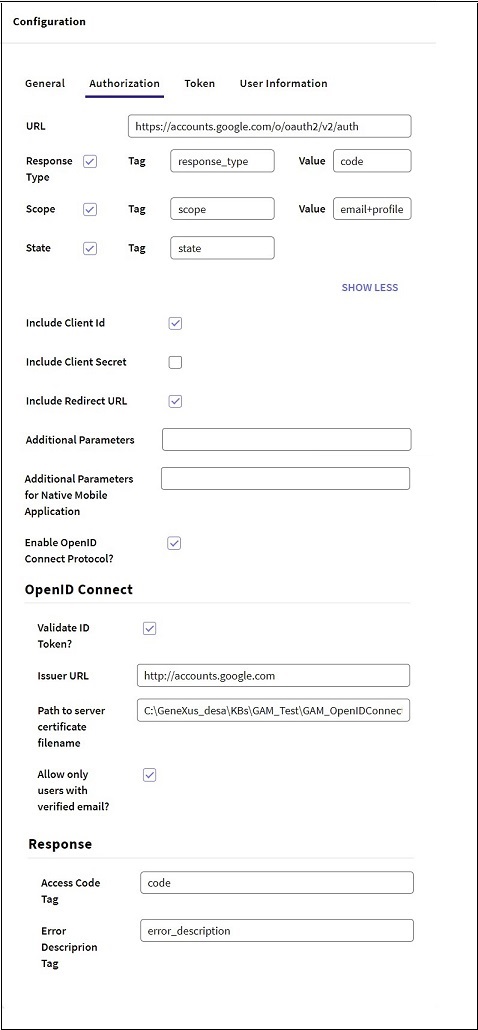
If the option to validate the ID Token is selected, it is not necessary to request the UserInfo endpoint data; that is, the field can be left empty. If you want to validate the ID Token and then call the UserInfo endpoint, the data obtained from the endpoint will prevail.
GAM - OpenID Connect Authentication Type
GAM - OAuth 2.0 Authentication Type