Warning: As GCM was deprecated (April 10, 2018) and removed (April 11, 2019) by Google, Notification Provider is the only method available to integrate Push Notifications in a GeneXus-generated Android application.
This is a step by step guide to set up push notifications for an Android Application. If you need general information on how to use push notifications please see Push Notifications in Native Mobile Applications.
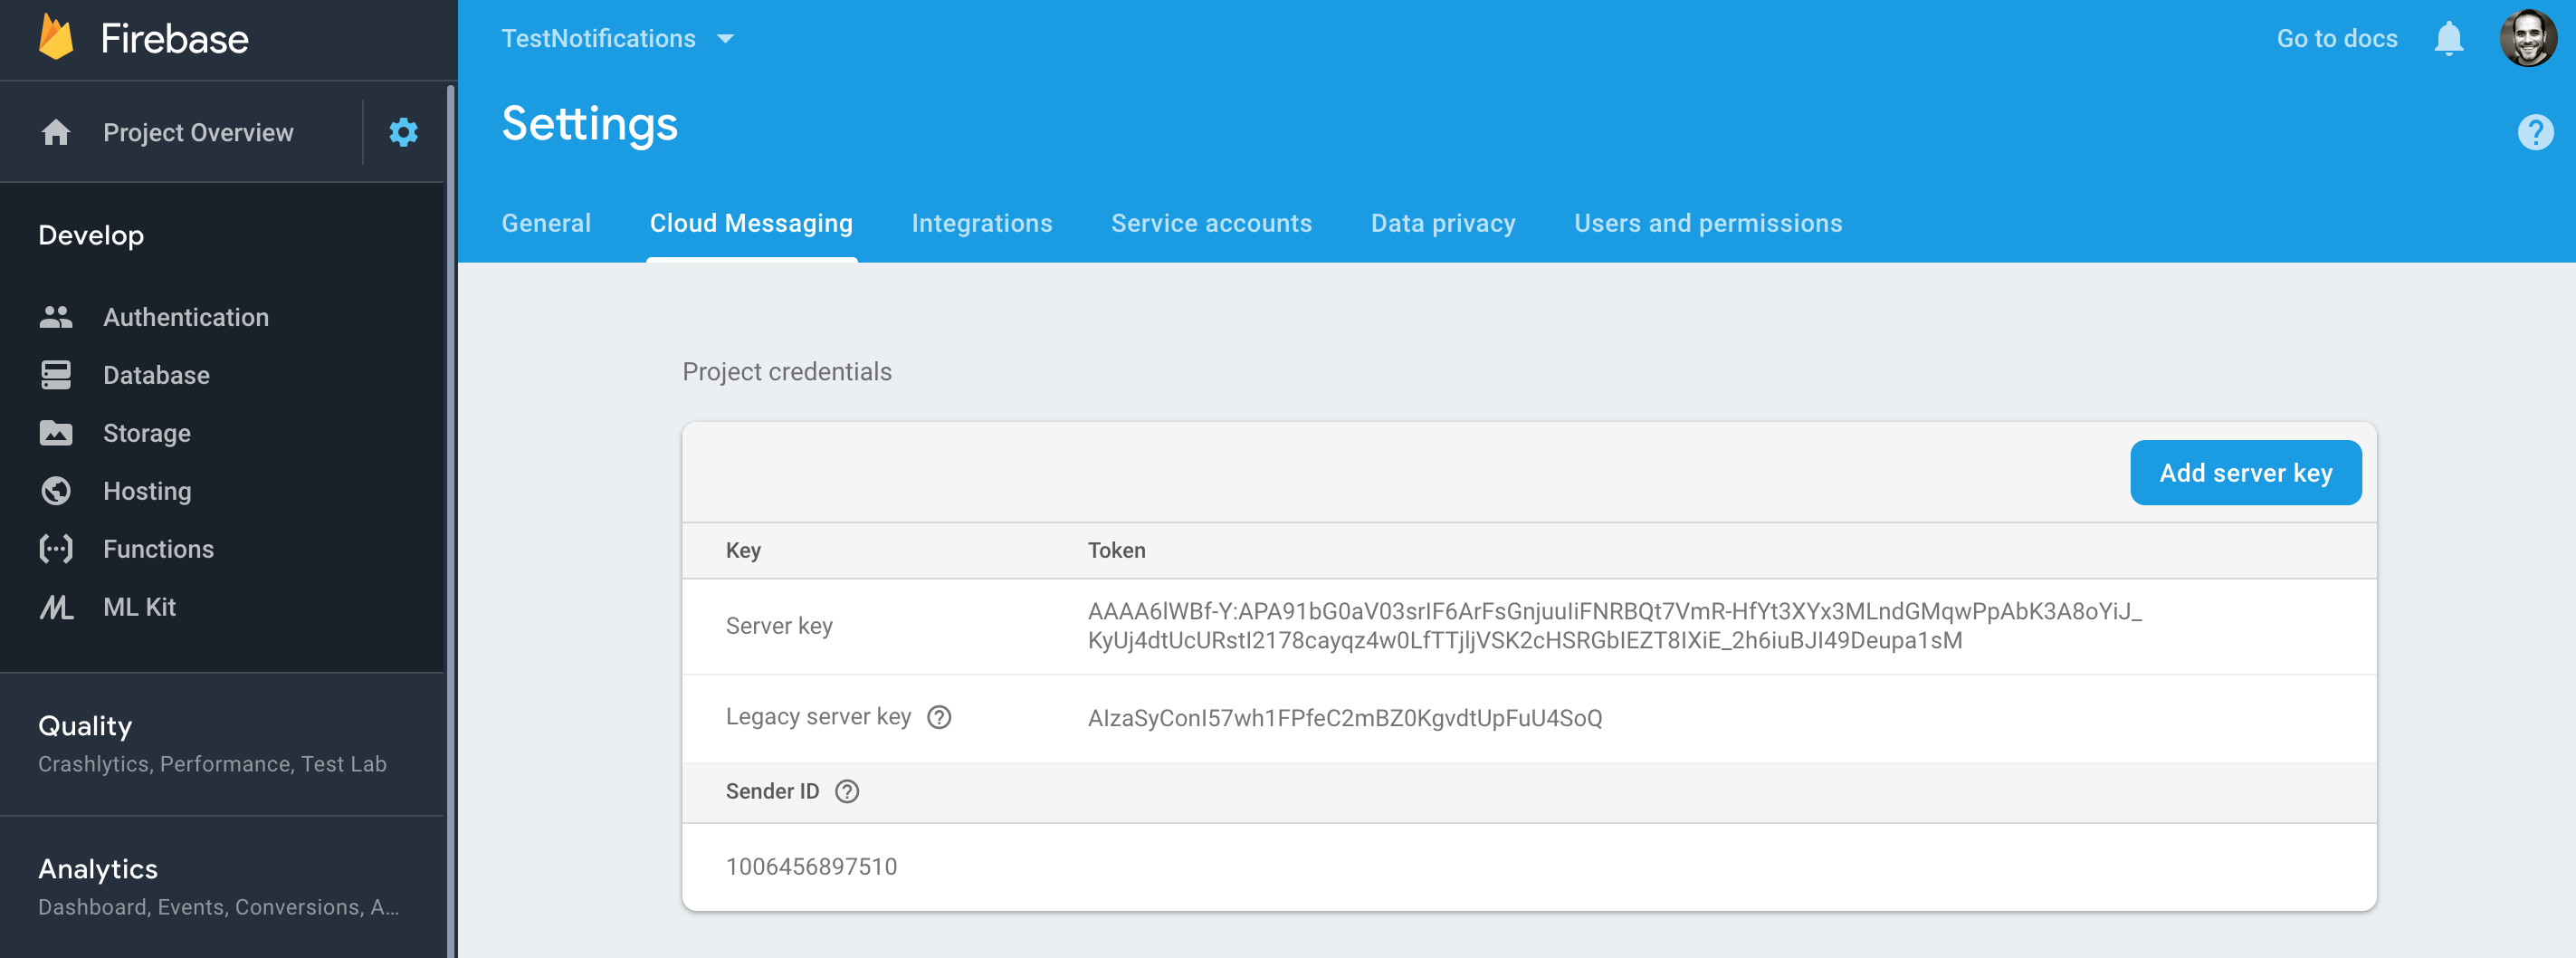
You need to access the Firebase Console with a Google Account, set up a new project, and then get a Sender ID and a Server Key.
Using Push Notifications in a GeneXus-generated application is really simple. It is done by setting the Enable Notifications property to True in the Main object properties group. When doing this, a new set of properties is available (under the header Notifications):
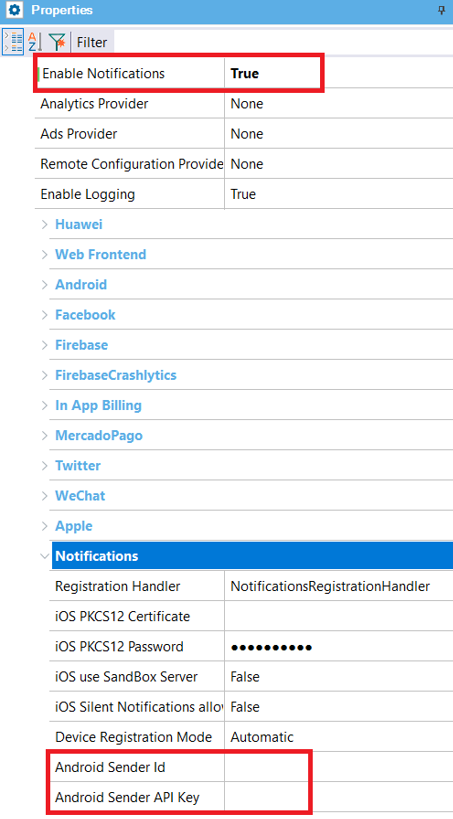
Here you need to set the credentials previously configured for the notifications service, Android Sender ID, and Android Server API Key (set with the Server Key obtained before).
From now on, every time you execute a GeneXus application that has Push Notifications enabled in a device, the Devices Registration Service is executed in order to register and store the device information to be used in the future to send messages (Push Notifications) to that device.
Notifications are sent as shown in this Sender example.
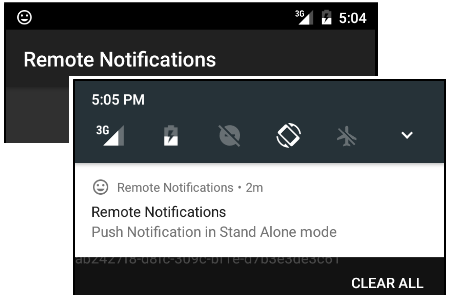
And that’s it. The messages sent will be shown as notifications in the Android device: