This document is a step-by-step explanation of how to create a simple Android application with GeneXus using .NET and SQLServer. If you are using another generator (Java) or DBMS, the steps are the same even though the prerequisites change.
Before starting the following steps, please check that the Android Requirements are correctly installed. See Android platform for more information.
Step 1
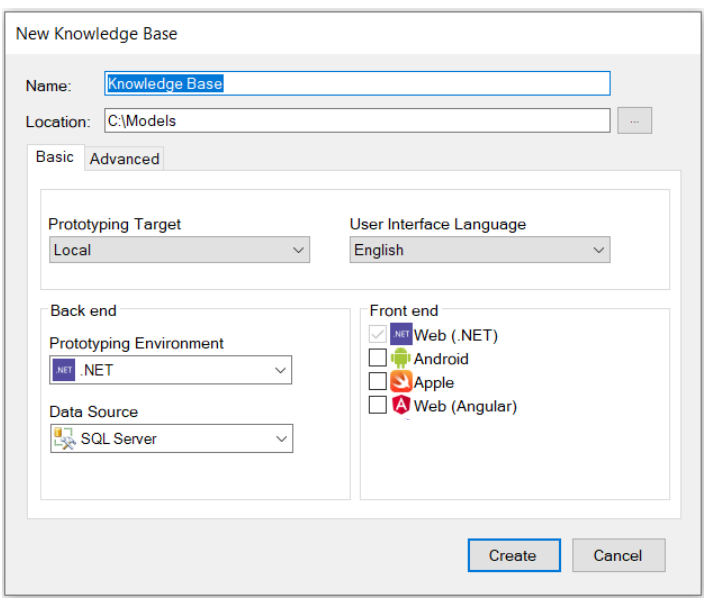
Create a New Knowledge Base and select .NET as Prototyping Environment (you can also select Java).
Create the Customer and Company Transaction objects with the following structures:
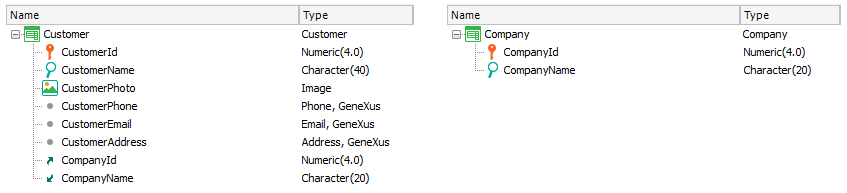
Note the Domains with Special Semantics in Phone, Email, Address attributes.
Next, auto-number the identifier attributes. While positioned in the CustomerId field, go to the Properties window and change the Autonumber property to True. Do the same for the CompanyId attribute.
Apply the Work With pattern to both Transactions. To do so, open each Transaction, click on the Patterns selector, choose the Work With tab, and select the "Apply this pattern on save" checkbox as shown below. Next, click on Save:

From the Toolbox, drag the control Attribute/variable to insert the attributes you want to see on the Customer list screen (i.e., CustomerEmail):

To remove the attribute label, change the Label position property value to "None":


Step 4
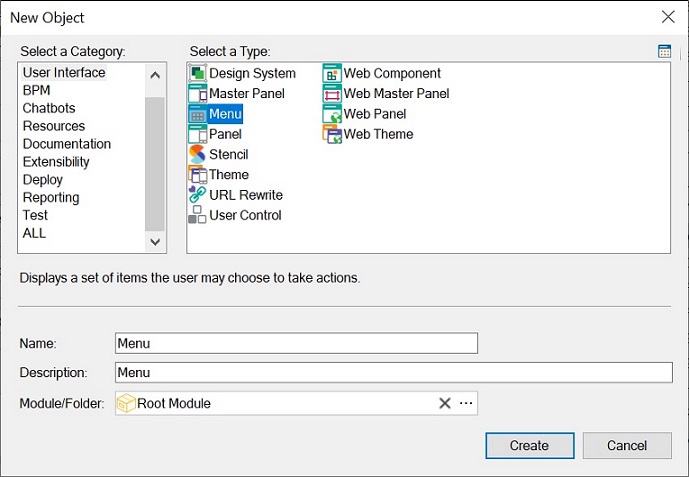
Create a Menu object called, for example, Menu.
This object is like a menu that you can use to add items/actions in order to call the Work With objects created in the previous step. To do so, right-click on the Items option and add two consecutive actions to the Menu. Each action must be associated with each Work With. You will be able to select the WorkWithCustomer in the Select Objects dialog for the first action and the WorkWithCompany for the second action:

When you select a WorkWith <TransactionName> object, the Event associated with this action will be generated automatically:
Event 'WorkWithCustomer'
     WorkWithCustomer.Customer.List()
EndEvent

Event 'WorkWithCompany'
     WorkWithCompany.Company.List()
EndEvent
Edit the Native Mobile Generator Preferences. Make sure you have set the following properties:

With these settings, the Android and iOS code will be generated. In addition, the Android platform application will be executed at runtime.
Before pressing F5 to build and run the application, you have to set a Main object as Startup Object. Menus by default are Main (their Main Object property is set to True by default), so set the Menu as Startup Object:

Next, press F5. The first time you do it, GeneXus needs to know the database connection information.
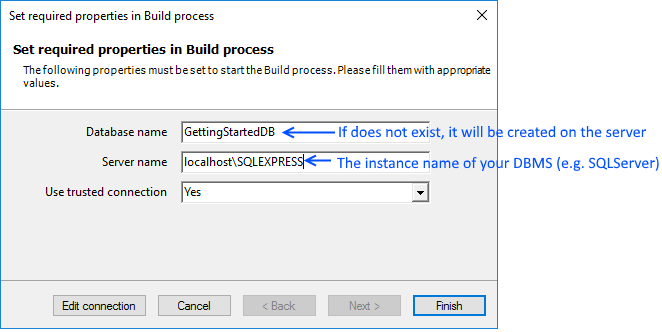
The other option is to deploy to cloud.
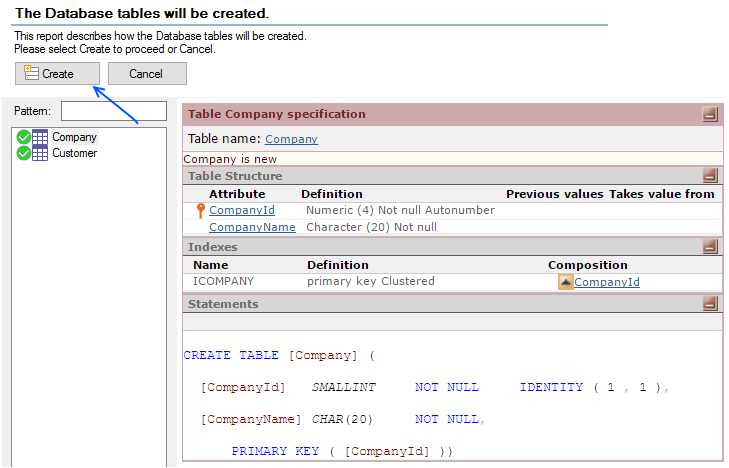
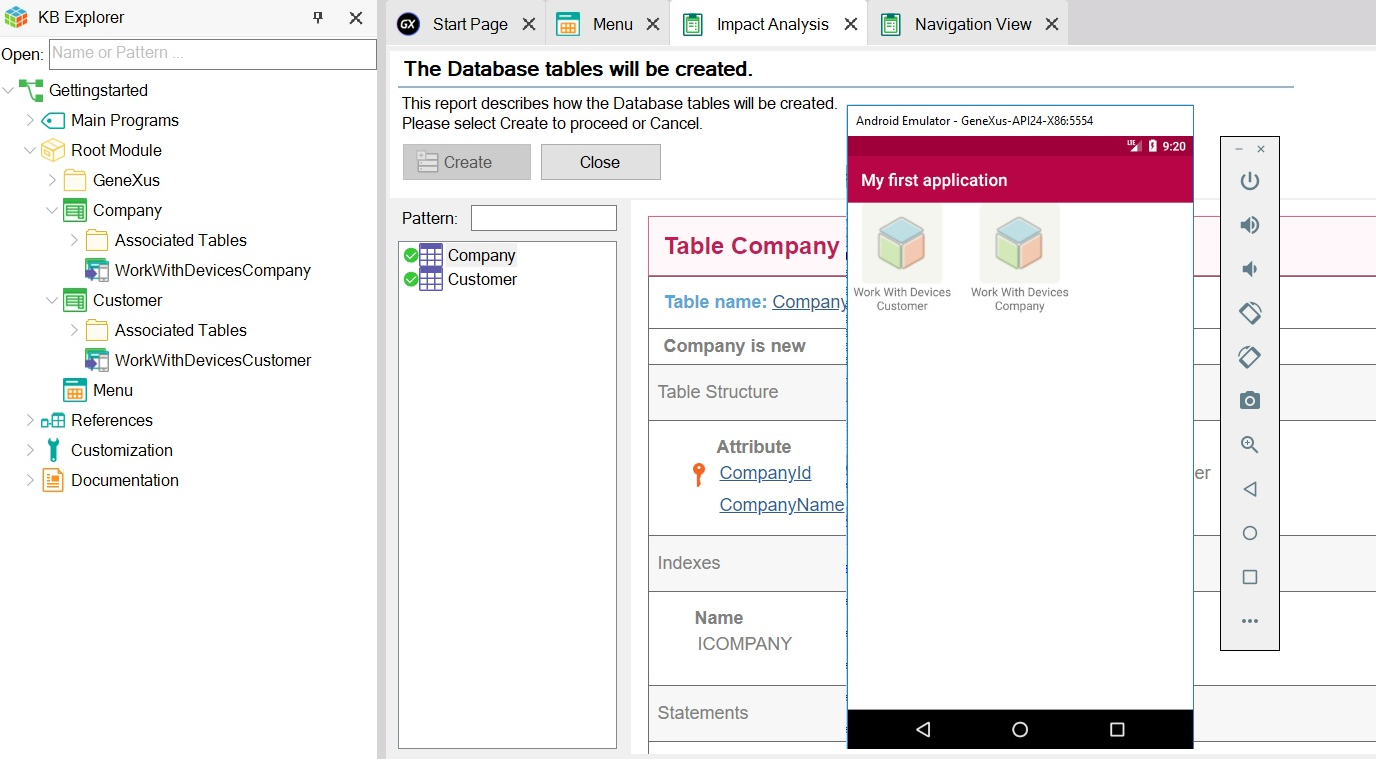
The following output is shown, as well as the Impact Analysis report, indicating the tables that must be created in the database. Click on the Create button to create them.
Then, GeneXus automatically runs the Android Emulator:
You are now ready to test it!
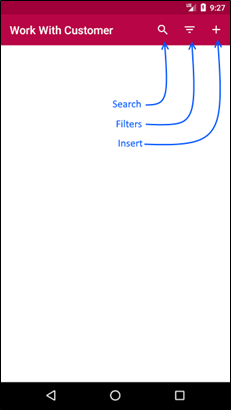
To do so, tap on the Work With Customer option. The following screen will be displayed:
Continue testing the application by inserting data and updating, deleting, searching, filtering, adding companies, etc.
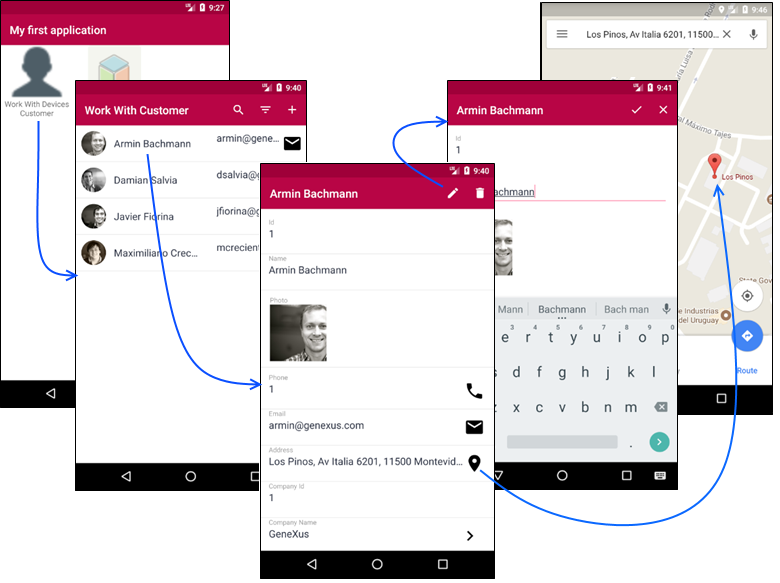
Enjoy it!
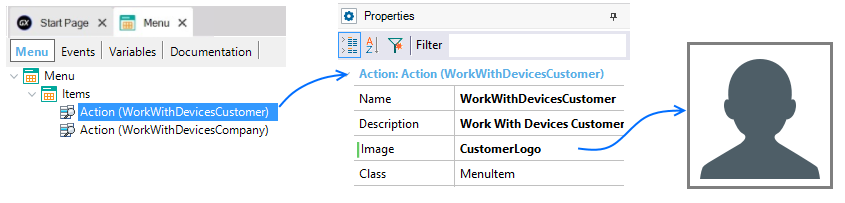
To display the desired image for each menu action, go to the Menu object created in step 4. Then, while positioned on each action, associate the image (inserting it simultaneously in the KB) through the properties dialog:
- To simplify the prototyping process, we recommend not closing the emulator between runs.
To import GeneXus objects used in this demo, right on your KB, download this file.
First steps with a native mobile app
For more information, check Apple - FAQ and Common Issues