This document explains how to build a list as a Table and provides a brief overview about it.
A GXquery table is a group of Query Elements. They are arranged in rows and columns; while they have a limited number of columns, the number of rows can range from one to as many as there are records in the database which satisfy the selection filters applied.
To create a Table, click on the New query link in the Shortcuts panel. Next, select the Table icon.
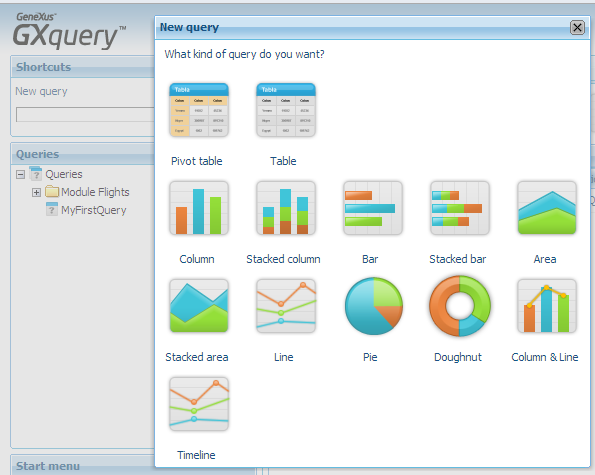
You will see a dialog box similar to the one shown below.

This window captures the name of the query, an optional description for it, and the name of the folder to save it (by default, GXquery provides the root node called Queries that will be used to save the entire structure of Folders and Queries).
In the Name cell, type “MyFirstTable” as the query name and press OK. Leave the other two fields in the dialog box unchanged.
Next, a screen will be displayed containing areas with labels. It is the Table in Edit mode.
To the right we can see a panel containing all the attributes of the active metadata which is available to the user.

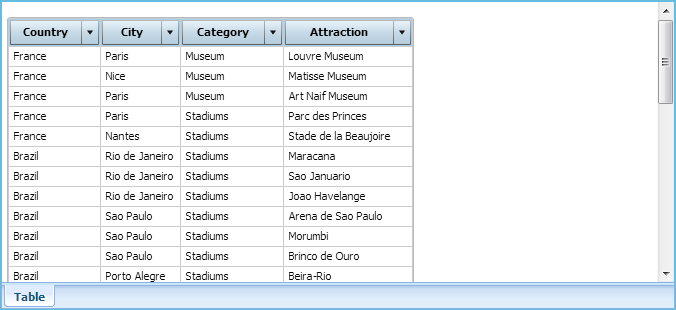
In this exercise we will create a Table that shows the tourist attractions of each city in each one of the countries stored in the database. Once it is completed, the result should be similar to the figure below.
To do so:
- Open the Attraction folder node located in the Attributes panel.
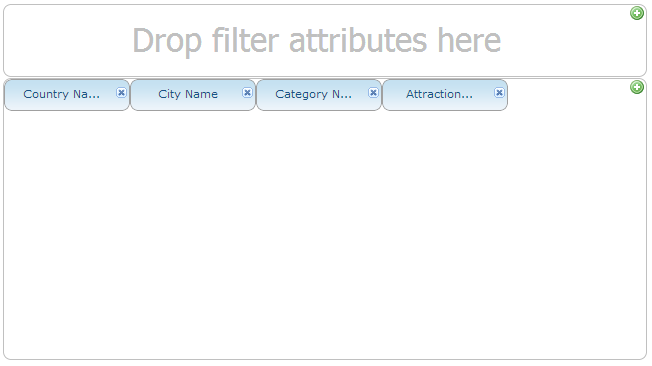
- Drag the attributes Country Name, City Name and Attraction Name to the row sector (it contains the message “Drop table attributes here”).
Note: When the attribute is dragged to any of the Table areas, it becomes a Query Element.
The screen must be similar to the image below..
Press the View button to see if the result is as expected. Only the column titles are not as expected, so we will change them.
Click on the Edit button to return to the Table Edit mode, and select the Attraction Name query element.
Take a look at the Properties panel: Query element. Note that its description says Country Name. Since GXquery takes the column label from this property, change the description to “Country”. Do the same with the query elements Country Name, City
Name and Attraction Name so that they look as shown in the View image.
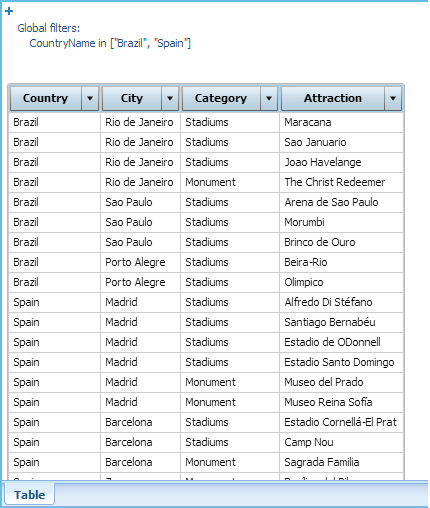
The GXquery Table provides another function such as data filtering, so that it can be set specifically to what we need. Let’s do the following exercise: Suppose that we only want to read the records of Brazil and Spain. To do so:
In Edit mode, drag the CountryName attribute to the filter area labeled “Drop filter attributes here”. A window similar to the one below will be displayed.
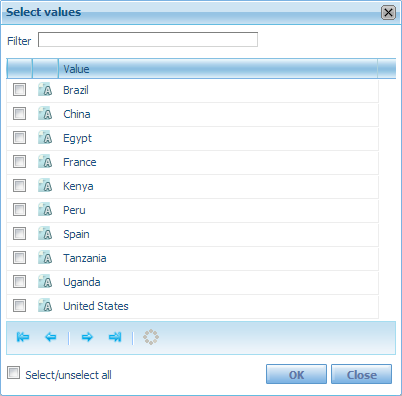
Select the Brazil and Spain checkboxes and click on OK to return to Edit mode.
Click on View. A screen similar to the image below should be displayed.