This article shows you the steps to create GXquery metadata in GeneXus.
See: Install GXquery extension
Execute GeneXus, and select the following option offered in the GeneXus menu: Tools > GXquery > Create metadata
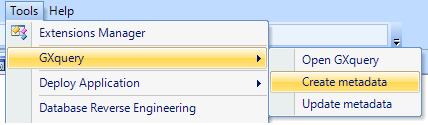
The following dialog will be displayed:
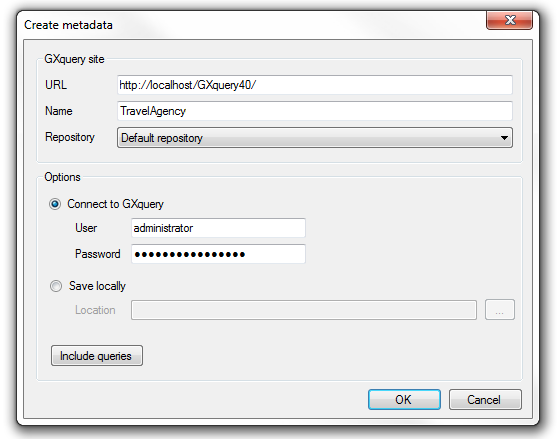
- URL: Enter the GXquery Web URL.
- Name: The new metadata, named with the KB name, will be created in GXquery Web.
- Repository: You can select the repository where the new metadata will be created on the defined GXquery instance.
- User: You have to select the option "Connect to GXquery" and enter the administrator user of the GXquery installation to connect to it. Administrator is the default value.
- Password: Enter the administrator password. administrator123 is the default value.
You will see the information of the metadata creation in the GeneXus Output:

Note: The metadata creation generates a
GXqueryExport.log in the
Knowledge Base directory
.
HowTo: Build a Pivot table
HowTo: Build a list as a Table
HowTo: Build Charts
 Metadata Creation