In order to enable users to make their queries, the metadata administrator must give permissions to the attributes that users can use to create these queries, whether directly over them or through the roles assigned to them.
To do this, select a role from the list in the Roles or Users windows. Next, click on the Permissions button to display the following dialog window.
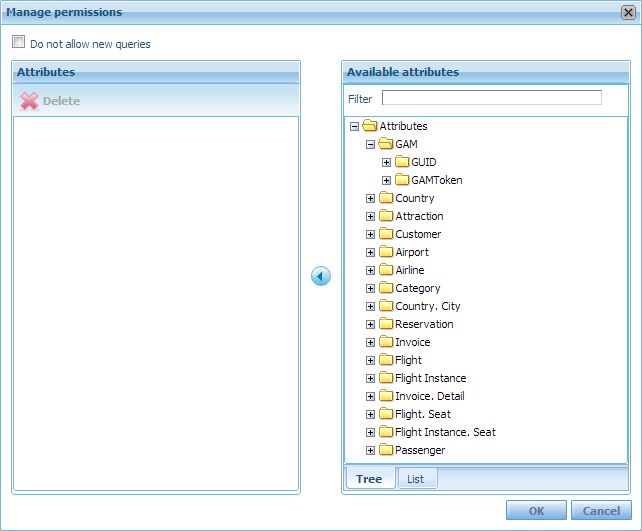
The panel to the right contains all the attributes available in the metadata, and the panel on the left shows those assigned to the role or user. Permissions haven't been assigned yet for the image.
To give permissions, select the folder or attribute from the "Available attributes" panel and click on the button in the center of the dialog box.
If you want to give permissions to all the attributes, simply move the Attributes folder; to give permissions to a group of attributes, you will have to move the folder containing them; otherwise, you can select the attributes to which permissions will be given and move them one by one.
Folders have a dynamic permission relationship. This means that if later on new attributes are added to it (this is done in the GeneXus development KB), they will be taken into account, automatically including them in the authorized folder, and the user will have permissions over those attributes.
Note the check box located in the upper left side, labeled “Do not allow new queries”. When it is selected, none of the users with the role that is being configured will be able to create queries. Of course, if we're setting permissions for a user, the effect will be the same but will only affect the selected user.
In addition to setting permissions to certain attributes or groups of attributes, the metadata administrator may need to set restrictions to the attributes that have permissions. These restrictions make it possible to prevent users from making queries over an attribute or some of its values.
A typical example is that of salespeople: they can't view the sales of a certain branch, or they can only view their own sales.
To set a restriction, first you need to select the Restrictions node of the desired attribute. Next, transfer the attribute that will be restricted, as shown below.
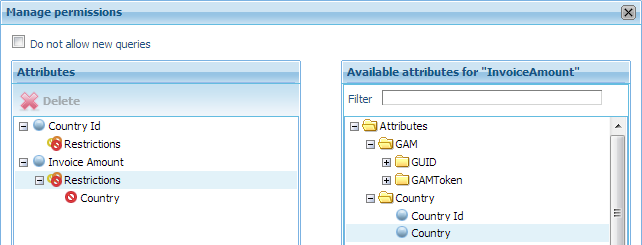
In this case, the Country attribute has been selected in the panel to the right, and it has been copied to the panel on the left, over the Restrictions node of the Invoice Amount attribute, which will be examined.
Restrictions can be set in two ways: total and partial.
It means that the query can never be executed if the attributes restricted in this way are included in it. If it is run, a message similar to the one shown below will be displayed.

To set a total restriction to an attribute, first it has to be selected in the panel to the left. Suppose that we will set a Total restriction to the Country attribute. The following image will be displayed.
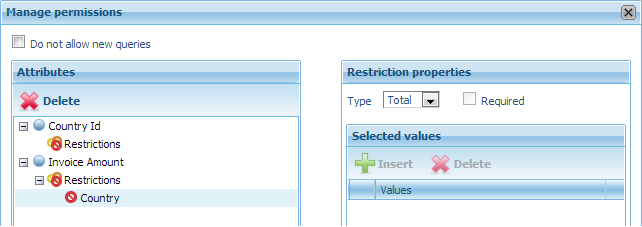
Note that the panel to the right has changed, and the Type combo box already has the Total value, which hasn't been confirmed yet. It is confirmed upon clicking on OK.
Taking the example of the image below, Country has a total restriction (note that InvoiceTotal now has a red icon next to it, and that it was still blue in Figure 4).
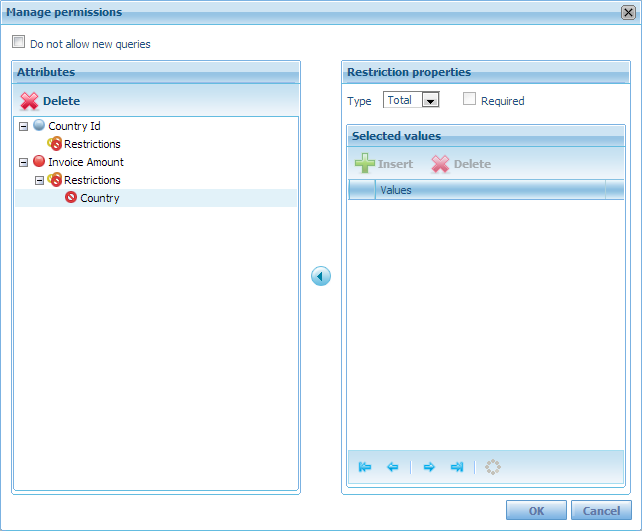
However, the query will be executed if the attribute(s) included in it don't have this type of restriction. In Figure 5, we can see that the Country attribute has a Total restriction, but CountryId doesn't. The query can be executed to see the totals by Country number and not by name.
It means that the attribute can be examined, but only for a set of values. For example, in the image below we can see a partial restriction indicating that for the restricted attribute Invoice Amount, only the data corresponding to Brazil, China, France and Italy will be displayed.
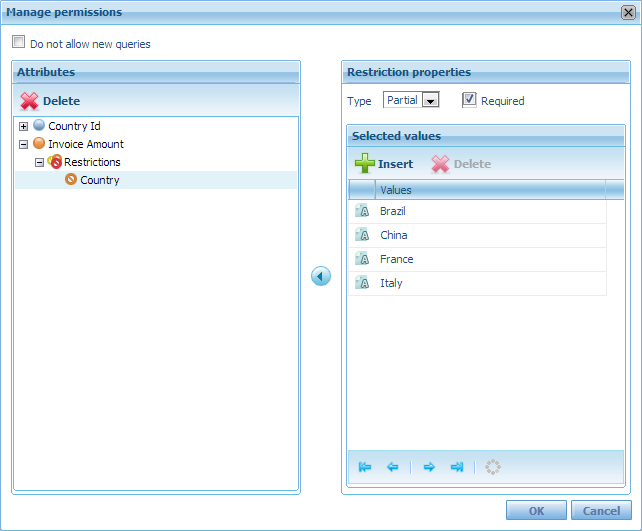
(Note that now the attribute’s color is orange, which indicates that even though it is restricted, it isn't a total restriction).
The meaning of the check box labeled "Required" is the following:
- Required: The restriction is always applied regardless if the attributes are included in the query specification. To indicate that a restriction is required, the Required check box must be selected in the restriction configuration window (Figure 8).
For example, if we want to set that the staff of a branch can only view the information of their branch (and not that of the rest of the company's branches), all the metadata attributes must have a partial restriction over the Branch attribute. In addition, it must be required. This implies that users are not allowed to query data that doesn't belong to this Branch, regardless if they have chosen the Branch in the query or not. For example, even if I query the Sales Total with no filter, only the enabled branch will be considered.
- Not required: The restriction of values will only be applied if the user is making the query by that attribute (whether in the axes or filters). Otherwise, the restriction will not be considered.
For example: the metadata values can be set so that the queries over Sales made by a Salesperson show only his/her values if they are detailed by Salesperson. However, if they are analyzed by other attributes, all the values will be considered.
In this case, since the Salesperson attribute is NOT required, it is only applied when it is detailed by Salesperson. Otherwise, the data corresponding to all salespeople is being displayed.