GXquery 4.0 provides us with a tool to convert GXquery 3.0 metadatas to GXquery 4.0 metadatas.
First we need to go to the GXquery 4.0 installation directory and locate the Metadata converter folder, then open it and run Artech.GXquery.Converter application.
Note: To run Artech.GXquery.Converter on Window 8 or higher, you need to right-click on the application and select the Run as administrator option from the contextual menu.
On the source section we have to select the GXquery 3.0 catalog. After choosing the catalog and the combo below is loaded with all the available metadatas, select one.

On the location option select the folder where the converted metadata is placed, as also the name of the converted metadata.

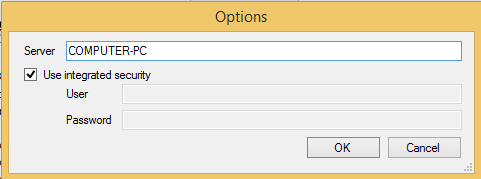
Note: If needed, with the Advance option we can set the credentials for SQLServer. This is because, as an intermediate step, the conversion process creates a GeneXus X Evolution 2 KB.
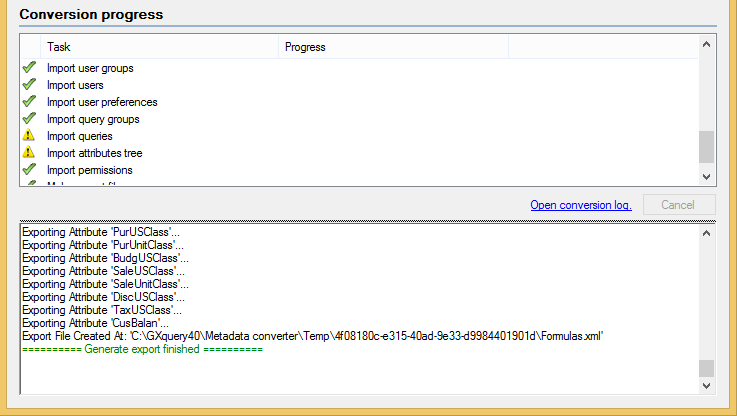
Click on the  button to begin the metadata conversion. Once it starts we are able to follow the conversion progress and get the conversion log:
The metadata generated as an .export file from the conversion tool is ready to be imported to our GXquery 4.0.