In GXquery, we can create our own secondary attributes involving other attributes in the data model by means of horizontal or aggregation formulas. Because they are global to the metadata, they can be shared with other queries, to the extent that a logical relation exists.
They support all text, numeric, date & time, and nullity functions.
UDAs may only be administered by the metadata’s Administrator user.
To create a UDA, select “User defined attributes” in the Start menu.
Next, you will see on screen an image similar to the one below.
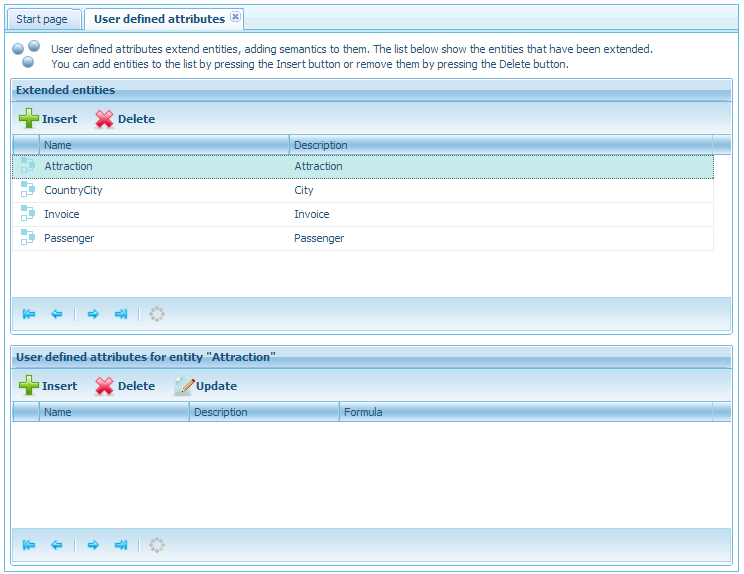
This window represents the extended entities that make up the metadata and are selected to create UDAs. It comprises two regions, one in the upper sector to contain those entities, and the other underneath, to contain the UDAs created for those entities.
For example, in the previous image we can see, in the upper sector, four entities already added: Attraction, CountryCity, Invoice and Passenger. Note that Attraction is the entity selected above, and the lower region is empty, thus indicating that Attraction has no secondary attributes (or UDAs) created.
Let’s now create a UDA to link the customer name, address, city and country. All these attributes are inside the Customer transaction, which is not included in the extended entities region. To create a UDA linked to it we must include it in the list and then press Insert to view the window below.
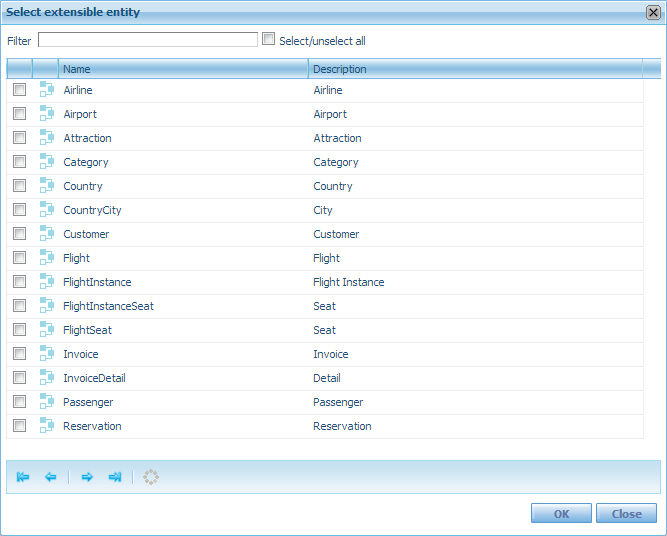
If we select the checkbox to the left of Customer and press OK, we will see that Customer appears on the list of extended entities. We select it and press Insert in the lower region. With this, we open a wizard that will guide us in making the UDA, as shown below.
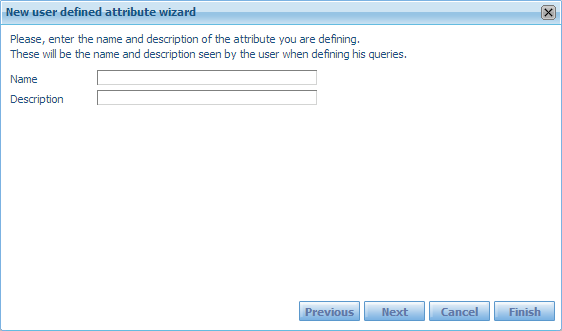
Here we must provide a name and a description, so we enter CompleteCustomer as name and then press Next to open the wizard’s second step.
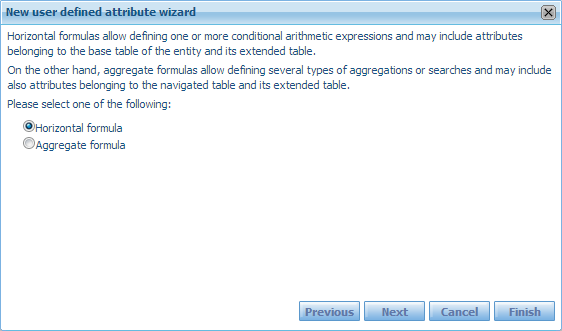
Now GXquery tells us to indicate whether we will be entering a horizontal or an aggregation formula. We leave Horizontal formula as the default option and press Next to access the last step.
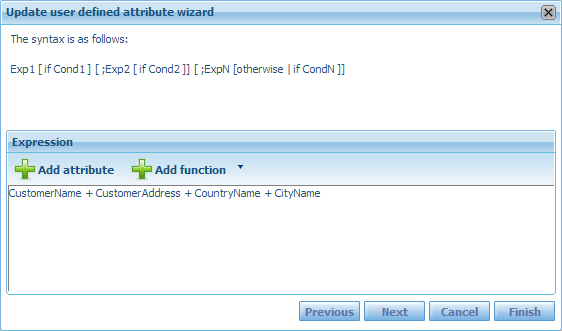
As shown in the image above, the following expression has been entered:
CustomerName + CustomerAddress + CountryName + CityName
We will then have to press Finish for the UDA to be saved and permanently linked to the Customer extended entity. The UDA may be included in any type of query.
Note that we have two tools available, Add attribute and Add function, to aid us in the construction.
With this button we can open the full list with all the attributes contained in the metadata, including other UDAs.
This button unfolds a submenu that proposes the selection of a function based on the attribute type.