Just like Queries, metadata can also be exported and later imported into another GXquery installation or even a GeneXus development KB.
Select the Metadata option from the Start menu.

Next, you will see a screen similar to the one shown below.
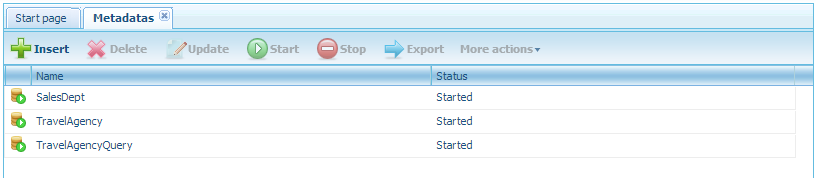
Select the metadata to export; for instance, TravelAgency. Note that after this action has been performed, the Stop button is enabled. Click on it to stop the selected metadata; this is indicated in the icon to the left of its name.
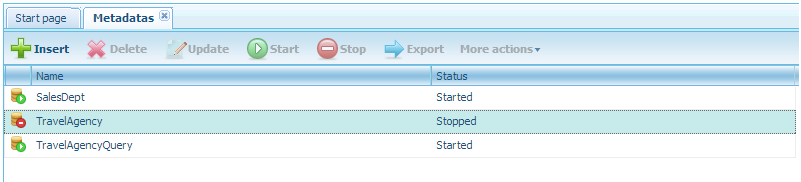
Select the TravelAgency metadata once again to enable the Export button. Click on it and the following notice will be displayed.
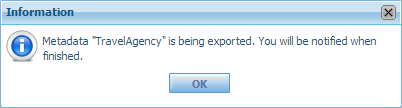
Finally, click OK button and the "Save as" dialog will prompt.