This document shows different functionalities of GXflow's license Manager, available since GeneXus 15 Upgrade 8 or higher, and that applies to both Native (default) and Protection Server methods.
For more details, see GXflow license scheme.
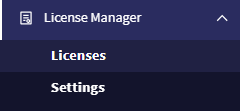
It is possible to enter the License Manager from the GXflow Client:
It is also possible to access the license manager without entering the GXflow Client by adding the following to the end of the URL:
Java: com.gxflow.wflicensemanager
.NET Frameowork or .NET: wflicensemanager.aspx
Note: Make sure that popups are enabled in your browser for the GeneXus license site.
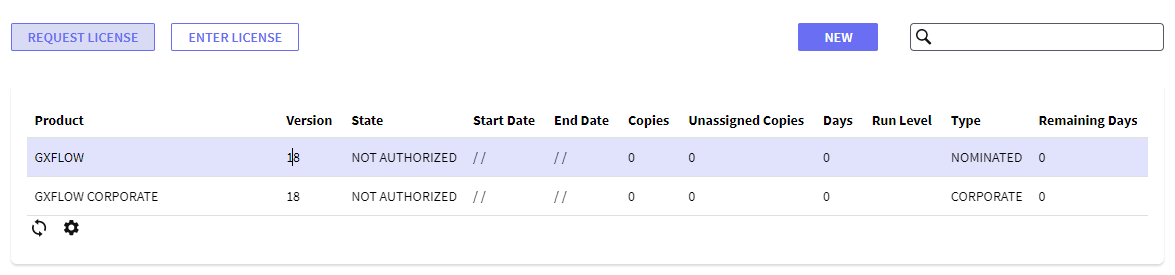
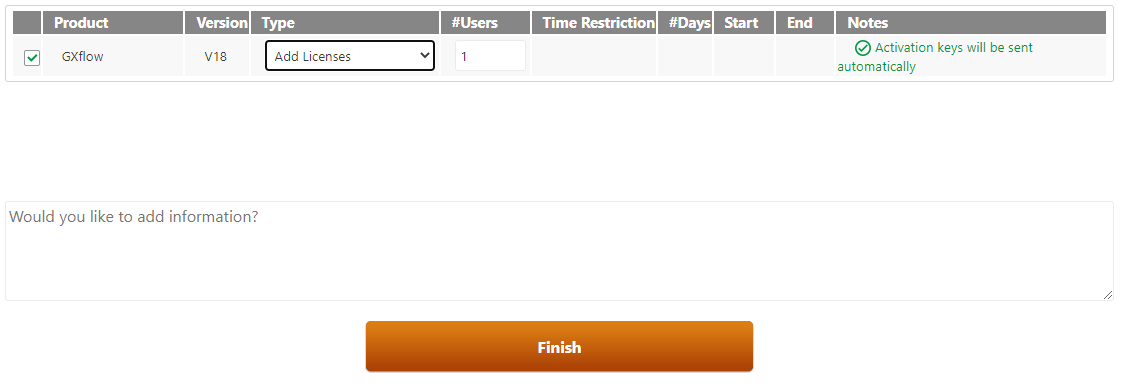
First, check that the product and version are the ones you want to use. Next, enter the license request information. The type (New Authorization for new licenses), the number of licenses you need, and the time restriction (if Limited is selected, you need to enter the number of days the license will be valid), are requested.
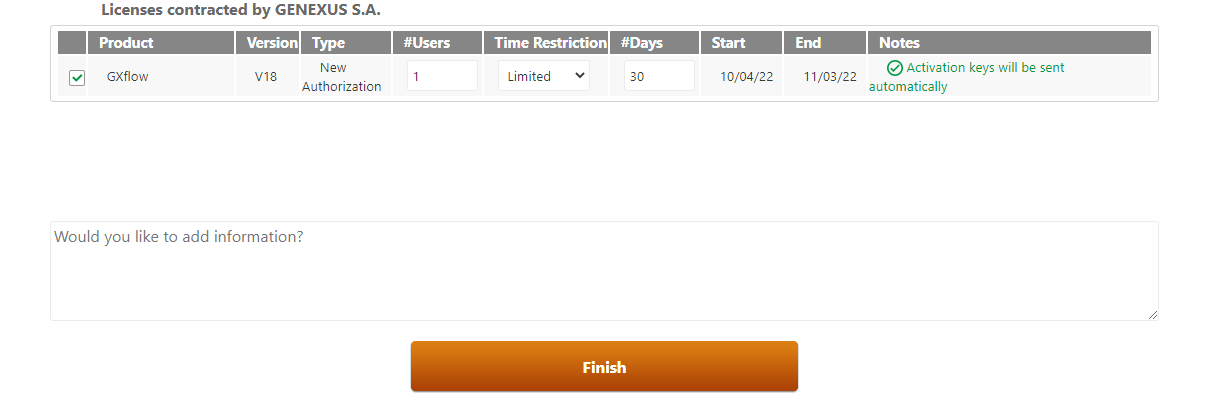
This process is valid to enter new licenses requested and also to enter modifications in active licenses (Change Restrictions or Add Licenses)
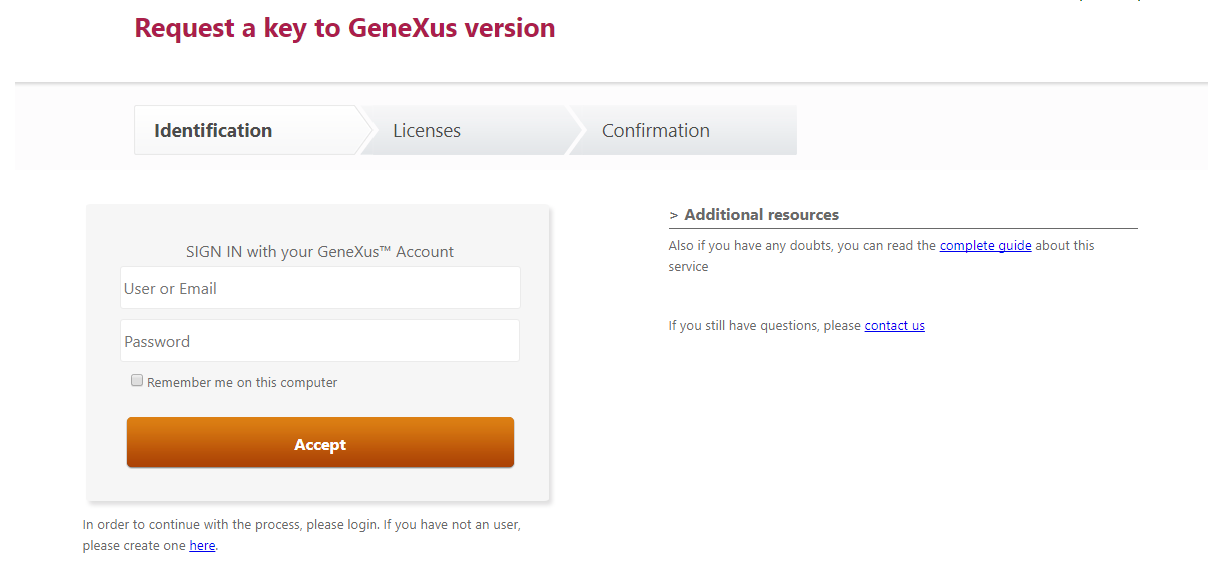
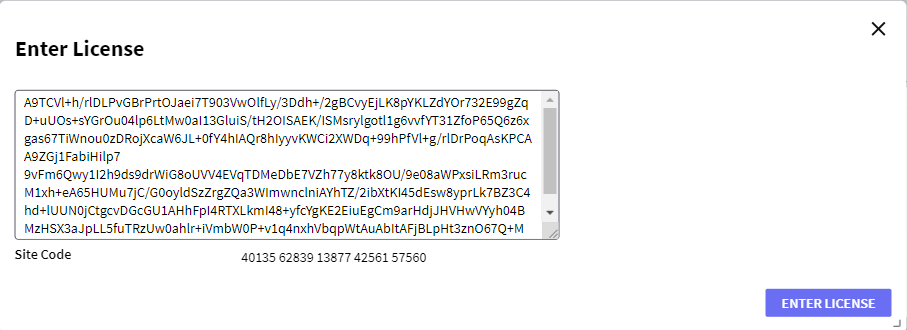
In the dialog box, enter the Site Key received by email from GeneXus with the licenses.
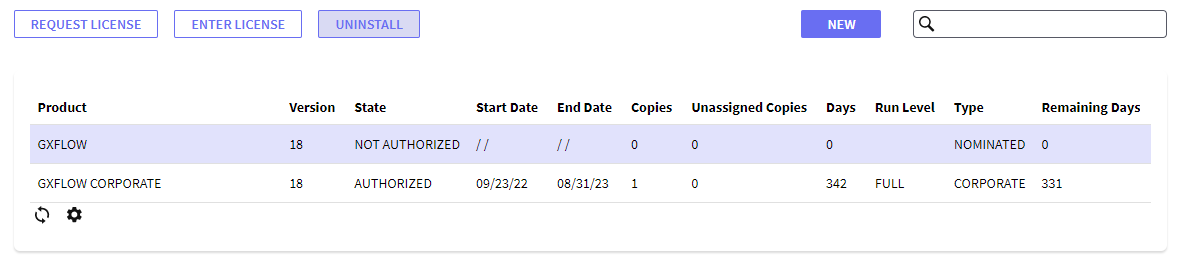
When working with GXflow licenses, there are two ways to modify the licenses.
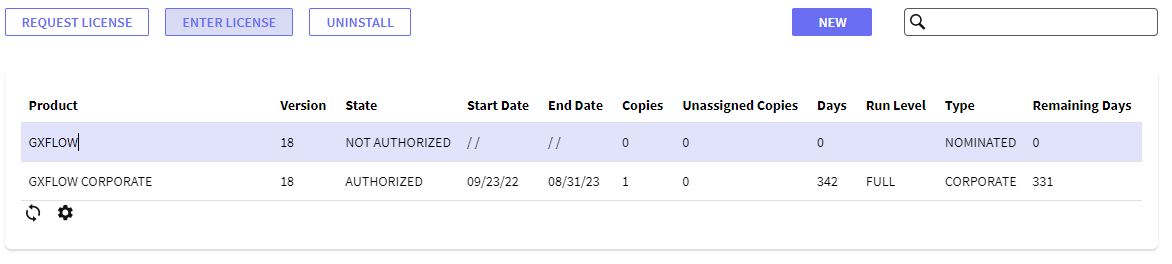
First, the user can add licenses to an installation. The first step is the same as when requesting a license; this means, you need to select the product from the list and click on the Request License button.
The changes are now displayed in the license system. You need to select the option "Add licenses."
After finishing the request process and receiving the Site Key, follow the same process explained to enter a License in order to apply the changes in the licenses.
This process consists of changing the validity time for GXflow licenses. The steps are the same as when adding licenses, but you need to select the option "Change Restrictions".

When using Remote licenses, you need to use the GeneXus License Manager to change license restrictions.

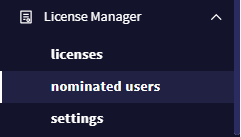
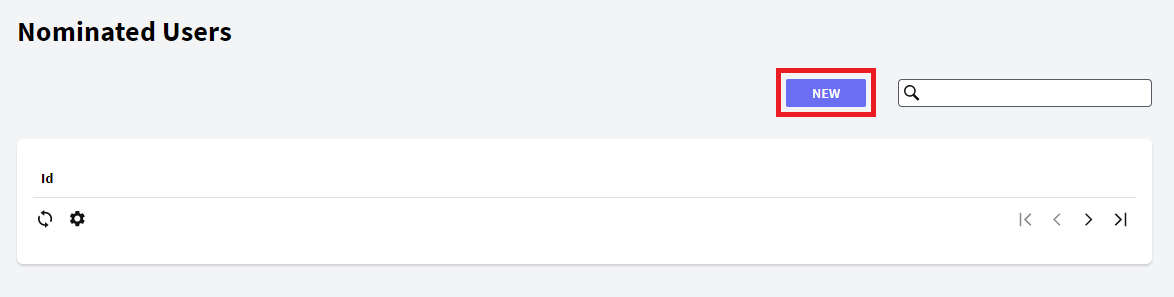
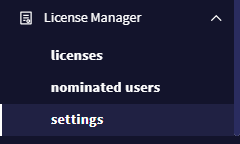
Go to the option License Manager > Nominated Users in the GXflow Client menu to work with nominated users.
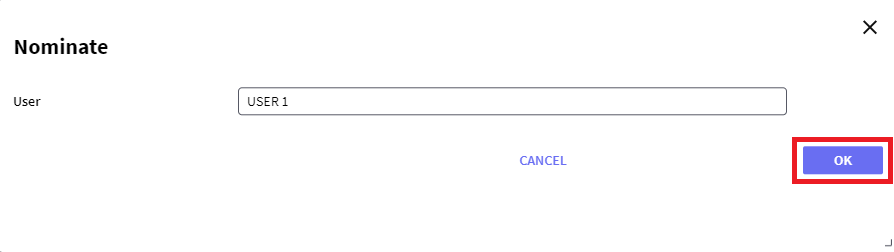
Click on the New button, write the name in the text box, and click the ok button. If there are licenses available, the user will be nominated. Unassigned copies' information will be updated.
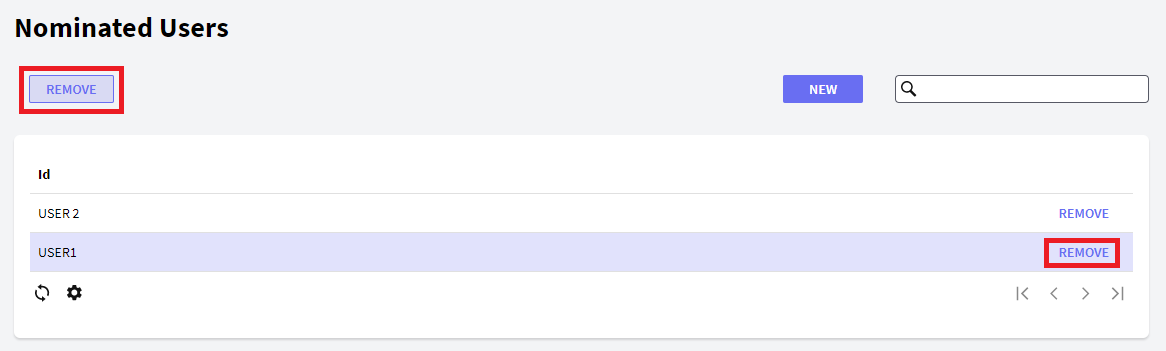
Select the user you want to remove from the list and click on the Remove button at the top of the grid or the Remove button in the corresponding row. Unassigned copies' information will be updated.
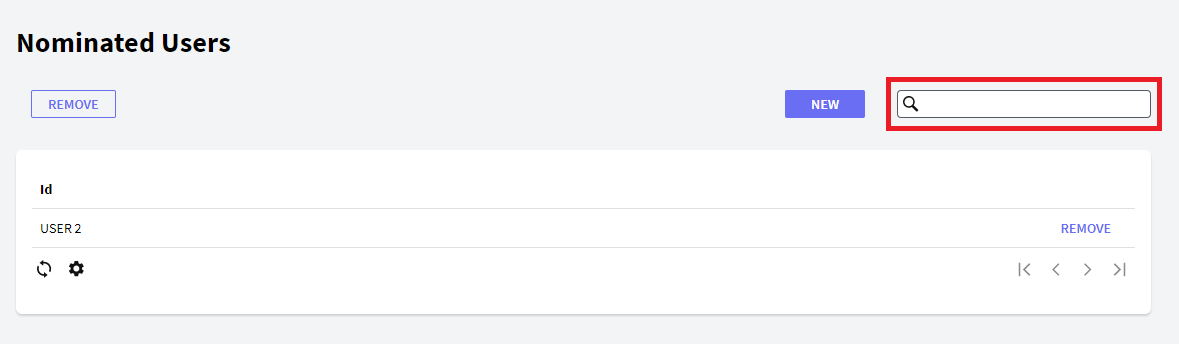
There is a search box available in the top right corner of the screen to filter the nominated user list.
Remember that when users are added using the GXflow API, they are automatically nominated if there are unassigned licenses available.
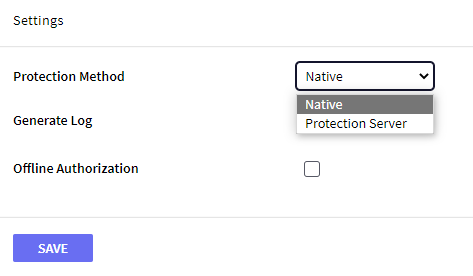
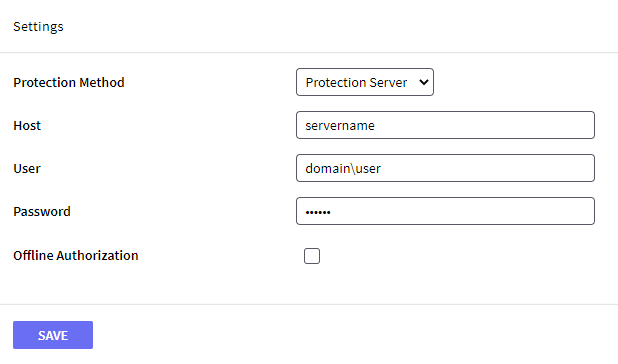
GXflow licenses can be stored in two different locations: Native and Protection Server. Native licenses use the database as primary storage and are handled using the GXflow's license manager. Protection Server licenses use the registry and/or other ways and are primarily handled using the GeneXus License Manager.
The process to change the location of the license is as follows:
In the drop-down menu, select the license protection method. If Protection Server is selected, you need to enter the server name and credentials.
Notes
- When using the Protection Server license, GeneXus Protection Server 9.7.2.14 or higher is required.
- Changing the license's location sets where to store or read license information. It does not move or copy licenses from one location to another.
- You cannot write localhost as a server name.
- When completing the user, you must indicate domain\user.
It is possible to generate a log of all the actions related to GXflow licenses, i.e., license requests, install/uninstall, and user nominations.
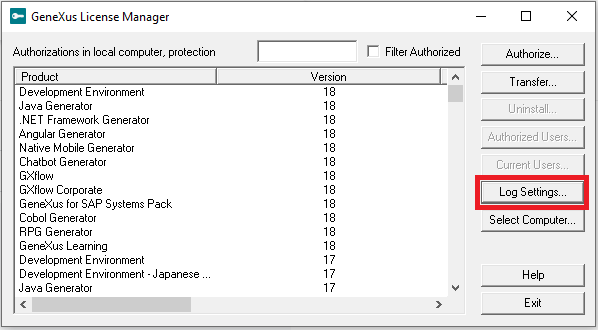
To generate a log when using the Protection Server method, you must configure the Log Settings in the GeneXus License Manager. Once you have done this, all the activities related to GXflow licenses will be recorded in the log previously set.
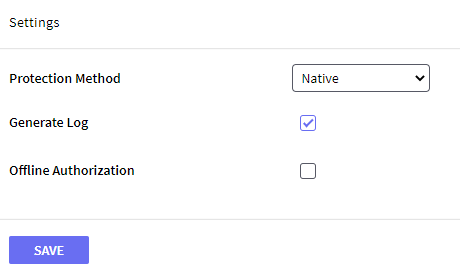
To generate a log when using the Native method, the "Generate Log" option must be checked. This option can be found in the GXflow client in License Manager > Settings section.
In Java environments, the log information will be stored in the server log files, i.e., in a Tomcat-based application, you will find the GXflow log information in the stdout and stderr files in the Tomcat logs folder. You can find this string "com.gxflow.protection" to locate the logging information in those files.
For C# environments, an additional setting is required. You need to modify the web.config file, adding the following in the <configuration> section:
- To save the log in a file
<system.diagnostics>
  <trace autoflush="true" indentsize="4">
    <listeners>
      <add name="myListener" type="System.Diagnostics.TextWriterTraceListener"
                initializeData="<LogFilePath>" />
      <remove name="Default" />
    </listeners>
  </trace>
</system.diagnostics>
- To save the log in the TraceAxd application
<system.diagnostics>
  <trace>
    <listeners>
      <add name="WebPageTraceListener" type="System.Web.WebPageTraceListener, System.Web,
           Version=2.0.3600.0, Culture=neutral, PublicKeyToken=b03f5f7f11d50a3a"/>
    </listeners>
  </trace>
</system.diagnostics>
Sometimes it is necessary to perform some actions for the GXflow licenses in order to solve problems or set up applications. Some command-line tools are available to help with these tasks, they are added automatically when the workflow application is installed. The execution syntax is like the following:
apwflicenseutil [option] ([License])

where options is:
    -c: Clean the licenses and return the licenses info
    -e: Export the licenses
    -i: Import the licenses. Requires the second parameter with the licenses info
To execute it you must do the following:
- .NET Framework
Execute the file apwflicenseutil.exe from a command line (Start - Run - cmd), specifying the option, for example:
C:\Models\<KB>\CSharpModel\Web\bin> apwflicenseutil.exe -e
- .NET
Execute the file apwflicenseutil.exe from a command line (Start - Run - cmd), specifying the option, for example:
C:\Models\<KB>\CSharpModel\Web\bin>dotnet apwflicenseutil.dll -e
- JAVA
When using Java, you must execute it from the webapp, for example:
..\<application>\WEB-INF\classes>java -cp ".;..\lib\*" com.gxflow.apwflicenseutil -e
| Authorized |
Correctly authorized. |
| Not authorized |
Not authorized. |
| Uninstalled |
Not installed. |
| Suspended date back |
License suspended, a backward change has been made to the date of the machine. |
| Time runout |
The authorized period of days to run has expired. |
| Runs runout |
The number of authorized runs has ended. |
| Server changed |
The licenses are not valid for the current database server, the database of the app was copied or restored on other servers. |
- Export process does NOT remove the licenses from the installation.
- Import process is only available in installations using a database of the same server.
- The tasks clean/export/import all the licenses information, always including both products (GXflow and GXflow Corporate).