This article explains the steps needed to configure the GXflow client for Native Mobile.
Create Knowledge Base from server http://samples.genexusserver.com/v18/.
Check out GXflowMXCustomClient Knowledge Base.
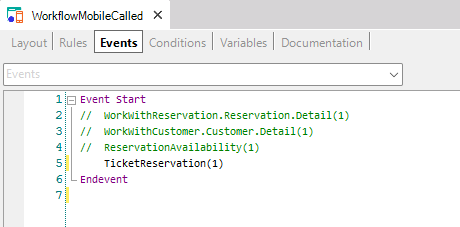
You can create your own Business Process Diagrams referencing custom mobile objects. In such a case, you must edit the WorkflowMobileCalled object and write calls to each of the referenced objects.

Make sure the chosen platform (Android and/or Apple) is enabled to be generated.
GXflow
HowTo: Using push notifications in Workflow for Native Mobile applications
Native Mobile Generator
My first BPM Native Mobile application
GAM Use Example: Public Application With Some Private Components