This document explains how to work with documents in GXflow and provides a brief overview about it.
In order to associate process instances with attachments of formats such as doc, xls, pdf, etc. etc., you have to do the following:
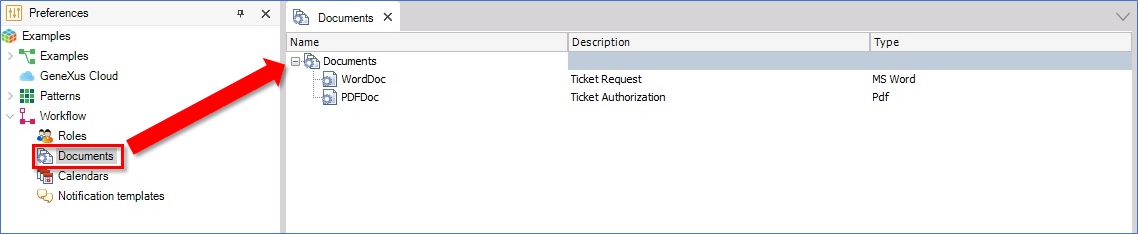
First, they should be defined at the global level from the GeneXus IDE GeneXus IDE using the Preferences > Workflow > Documents option, as shown in the image below:
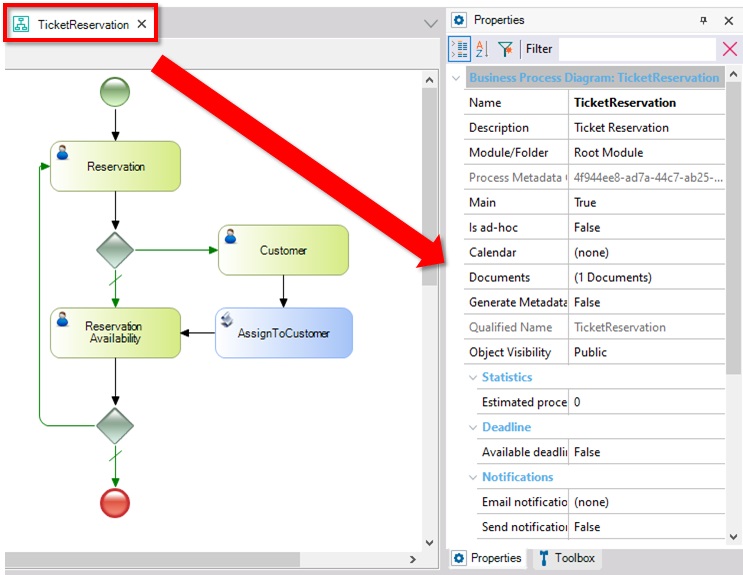
Once the documents have been defined at the global level, they have to be associated with the processes in which they are going to be used. This is done from the process properties dialog, as shown below:
Note: If the documents are not associated with the process, it will be automatically done upon associating the documents with the task.
Once the documents have been defined at the global level, they can be associated with a task. If the previous step was skipped, and they weren't defined at the process level, it will be automatically done.
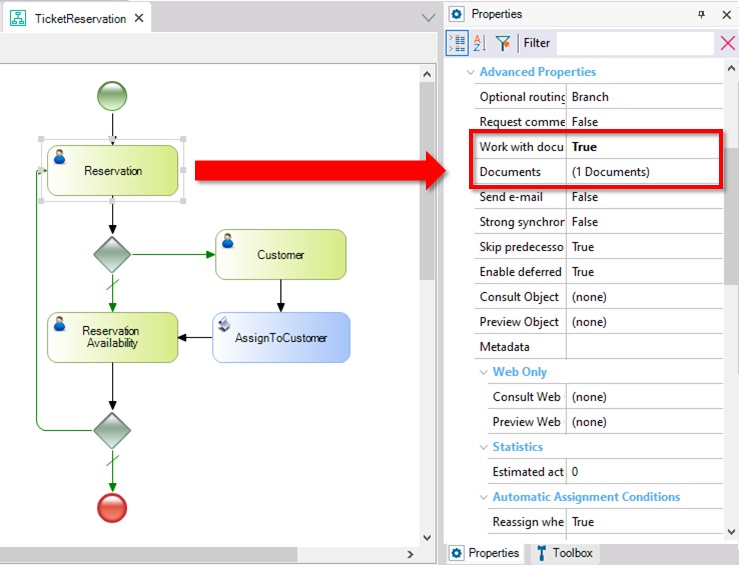
Before associating the documents with the task, you will have to enable it to manage them as shown below.
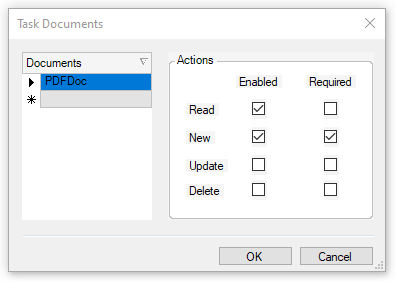
Next, you will have to associate the document definitions with the task, which implies that you will be able to instance documents of that type later on. When you do this, it is also possible to indicate which actions are available to the user and which are required, by checking the enabled and required columns respectively.
Once the documents' logic has been defined, you have to perform the following steps in the Workflow client before executing a flow with documents.
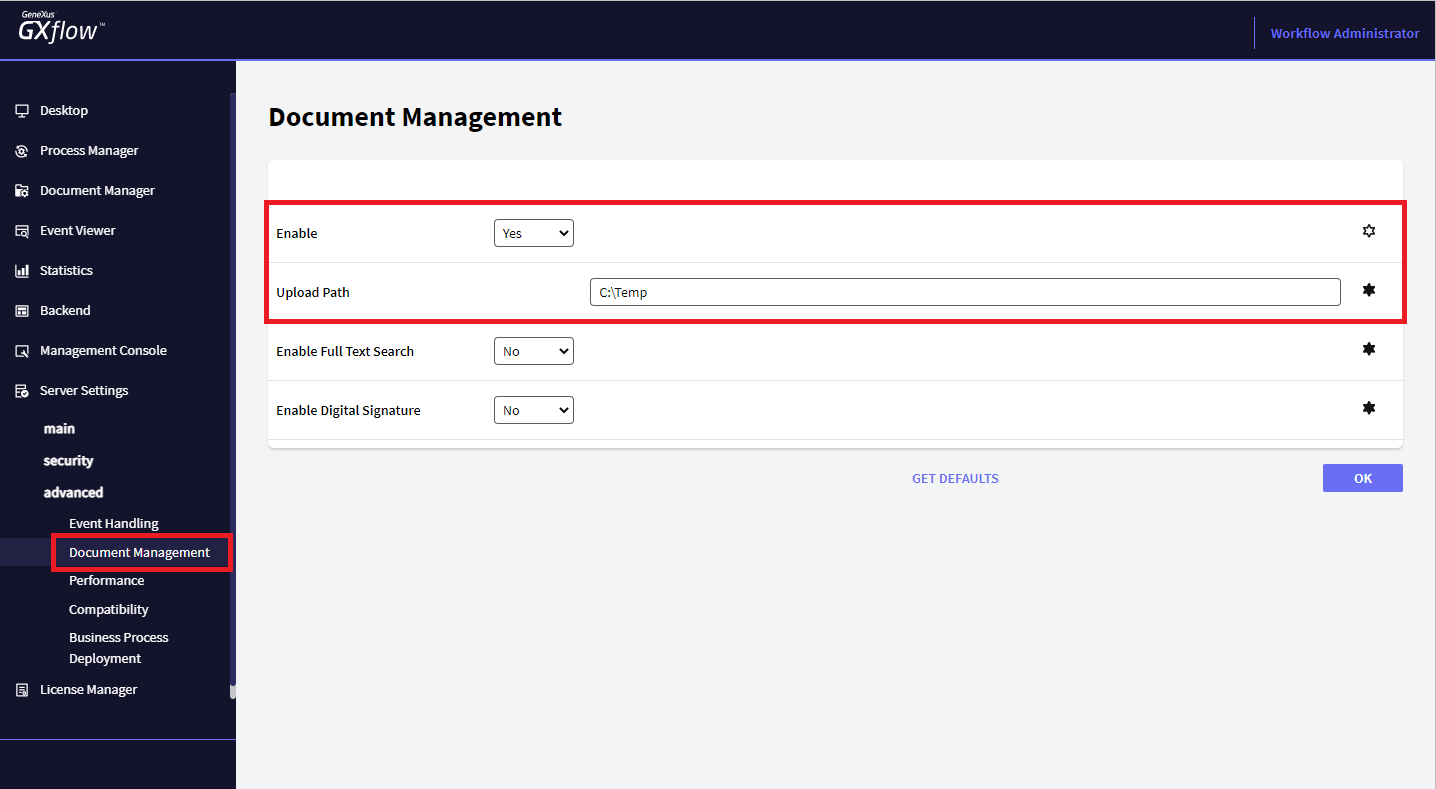
In the Advanced > Document Management group of preferences of the GXflow Client, the Enabled preference must be set to Yes. Also, in the Upload Path, you have to specify the absolute path to the directory in the server that will be used to temporarily save the uploaded documents (before they are entered into the system database. The documents must be temporarily saved on in the server disk).
Note: the Upload Path must be an absolute path and the web server user must have write rights over that folder.
See more in this article Configuration of preferences.
After configuring all the necessary settings, execute the task with its associated documents.
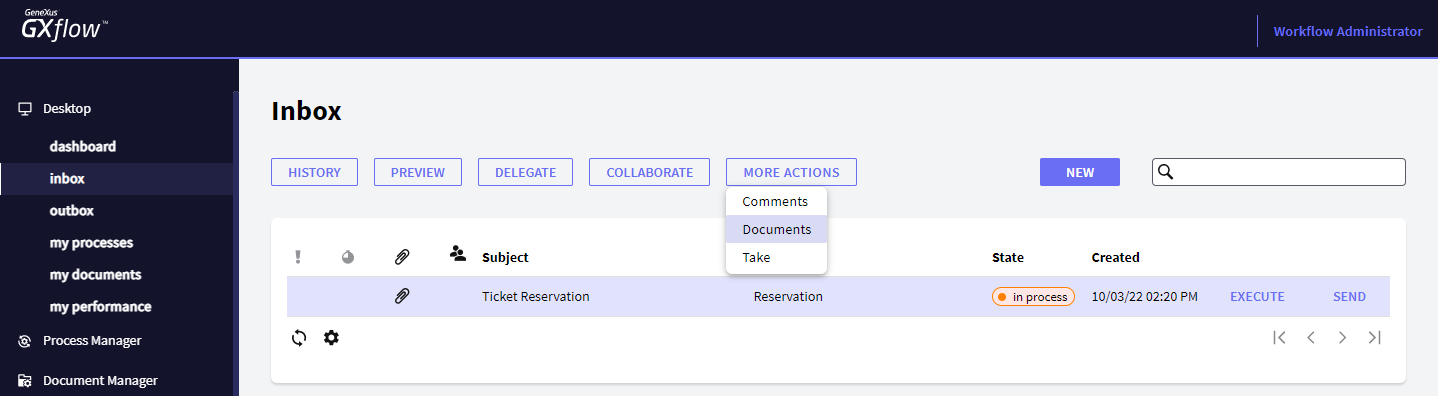
If the task doesn't have an associated application, such as a Transaction, the dialog to work with documents is displayed when executing the task. Otherwise, select the instance and press the Documents button as shown in the image below:
Then, in both cases, a dialog similar to the one below will be displayed:
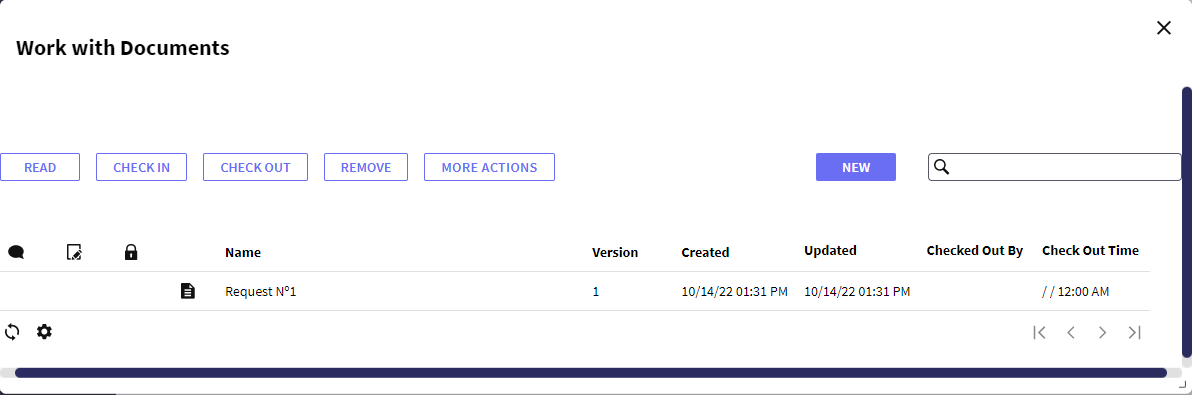
The possible actions that you can execute on the documents are the following:
- Read documents: you can visualize the content of the last document version by accessing the button "Read". If the document format has an associated application in the client PC, the document will be opened with this application. Otherwise, a document copy will be saved on the disk.
- Check out documents: you can modify documents content by accessing the button "Check out". This action is equivalent to executing a “check out” document. The user obtains a soft copy of the document to make the modifications and once the modifications have been made, the user will be able to execute the corresponding document “check in”, that is, upload the document to the server as a new version (See “Uploading documents” section). It needs to be pointed out that, once a user has executed a document “check out”, this document will remain locked and other users will not be able to modify it until the corresponding “check in” is executed.
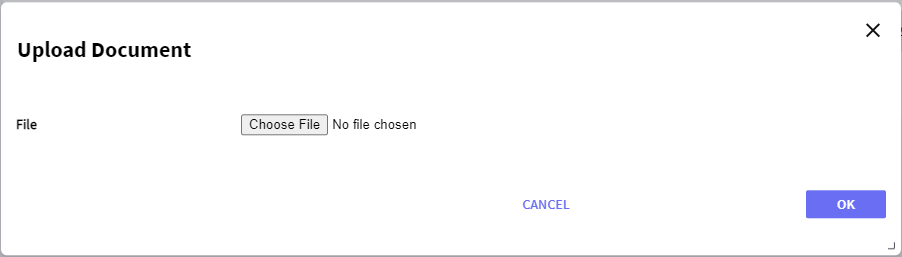
- Check in documents: you can upload a new version of the document to the server (execute a “check in”) by accessing the button "Check In". In the dialog displayed, you must specify the path of the document that you want to upload:
This option will only be available if the user has executed the corresponding “check out” of the document (mentioned in the previous section). Once the check in is done, the document will be unlocked.
- Remove documents: you can delete a document and all its versions by accessing the button " Remove".
- Versions: you can see all the versions of a document that have been uploaded by accessing the button "Versions".
- New documents: the creation of a new document is also among the actions that you can execute with them. For this, access the button "New" and then enter the document and its type in the dialog shown:

The available types are defined in GeneXus for the corresponding task (see Workflow Preferences).
The actions that can be executed on documents associated to a task are those specified in the diagram. For instance, it is possible that, given a document, you can only visualize its content, but you cannot modify it. Another possibility is not to allow the creation of new documents from of a specific type.
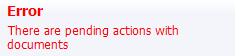
It is also possible that a task has a group of actions whose execution is required on specific document types. E.g.: Fore example, it can be determined that the creation of a “Doc1” type document is required. In this way, if the user does not create this document and attempts to finish the task, the following error message will be displayed:
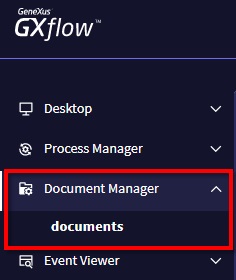
You can globally manage all the documents existing in the workflow application from here, regardless of the process or task they belong to. This application can be accessed from the Navigator as shown below:
GXflow offers the possibility of searching for words within the documents. To do this, you must set the Full Text Search Document Property to yes in the IDE and in the Document Management section. After that, you need to select an Index Directory, which should be different from than the Upload Path. Once you have configured it correctly, if you search by word in the Document Manager, all the documents that contain that word in the grid will appear. Only documents uploaded after the Full Text Search Document setting will appear.
Note: The size of the uploaded files is limited by the property maxRequestLength in the web.config file under <system.web>.
There is a way of determining the maximum value of upload file size and its it is by changing its value:
<httpRuntime maxRequestLength="<size>"/>
Where <size> is the number of kilobytes; e.g.: 2048. (see http://msdn.microsoft.com/es-es/library/e1f13641(v=vs.80).aspx).http://msdn.microsoft.com/es-es/library/e1f13641(v=vs.80).aspx )
In Java, it is for timeout, and you have has to configure be configured it in the web server.
Workflow documents are by default stored in the database, however, it is possible to store them in the cloud by setting the Enable Cloud Storage property to true for each document definition that you want to store in the cloud.
Besides setting this property to true, you have to choose and configure your storage provider in the GXflow Client Document Management Settings. After this, new instances of this document definition will be stored in the cloud. It is also possible to migrate all the documents from the database to the cloud by running the apwfmigratedocumentstocloud.
To execute it you must do the following:
- .NET
Execute the file apwfmigratedocumentstocloud.exe from a command line (Start - Run - cmd), for example:
C:\Models\<KB>\CSharpModel\Web\bin> apwfmigratedocumentstocloud.exe
-
JAVA
When using Java, you must execute it from the web app, for example:
..\<application>\WEB-INF\classes>java -cp ".;..\lib\*" com.gxflow.apwfmigratedocumentstocloud